How can I help you?
NuGet Packages of Syncfusion Essential ASP.NET Core
NuGet can be used to automatically add files and references to your Visual Studio projects. You can use the Syncfusion ASP.NET Core NuGet packages without installing the Essential Studio or ASP.NET Core platform installation to development with the Syncfusion ASP.NET Core controls.
From v16.2.0.46 (2018 Volume 2 Service Pack 1) onwards, all the Syncfusion components are available as NuGet packages at nuget.org.
Starting with v16.2.0.x, if you reference Syncfusion assemblies from trial setup or from the NuGet package, you must include a license key in your projects. Refer to this link to learn about registering Syncfusion license key in your ASP.NET Core application to use Syncfusion controls
NOTE
Starting from v17.1.0.32 (2018 Volume 1), Syncfusion will no longer publish NuGet packages at nuget.syncfusion.com.
Installing NuGet Packages
Using NuGet Package Manager
The NuGet Package Manager can be used to search and install NuGet packages in the Visual Studio solution or project.
-
Right-click the project or solution in the Solution Explorer tab, and choose Manage NuGet Packages…
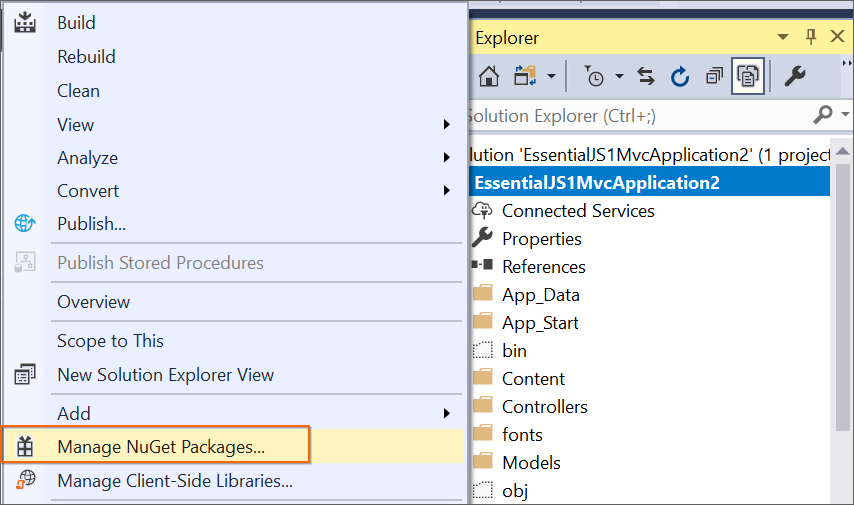
Alternatively, click Tools, menu,
NuGet Package Manager | Manage NuGet Packages for Solution... -
Select the NuGet.org from the Package source drop-down.
-
The Syncfusion ASP.NET Core NuGet Packages are listed and available. Search and install the required packages in your application, by clicking the Install button.
NOTE
The Syncfusion NuGet packages are published in public NuGet.org from v16.2.0.46. To Install earlier version of 16.2.0.46 Syncfusion NuGet packages, configure Syncfusion private feed URL.
Using Package Manager Console
To reference the Syncfusion ASP.NET Core component using the Package Manager Console as NuGet packages, follow the below steps:
-
On the Tools menu, select NuGet Package Manager and then Package Manager Console.
-
Run the following NuGet installation commands.
#install specified package in default project
Install-Package <Package Name>

#install specified package in specified project
Install-Package <Package Name> - ProjectName <Project Name>
For example:
#install specified package in default project
Install-Package Syncfusion.EJ.AspNet.Core

#install specified package in specified project
Install-Package Syncfusion.EJ.AspNet.Core -ProjectName SyncfusionDemoApplication
Using Visual Studio for macOS
Add packages can be used to search and install NuGet packages to the Visual Studio project in macOS.
-
Right-click the folder in the project, and then select Add Packages…

-
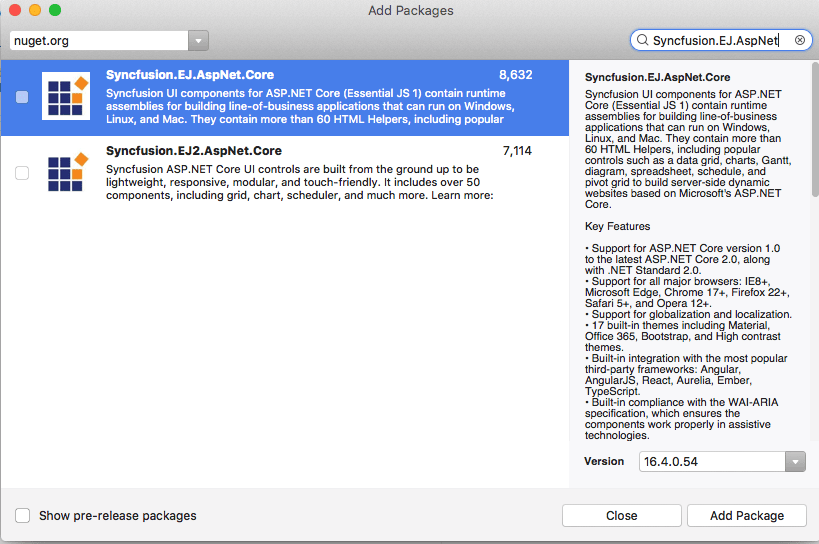
Select the NuGet.org from the Package source drop-down.
-
The Syncfusion ASP.NET Core NuGet packages are listed and available. Search and install the required packages in your application, by clicking the Add Package button.
Managing NuGet package using NuGet CLI
The NuGet Command Line Interface (CLI), nuget.exe, provides the full extent of NuGet functionality to install, create, publish, and manage packages without making any change to the project files.
-
Download the latest NuGet CLI here.
NOTE
To update the existing nuget.exe to latest version use the following command:
nuget update -self -
Open the downloaded executable location in the command window, and run the following commands to download and install the required NuGet packages to a project specified in the package.config.
#install specified package in default project from specified package source for Windows Platform
nuget.exe install <Package name | ConfigFilePath > <Options>

#install specified package in default project from specified package source for MAC/Linux Platform
mono nuget.exe install <Package name | ConfigFilePath > <Options>
NOTE
configPath is optional. This identifies the packages.config or solutions file that lists the packages utilized in the project.
For example:
#install specific package for Windows
nuget.exe install “Syncfusion.EJ.AspNet.Core”

#install all package which mention in package.config path for Windows
nuget.exe install “C:\Users\SyncfusionApplication\package.config”

#install specific package for Mac and Linux
mono nuget.exe install “ Syncfusion.EJ.AspNet.Core”

#install all package which mention in package.config path for Mac and Linux
mono nuget.exe install “C:\Users\SyncfusionApplication\package.config”
NOTE
To Install earlier version of 16.2.0.46 Syncfusion NuGet packages, configure Syncfusion private feed URL.
Managing NuGet package using Dotnet CLI
The NuGet Command Line Interface (CLI), Dotnet.exe, provides the full extent of NuGet functionality to add, restore, pack, publish, and manage packages without making any change to the project files.
-
Open command prompt window with administrator privileges and navigate to your project folder.
-
The specified ASP.NET Core NuGet package command as follows:
Add
#Add specified package in specified project from Package Source
dotnet add package <Package name>
For example :
dotnet add package Syncfusion.EJ.AspNet.CoreRestore
#Restore all package which specified in project
dotnet restore
To know more command about the dotnet CLI, refer here.
Upgrading NuGet packages
Using NuGet Package Manager
NuGet packages can be updated to their specific version or latest version available in the Visual Studio solution or project:
-
Right-click the project or solution in the Solution Explorer tab, and choose Manage NuGet Packages…
Alternatively, click Tools menu,NuGet Package Manager | Manage NuGet Packages for Solution... -
Select the Updates tab to see the packages available for update. Select the required packages and the specific version from the dropdown, and click the Update button.
Using Visual Studio for macOS
Using Update context menu from Visual Studio for Mac application, NuGet packages can be updated:
-
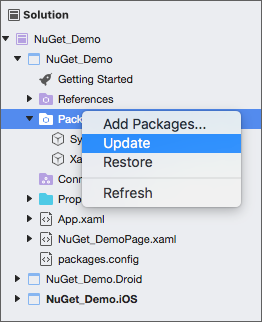
Right-click the Packages folder in the project, and select Update.
-
This will update the NuGet package to the latest version. You can double-click the Add packages and choose the specific version.
NOTE
To update all the projects from solution, use update option in the solution level.
Using Package Manger Console
To update the installed Syncfusion ASP.NET Core NuGet packages using the Package Manager Console, follow the below steps.
-
On the Tools menu, select NuGet Package Manager, and then Package Manager Console.
-
Run the following NuGet installation commands:
#Update specific NuGet package in default project
Update-Package <Package Name>

#Update all the packages in default project
Update-Package

#Update specified package in specified project
Update-Package <Package Name> - ProjectName <Project Name>
For example:
#Update specified Syncfusion ASP.NET Core NuGet package
Update-Package Syncfusion.EJ.AspNet.Core

#Update specified package in specified project
Update-Package Syncfusion.EJ.AspNet.Core -ProjectName SyncfusionDemoApplication
Using NuGet CLI
Using the NuGet CLI, all the NuGet packages in the project can be updated to the available latest version.
-
Download the latest NuGet CLI here.
NOTE
To update the existing nuget.exe to latest version use the following command:
nuget update -self -
Open the downloaded executable location in the command window. Run the following “update commands” to update the Syncfusion ASP.NET Core NuGet packages:
#update all NuGet packages from config file
nuget update <configPath> [options]

#update all NuGet packages
nuget update
NOTE
configPath is optional. This identifies the packages.config or solutions file lists the packages utilized in the project.
For example:
#Update all NuGet packages from config file
nuget update “C:\Users\SyncfusionApplication\package.config”
NOTE
Update command is not working as expected in Mono (Mac and Linux) and projects using PackageReference format.
Syncfusion NuGet feed URL Configuration
Get the Syncfusion NuGet feed URL
You should get the private Syncfusion ASP.NET Core NuGet feed URL to install or upgrade the Syncfusion ASP.NET Core NuGet packages. To get the URL from Syncfusion website use the following steps:
-
Navigate to nuget.syncfusion.com, and select the WEB tab.
-
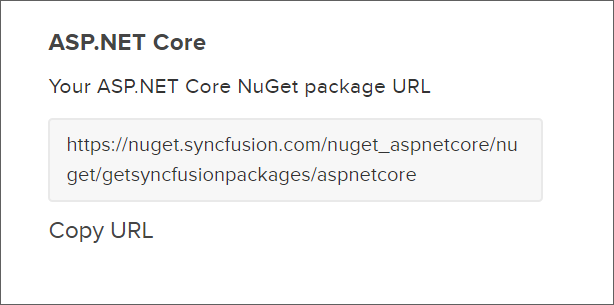
Navigate to WEB(Essential JS1), click the Copy URL label under ASP.NET Core platform to copy the Syncfusion ASP.NET Core platform NuGet feed to clipboard or directly use the following URL:
https://nuget.syncfusion.com/nuget_aspnetcore/nuget/getsyncfusionpackages/aspnetcore
-
Now, use this NuGet feed URL to access the Syncfusion NuGet Packages in Visual Studio.
Add the Syncfusion NuGet feed URL
Windows
-
Open your Visual Studio application.
-
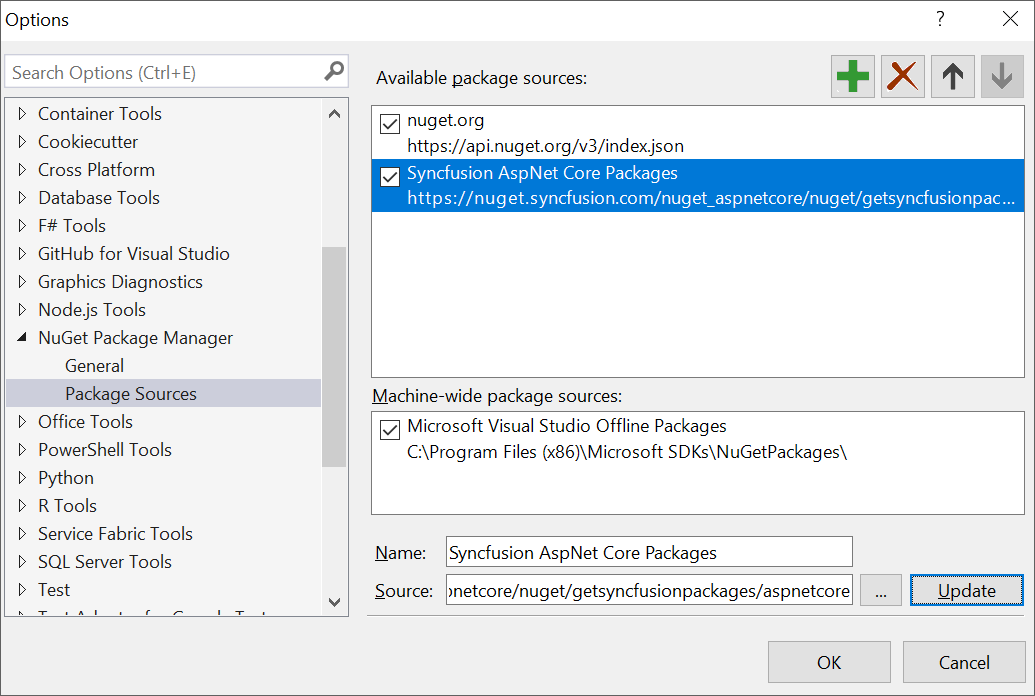
On the Tools menu, select Options.
-
Expand the NuGet Package Manager and select Package Sources.
-
Click the Add button (green plus), and enter the ‘Package Name’ and ‘Package Source URL’ of the Syncfusion ASP.NET Core NuGet packages.
Name: Name of the package listed in the available package sources.
Source: Syncfusion ASP.NET Core NuGet Feed URL.
https://nuget.syncfusion.com/nuget_aspnetcore/nuget/getsyncfusionpackages/aspnetcore. -
Click the Update button to add the name and source details to package sources.
macOS
-
Open your Visual Studio application.
-
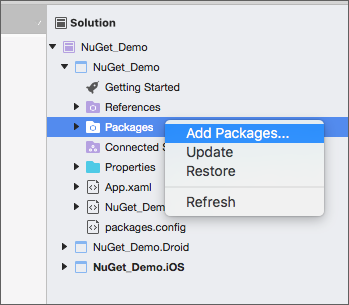
Right-click the Packages folder in the project, and then select Add Packages…
-
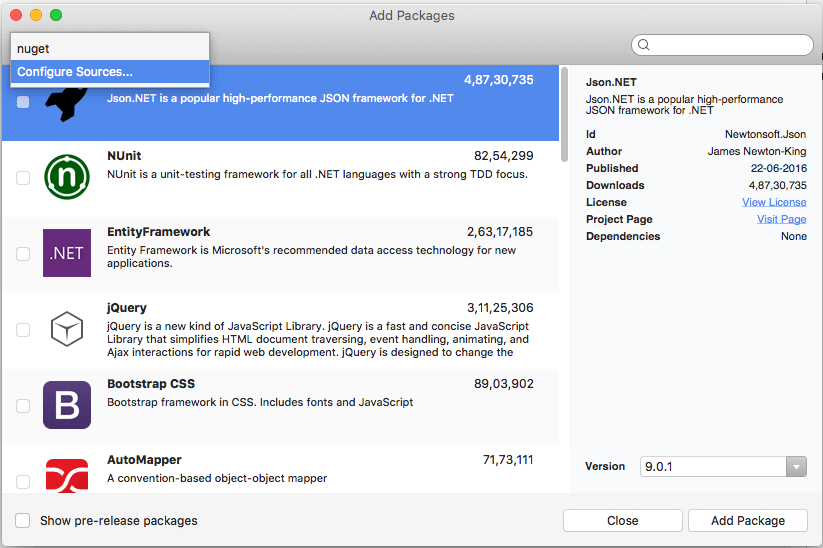
Choose the Configure Sources… from the dropdown that appears in the left corner of the Add Packages dialog.
-
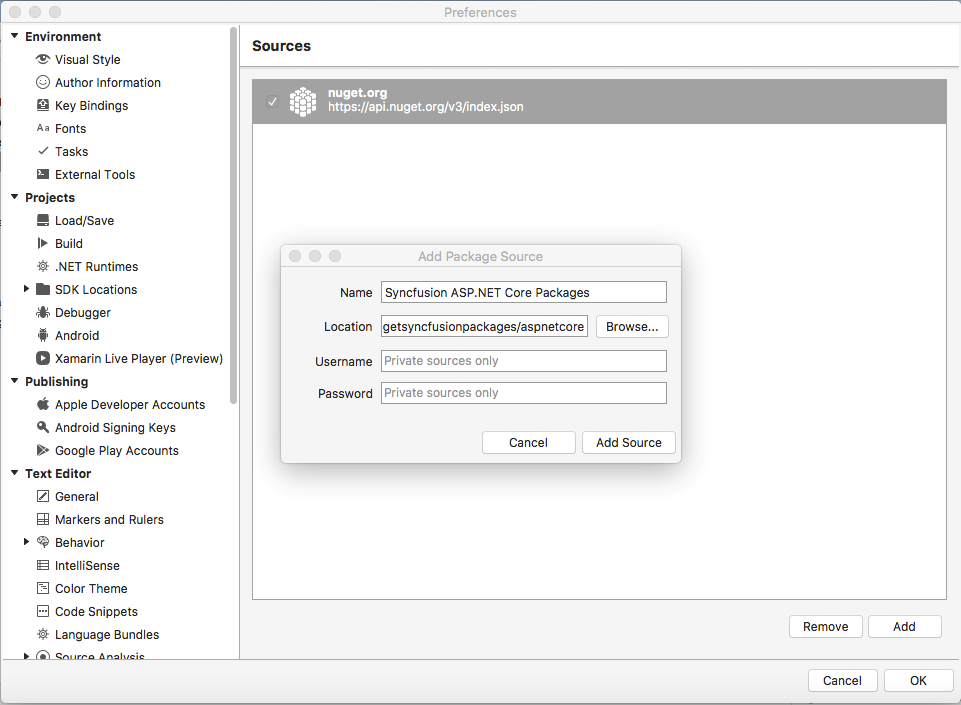
At the bottom right corner of the dialog, click the Add button to enter the feed name and the URL.
Name: Enter the name (For e.g., Syncfusion ASP.NET Core Packages).
Location: Enter the following URL – https://nuget.syncfusion.com/nuget_aspnetcore/nuget/getsyncfusionpackages/aspnetcore.
-
Now, click Add Source and then click OK.
NuGet CLI
-
Download the latest NuGet CLI from here.
NOTE
To update the existing nuget.exe to latest version use the following command:
nuget update -self -
Open the downloaded executable location in the command window, and run the following commands to configure the Syncfusion NuGet packages:
#Add specified package source in NuGet.config file for Windows platform
nuget.exe Sources Add –Name <Source name> –Source <Source location>

#Add specified Package Source in Nuget.config file for MAC/Linux platform
mono nuget.exe Sources Add –Name <Source name> –Source <Source location>
For example:
#For Windows platform
nuget.exe Sources Add –Name “Syncfusion Source” –Source “http://nuget.syncfusion.com/nuget_aspnetcore/nuget/getsyncfusionpackages/aspnetcore”

#For MAC/Linux platform
mono nuget.exe Sources Add –Name “Syncfusion Source” –Source “http://nuget.syncfusion.com/nuget_aspnetcore/nuget/getsyncfusionpackages/aspnetcore”