Getting Started
3 Sep 20207 minutes to read
This section provides a quick overview for working with SfPullToRefresh in Xamarin.iOS. Walk through the entire process of creating a simple application with this control.
Assembly deployment
After installing Essential Studio for Xamarin, all the required assemblies can be found in {Syncfusion Essential Studio Installed location}\Essential Studio\25.1.35\Xamarin\lib this installation folder.
e.g., C:\Program Files (x86)\Syncfusion\Essential Studio\25.1.35\Xamarin\lib
NOTE
Assemblies can be found in unzipped package location in Mac.
NuGet configuration
To install the required NuGet for the SfPullToRefresh control in the application, configure the NuGet packages of the Syncfusion components.
Refer to the following KB to configure the NuGet packages of the Syncfusion components:
How to configure package source and install Syncfusion NuGet packages in an existing project?
The following NuGet package should be installed to use the SfPullToRefresh control in the application.
| Project | Required package |
|---|---|
| Xamarin.iOS | Syncfusion.SfPopupLayout.iOS |
Adding SfPullToRefresh Reference
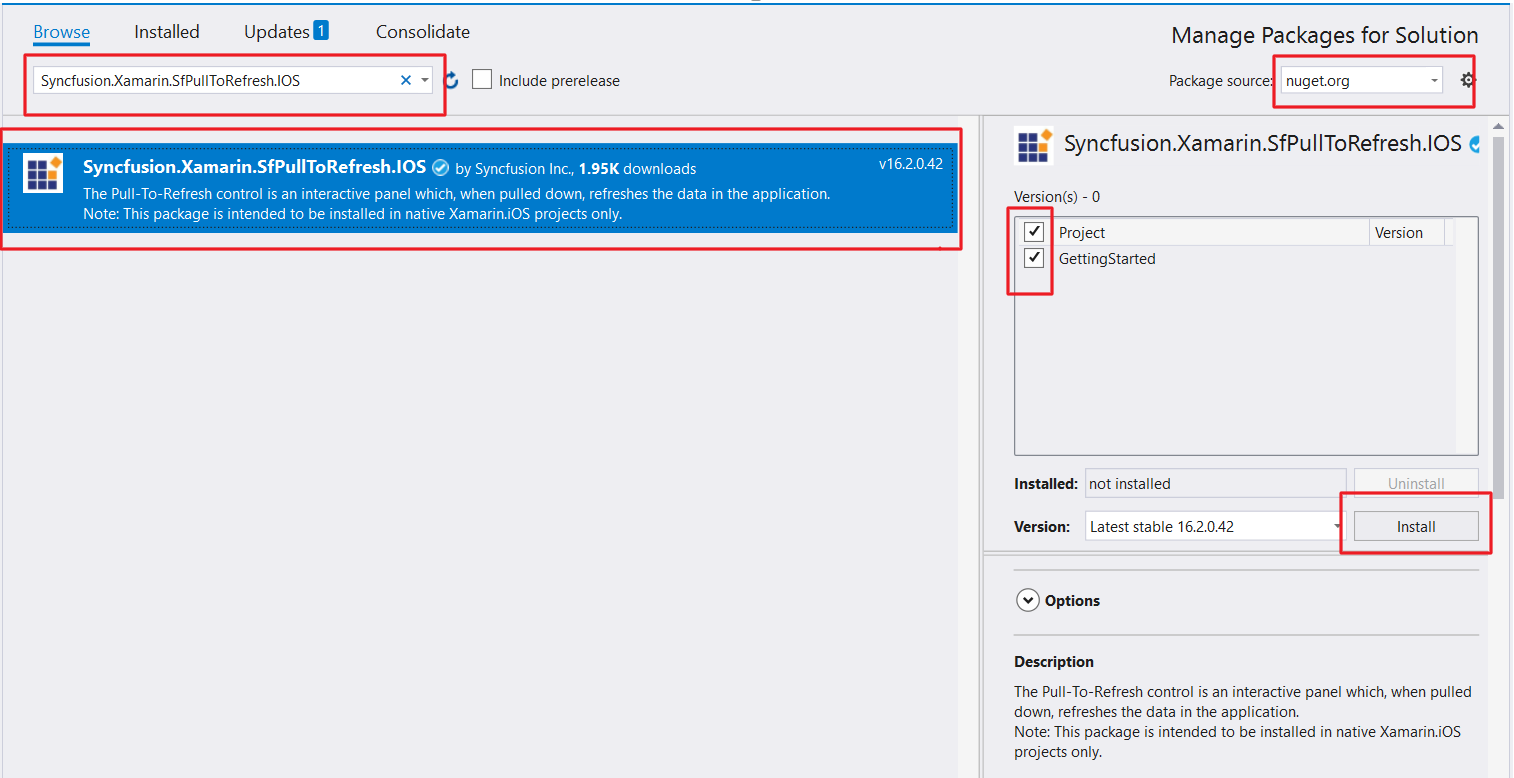
Syncfusion Xamarin components are available in nuget.org. To add SfPullToRefresh to your project, open the NuGet package manager in Visual Studio, and search for Syncfusion.Xamarin.SfPullToRefresh.IOS, and then install it.
Refer to the following screenshot in which the Syncfusion.Xamarin.SfPullToRefresh.iOS package is highlighted:
To know more about obtaining our components, refer to this link. Also, if you prefer to manually refer the assemblies instead of NuGet, refer the list of assemblies mentioned in the table below.
| Project | Required assembly |
|---|---|
| Xamarin.iOS | ios-unified\Syncfusion.SfPullToRefresh.iOS.dll |
IMPORTANT
Starting with v16.2.0.x, if you reference Syncfusion assemblies from trial setup or from the NuGet feed, you also have to include a license key in your projects. Please refer to this link to know about registering Syncfusion license key in your Xamarin application to use our components.
Create a sample application with SfPullToRefresh
SfPullToRefresh control can be configured entirely in C# code or using story board. To create a sample application for this control, follow the topics:
- Creating the project
- Adding SfPullToRefresh in Xamarin.iOS
- Adding a simple view as the PullableContent
- Refreshing the view
- TransitionType Customization
- Final Output of the sample
- Sample Link
Creating the project
Create a new iOS application in Xamarin Studio or Visual Studio for Xamarin.iOS.
Adding SfPullToRefresh in Xamarin.iOS using story board
To add SfPullToRefresh using story board, follow the steps:
- Add a new story board inside the project.
- Drag the SfPullToRefresh control from toolbox and drop into story board.
- Drag the SfDataGrid control from toolbox and drop into SfPullToRefresh in story board. Preview will not be shown since this is a hosting control. You can only see the pull-to-refresh when deployed in the device.
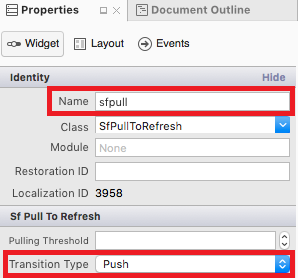
- Open the properties window of SfPullToRefresh and set the required properties.
- Set the SfDataGrid as PullableContent to SfPullToRefresh in code-behind.
public partial class newViewController : UIViewController
    {


        ViewModel viewModel;
        public newViewController() : base("newViewController", null)
        {

        }

        public override void ViewDidLoad()
        {
            base.ViewDidLoad();
            // Perform any additional setup after loading the view, typically from a nib.
            viewModel = new ViewModel();

            sfGrid.ItemsSource = viewModel.OrdersInfo;
            sfPull.PullableContent = sfGrid;

        }

        public override void DidReceiveMemoryWarning()
        {
            base.DidReceiveMemoryWarning();
        }
    }
You can download the entire source code of this demo here.
Refer to this link to know the properties that can be configured using story board for SfPullToRefresh.
Adding SfPullToRefresh in Xamarin.iOS
-
Add the required assembly references to the project as mentioned in the Assembly deployment section or install the NuGet as mentioned in the NuGet installation section.
-
Import SfPullToRefresh control under the namespace
Syncfusion.SfPullToRefresh. -
Create an instance of SfPullToRefresh control and add as the subview of the UIViewController. Refer to the following code example to add this control to the application:
using Syncfusion.SfPullToRefresh;

public class MyViewController : UIViewController
{
    SfPullToRefresh pullToRefresh;

    public MyViewController()
    {
        pullToRefresh = new SfPullToRefresh();
        this.View.AddSubview(pullToRefresh);
    }
}
Adding a simple view as the PullableContent
Any view can be added as the pullable content using SfPullToRefresh.PullableContent property to refresh it. Refer to the following code example in which a simple custom view is added as pullable content:
//MyViewController.cs

CustomView customView;
BaseView baseView;
UILabel label;
UIButton button;

public MyViewController()
{
	....
	InitializeViews();
    customView = new CustomView(label, baseView);
	//Setting the PullableContent of the SfPullToRefresh.
	pullToRefresh.PullableContent = customView;
	....
}

private void InitializeViews()
{
    ....
    baseView = new BaseView();
    label = new UILabel();
    ....
}
Refreshing the view
To refresh the view, hook the SfPullToRefresh.Refreshing event. The SfPullToRefresh.Refreshing event will be fired, once the pulling progress reaches 100% and touch is released. The user can do the required operations to refresh the view and once the view is refreshed, set the RefreshingEventArgs.Refreshed to true to stop the refreshing animation.
Refer to the following code example illustrating hooking of the SfPullToRefresh.Refreshing event and refreshing the view:
//MyViewController.cs
public MyViewController()
{
    ....
    //Hooking the Refreshing event.
    pullToRefresh.Refreshing += PullToRefresh_Refreshing;
    ....
}

private void PullToRefresh_Refreshing(object sender, RefreshingEventArgs e)
{
    NSTimer.CreateScheduledTimer(TimeSpan.FromSeconds(3), new Action<NSTimer>(delegate {
        baseView.model.Temperature = (NSString)new Random().Next(10, 40).ToString();
        baseView.UpdateBaseView();
        e.Refreshed = true;
    }));
}
TransitionType customization
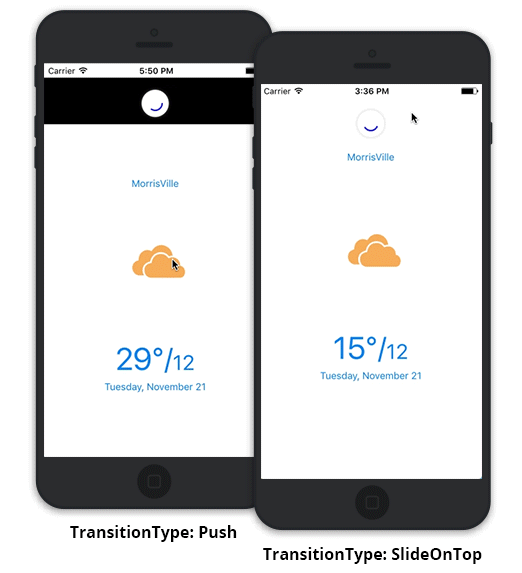
SfPullToRefresh support two types of transitions. By default, TransitionType.SlideOnTop is enabled.
Refer to the topic TransitionType under Built-in Customization section for more details regarding SfPullToRefresh.TransitionType property.
Refer to the following code example to switch to the TransitionType.Push mode of transition:
public MyViewController()
{
....
pullToRefresh.TransitionType = TransitionType.Push;
....
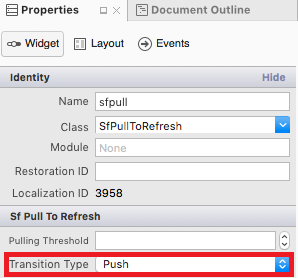
}Refer to the following image to set TransitionType mode to SfPullToRefresh using story board.
Final output of the sample
The following GIF demonstrates the final output of the sample:
Sample link
You can download the source code of this sample here.
Properties configured using story board
| Properties | Attribute Name |
|---|---|
| PullingThreshold | Pulling Threshold |
| ProgressStrokeColor | Progress Stroke Color |
| ProgressBackgroundColor | Progress Background Color |
| ProgressShadowColor | Progress Shadow Color |
| ProgressStrokeWidth | Progress Stroke Width |
| TransitionType | Transition Type |
| RefreshContentThreshold | Refresh Content Threshold |
| RefreshContentRadius | Refresh Content Radius |