Scaffolding in ASP.NET MVC Scheduler
Syncfusion® includes Visual Studio extensions with UI Scaffolding options for the ASP.NET MVC Scheduler that let you quickly add code and interact with data models. This makes it easy to create the appropriate Views and Controller action methods along with the corresponding ASP.NET MVC Scheduler code.
NOTE
The Syncfusion® ASP.NET MVC UI Scaffolder is available from the version v16.4.0.40.
Getting started
The following steps describe how to scaffold the ASP.NET MVC Scheduler into your web application.
-
Create an ASP.NET MVC application and add an Entity Framework data model referring to the documentation, with Scheduler-related fields such as Id, Subject, Location, Start Date, End Date, and All-day. Once the model file is added, ensure that the required
DBContextand all its related properties are added. -
Refer to the Getting Started documentation to learn how to configure Syncfusion® Essential® JS2 for ASP.NET MVC in your web application.
-
Right-click the Controllers folder in the Solution Explorer and select Add → New Scaffolded Item from the menu.
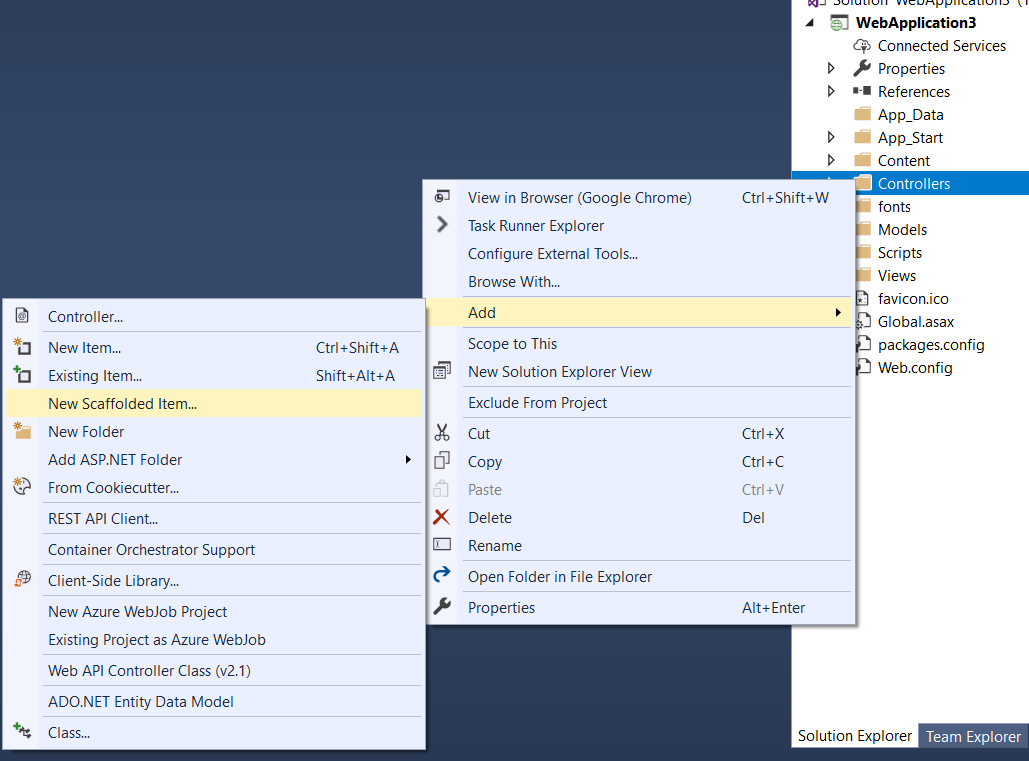
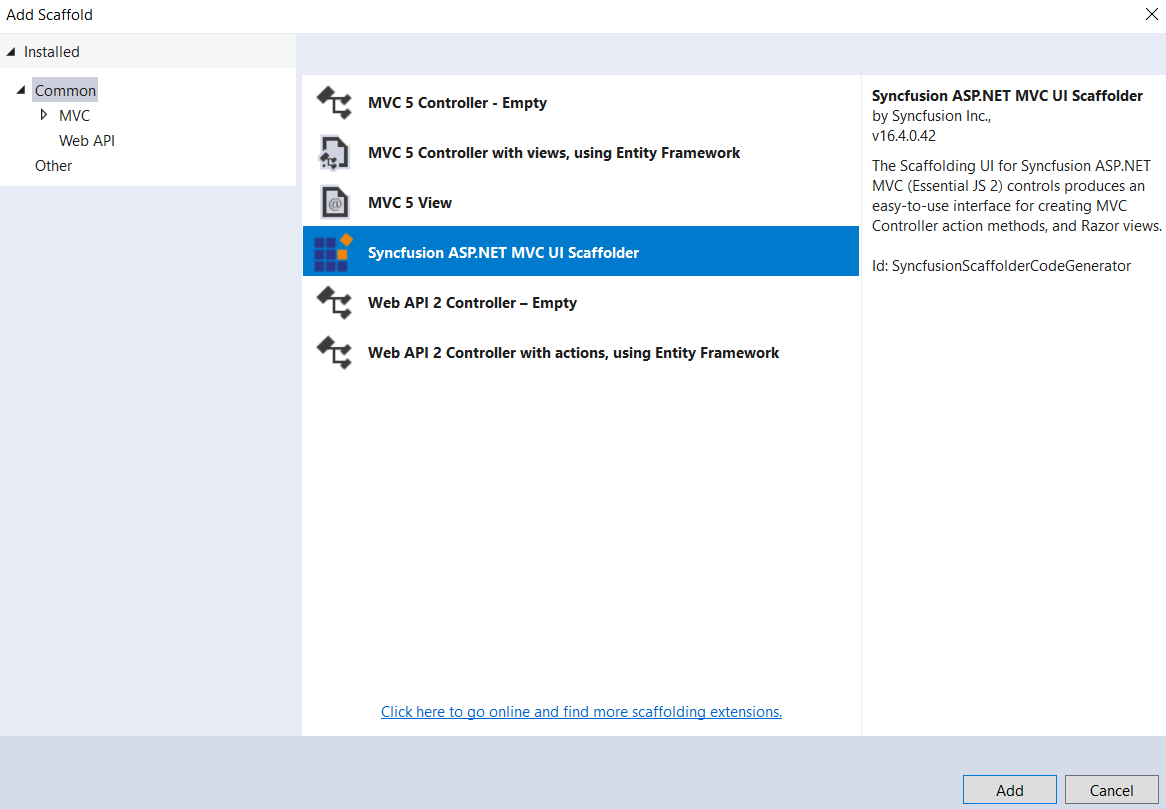
- The
Add Scaffolddialog will appear. Select Syncfusion® ASP.NET MVC UI Scaffolder and click theAddbutton, which displays the Syncfusion® UI Scaffolding dialog.
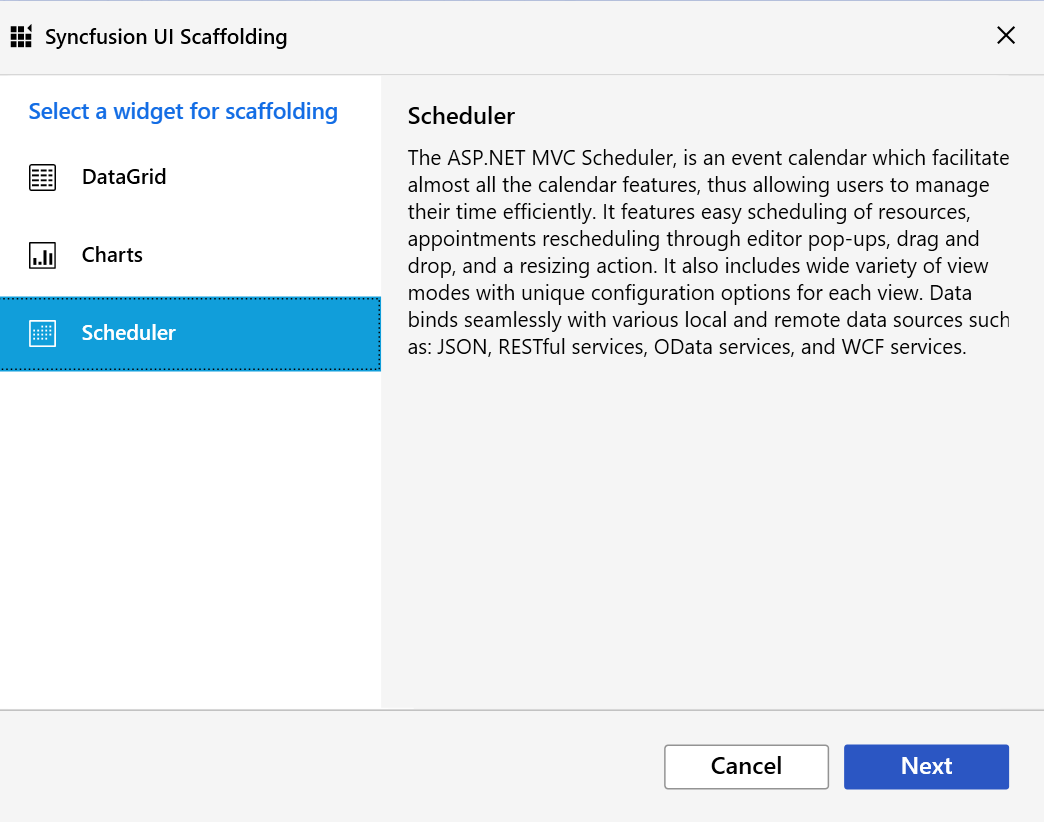
- Choose the Scheduler control to scaffold and click Next.
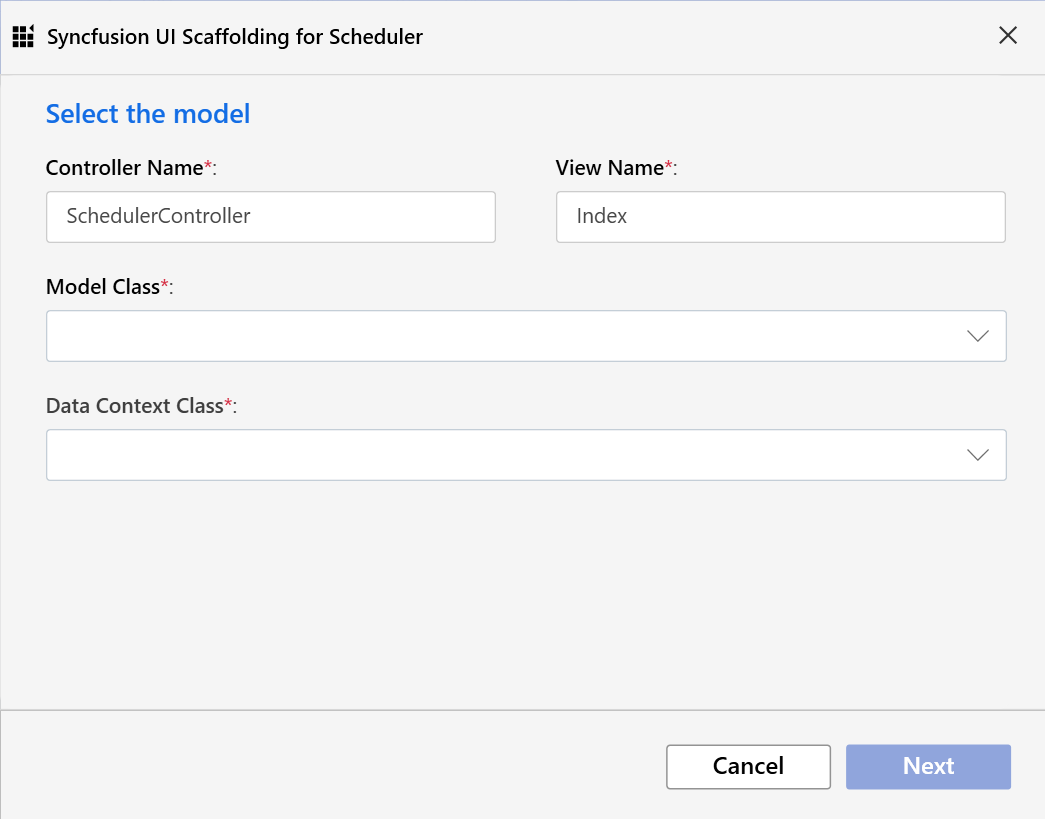
- The
Syncfusion<sup style="font-size:70%">®</sup> UI Scaffolding for Schedulerdialog opens, from which you can choose the Model and Data Context options. Enter the Controller and View names as required by your application. Once the required Model Class and its relevant Data Context Class are selected, click the Next button, which exposes the Scheduler functionalities that can be configured before scaffolding.
NOTE
All the model types present in the current application are listed in the Model Class drop-down. From the available Data Context Class, choose the appropriate Entity Framework data model.
- Now, select the required Scheduler options (the corresponding Scheduler Views and Properties) and click the Add button. Use the Back arrow if you need to modify the already chosen Controller or View name, or to change the selected Model Class and Data Context Class.
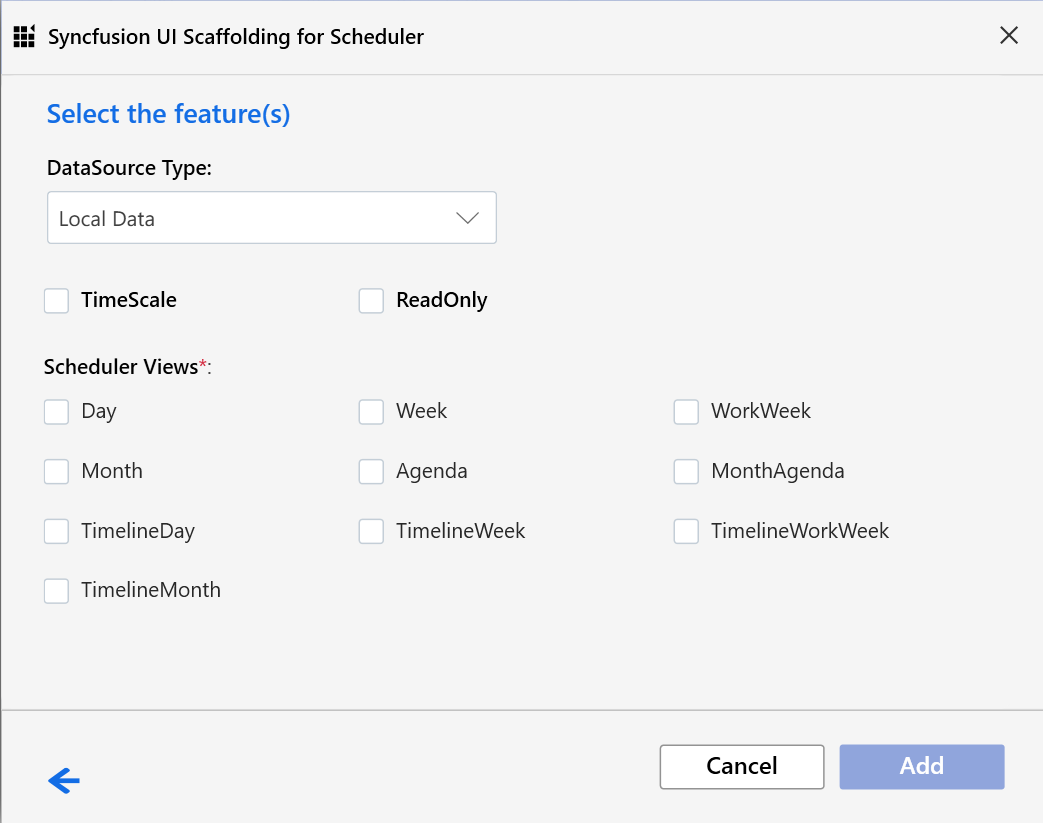
- Once the required Scheduler options are configured through the Scheduler UI Scaffolding, the corresponding Scheduler Controller and View files are generated with the appropriate Scheduler code snippet.
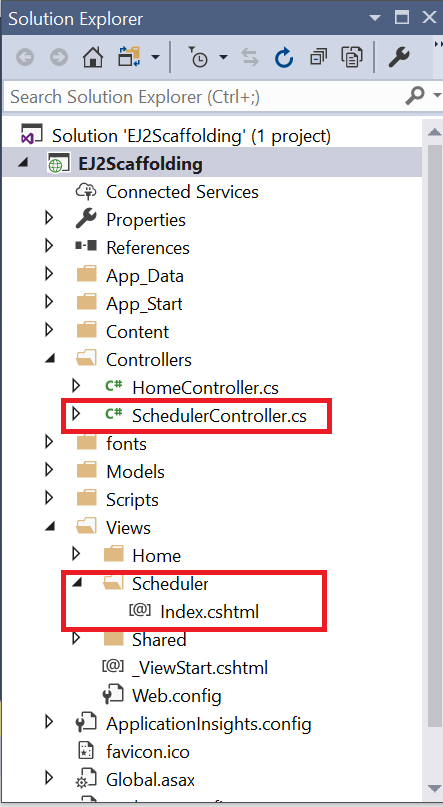
NOTE
Ensure that at least one Entity Framework model exists in your active project and that the application compiles successfully. If you make any changes to the Model properties later, compile the application once before performing the scaffold again.
NOTE
You can refer to our ASP.NET MVC Scheduler feature tour page for its groundbreaking feature representations. You can also explore our ASP.NET MVC Scheduler example to know how to present and manipulate data.