Integrating Ionic with Angular Scheduler
This guide provides a step-by-step walkthrough for creating an Angular application with the Ionic Framework, featuring integration of Angular UI components for modern, responsive interfaces.
Prerequisites
Before beginning, ensure the following are installed:
- System requirements for Angular UI components
- Ionic CLI version
^8.0.0or later - Node.js (latest LTS version is recommended)
- Angular 19 (compatible with Ionic 8.0.0)
- Angular CLI compatible with your Angular version
Create an Application
To set up a new Ionic Angular project, install the Ionic CLI and initialize your application:
npm i -g @ionic/cliWe are utilizing Node.js version 22 and Ionic version 8.0.0 to support Angular 19.
Once the development setup is complete, create a new project by running:
ionic start syncfusion-angular-ionic blank --type=angularThis creates an Ionic application in the syncfusion-angular-ionic directory with default npm packages. Navigate into the project directory before installing additional packages:
cd syncfusion-angular-ionicRefer to this Ionic getting started guide for more framework installation details.
Installing Schedule Package
Add the Schedule package to your project using the following command:
npm install @syncfusion/ej2-angular-schedule --saveAdding CSS References
To apply the required styles for the Schedule component, update the src/global.scss file with the following imports:
@import '../node_modules/@syncfusion/ej2-base/styles/material3.css';
@import '../node_modules/@syncfusion/ej2-buttons/styles/material3.css';
@import '../node_modules/@syncfusion/ej2-calendars/styles/material3.css';
@import '../node_modules/@syncfusion/ej2-dropdowns/styles/material3.css';
@import '../node_modules/@syncfusion/ej2-inputs/styles/material3.css';
@import '../node_modules/@syncfusion/ej2-lists/styles/material3.css';
@import '../node_modules/@syncfusion/ej2-popups/styles/material3.css';
@import '../node_modules/@syncfusion/ej2-navigations/styles/material3.css';
@import '../node_modules/@syncfusion/ej2-angular-schedule/styles/material3.css';
Adding Schedule Component
After installation, include the following code in your ~/src/app/home/home.page.ts file to render the Syncfusion Schedule:
import { Component, ViewChild } from '@angular/core';
import { IonicModule } from '@ionic/angular';
import { CommonModule } from '@angular/common';

import {
  ScheduleModule,
  ScheduleComponent,
  EventSettingsModel,

  // View services
  DayService, WeekService, WorkWeekService, MonthService, AgendaService
} from '@syncfusion/ej2-angular-schedule';

@Component({
  selector: 'app-home',
  standalone: true,
  imports: [IonicModule, CommonModule, ScheduleModule],

  // Inject views
  providers: [
    DayService, WeekService, WorkWeekService, MonthService, AgendaService
  ],
  template: `
    <ion-header>
      <ion-toolbar>
        <ion-title>Syncfusion Scheduler</ion-title>
      </ion-toolbar>
    </ion-header>

    <ion-content class="ion-padding">
      <ejs-schedule
        #schedule
        width="100%"
        height="650px"
        [selectedDate]="selectedDate"
        [views]="views"
        [eventSettings]="eventSettings"
      >
      </ejs-schedule>
    </ion-content>
  `
})
export class HomePage {
  @ViewChild('schedule', { static: true }) public scheduleObj!: ScheduleComponent;

  public selectedDate: Date = new Date();
  public views: string[] = ['Day', 'Week', 'WorkWeek', 'Month', 'Agenda'];

  public events: object[] = [
    {
      Id: 1,
      Subject: 'Meeting',
      StartTime: new Date(new Date().setHours(10, 0, 0, 0)),
      EndTime: new Date(new Date().setHours(10, 30, 0, 0))
    },
    {
      Id: 2,
      Subject: 'Planning',
      StartTime: new Date(new Date().setHours(12, 0, 0, 0)),
      EndTime: new Date(new Date().setHours(13, 0, 0, 0))
    }
  ];

  public eventSettings: EventSettingsModel = { dataSource: this.events };
}
Configure Routing
Update src/app/app.routes.ts to route to the HomePage component:
import { Routes } from '@angular/router';
import { HomePage } from './home/home.page';

export const routes: Routes = [
  { path: '', component: HomePage }
];
Running the Application
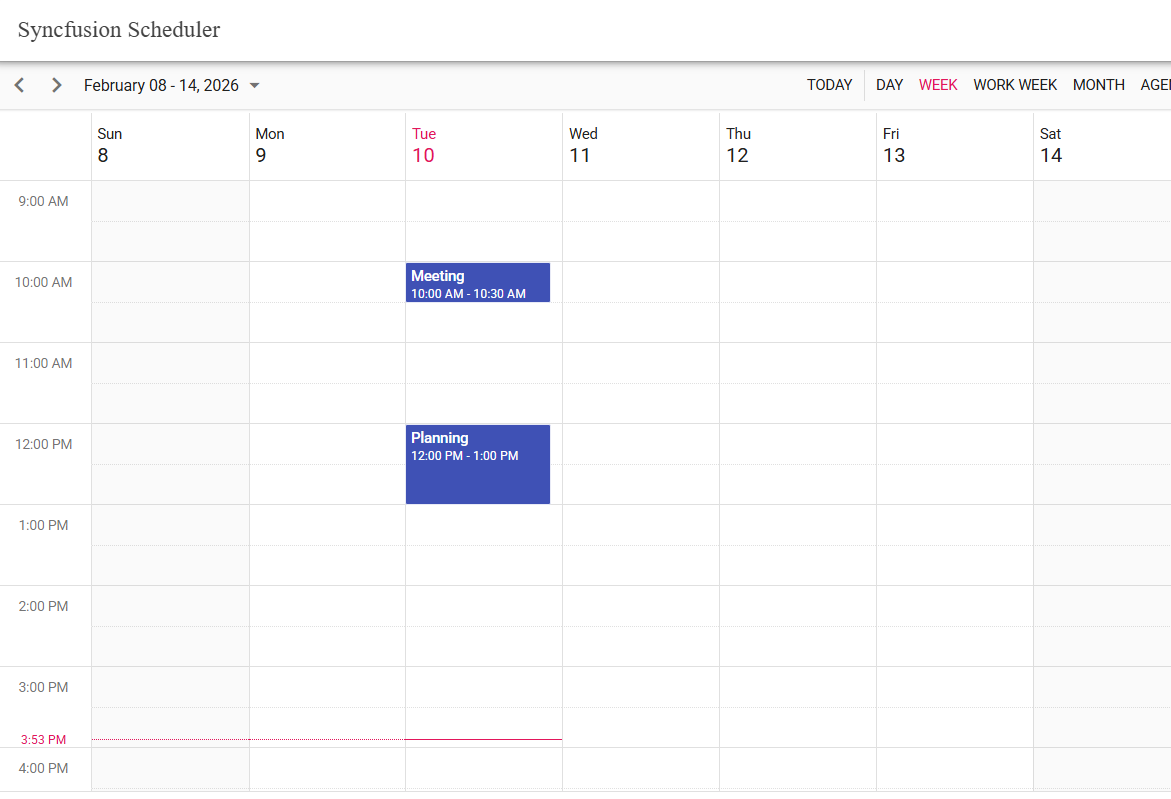
To run the application and view the integrated Schedule component, use the following command:
ionic serveOutput
For additional help, see the Angular sample with Ionic framework on GitHub