Getting Started with Angular Scheduler and Electron
This guide explains how to build a basic Angular application using a standalone component structure with Electron and integrate the Scheduler component.
Prerequisites
Before getting started, ensure the following software is installed:
- Angular version 17 or later
- TypeScript version 5.4 or later
- Electron CLI version 34.0.0 or later
If the Electron CLI is not installed, refer to the Electron package for installation instructions.
Set Up Angular Environment
Refer to the Setting up the local environment and workspace guide for Angular setup instructions.
Create an Angular Application
ng new my-appInstall Electron with the following command:
npm install -g electronNote: See the getting started guide to learn more about Electron installation.
Installing the Schedule package
Angular packages are available on npm under the @syncfusion scope. Explore all Angular packages here.
To install the Schedule package, execute the following command:
npm install @syncfusion/ej2-angular-schedule --saveAdding CSS References
To incorporate styles for the Schedule component, add the following imports to styles.css:
@import '../node_modules/@syncfusion/ej2-base/styles/material3.css';
@import '../node_modules/@syncfusion/ej2-buttons/styles/material3.css';
@import '../node_modules/@syncfusion/ej2-calendars/styles/material3.css';
@import '../node_modules/@syncfusion/ej2-dropdowns/styles/material3.css';
@import '../node_modules/@syncfusion/ej2-inputs/styles/material3.css';
@import '../node_modules/@syncfusion/ej2-lists/styles/material3.css';
@import '../node_modules/@syncfusion/ej2-popups/styles/material3.css';
@import '../node_modules/@syncfusion/ej2-navigations/styles/material3.css';
@import '../node_modules/@syncfusion/ej2-angular-schedule/styles/material3.css';
Adding the Angular Scheduler component
To integrate the Scheduler component, update the template in app.ts.
import { Component } from '@angular/core';
import { CommonModule } from '@angular/common';
import {
  ScheduleModule,
  EventSettingsModel,
  View,
  DayService,
  WeekService,
  WorkWeekService,
  MonthService,
  AgendaService
} from '@syncfusion/ej2-angular-schedule';

@Component({
  selector: 'app-root',
  standalone: true,
  imports: [CommonModule, ScheduleModule],
  providers: [DayService, WeekService, WorkWeekService, MonthService, AgendaService],
  template: `
    <h2>Syncfusion Scheduler</h2>

    <ejs-schedule
      width="100%"
      height="650px"
      [selectedDate]="selectedDate"
      [currentView]="currentView"
      [eventSettings]="eventSettings"
    >
      <e-views>
        <e-view option="Day"></e-view>
        <e-view option="Week"></e-view>
        <e-view option="WorkWeek"></e-view>
        <e-view option="Month"></e-view>
        <e-view option="Agenda"></e-view>
      </e-views>
    </ejs-schedule>
  `
})
export class App {
  public selectedDate: Date = new Date(2026, 1, 4); // Feb 4, 2026
  public currentView: View = 'Week';

  private data: object[] = [
    {
      Id: 1,
      Subject: 'Syncfusion Meeting',
      StartTime: new Date(2026, 1, 4, 10, 0),
      EndTime: new Date(2026, 1, 4, 11, 0)
    },
    {
      Id: 2,
      Subject: 'Meeting',
      StartTime: new Date(2026, 1, 5, 14, 0),
      EndTime: new Date(2026, 1, 5, 15, 30)
    }
  ];

  public eventSettings: EventSettingsModel = {
    dataSource: this.data,
    allowAdding: true,
    allowEditing: true,
    allowDeleting: true
  };
}
Create a main.js file
Create a main.js file in your project’s root directory and add the following code:
const { app, BrowserWindow } = require('electron');
const path = require('node:path');

function createWindow() {
  const win = new BrowserWindow({
    width: 1100,
    height: 800
  });

  // Load Angular build output (common location)
  win.loadFile(path.join(__dirname, 'dist', 'my-app', 'browser', 'index.html'));

  // Optional
  win.webContents.openDevTools();
}

app.whenReady().then(() => {
  createWindow();

  app.on('activate', () => {
    if (BrowserWindow.getAllWindows().length === 0) createWindow();
  });
});

app.on('window-all-closed', () => {
  if (process.platform !== 'darwin') app.quit();
});
Update index.html
In /src/index.html, change <base href="/"> to <base href="./"> to ensure Electron locates the built Angular files correctly.
Update package.json
Modify package.json to include the main entry and update scripts:
{
  "main": "main.js",
  "scripts": {
    "ng": "ng",
    "start": "ng serve",
    "build": "ng build",
    "watch": "ng build --watch --configuration development",
    "test": "ng test",
    "electron-build": "ng build --configuration production",
    "electron": "electron ."
  }
}
Running the application
To build and launch the application, run these commands sequentially:
npm run electron-build
npm run electron
The Essential® JS 2 Schedule component renders within the Electron window.
Output
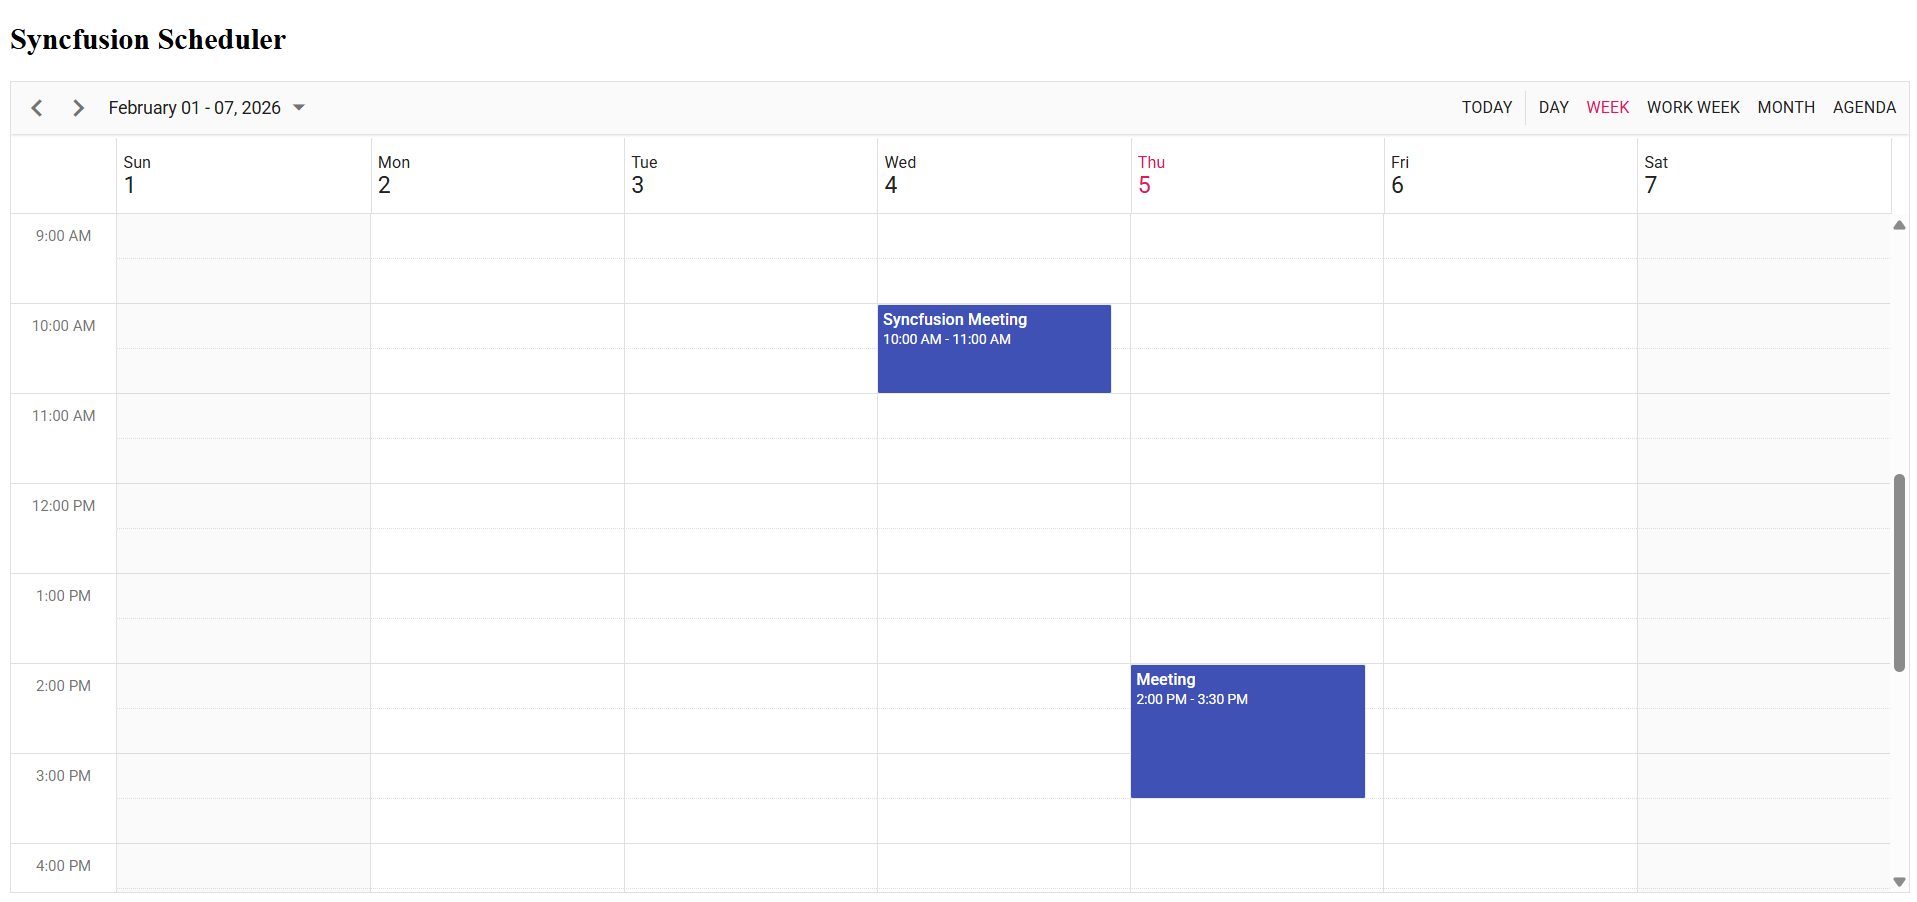
Note: For a complete example, see the Angular sample with Electron in GitHub.
Troubleshooting
Problem:
Angular Bundle Exceeded Maximum Budget error
Solution:
Increase the maximumWarning and maximumError size limits.
"maximumWarning": "5MB",
"maximumError": "6MB"