How can I help you?
Getting Started
The external script dependencies of the DropDownList widget are,
- jQuery 1.7.1 and later versions.
- jQuery.easing - to support the animation effects.
And the internal script dependencies of the DropDownList widget are:
| File | Description / Usage |
|---|---|
| ej.core.min.js | Must be referred always before using all the JS controls. |
| ej.data.min.js | Used to handle data operation and should be used while binding data to JS controls. |
| ej.dropdownlist.min.js | The dropdownlist’s main file |
| ej.checkbox.min.js | Should be referred when using checkbox functionalities in DropDownList. |
| ej.scroller.min.js | Should be referred when using scrolling in DropDownList. |
| ej.draggable.min.js | Should be referred when using popup resize functionality in DropDownList. |
For getting started you can use the ‘ej.web.all.min.js’ file, which encapsulates all the ‘ej’ controls and frameworks in one single file.
For themes, you can use the ‘ej.web.all.min.css’ CDN link from the snippet given. To add the themes in your application, please refer this link.
Preparing HTML document
You can create a PHP Project and add necessary scripts and styles with the help of the given PHP Getting Started Documentation.
Create a first PHP file in Xampp and name it appropriately with .php extension and also place it under the newly created sample folder. For example, say Index.php with the initial code as shown below -
Refer the required scripts and CSS files in your PHP page as mentioned below in order to render the DropDownList control -
<!DOCTYPE html>
<html>
<head>
<title>Getting Started - DropDownList</title>
<link href="http://cdn.syncfusion.com/33.1.44/js/web/flat-azure/ej.web.all.min.css" rel="stylesheet" />
<link href="http://cdn.syncfusion.com/33.1.44/js/web/responsive-css/ej.responsive.css" rel="stylesheet" />
<script src="http://cdn.syncfusion.com/js/assets/external/jquery-3.0.0.min.js"></script>
<script src="http://cdn.syncfusion.com/js/assets/external/jsrender.min.js"></script>
<script src="http://cdn.syncfusion.com/33.1.44/js/web/ej.web.all.min.js"></script>
</head>
<body>
<?php require_once 'EJ/AutoLoad.php'; ?>
</body>
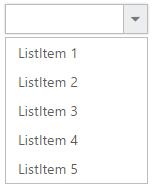
</html>Creating DropDownList
The DropDownList can be created in PHP by using the below given code.
<?php
    $items = array(
       array('text'=> 'ListItem 1'),
       array('text'=> 'ListItem 2'),
       array('text'=> 'ListItem 3'),
       array('text'=> 'ListItem 4'),
       array('text'=> 'ListItem 5'),
        );
    $dropdownlist =new EJ\DropDownList('items');
    $fields = new EJ\DropDownList\Field();
    $fields->text('text');
    echo $dropdownlist->AddItem($fields)->dataSource($items)->render();
    ?>
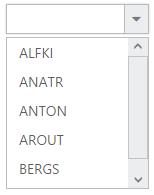
Populating data
The DropDownList can be bounded to both local array and remote data services using ej.DataManager. You can use DataManager component to serve data from the data services based on the query provided. To bind data to DropDownList widget, the dataSource property can be used.
NOTE
ODataAdaptor is the default adaptor for DataManager. On binding to other web services, proper data adaptor needs to be set on ‘adaptor’ option of DataManager.
<?php
     $customers = array(
       array('text'=> "ALFKI"),
       array('text'=> "ANATR"),
       array('text'=> "ANTON"),
       array('text'=> "AROUT"),
       array('text'=> "BERGS"),
       array('text'=> "BLAUS"),
       );
	 $dropdownlist =new EJ\DropDownList("customers");
    $fields = new EJ\DropDownList\Field();
    $fields->text("text");
    echo $dropdownlist->AddItem($fields)->dataSource($customers)->render();
    ?>
Setting Dimensions
DropDownList dimensions can be set using width and height API.
<?php
      $items = array(
       array('text'=> 'ListItem 1'),
       array('text'=> 'ListItem 2'),
       array('text'=> 'ListItem 3'),
       array('text'=> 'ListItem 4'),
       array('text'=> 'ListItem 5'),
        );

    $dropdownlist =new EJ\DropDownList('items');
    $fields = new EJ\DropDownList\Field();
    $fields->text('text');
    echo $dropdownlist->AddItem($fields)->dataSource($items)->width("300px")->height("50px")->render();
    ?>
Setting dimensions to Popup list
PopupWidth and popupHeight can be used to create a fixed size popup list.
<?php
    $items = array(
       array('text'=> 'ListItem 1'),
       array('text'=> 'ListItem 2'),
       array('text'=> 'ListItem 3'),
       array('text'=> 'ListItem 4'),
       array('text'=> 'ListItem 5'),
        );

    $dropdownlist =new EJ\DropDownList('items');
    $fields = new EJ\DropDownList\Field();
    $fields->text('text');
    echo $dropdownlist->AddItem($fields)->dataSource($items)->width("300px")->height("50px")->popupHeight("100px")->popupWidth("300px")->render();
    ?>
Setting and Getting Value
You can select single or multiple values from DropDownList widget. To assign a value initially to the DropDownList, you can use value property.
NOTE
To select multiple items based on index, refer here.
<div class="cols-sample-area">

     <?php
     $items = array(
       array('text'=> 'ListItem 1' ,'value'=>'item1'),
       array('text'=> 'ListItem 2' ,'value'=>'item2'),
       array('text'=> 'ListItem 3' ,'value'=>'item3'),
       array('text'=> 'ListItem 4' ,'value'=>'item4'),
       array('text'=> 'ListItem 5','value'=>'item5'),
        );

     $dropdownlist =new EJ\DropDownList('items');
     $fields = new EJ\DropDownList\Field();
     $fields->text('text')->value('value');
     echo $dropdownlist->AddItem($fields)->dataSource($items)->width("300px")->height("50px")->popupHeight("100px")->popupWidth("300px")->value("item3")->change("onchange")->render();
     ?>
     </div>
     <script>

     function onchange()

       {
         var obj=$("#items").data("ejDropDownList");
         console.log("Selected Item's Text - " + obj.option("text"));
         console.log("selected Item's Value - " + obj.option("value"));

        }
      </script>