How can I help you?
Customization in JavaScript DropDown List
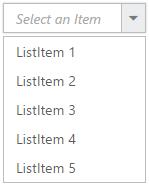
Adding watermark text
It provides the short description of the expected value in dropdown and will display the text until any item is selected. You can set this text using watermarkText property.
<input type="text" id="dropdown1" />$(function() {
var items = [{
text: "ListItem 1",
value: "item1"
}, {
text: "ListItem 2",
value: "item2"
}, {
text: "ListItem 3",
value: "item3"
}, {
text: "ListItem 4",
value: "item4"
}, {
text: "ListItem 5",
value: "item5"
}];
$('#dropdown1').ejDropDownList({
dataSource: items,
fields: {
text: "text",
value: "value"
},
watermarkText: "Select an Item"
});
});
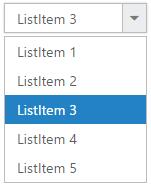
Applying Rounded Corner
You can use showRoundedCorner property to add rounded borders to the input and popup elements. By default, rounded corner property is disabled in DropDownList.
<input type="text" id="dropdown1" />$(function() {
var items = [{
text: "ListItem 1",
value: "item1"
}, {
text: "ListItem 2",
value: "item2"
}, {
text: "ListItem 3",
value: "item3"
}, {
text: "ListItem 4",
value: "item4"
}, {
text: "ListItem 5",
value: "item5"
}];
$('#dropdown1').ejDropDownList({
dataSource: items,
fields: {
text: "text",
value: "value"
},
showRoundedCorner: true
});
});
IMPORTANT
The browser support details for rounded corner is given here.
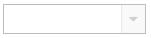
Enable/Disable the widget
The enabled property is used to indicate whether the widget can respond to the user interaction or not. You can disable it by assigning false to this property. When the widget is disabled state, you cannot interact with the control.
NOTE
<input type="text" id="dropdown1" />$(function() {
var items = [{
text: "ListItem 1",
value: "item1"
}, {
text: "ListItem 2",
value: "item2"
}, {
text: "ListItem 3",
value: "item3"
}, {
text: "ListItem 4",
value: "item4"
}, {
text: "ListItem 5",
value: "item5"
}];
$('#dropdown1').ejDropDownList({
dataSource: items,
fields: {
text: "text",
value: "value"
},
enabled: false
});
});
NOTE
you can disable/enable the single or multiple list items by using disableItemsByIndices and enableItemsByIndices property.
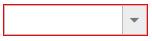
Applying HTML Attributes
Additional HTML attributes can be applied to the widget by using htmlAttributes property. The valid attributes such as name, required, read-only and disabled are directly applied to the input element of DropDownList, and other attributes such as style, class will be applied to the outer wrapper element of DropDownList. Please refer to the How-to section.
NOTE
when you add an item dynamically to the widget, you can specify the HTML attributes in the addItem() method parameters.
<input type="text" id="dropdown1" />$(function() {
var items = [{
text: "ListItem 1",
value: "item1"
}, {
text: "ListItem 2",
value: "item2"
}, {
text: "ListItem 3",
value: "item3"
}, {
text: "ListItem 4",
value: "item4"
}, {
text: "ListItem 5",
value: "item5"
}];
$('#dropdown1').ejDropDownList({
dataSource: items,
fields: {
text: "text",
value: "value"
},
htmlAttributes: {
style: "border:1px solid red;"
}
});
});