How can I help you?
How to add Syncfusion® Radial Gauge widget in FlutterFlow?
14 Dec 20242 minutes to read
Overview
FlutterFlow enables you to create native applications using its graphical interface, reducing the need to write extensive amounts of code. Additionally, it offers the capability to include custom widgets that are not included in the default FlutterFlow widget collection. This article explains how to incorporate our SfRadialGauge widget as a custom widget in FlutterFlow.
Create a new project
Navigate to the FlutterFlow dashboard and click the + Create New button to create a new project.
Creating the custom widget
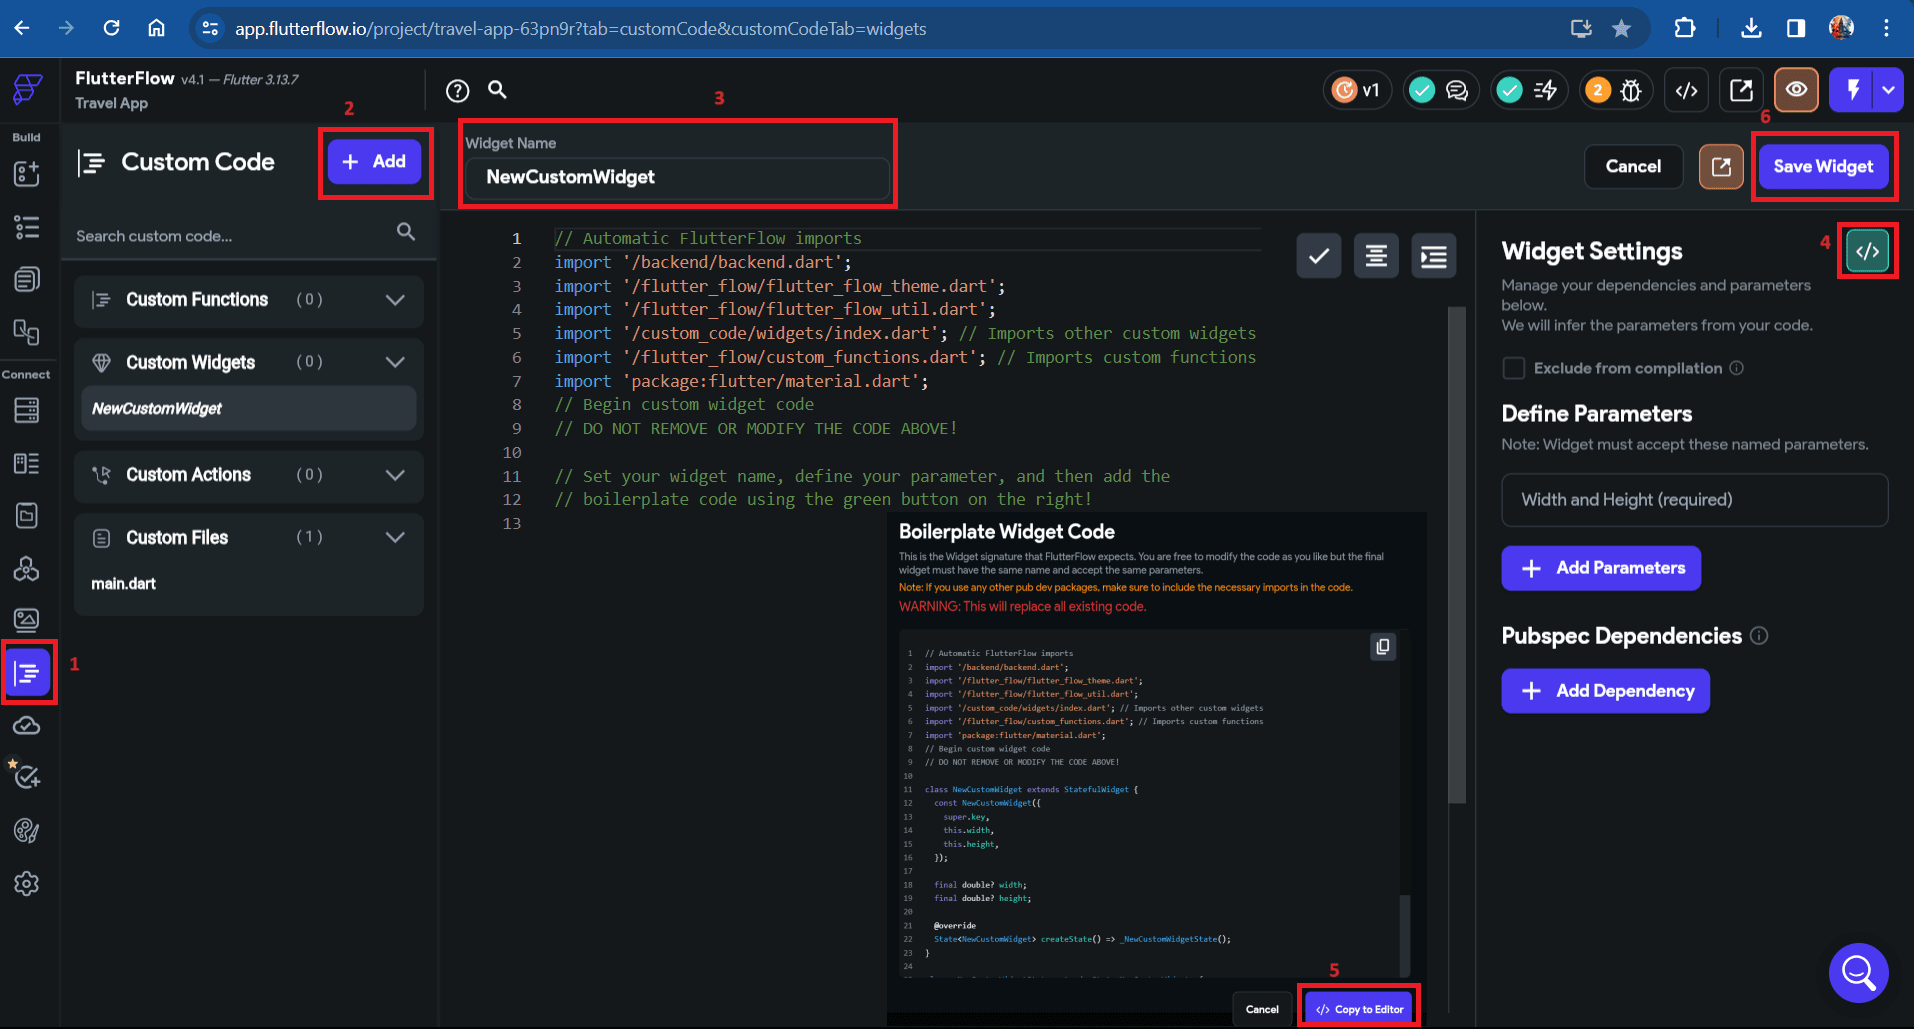
- Navigate to the
Custom Codesection in the left side navigation menu. - Click on the
+ Addbutton to open a dropdown menu, then selectWidget. - Update the widget name as desired.
- Click the
View Boilerplate Codebutton on the right side, represented by this icon[</>]. - A popup will appear with startup code; locate the button labeled
</> Copy to Editorand click on it. - Save the widget.
Add Radial Gauge widget as a dependency
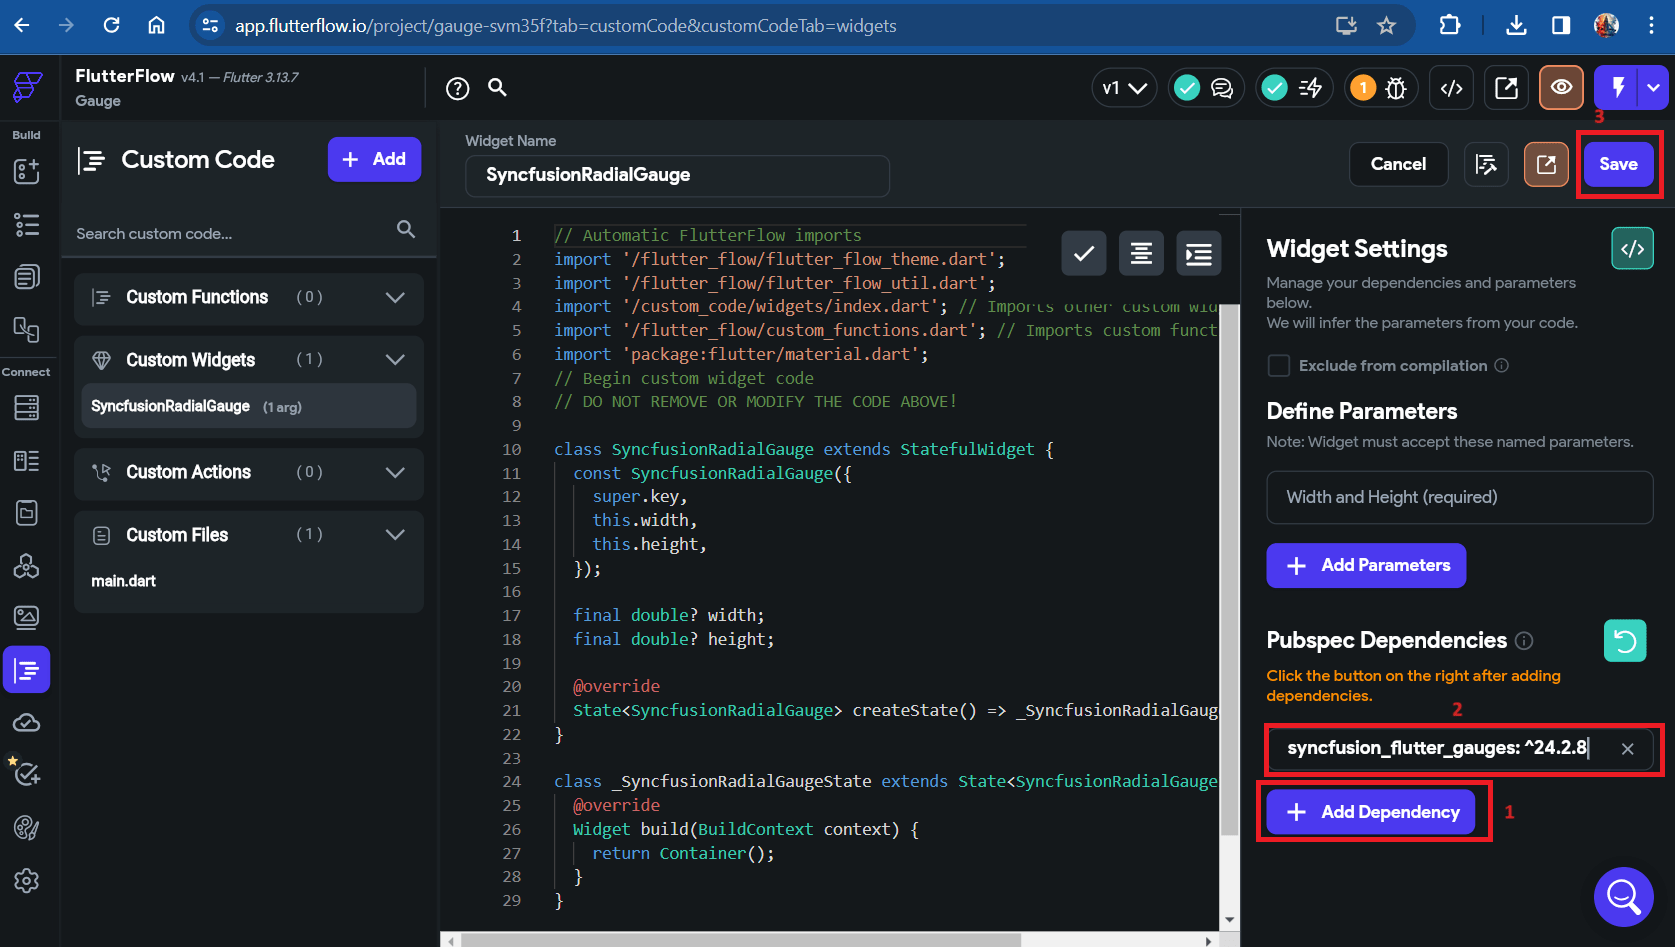
- Click on
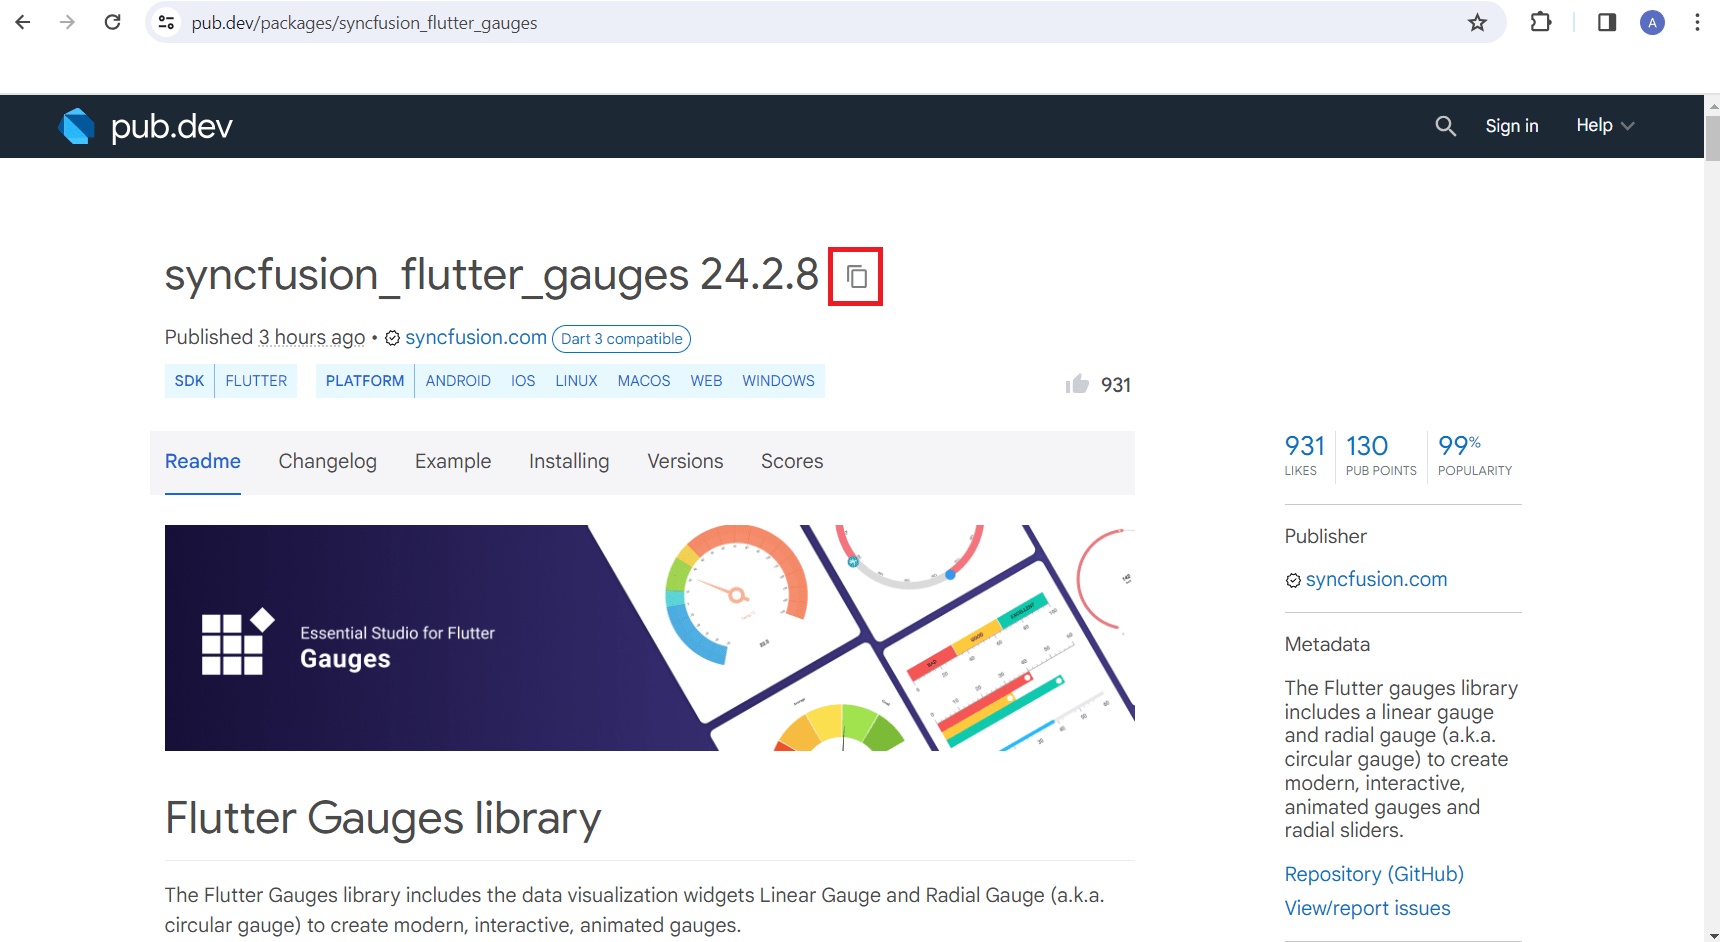
+ Add Dependency, a text editor will appear. - Navigate to Syncfusion® Flutter Gauges in pub.dev and copy the dependency name and version using the
Copy to Clipboardoption.
- Paste the copied dependency into the text editor, then click
RefreshandSaveit.
Note: The live version of Syncfusion® Flutter Gauges has been migrated to the latest version of Flutter SDK. To ensure compatibility, check FlutterFlow’s current Flutter version and obtain the corresponding version of Syncfusion® Flutter Gauges by referring to the SDK compatibility.
Note: If you are using an older version of a dependency instead of the latest one, remove the caret symbol (^) prefix in the version number after pasting the dependency. For example, change
^21.3.0to21.3.0.
Note: Since Syncfusion® Flutter Gauges depends on the Syncfusion® Flutter Core package, make sure to add it as a dependency following the same steps mentioned above.
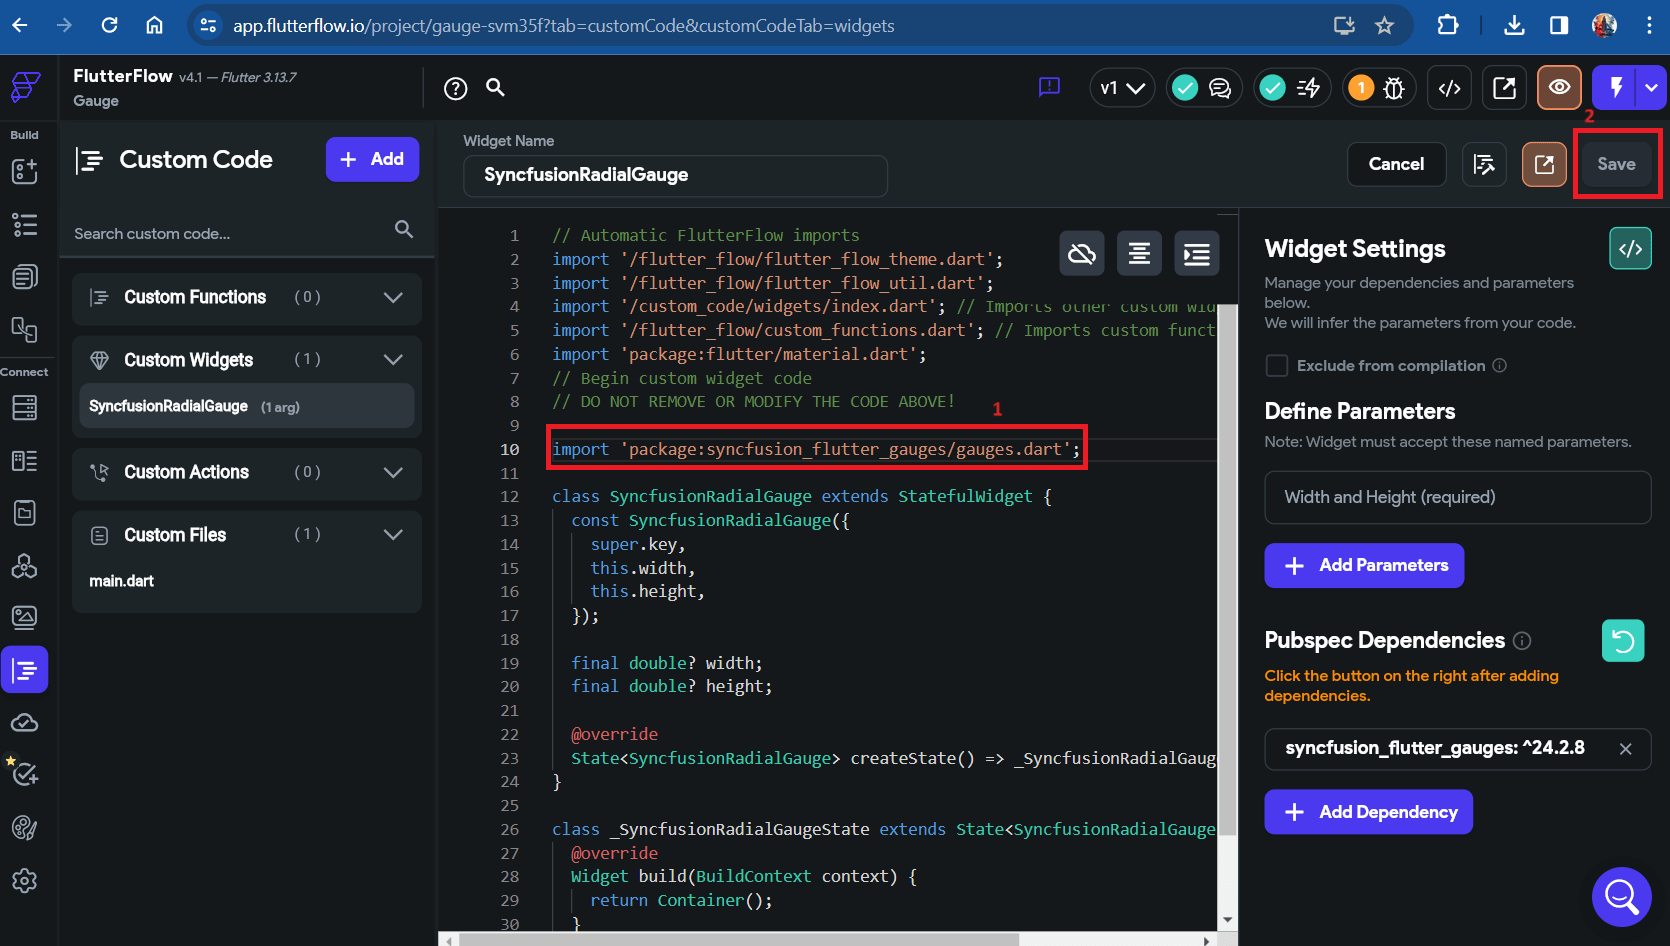
Import the package
- Navigate to the
Installingtab on the Syncfusion® Flutter Gauges page. Under theImport itsection, copy the package import statement.

- Paste the copied import statement into the code editor and then
Saveit.
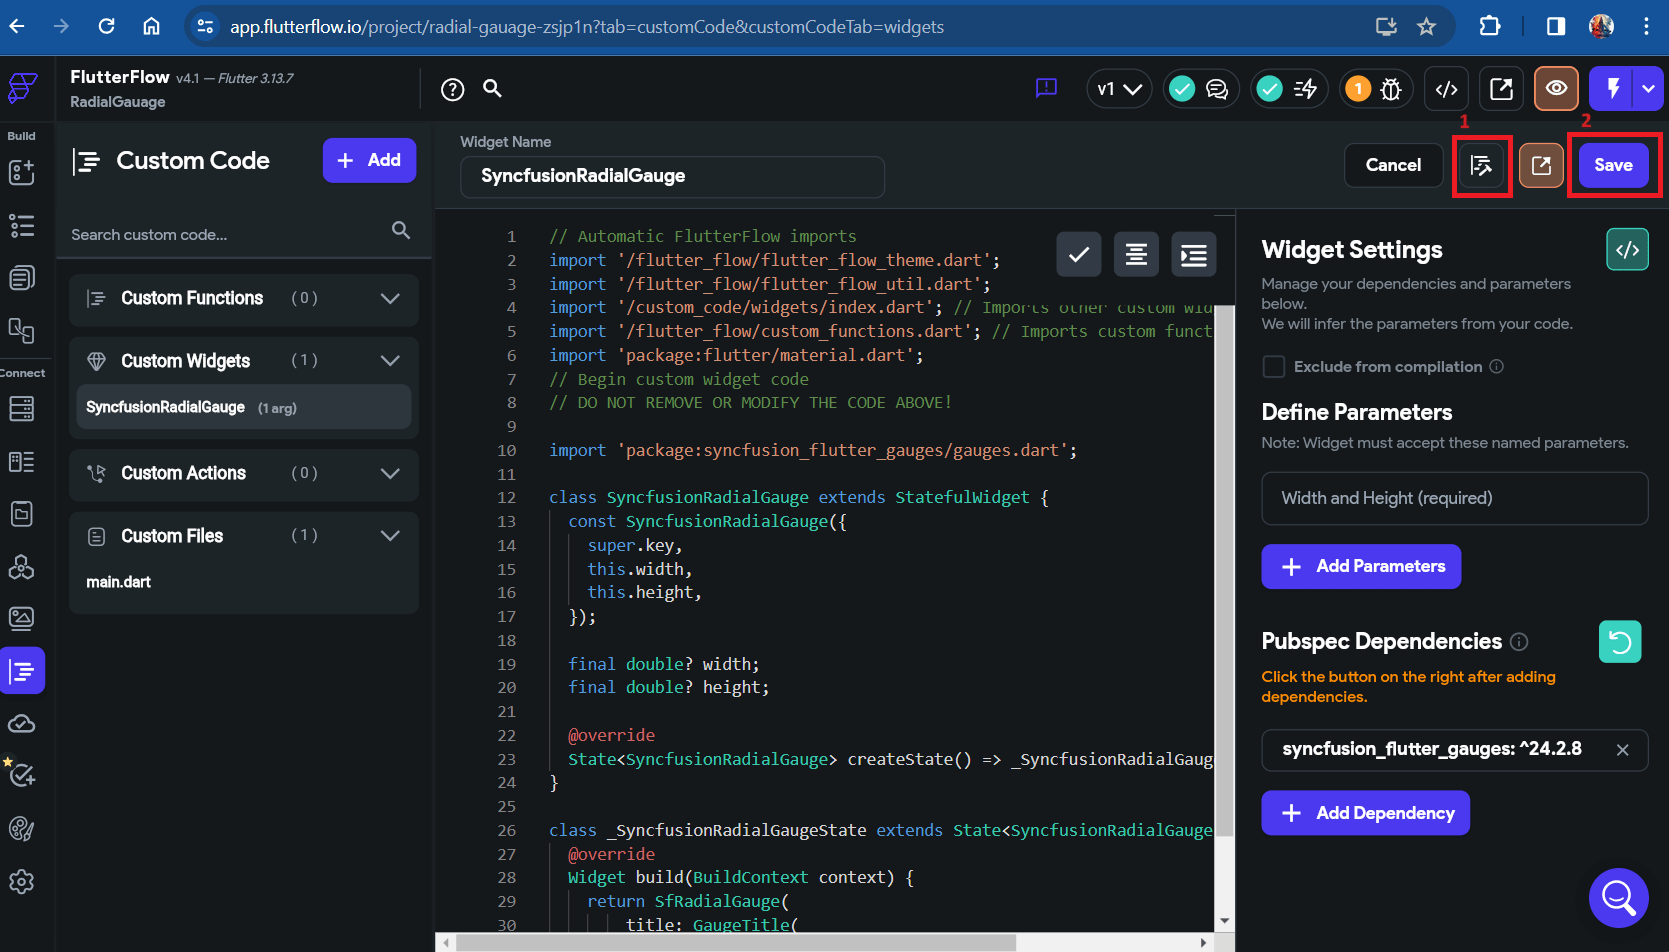
Add widget code snippet in code editor
- Navigate to the Example tab in Syncfusion® Flutter Gauges and copy the widget specific codes.
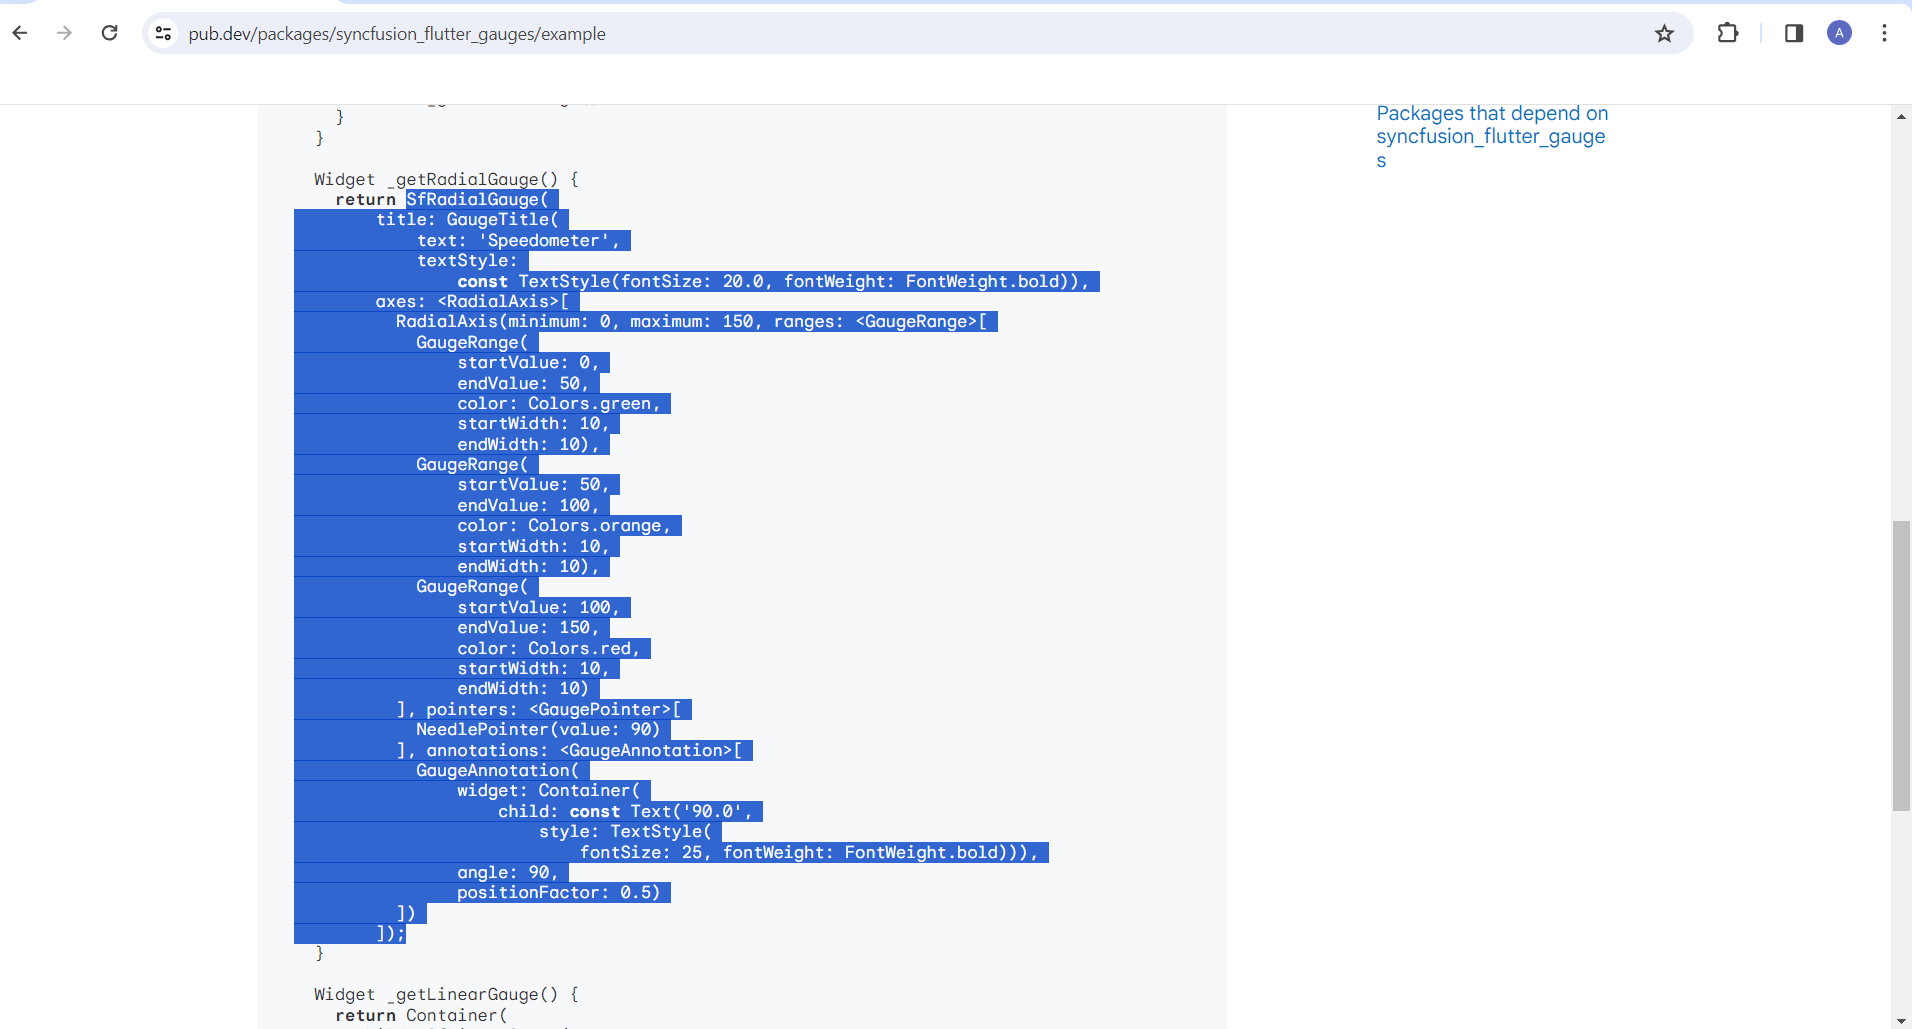
- Paste the copied code sample into the code editor, click
Format Code, andSaveit.

Compiling the codes
- Click the ‘Compile Code’ button located in the top right corner.
- If there are no errors, save the process. If errors are present, fix them and compile the code again. Once the code has been successfully compiled, save the process.
Note: The compilation progress takes 2 to 3 minutes to complete.
Utilizing the custom widget
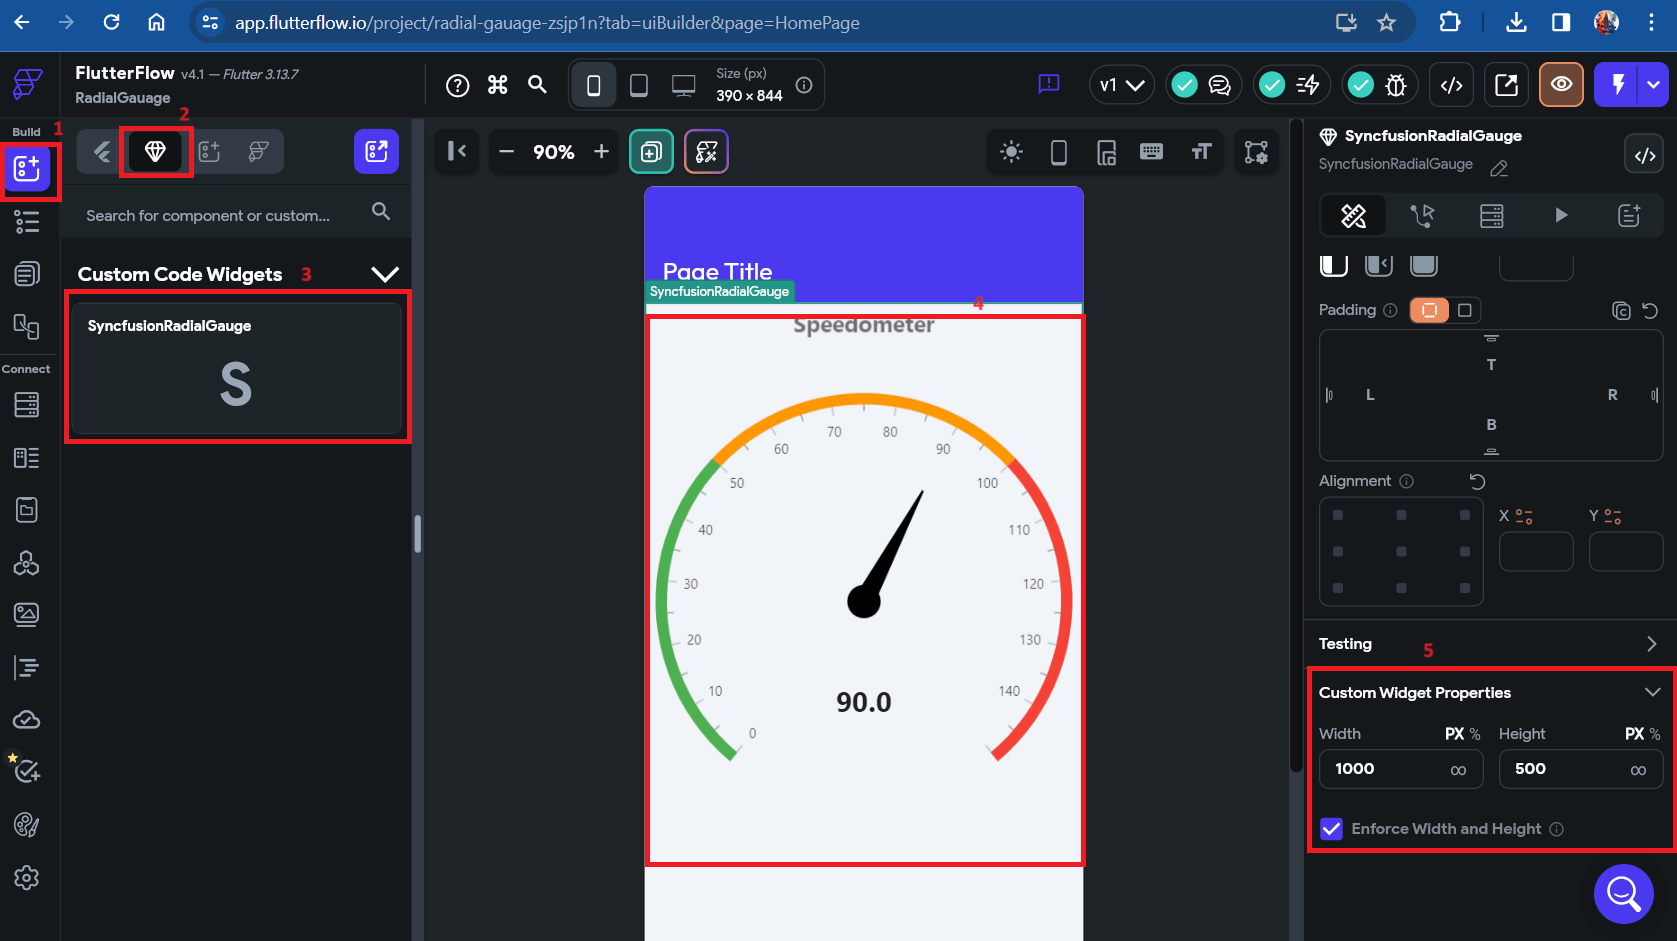
- Navigate to
Widget Palettelocated in the left side navigation menu. - Click on the
Componentstab. - Your custom widget will be under
Custom Code Widgets. Drag and drop the custom widget to your page.