How to use Data Integration Platform in Production Server
System Requirement
The amount of hardware and memory needed will depend on the size and nature of the dataflow involved. High configuration machine with 16 GB RAM is capable to run most of the use cases with single Data Integration Platform installation.
The data is stored on disk while Data Integration is processing it. So, Data Integration needs to have sufficient disk space allocated for its various repositories. Particularly the content repository, flowfile repository, and provenance repository.
|
Hardware |
|
|
|
|
Software |
|
Installation
For Windows
- For Downloading and Installing Data Integration Platform, refer below link
User and Policy Management
Defined Roles (Groups)
Instead of giving permissions to each individual user, admin can create separate groups with required policies. Then users can be added to group as needed.
Example
-
Consider three groups such as Administrators, Developersand Viewers with defined policies set by admin.
-
If any user need administrator privileges, admin can simply add that user to Administrator group.
To create users, groups, assigning global and component level policies, refer https://help.syncfusion.com/data-integration/security/user-and-policy-management
Accessibility
Restrict root process group access
- For Production environment, you can restrict accessibility to the root process group for all users except admin users (Administrator group). Admin should have root process group access permission.
Create process groups for various teams
-
Create separate process groups for various teams like Management, Development and Monitoring. Set required policies for each process group. Therefore, admin will have the full rights to access all process group including root process group.
-
For example: users belong to Viewers group, can able to access only Monitoring process group.
Access Policies
Refer below tabular column for defined group and Global Policies
|
Groups |
Access Policies |
|
Administrator – should able to read and modify all process groups |
|
|
Developers – should able to read and modify data only for Development process group. Also, they can have access to read data in Monitoring process group. Root and Management process groups write access should be restricted for this group |
|
|
Viewers – should able to access only Monitoring process group |
|
NOTE
Policies will be inherited automatically to new process group from parent(root) process group while creating
Refer below tabular column for defined groups and assign Component Policies accordingly
|
Groups |
Process Groups |
|||
|
Root |
Management |
Development |
Monitoring |
|
|
Administrators |
</li> |
|
|
|
|
Developers |
|
No Access (Restricted) |
|
|
|
Viewers |
|
No Access (Restricted) | No Access (Restricted) |
|
For more information, refer this link: https://help.syncfusion.com/data-integration/security/user-and-policy-management#policy-details
Below example illustrate how it will be accessible when different users logged in to Data Integration Platform once groups and policies defined based on above steps.
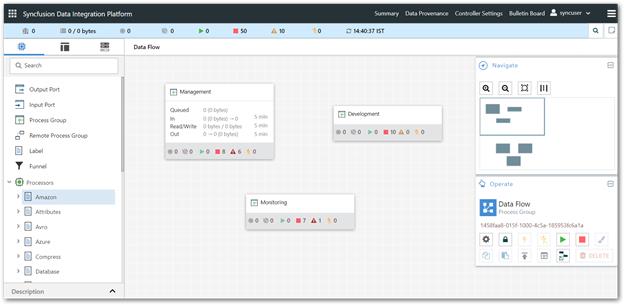
Login as Administrators
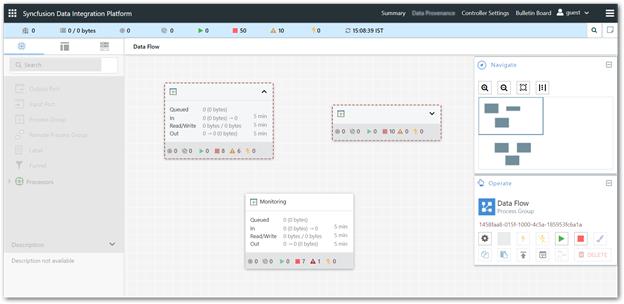
Administrator users have permission to read and modify all process groups.
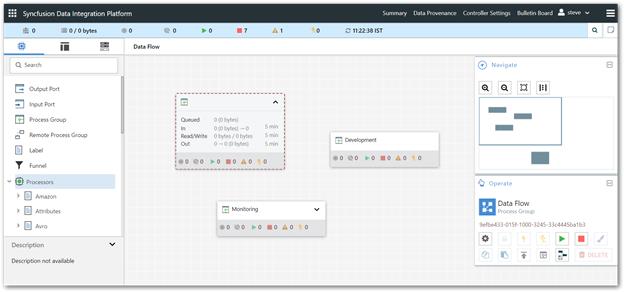
Login as Developers
Developers have permission to read and modify the Development process group and able to view data in Monitoring process group. Please refer below screenshots.
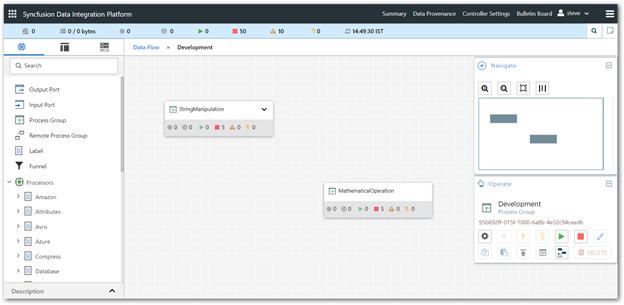
Inside Development process group, Developers will have all permission to read and write.
Inside Monitoring process group, Developers will have only read permission.
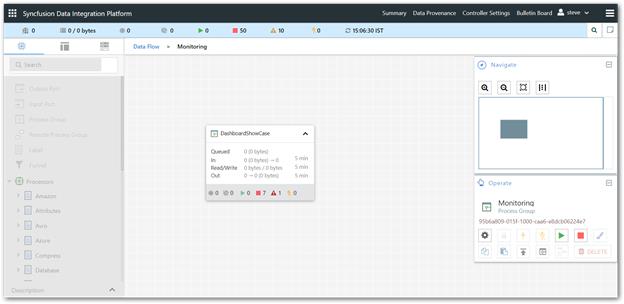
Login as Viewers
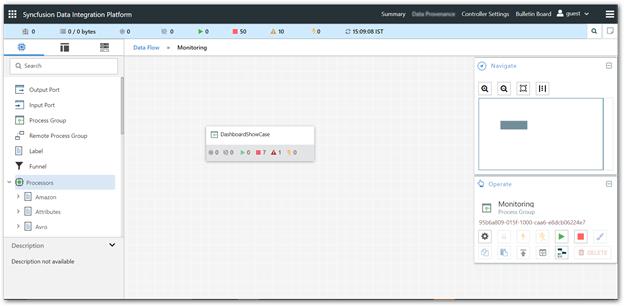
Viewers can access only Monitoring process group. Please refer the below screenshot.
Workflow Development
Workflow development process involves developing, testing, quality check and production deployment. Workflow should be shareable to other servers for testing and production as well. It is also important to maintain Version Control for the workflow in each stage of development cycle. To understand the complete development process, look at the below pictorial illustration.
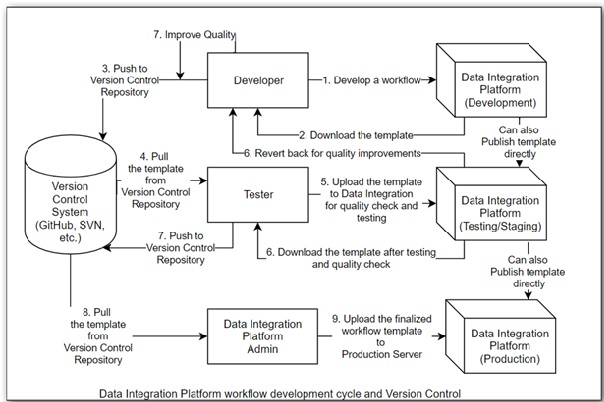
Step 1: Develop a workflow in developing environment. After development, create template and download in local drive. Store template in Version Control System.
Step 2: Share the workflow to testing server (staging) to check the quality of the workflow. After quality check, create it as template and update the template in Version Control System.
Sharing workflow can be done in 2 ways. It will be explained in detail in deployment section.
Step 3: After quality check and testing, workflow can publish it into Production Server. In case of any further workflow changes, you can create and update template in Version Control repository. So that the committed template will be reusable and sharable to any other Data Integration Server as per requirement.
Template
Templates are XML file. Template can be created for the workflow in the UI and it is downloadable. They can be share and run on other Data Integration Server by uploading the templates.
For detailed explanation about the templates,(see Working with Templates)
Configure Data Integration Platform in production
Production environment port number
|
Production environment mode |
Port number |
| Secure Data Integration Platform | 443 |
| Non-secure Data Integration Platform | 80 |
For configuring Data Integration Platform in production, change the hostname and port number details in four components.
Syncfusion Data Integration Platform
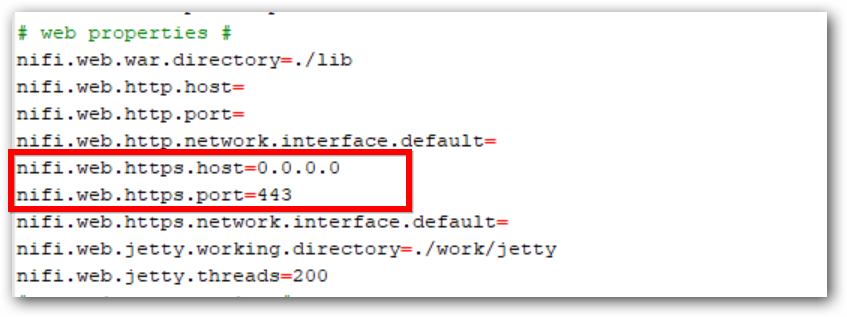
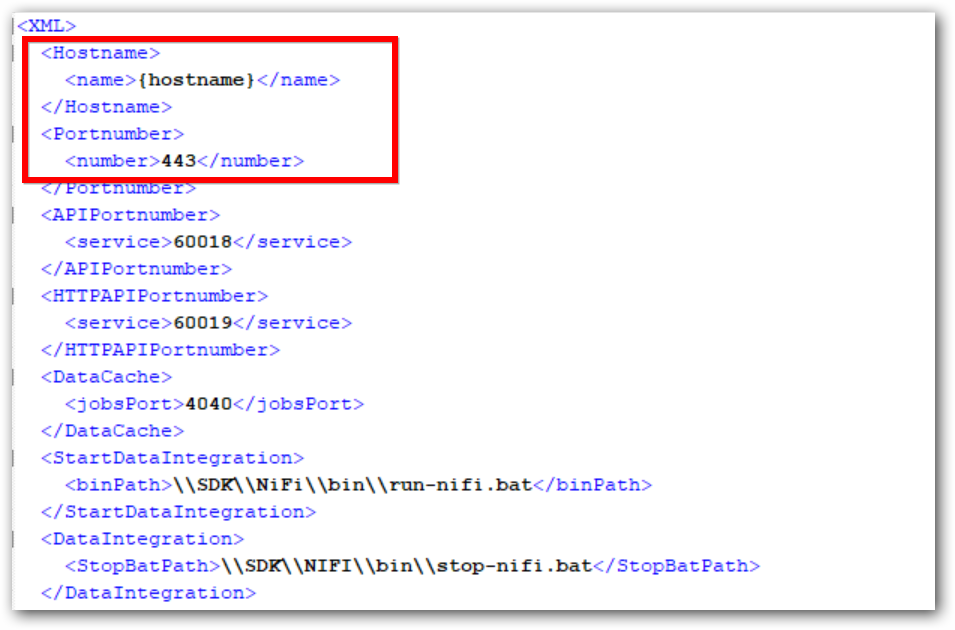
- Open the nifi.properties file from C:\Syncfusion\DataIntegration\{build-version}\SDK\NIFI\conf.
- Change the nifi.web.https.host and nifi.web.https.port properties to your required host name and port number. Refer to the following screenshot.
Syncfusion Data Integration agent
- Open the DataIntegrationAgent.xml file in notepad from C:\Syncfusion\DataIntegration\{build-version} \Utilities\SyncfusionDataIntegrationAgent
- Change the required port number in the corresponding property as shown in the following screenshot.
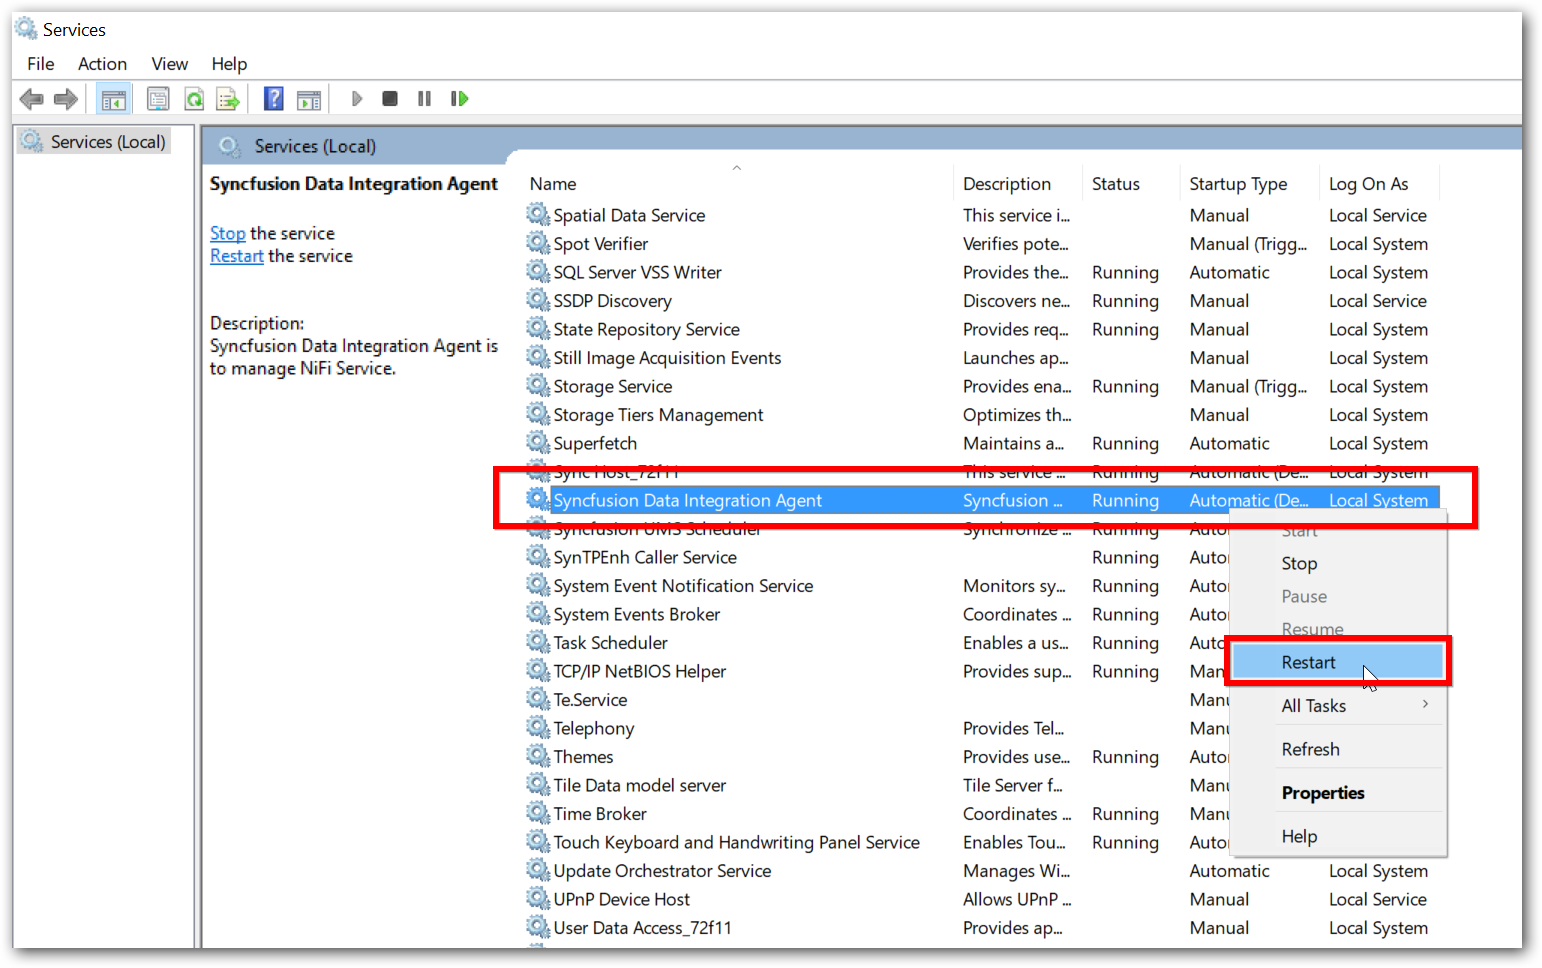
- Click Windows button and press CTRL + R. Enter the services.msc in run command prompt. Search Syncfusion Data Integration Agent in service.msc dialog and, then right-click it and restart.
Syncfusion Data Integration service manager
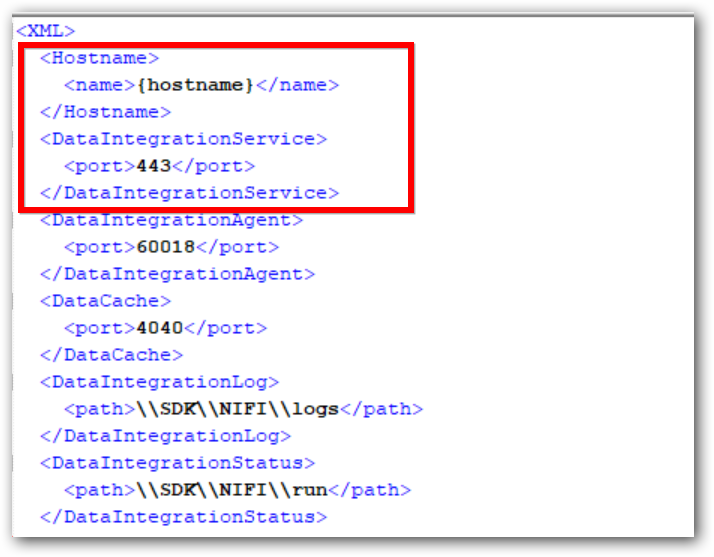
- Open the DataIntegrationManager.xml file from C:\Syncfusion\DataIntegration\{build-version}\Utilities\SyncfusionDataIntegrationManager
- Change the Hostname property and Data Integration Service port number as you require. Refer to the following screenshot.
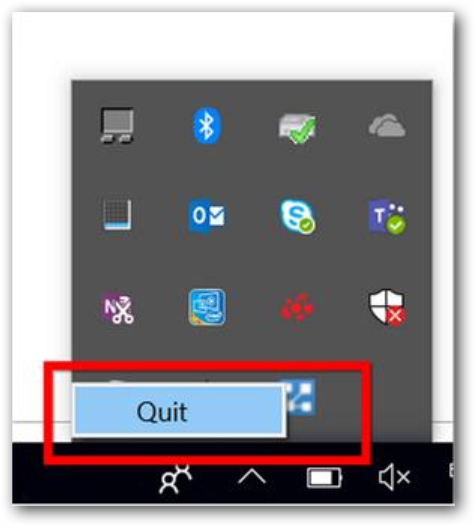
- In system tray, right-click the Syncfusion Data Integration Platform Service Manager and click Quit option. Refer to the following screenshot.
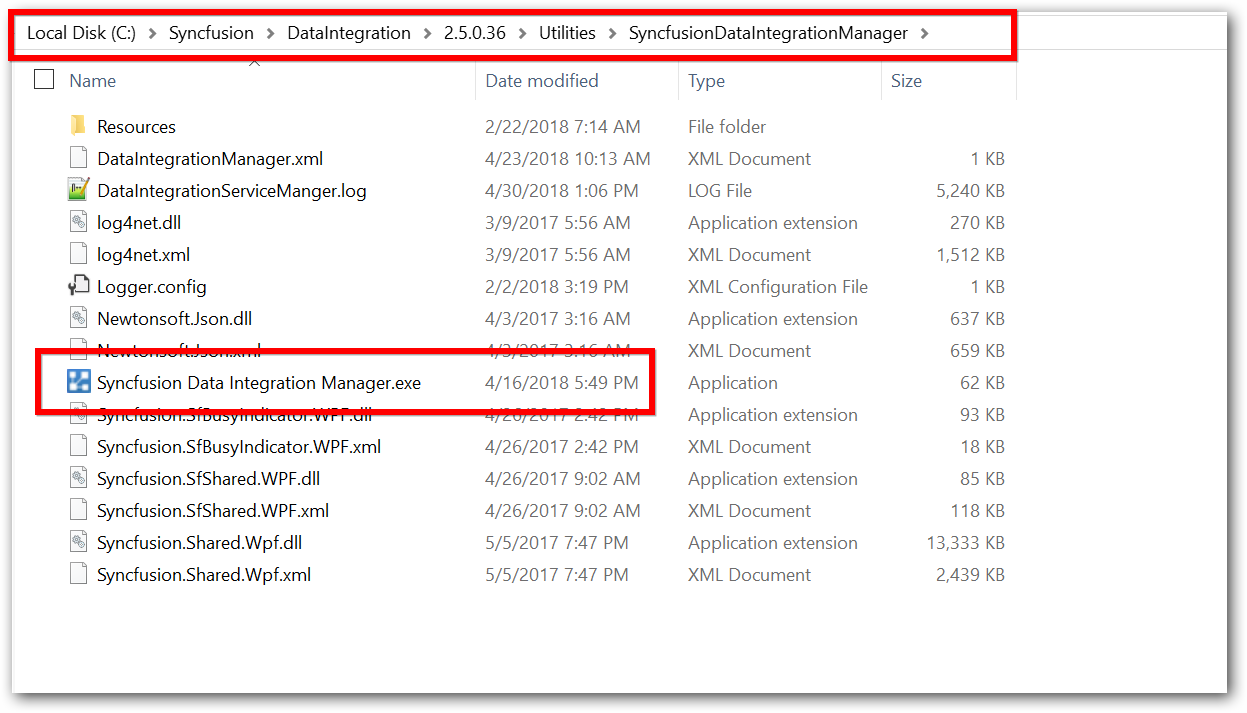
- Launch the Data Integration Service Manager by double clicking its exe from C:\Syncfusion\DataIntegration\{build-version}\Utilities\SyncfusionDataIntegrationManager\Syncfusion Data Integration Manager.exe
- Restart the service using Syncfusion Data Integration Service Manager to reflect the changes in the Data Integration service.
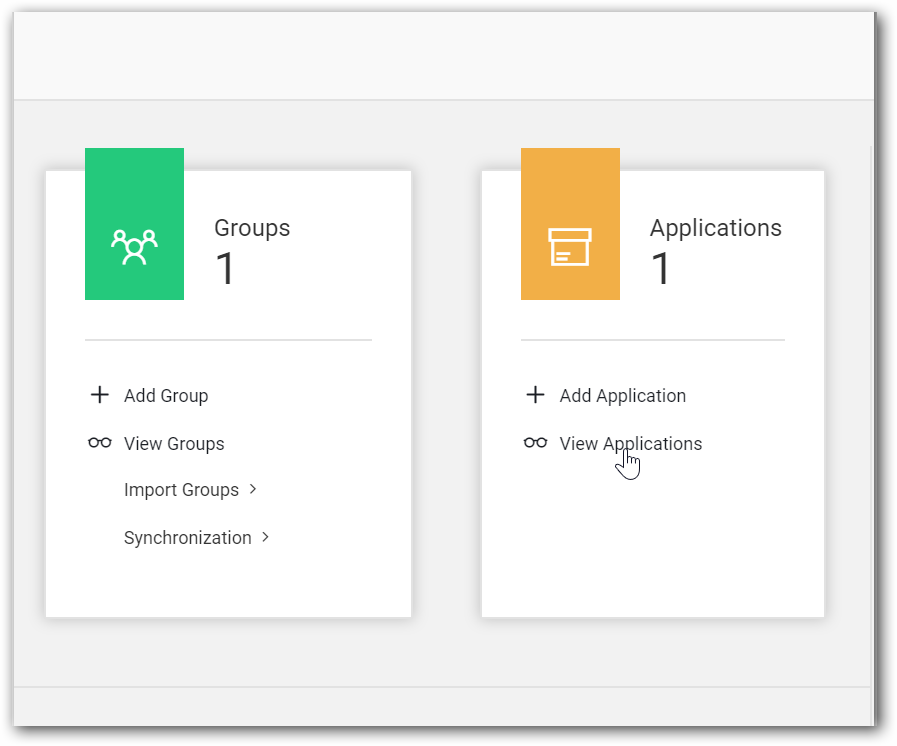
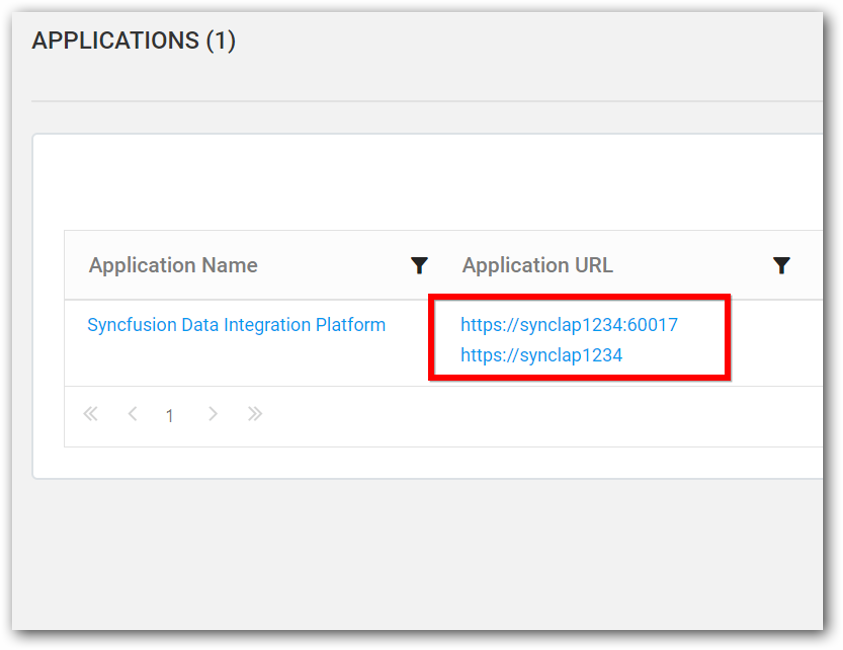
Syncfusion User Management Server - In User Management Server home page, click view Applications.
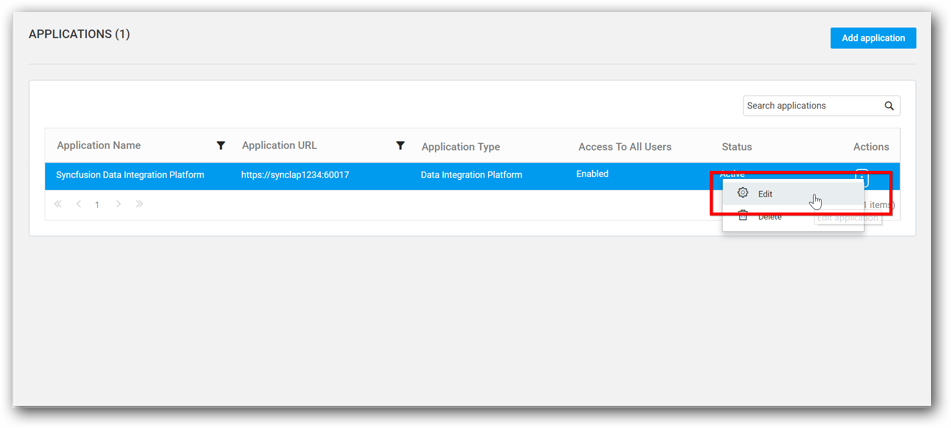
- In application page, click Edit option for the added Data Integration application.
- Add the changed URL using Add Url option and click Update.
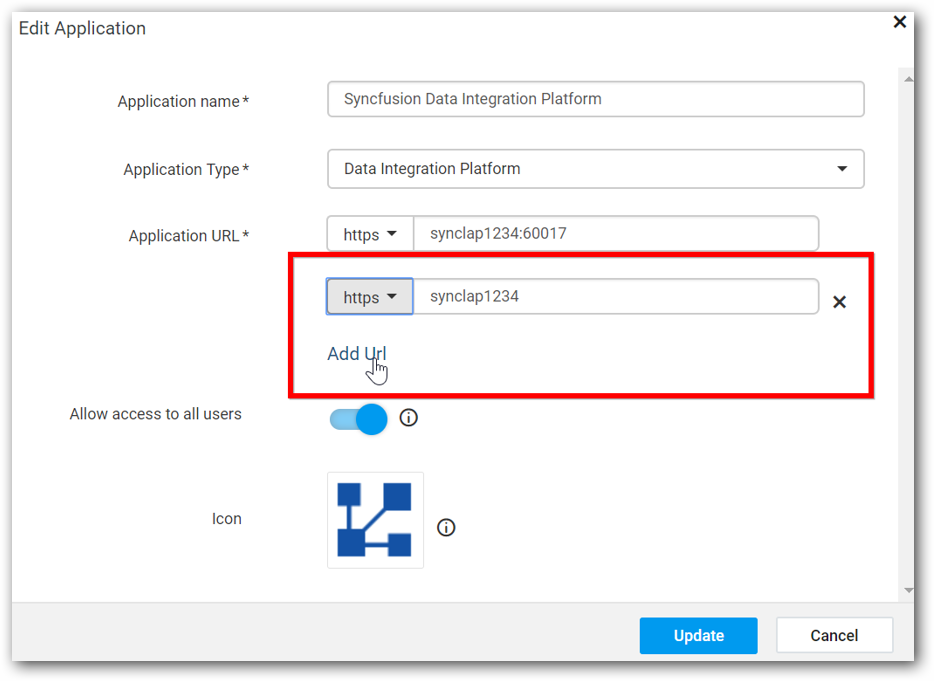
- Now, URL will be added in application details and it will be accessible.
Monitoring
Data Integration Platform provides various processors, reporting tasks and notification services to monitor your workflow. It is easy to send mail along with the workflow status and logs as needed. Also, it is possible to monitor the memory usage and getting alert when reaches the configured threshold through reporting tasks. Bulletin board has a support to monitor all error messages of running processors in single dialog. Session view allow you to monitor the complete status of a workflow and its status in easy manner.
For more information for Data Integration Platform monitoring solution, you can refer our user guide documentation https://help.syncfusion.com/data-integration/how-to/monitor-data-integration-platform
Deployment
In Data Integration Platform, there are two ways to deploy the workflow into the Production Server.
Publish Option
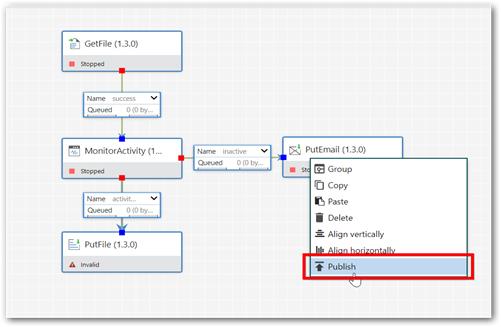
-
Right click selected data flow and click Publish.
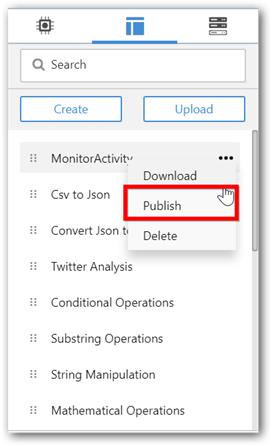
-
Templates can also be published to production server. Go to templates tab, click option menu for specific template and click Publish option.
-
Enter valid production server details in Publish Template dialog and click Publish button.
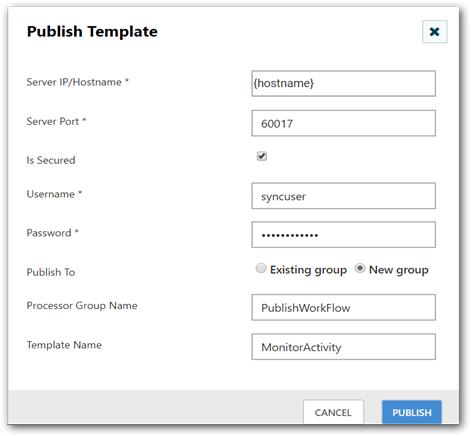
-
New process group with template will be published to Production Server.
Download and Upload Template
-
Navigate to the required process group in which you need to create template.
-
Navigate to Template tab and click Create button.
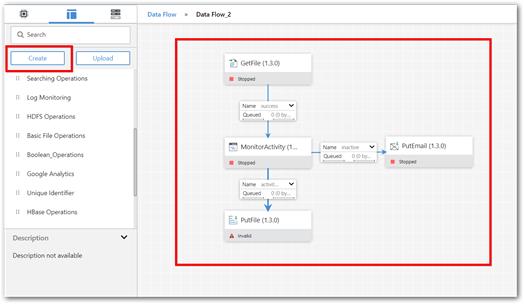
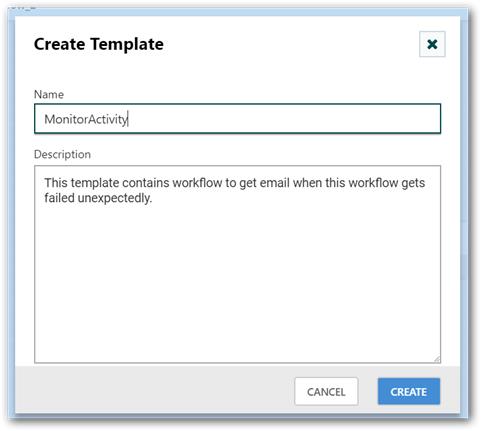
-
In Create Template dialog, enter Template name and description if required.
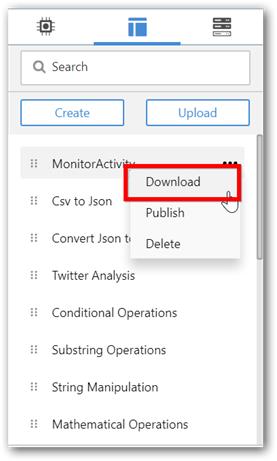
-
You can find created template in left side template panel. Click Download in dropdown option to download it.
-
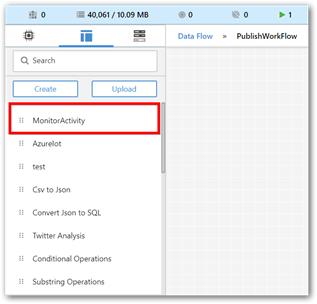
Once template downloaded, you need to move it to production server and then upload it using Upload option.

-
Once Upload operation is completed, then uploaded template will be listed in template list.
-
For version control, downloaded template can be saved in any storage repositories such as SVN, GitHub, GitLab, etc.
Fine Tuning
To improve overall performance of Data Integration Platform, you can increase Heap and PermGen memory configuration manually based on recommendation provided in user guide documentation
https://help.syncfusion.com/data-integration/admin-guide#fine-tuning-memory