Getting Started with SfDigitalGauge
13 Oct 20221 minute to read
This section explains you the steps to configure a SfDigitalGauge control in a real-time scenario and some of the customization features available in it.
Referencing Essential Studio Components in Your Solution
After installing Essential Studio for Xamarin, you can find all the required assemblies in the installation folders, typically:
{Syncfusion Installed location}\Essential Studio {version number}\lib
And below assembly reference to the iOS unified project.
iOS-unified\Syncfusion.SfGauge.iOS.dll
Initialize digital gauge from designer
SFDigitalGauge allows users to drag the control from toolbox to designer window. The properties window will be displayed where you change the necessary functionalities to customize the digital gauge in designer.
Add SfDigitalGauge
-
Adding namespace for the added assemblies.
using Syncfusion.SfGauge.iOS; -
Now add the SfDigitalGauge control with a required optimal name by using the included namespace.
SFDigitalGauge  digitalGauge = new SFDigitalGauge ();
this.AddSubview(digitalGauge);
Configuring properties
Character Height, Width and segment which is used to display the Characters can be customized as in the below code snippets.
digitalGauge.CharacterHeight = 36;
digitalGauge.CharacterWidth = 18;
digitalGauge.CharacterType = SFDigitalGaugeCharacterType.SFDigitalGaugeCharacterTypeSegmentSeven;
digitalGauge.Value = (NSString)“Syncfusion”;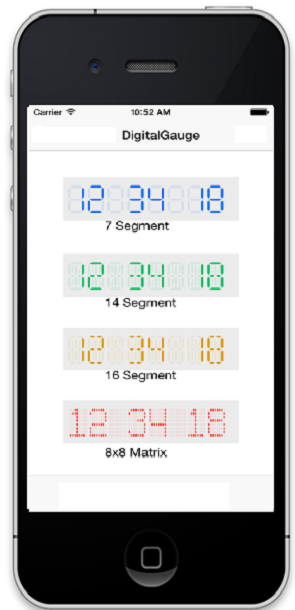
You can find the complete getting started sample from this link.