Toolbox Configuration
8 Dec 20255 minutes to read
The Syncfusion Toolbox Installer utility incorporates the Syncfusion® WPF components into the Visual Studio .NET toolbox.
NOTE
Toolbox configuration support is not available for the Visual Studio Express Edition. However, you can manually configure the Syncfusion® controls into the Visual Studio Express Toolbox. To do so, refer to the Manual Toolbox Configuration.
If the “Configure Syncfusion® Controls in Visual Studio” checkbox is selected from the installer UI while installing the Syncfusion® WPF installer, Syncfusion® components will be automatically configured in the Visual Studio toolbox.
To add the Syncfusion® WPF components via the Syncfusion Toolbox Installer, perform the following steps:
-
To launch Toolbox configuration utility, follow either one of the options below:
Option 1:
Open the Syncfusion Control Panel, click Add On and Utilities > Toolbox Installer.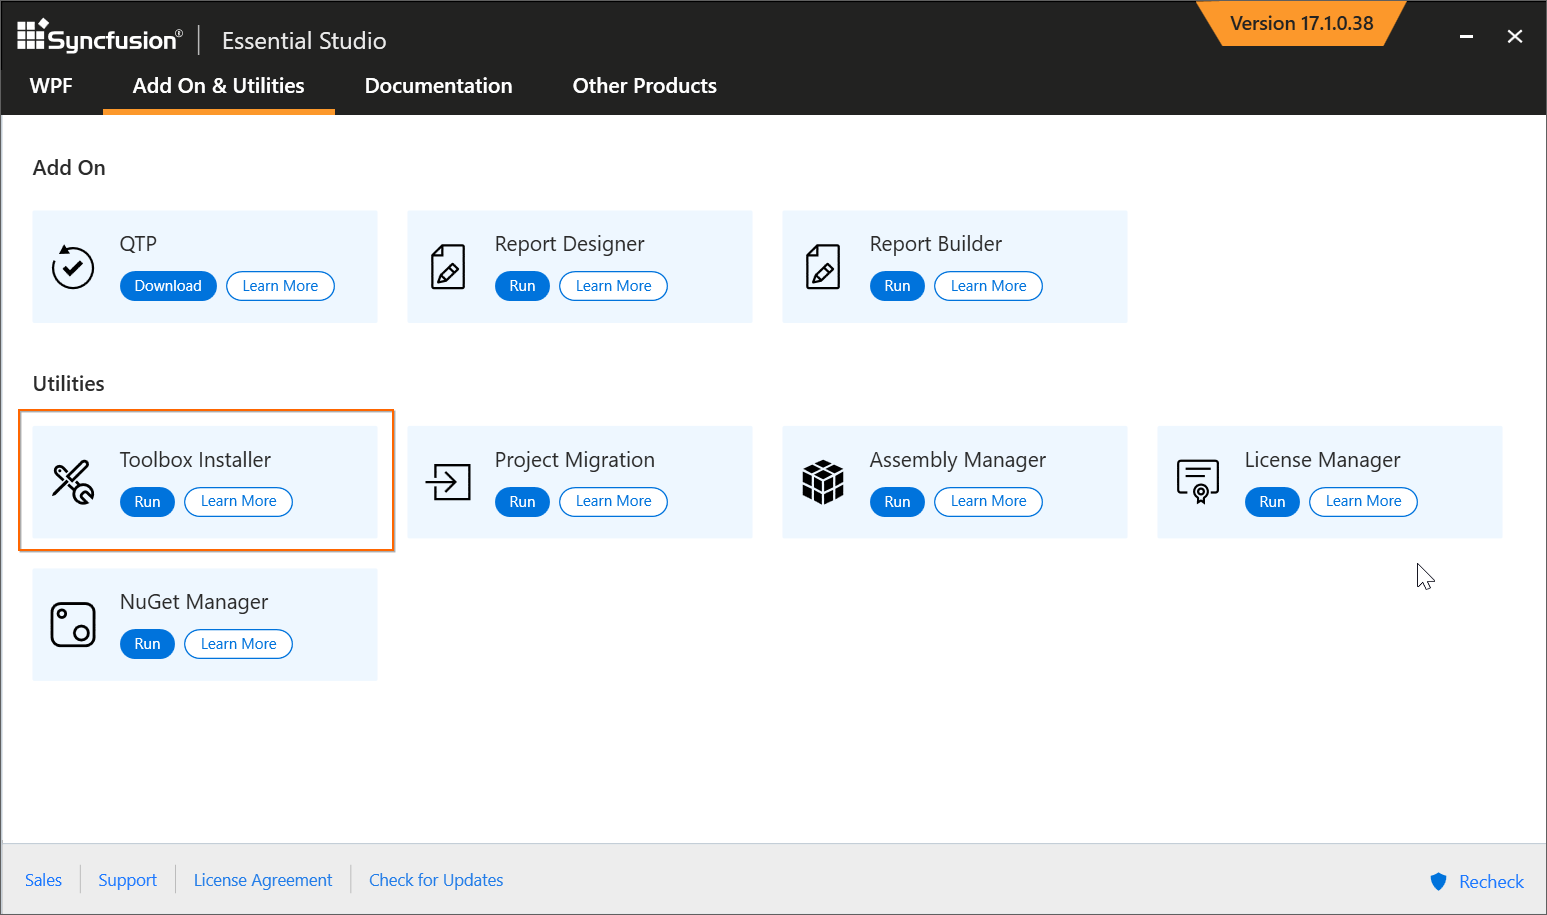
Option 2:
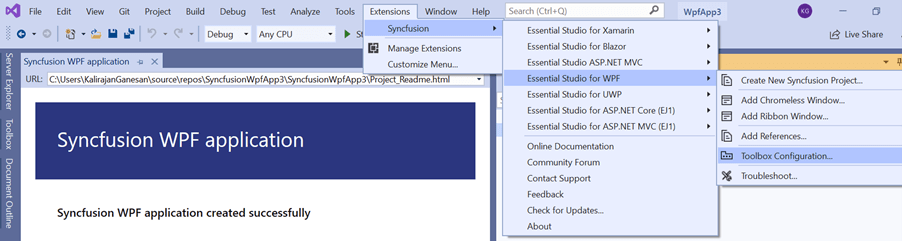
Click Syncfusion menu and choose Essential Studio® for WPF > Toolbox Configuration… in Visual Studio
NOTE
From Visual Studio 2019, Syncfusion menu is available under Extensions in Visual Studio menu.
-
Toolbox Installer will be opened.
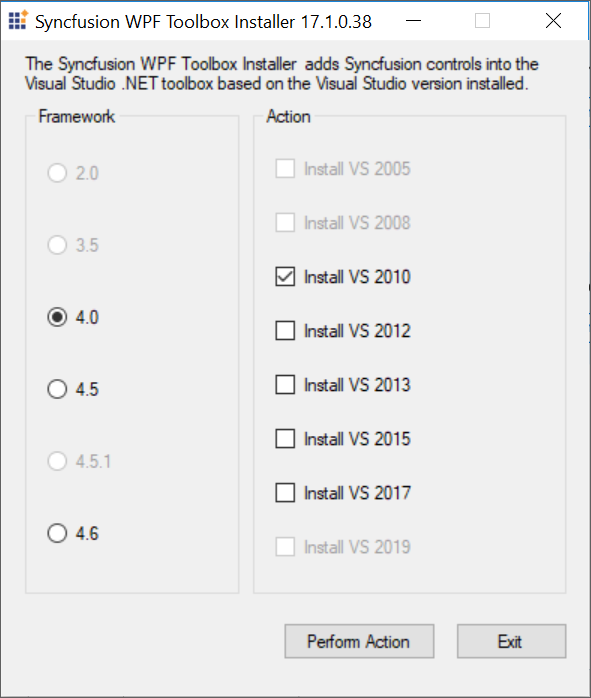
The following options are available in Toolbox Configuration:
- Install VS2015 – Configures Framework 4.6.2 Syncfusion controls in VS 2015 toolbox.
- Install VS2017 – Configures Framework 4.6.2 Syncfusion controls in VS 2017 toolbox.
- Install VS2019 – Configures Framework 4.6.2 Syncfusion controls in VS 2019 toolbox
- Install VS2022 – Configures Framework 4.6.2 Syncfusion controls in VS 2022 toolbox.
- Install VS2026 – Configures Framework 4.6.2 Syncfusion controls in VS 2026 toolbox.
NOTE
You can also configure Syncfusion controls from a lower version Framework assembly to higher version of Visual Studio.
-
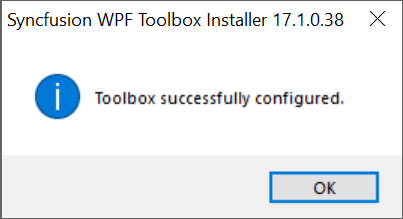
The successful configuration of Toolbox is indicated by an Information message. Click OK.
NOTE
- If your installed controls are not reflected properly in the Visual Studio Toolbox, you’ll have to reset the Toolbox.
- This tool configures only the controls that are located under {Installed Location}\Assemblies{Framework version}.
Configuring toolbox for WPF in Visual Studio 2026
From 2025 Volume 3 SP 2, Syncfusion® started providing toolbox support for .NET Framework in Visual Studio 2026 Toolbox. After installing the Syncfusion® WPF installer, Syncfusion® controls will be automatically configured in the Visual Studio 2026 toolbox for WPF projects.
Configuring toolbox for WPF in Visual Studio 2022
From 2021 Volume 4, Syncfusion® started providing toolbox support for .NET Framework in Visual Studio 2022 Toolbox. After installing the Syncfusion® WPF installer, Syncfusion® controls will be automatically configured in the Visual Studio 2022 toolbox for WPF projects.
NOTE
- Syncfusion® WPF .NET 5.0 controls will be compatible with .NET 6.0, on installing the Syncfusion® WPF installer, our .NET 5.0 controls will be configured the toolbox for .NET 6.0 projects too.
Configuring toolbox for WPF .NET 8.0\9.0\10.0 projects
From 2025 Volume 3 SP 2 Release, Syncfusion® started providing toolbox support for WPF .NET 8.0\9.0\10.0 framework in Visual Studio 2026. Syncfusion® controls will be automatically configured in the Visual Studio 2026 toolbox for WPF .NET 8.0\9.0\10.0 projects.
Configuring toolbox for WPF .NET 5.0 projects
From 2021 Volume 1, Syncfusion® started providing toolbox support for the WPF .NET 5.0 framework in Visual Studio. After installing the Syncfusion® WPF installer, Syncfusion® controls will be automatically configured in the Visual Studio toolbox for WPF.NET 5.0 projects.
NOTE
- Syncfusion® included this toolbox support for .NET 5.0 WPF platform from 2021 Volume 1 release version v19.1.0.54 only.
- If the project was created with TargetFramework.NET Core 3.1 and then changed to.NET 5.0 after installing the WPF setup, you must restart Visual Studio to see the Syncfusion® controls in the Visual Studio Toolbox.
- Visual Studio 2019 16.7 Preview 2 and later is required.
Upgrading the Syncfusion® WPF toolbox .NET 5.0 controls without installing the build
You can upgrade the Syncfusion® WPF toolbox for .NET 5.0 control with NuGet packages downloaded from nuget.org. Download “Syncfusion.UI.WPF.NET” package from nuget.org in your machine.
Use the following steps to add the Syncfusion® WPF controls through Syncfusion® NuGet packages:
step 1:
Extract “Syncfusion.UI.WPF.NET” package by using the below commands.
Open Command prompt from nuget.exe path and run the following commands
Command: {nuget.exe path} add “F:\Syncfusion\Syncfusion.UI.WPF.NET.{version}.nupkg” -Source “F:\Syncfusion\Expand” -expand
Example: F:\Syncfusion>nuget.exe add “F:\Syncfusion\Syncfusion.UI.WPF.NET.19.1.0.50.nupkg” -Source “F:\Syncfusion” -expand

step 2:
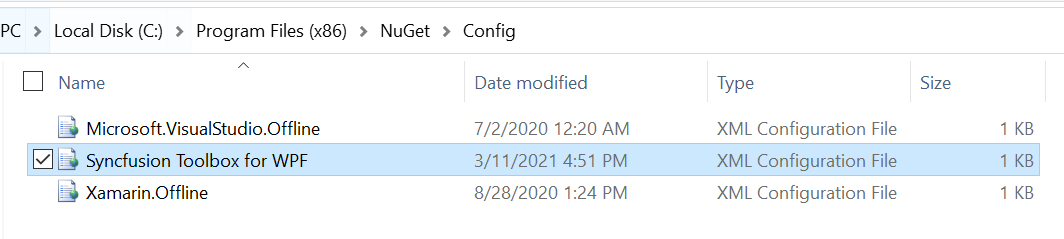
Open “Syncfusion Toolbox for WPF.config” file from the following location.
Location: “C:\Program Files (x86)\NuGet\Config\Syncfusion Toolbox for WPF.config”
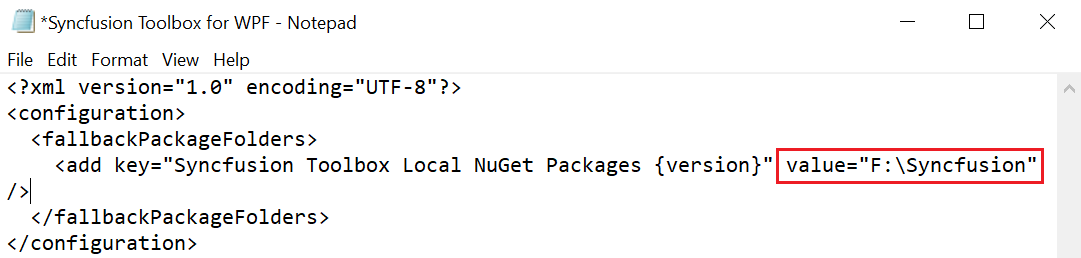
Or you can create this file in the same location by using the XML format given below
<?xml version="1.0" encoding="utf-8"?>
      <configuration>
        <fallbackPackageFolders>
          <add key="Syncfusion Toolbox Local NuGet Packages {version}" value="F:\Syncfusion" />
        </fallbackPackageFolders>
      </configuration>
step 3:
Update extracted Syncfusion® NuGet package path in value attribute.
Example:
step 4:
Now restart the Visual Studio 2019 to get populate the latest Syncfusion® controls in Toolbox.
Configuring toolbox for .NET Core 3.1 projects
The Syncfusion® NuGet packages must be installed in the WPF .NET Core application before the Syncfusion® toolbox can be configured. The corresponding NuGet packages for Syncfusion® components will be configured in the Visual Studio toolbox after installing the Syncfusion® NuGet packages in the .NET Core application.
Please refer the documentation link, to learn more about how to use the Syncfusion® components using the Syncfusion® NuGet packages in .NET Core application.