Syncfusion® WinUI UI Builder Skill for AI Assistants
25 May 20269 minutes to read
Syncfusion® WinUI UI Builder is an AI-powered skill and companion agent that accelerates WinUI application development by transforming natural-language UI requirements into production-ready controls using Syncfusion® WinUI libraries.
Integrated with your AI-powered IDE, it leverages deep knowledge of Syncfusion® controls to deliver accurate and ready-to-use code.
By combining intelligent code generation with best practices, accessibility standards, and design-system consistency, WinUI UI Builder helps you rapidly build scalable dashboards and user interfaces without leaving your development workflow.
Prerequisites
Before installing WinUI UI Builder, ensure the following:
- Install APM (Agent Package Manager)
- Required .NET SDK version ≥ 6
- WinUI application (existing or new); see Overview
- A supported AI agent or IDE that integrates with the Skills (VS Code, Cursor, Syncfusion® Code Studio, etc.)
- Active Syncfusion® license(any of the following):
Key Benefits
AI-Driven UI Generation
- Converts prompts into complete WinUI components—not just snippets
- Automatically selects appropriate Syncfusion® controls and features
- Produces structured, maintainable code
Control Usage & API Accuracy
- Uses correct Syncfusion® control APIs
- Injects required feature modules (paging, sorting, filtering, etc.)
- Avoids unsupported or deprecated patterns
Patterns & Best Practices
- Recommended control composition and data binding patterns
- Event handling and command routing aligned with WinUI standards
- Secure and scalable coding patterns with proper resource management
- XAML-friendly code that works seamlessly in Visual Studio designer
Accessibility & Design System
- Follows Windows accessibility guidelines (UIA and narrator support)
- Supports keyboard navigation and accessibility standards
- Theme consistency across WinUI desktop applications
- High DPI awareness and resolution support
Design-System Integration
- Supports Syncfusion® WinUI Light and Dark themes for consistent styling
- Applies themes at application level via
RequestedThemeproperty (set in App.xaml) or at individual control level - ResourceDictionary-based theming with customizable theme resource keys for advanced styling
- Respects system theme settings when
RequestedThemeis not explicitly configured - Ensures theme inheritance across nested UI elements for visual consistency
- Ensures consistent Syncfusion® styling and theme usage
Installation
Before installing WinUI UI Builder, ensure that APM (Agent Package Manager) is installed and available in your environment.
Verify APM Installation
Run the following command to confirm APM is installed:
apm --versionInstall the Syncfusion® WinUI UI Builder package using APM
Use the APM CLI to install the WinUI UI Builder skill for your preferred environment:
apm install syncfusion/winui-ui-builder -t copilotapm install syncfusion/winui-ui-builder -t cursorapm install syncfusion/winui-ui-builder -t copilotapm install syncfusion/winui-ui-builder -t claudeAfter installation, the following artifacts are added to your project for the GitHub Copilot target:
-
.agent/skills/– contains the skill files -
.github/agents/– contains the agent configuration
Refer to the documentation for details about supported deployment targets.
For Syncfusion® Code Studio, use the Copilot command above to install the WinUI UI Builder.
How the Syncfusion® WinUI UI Builder Skill Works
- Intent Analysis — Parse the user’s prompt to identify control types and high-level page/window layout intent.
- Project Detection — Automatically detects .NET framework version (net6.0+) and existing Syncfusion® WinUI configurations.
- Control Mapping — Map intent to Syncfusion® WinUI controls and required feature modules.
-
Theming & Design System
Load required theming guidelines and confirm key design choices:- Applies Syncfusion® WinUI Light or Dark themes with
RequestedThemeproperty configuration - Customizes theme resources using ResourceDictionary keys for control styling
- Core design basics (colors, fonts, control appearance, DPI awareness)
- Applies Syncfusion® WinUI Light or Dark themes with
- Code Generation — Produce C# and XAML WinUI controls, data bindings, event handlers, and styling.
- Dependency Management — Recommend or install required Syncfusion® NuGet packages and .NET dependencies.
- Validation — Run code compatibility and basic security checks, request confirmation for changes.
- Code Insertion — Create Page/Window classes, User Controls, or patch existing files following WinUI conventions.
Key enforcement points:
- Configures theme ResourceDictionaries for Syncfusion® Light/Dark themes at application or control level
- Leverages Syncfusion® theme resource files from GitHub repository with custom resource keys (e.g.,
SyncfusionRibbonTabMenuButtonBackground) - Respects system theme settings when
RequestedThemeis not explicitly configured - Injects only the feature controls and behaviors required by generated controls
- Generates well-structured XAML markup with proper binding and command setup
- Follows WinUI patterns for control initialization and event handling
- Ensures all required Syncfusion® NuGet packages are referenced
- Avoids unsupported or deprecated API usages for Syncfusion® WinUI controls
The assistant handles most stages automatically and may request confirmation where required.
Using the AI Assistant
After installing WinUI UI Builder with APM, the relevant agent and skill files are added to your project under:
-
.agent/skills/(skill files) -
.github/agents/(WinUI UI builder agent configuration, based on the selected target)
To start using the skill:
- Open your supported IDE.
- In the chat panel, select the WinUI UI builder agent from the Agent dropdown.
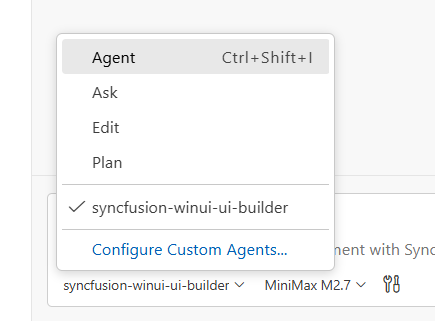
- Start prompting the agent with a clear description of your UI requirements.
Examples Prompts:
Create a login page using the Light theme with a centered StackPanel containing email and password TextBox controls with validation. Include a “Remember Me” CheckBox, a forgot password Hyperlink, and a primary login Button. Add a secondary “Create Account” button below. Ensure the layout is well-organized and follows Windows desktop UI standards.
Create a CMS Admin Dashboard UI featuring a collapsible NavigationView in a left panel with menu items for Dashboard, Content, Users, Analytics, and Settings; a CommandBar header showing the title “CMS Admin Dashboard” on the left and user information on the right; and a main content area with a Grid layout containing three summary cards in a row displaying Total Content, Total Users, and Active Sessions (each showing a label, count value, and percentage change), followed by a “Content Management” section with a DataGrid containing columns for Title, Author, Status, Date, and Actions, and finally two charts displayed side by side—a bar chart titled “Content Over Time” and a pie chart titled “Content by Category”—using realistic sample data.
Generated code follows WinUI best practices with well-structured XAML markup, proper data binding patterns, strong C# typing, and built-in security measures such as input validation and avoidance of hardcore secrets.
Best Practices
Follow these guidelines to get the most out of UI Builder and ensure high-quality production-ready results:
- Stay consistent — Maintain consistent file organization, naming conventions (PascalCase for classes, camelCase for properties), and WinUI coding standards throughout your project.
- Use advanced AI models — For best results, use Claude Sonnet 4.6 or higher capability models to produce better code quality and more accurate implementations.
- Review all content before production — Validate the logic, security, and compatibility with your existing code and target .NET version before deployment. Test control functionality within Visual Studio designer and at runtime.
- Verify Syncfusion® licenses — Ensure all required Syncfusion® WinUI controls have valid licenses before deploying to production.
- Test accessibility — Verify UIA support, keyboard navigation, and narrator compatibility for Windows accessibility standards.
Troubleshooting
-
APM installation failure: Refer to this documentation
-
Skills not loading: Ensure the .agent/ and .github/agents/ folders exist in your project and that the skill was installed successfully using APM. Verify that the correct agent is selected from the Agent dropdown in your IDE.
-
Control not rendering: Retry generation using the specific control skill to resolve the issue, and ensure required Syncfusion® packages and themes are properly configured.
-
Syncfusion license banner appears: Use the licensing skill to correctly register and validate your Syncfusion® license key in the application.
FAQ
Which agents/IDEs are supported?
Any Skills-compatible agent that reads local skill files (Code Studio, VS Code, Cursor, etc.).
Are skills loaded automatically?
Yes. Supported agents automatically load relevant skills based on your query.
Can I customize the generated styles?
Yes — the generated WinUI controls include clear integration points for style adjustments.
Does it modify files automatically?
The skill proposes changes and requires confirmation for insertion; automatic dependency installation may be offered depending on agent permissions.