Getting Started
18 Aug 20176 minutes to read
Using the following steps, you can create a Typescript ListBox component. The basic rendering of Typescript ListBox is achieved with default functionality.
Create a ListBox
You can create a Typescript application with the help of the given Typescript Getting Started Documentation.
Within an index.html file and add the scripts references in the order mentioned in the following code example.
<!DOCTYPE html>
<html>
<head>
    <title>Typescript Application</title>
    <link href="http://cdn.syncfusion.com/**24.2.3**/js/web/flat-azure/ej.web.all.min.css" rel="stylesheet" />
    <script src="https://code.jquery.com/jquery-3.0.0.min.js"></script>
    <script src="http://cdn.syncfusion.com/**24.2.3**/js/web/ej.web.all.min.js" type="text/javascript"></script>
</head>
<body>
    <!--Add ListBox here-->
</body>
</html>
Create UL and LI elements and add in the <body> tag. To create the ListBox, you should call the `ejListBox jQuery plug-in function.
<div>
                    <ul id="listbox">
                        <li>Audi A4</li>
                        <li>Audi A5</li>
                        <li>Audi A6</li>
                        <li>Audi A7</li>
                        <li>Audi A8</li>
                        <li>BMW 501</li>
                        <li>BMW 502</li>
                        <li>BMW 503</li>
                        <li>Batch</li>
                        <li>BMW 507</li>
                        <li>BMW 3200</li>
                        <li>Cut</li>
                    </ul>
</div>
     <script src="app.js"></script>
Initialize the ListBox in app.ts file by using the ej.ListBox method.
/// <reference path="jquery.d.ts" />
/// <reference path="ej.web.all.d.ts" />

module ListComponent {
    $(function () {
          let sample = new ej.ListBox($("#listbox"));
    });
}
Now build your application, so that the app.js file is automatically generated and got added to your project (User have nothing to do with this file). Now, whatever code changes that you make in app.ts file will be reflected in app.js file automatically.
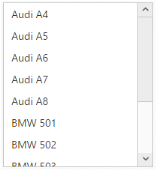
Run the above code to render the following output:
Data Binding
We can populate data in the ListBox widget using “dataSource” and “fields” properties
<ul id="listbox"></ul>
/// <reference path="jquery.d.ts" />
/// <reference path="ej.web.all.d.ts" />
module ListComponent {
$(function () {
let bikeList = [
{ bikeId: "bk1", bikeName: "Apache RTR" },
{ bikeId: "bk2", bikeName: "CBR 150-R" },
{ bikeId: "bk3", bikeName: "CBZ Xtreme" },
{ bikeId: "bk4", bikeName: "Discover" },
{ bikeId: "bk5", bikeName: "Dazzler" },
{ bikeId: "bk6", bikeName: "Flame" },
{ bikeId: "bk7", bikeName: "Fazer" },
{ bikeId: "bk8", bikeName: "FZ-S" },
{ bikeId: "bk9", bikeName: "Pulsar" },
{ bikeId: "bk10", bikeName: "Shine" },
{ bikeId: "bk11", bikeName: "R15" },
{ bikeId: "bk12", bikeName: "Unicorn" }
];
let sample = new ej.ListBox($("#listbox"), { dataSource: bikeList, fields: { text: "bikeName", id: "bikeId" } });
});
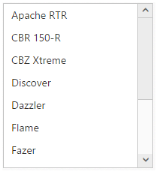
}Run the above code to render the following output:
Selection
The ListBox widget supports the item selection.
let sample = new ej.ListBox($("#listbox"), { dataSource: bikeList, selectedIndex: 2, fields: { text: "bikeName", id: "bikeId" } });Run the above code to render the following output:

Note: You can find the ListBox properties from the API reference document