Getting Started
8 Jun 202315 minutes to read
For common getting started of typescript , you can refer here.
The default type definition file ej.web.all.d.ts needs to include the support for type-checking while initializing any of the Syncfusion widgets.
The important step you need to do is to copy the ej.web.all.d.ts file into your project and then need to refer it in your TypeScript application (app.ts file), so that you will get the intelliSense support and also the compile time type-checking.
You can find the ej.web.all.d.ts file in the following location,
(installed location)\Syncfusion\Essential Studio\32.1.19\JavaScript\assets\typescript
Apart from ej.web.all.d.ts file, it is also necessary to make use of the jquery.d.ts file in your TypeScript application, which can be downloaded from here.
Preparing HTML document
The Kanban control has the following list of external JavaScript dependencies.
-
jQuery 1.7.1and later versions -
jsRender- to render the templates
Adding Script Reference
Refer to the internal dependencies in the following table.
| Files | Description/Usage |
|---|---|
| ej.core.min.js | It is referred always before using all the JS controls. |
| ej.data.min.js | Used to handle data operation and is used while binding data to the JS controls. |
| ej.touch.min.js | It is referred when using touch functionalities in Kanban. |
| ej.draggable.min.js | It is referred when using drag and drop in Kanban. |
| ej.kanban.min.js | The Kanban’s main file. |
| ej.globalize.min.js | It is referred when using localization in Kanban. |
| ej.scroller.min.js | It is referred when scrolling is used in the Kanban. |
| ej.waitingpopup.min.js | It is referred when waiting popup used. |
| ej.dropdownlist.min.js | These files are used while enable the Editing feature in the Kanban. |
| ej.dialog.min.js | |
| ej.button.min.js | |
| ej.datepicker.min.js | |
| ej.datetimepicker.min.js | |
| ej.editor.min.js | |
| ej.toolbar.min.js | These files are used while enable the Filtering feature in the Kanban. |
| ej.menu.min.js | These files are used while enable the context menu feature in the Kanban. |
| ej.checkbox.min.js | |
| ej.rte.min.js | These files are used while using the cell edit type as RTE in the Kanban. |
To get started, you can use the ej.web.all.min.js file that encapsulates all the ej controls and frameworks in one single file. So the complete boilerplate code is
<!DOCTYPE html>
    <html>
        <head>
            <meta name="viewport" content="width=device-width, initial-scale=1.0">
            <meta name="description" content="Essential Studio for JavaScript">
            <meta name="author" content="Syncfusion">
            <title></title>
            <!-- Essential Studio for JavaScript  theme reference -->
            <link href="http://cdn.syncfusion.com/32.1.19/js/web/flat-azure/ej.web.all.min.css" rel="stylesheet" />
            <!-- Essential Studio for JavaScript  script references -->
            <script src="http://cdn.syncfusion.com/js/assets/external/jquery-3.0.0.min.js"></script>
            <script src="http://cdn.syncfusion.com/js/assets/external/jquery.globalize.min.js"></script>
            <script src="http://cdn.syncfusion.com/js/assets/external/jsrender.min.js"></script>
            <script src="http://cdn.syncfusion.com/32.1.19/js/web/ej.web.all.min.js"></script>
            <!-- Add your custom scripts here -->
        </head>
        <body>
        </body>
    </html>
Create a Kanban
The Kanban can be created from a HTML DIV element with the HTML id attribute set to it. To create the Kanban, you should call the ejKanban jQuery plug-in function with the options as parameter. Refer to the following code example.
/// <reference path="tsfiles/jquery.d.ts" />
    /// <reference path="tsfiles/ej.web.all.d.ts" />
    module KanbanComponent {
        $(function () {
            var sample = new ej.Kanban($("#Kanban"), {
            columns: [
                    { headerText: "Backlog", key: "Open" },
                    { headerText: "In Progress", key: "InProgress" },
                    { headerText: "Done", key: "Close" }
                ]
                });
        });
    }
Data Binding
Data binding in the Kanban is achieved by using the ej.DataManager that supports both RESTful JSON data services binding and local JSON array binding. To set the data source to Kanban, the dataSource property is assigned with the instance of the ej.DataManger.
module KanbanComponent {
        $(function () {
            var sample = new ej.Kanban($("#Kanban"), {
            dataSource: new ej.DataManager(window["kanbanData"]).executeLocal(new ej.Query().take(20)),
            columns: [
                    { headerText: "Backlog", key: "Open" },
                    { headerText: "In Progress", key: "InProgress" },
                    { headerText: "Done", key: "Close" }
                ]
            });
        });
    }
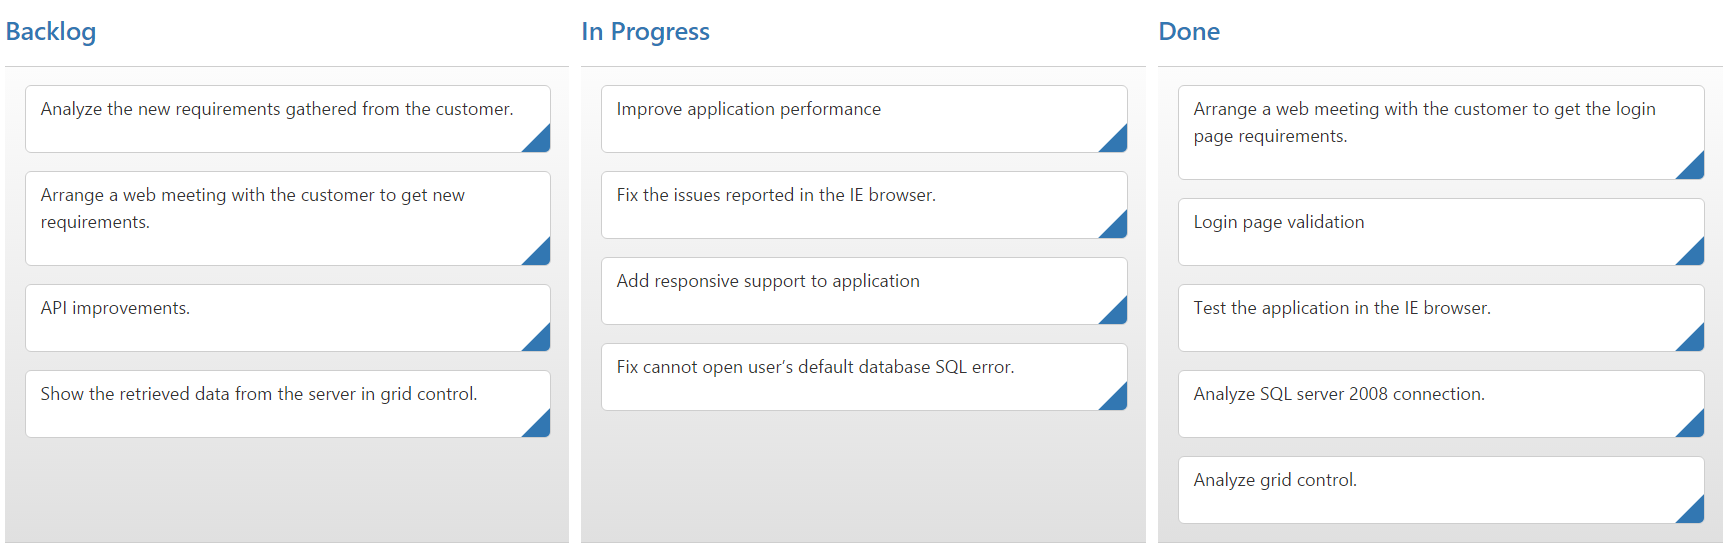
Mapping Values
In order to display cards in Kanban control, you need to map the database fields to Kanban cards and columns. The required mapping field are listed as follows
-
keyField- Map the column name to use askeyvalues to columns. -
columns- Map the correspondingkeyvalues ofkeyFieldcolumn to each columns -
fields.content- Map the column name to use as content to cards. -
fields.primaryKey- Map the column name to use as primary Key.
declare var window:myWindow;
    export interface myWindow extends Window{
        kanbanData:any;
    }
    module KanbanComponent {
        $(function () {
            var sample = new ej.Kanban($("#Kanban"), {
            dataSource: new ej.DataManager(<any>window["kanbanData"]).executeLocal(new ej.Query().take(20)),
            columns: [
                    { headerText: "Backlog", key: "Open" },
                    { headerText: "In Progress", key: "InProgress" },
                    { headerText: "Done", key: "Close" }
                ],
                keyField: "Status",
                allowTitle: true,
                fields: {
                    content: "Summary",
                    primaryKey: "Id",
                }
            });
        });
    }
NOTE
fields.primaryKeyfield is mandatory for “Drag and Drop” ,”Selection” and “Editing” Features.
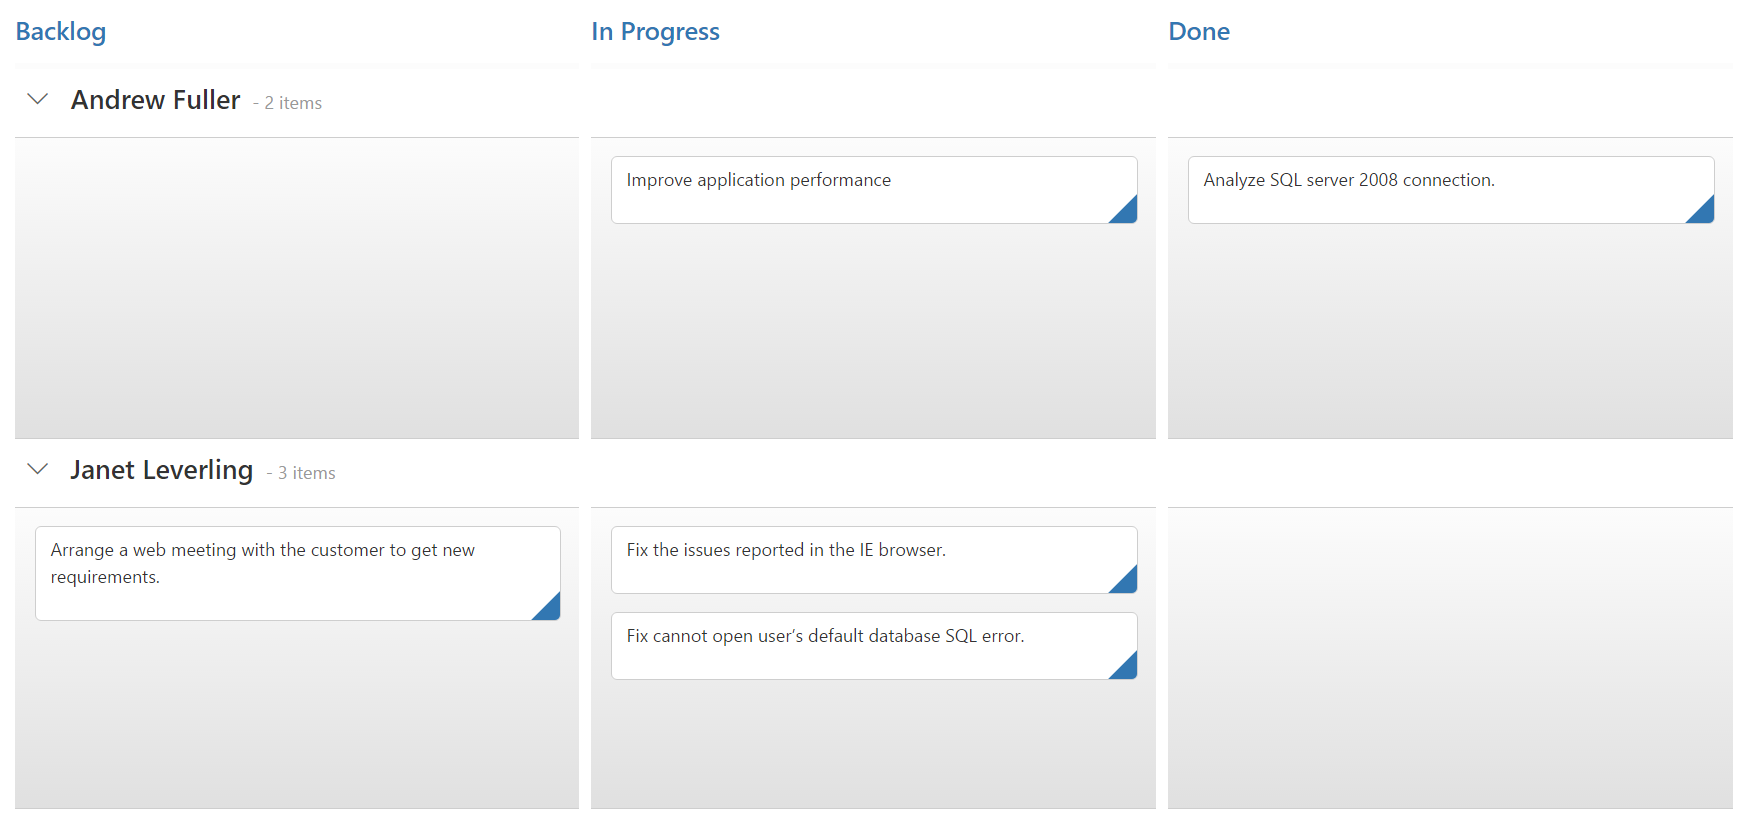
Enable Swimlane
Swimlane can be enabled by mapping the fields.swimlaneKey to appropriate column name in dataSource. This enables the grouping of the cards based on the mapped column values.
declare var window:myWindow;
    export interface myWindow extends Window{
        kanbanData:any;
    }
    module KanbanComponent {
        $(function () {
            var sample = new ej.Kanban($("#Kanban"), {
            dataSource: new ej.DataManager(<any>window["kanbanData"]).executeLocal(new ej.Query().take(20)),
            columns: [
                    { headerText: "Backlog", key: "Open" },
                    { headerText: "In Progress", key: "InProgress" },
                    { headerText: "Done", key: "Close" }
                ],
                keyField: "Status",
                allowTitle: true,
                fields: {
                    content: "Summary",
                    swimlaneKey: "Assignee",
                    primaryKey: "Id",
                }
            });
        });
    }
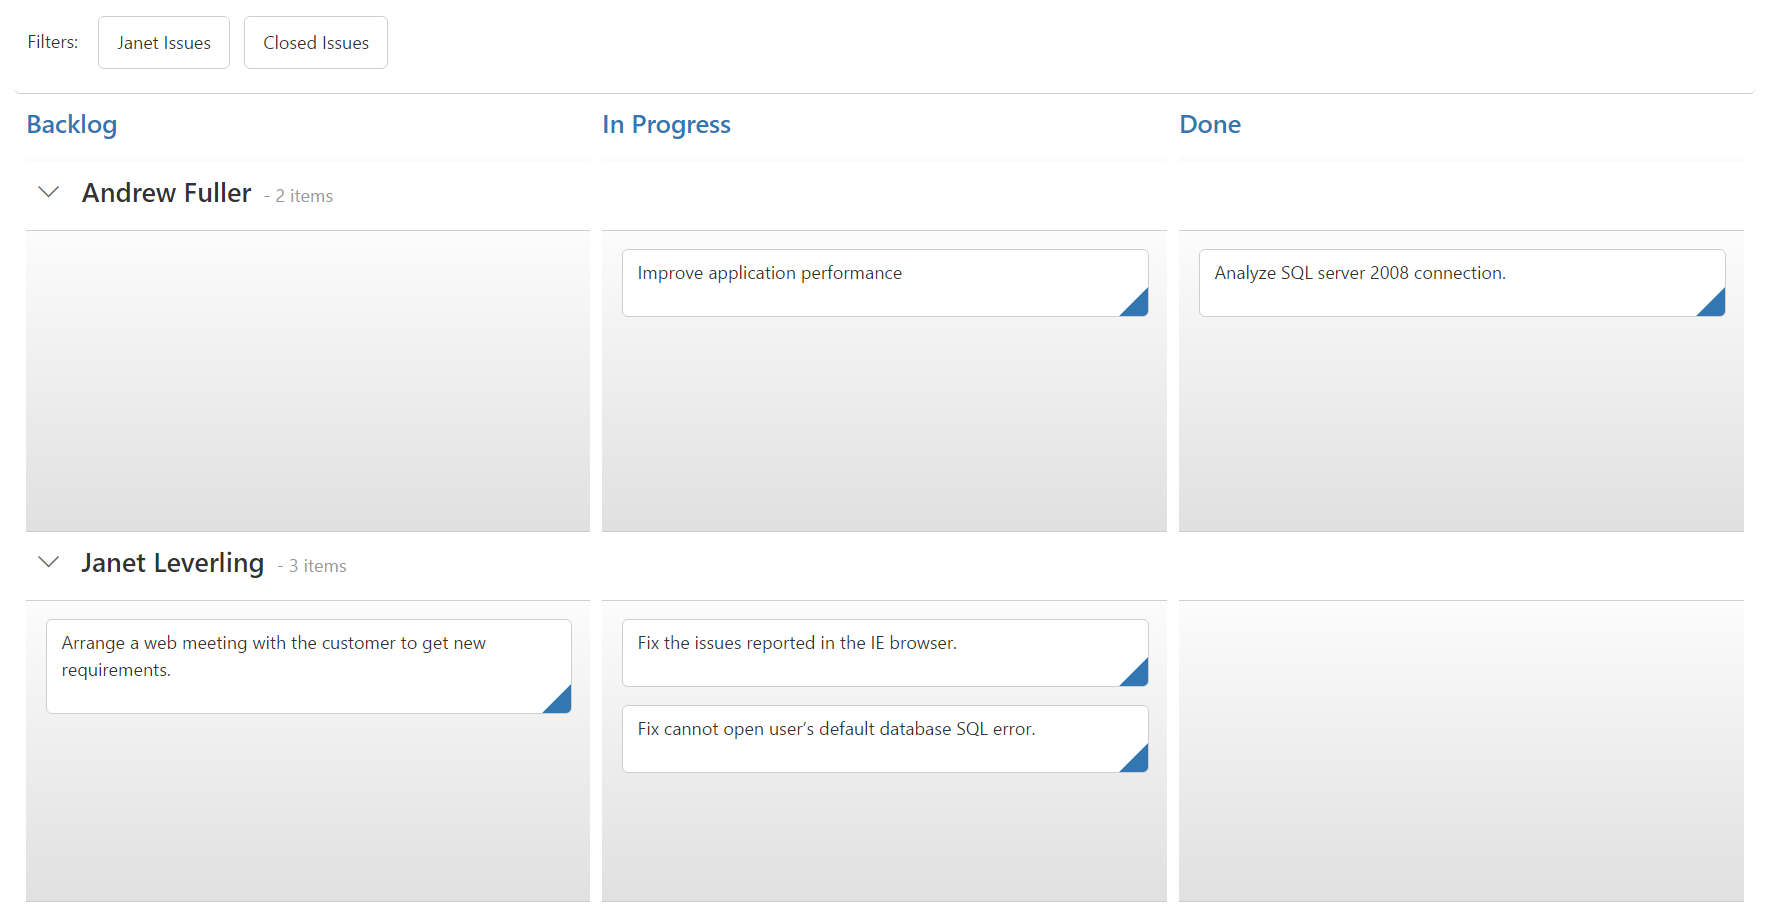
Adding Filters
Filters allows to filter the collection of cards from dataSource which meets the predefined query in the filters collection. To enable filtering, define filterSettings collection with display text and ej.Query.
declare var window:myWindow;
    export interface myWindow extends Window{
        kanbanData:any;
    }
    module KanbanComponent {
        $(function () {
            var sample = new ej.Kanban($("#Kanban"), {
            dataSource: new ej.DataManager(<any>window["kanbanData"]).executeLocal(new ej.Query().take(20)),
                columns: [
                    { headerText: "Backlog", key: "Open" },
                    { headerText: "In Progress", key: "InProgress" },
                    { headerText: "Done", key: "Close" }
                ],
                keyField: "Status",
                fields: {
                    content: "Summary",
                    primaryKey: "Id",
                    swimlaneKey: "Assignee"
                },
                filterSettings: [
                    { text: "Janet Issues", query: new ej.Query().where("Assignee", "equal", "Janet Leverling") },
                    { text: "Closed Issues", query: new ej.Query().where("Status", "equal", "Close") }
                ]
            });
        });
    }