Getting Started with Typescript DatePicker
23 Aug 20212 minutes to read
This section will explain the Getting started of the DatePicker in TypeScript application, with the step-by-step instructions.
Creating an DatePicker in TypeScript
You can create a TypeScript application with the help of the given Typescript Getting Started Documentation.
The DatePicker can be created from a input element with the HTML id attribute and pre-defined options set to it.
<input id="datetpick" />Create or open (if already exists) app.ts file from TypeScript application, to render the JS component. Then use below code example to render the DatePicker in typescript.
Also, Reference path should be included in the TypeScript definitions of the EJ component
/// <reference path="tsfiles/jquery.d.ts" >;

    /// <reference path="tsfiles/ej.web.all.d.ts" />;


    module DatePickerComponent {

        $(function () {

            var dateSample = new ej.DatePicker($("#datepicker"), {

                value: new Date()

            });

        });

    }
Compile and build the application. In compilation time the app.js will be generated which can be referred in index page to render the EJ component.
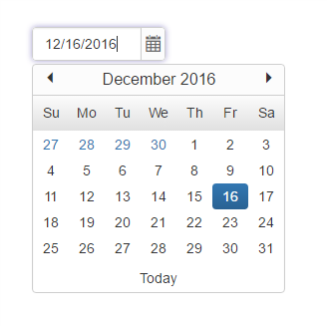
Execution of above code will render the following output.

Configuring the DatePicker properties
All DatePicker APIs can be configured and used in TypeScript like below.
To set the minimum date value of the DatePicker, you can use the minDate property. Data type of this property is “Date/String”.
module DatePickerComponent {

    $(function () {

        var dateSample = new ej.DatePicker($("#datepicker"), {

            value: new Date(),

            minDate: new Date("11/11/2012"),


        });

    });

    }
To set the maximum value of the Textbox, you can use the maxDate property. Data type of this property is “Date/String”.
module DatePickerComponent {

    $(function () {

        var dateSample = new ej.DatePicker($("#datepicker"), {

            value: new Date(),

            maxDate: new Date("11/11/2019"),


        });

    });

    }