Getting Started with React Scheduler
This section briefly explains how to create React Scheduler and configure its available functionalities in React environment.
Ready to streamline your Syncfusion® React development? Discover the full potential of React components with Syncfusion® AI Coding Assistant. Effortlessly integrate, configure, and enhance your projects with intelligent, context-aware code suggestions, streamlined setups, and real-time insights—all seamlessly integrated into your preferred AI-powered IDEs like VS Code, Cursor, Syncfusion® CodeStudio and more. Explore Syncfusion® AI Coding Assistant
To get started quickly with React Scheduler using the Create React App, you can check on this video
Prerequisites
- Node.js 24+ (LTS recommended).
- Syncfusion CLI.
Install the Syncfusion CLI
Install the Syncfusion CLI globally using the following command:
npm install -g @syncfusion/syncfusion-cliSet up the Vite project using Syncfusion CLI
You can create a React Vite application using the Syncfusion CLI. The CLI provides two ways to create a project:
Non-interactive mode
Non-interactive mode allows you to create a project directly using a single command with the required command-line arguments.
sf new my-app --framework react --type ts --template scheduler --theme tailwind3In this mode, the project configuration is passed directly in the command. The above command creates a React Vite application configured with the Syncfusion® Scheduler component.
Interactive mode
Interactive mode guides you through the project creation process with step-by-step prompts.
sfWhen you run the sf command, the CLI prompts you to select the required project configuration. To create a React Vite application with the Syncfusion® Scheduler component, select the following options:
√ Project name? ... my-app
√ Choose Framework: » React
√ Choose Build Tool: » Vite
√ Choose Language: » TypeScript
√ Choose Template: » Scheduler
√ Choose Theme: » Tailwind3
√ Choose Style Format: » CSS
√ Would you like to integrate the Syncfusion MCP Server (AI Assistant) into this project? ... no
√ Would you like to install Syncfusion Component Skills for AI-powered development? ... no
√ Install dependencies and start app now? ... no
The above selections generate a React Vite application configured with the Syncfusion® Scheduler component. You can choose different values for language, theme, style format, MCP setup, and skills installation based on your project requirements.
The Syncfusion® CLI creates the project with a predefined template. After the project is generated, you can customize or replace the component code based on your application requirements.
Run the project
Once the project is created, navigate to the project directory and run the following commands in your terminal.
cd my-app
npm install
npm run dev
The output will appear as follows:
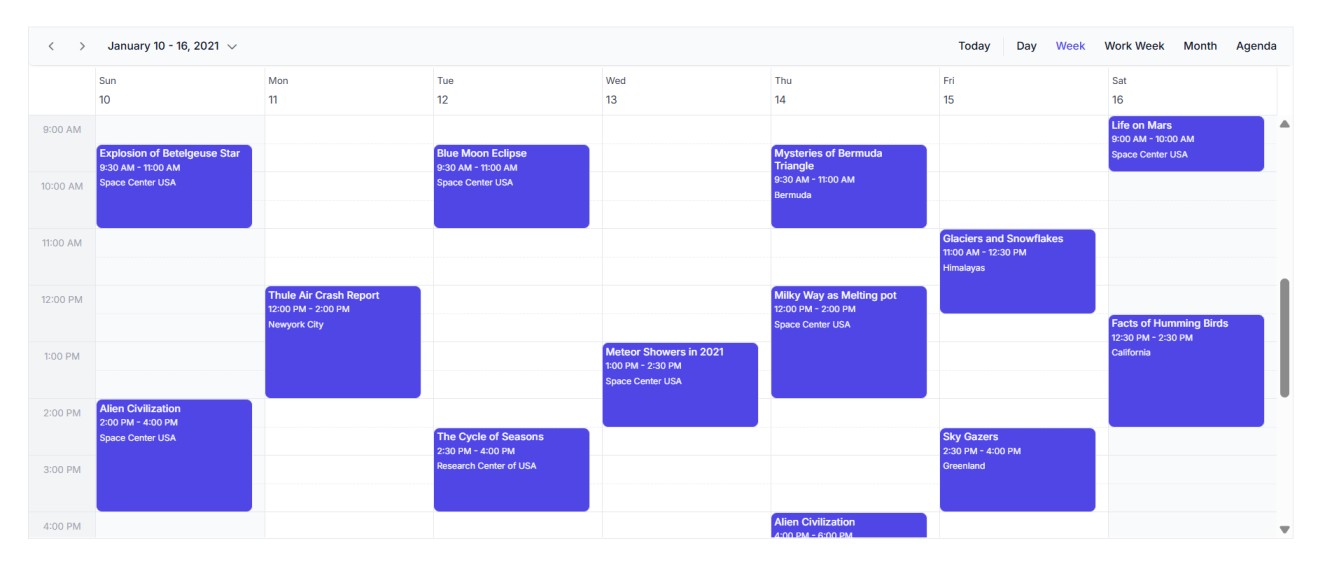
Prerequisites
| Requirement | Version |
|---|---|
| React | 15.5.4 or higher |
| Node.js | 14.0.0 or above |
| Yarn (optional) | 0.25 or above |
React supported versions
| React version | Minimum Syncfusion React Scheduler version | |
|---|---|---|
| React v19 | 29.1.33 and above | |
| React v18 | 20.2.36 and above | |
| React v17 | 18.3.50 and above | |
| React v16 | 16.2.45 and above |
Browser Support
| Browser | Supported versions |
|---|---|
| Chrome | Latest |
| Firefox | Latest |
| Opera | Latest |
| Edge | 13+ |
| Internet Explorer (IE) | 11+ |
| Safari | 9+ |
| iOS Safari | 9+ |
| Android Browser / Chrome for Android | 4.4+ |
| Windows Mobile | IE 11+ |
Installation and configuration
To build a high-performance React application with a smooth development workflow, Vite is the recommended tool. Unlike traditional setups such as Create React App, Vite is designed for speed and simplicity, providing near-instant startup and lightning-fast updates during development. For detailed steps, refer to the Vite installation instructions
Run the following command to set up a React application:
For TypeScript environment:
npm create vite@latest my-app -- --template react-ts
For JavaScript environment:
npm create vite@latest my-app -- --template react
After running the above commands, the project will be created and all required dependencies will be installed automatically.
Adding Syncfusion® Schedule package
All the available Essential® JS 2 packages are published in the npmjs.com public registry.
To install the Schedule component, use the following command:
cd my-app
npm install @syncfusion/ej2-react-schedule --save
Adding CSS reference from a theme package
Themes for the Syncfusion® React Schedule component can be applied with CSS files provided through npm theme packages. For a full list of available themes, refer to the Themes documentation. The example below uses the Tailwind 3 theme.
Note: If you are not using Tailwind 3, you can skip the theme-package install and use the default theme CSS shipped with the Schedule component.
Install the Tailwind 3 theme package using the following command:
npm install @syncfusion/ej2-tailwind3-theme --saveThen add the following CSS reference to the src/App.css file:
@import "../node_modules/@syncfusion/ej2-tailwind3-theme/styles/schedule/index.css";
Initialize the Schedule and configure module injection
Import the Schedule component into your src/App.tsx (or src/App.jsx) file and inject the required modules. Since each view in the Schedule is maintained as a separate module, you need to inject the modules required for the desired views.
import { ScheduleComponent, Day, Week, WorkWeek, Month, Agenda, Inject } from '@syncfusion/ej2-react-schedule';
import './App.css';

function App () {
  return (
    <ScheduleComponent width="100%" height="550px">
      <Inject services={[Day, Week, WorkWeek, Month, Agenda]} />
    </ScheduleComponent>
  );
};

export default App;
import { ScheduleComponent, Day, Week, WorkWeek, Month, Agenda, Inject } from '@syncfusion/ej2-react-schedule';
import './App.css';
function App () {
return (
<ScheduleComponent>
<Inject services={[Day, Week, WorkWeek, Month, Agenda]} />
</ScheduleComponent>
);
};
export default App;Run the following command in the terminal to start the development server. This compiles the project, launches a local server, and allows you to view changes in real time during development.
npm run dev
Open the URL shown in the terminal (typically http://localhost:5173) to view the app.
The demo above will display an empty Schedule.
Setting the current date
The Schedule usually displays the system date as its current date. To change the current date of the Schedule to a specific date, define the selectedDate property.
The
Dateconstructor in JavaScript uses 0-indexed months, sonew Date(2026, 4, 18)corresponds to May 18, 2026.
import { ScheduleComponent, Day, Week, WorkWeek, Month, Agenda, Inject } from '@syncfusion/ej2-react-schedule';
import './App.css';

function App () {
  return (
    <ScheduleComponent selectedDate={new Date(2026, 4, 18)}>
      <Inject services={[Day, Week, WorkWeek, Agenda, Month]} />
    </ScheduleComponent>
  )
};

export default App;
import { ScheduleComponent, Day, Week, WorkWeek, Month, Agenda, Inject } from '@syncfusion/ej2-react-schedule';
import './App.css';
function App () {
return (
<ScheduleComponent selectedDate={new Date(2026, 4, 18)}>
<Inject services={[Day, Week, WorkWeek, Agenda, Month]} />
</ScheduleComponent>
)
};
export default App;Setting the current view
Scheduler displays week view by default. To change the current view, define the applicable view name to the currentView property. The default applicable view names are:
- Day
- Week
- WorkWeek
- Month
- Agenda
import { ScheduleComponent, Day, Week, WorkWeek, Month, Agenda, Inject } from '@syncfusion/ej2-react-schedule';
import './App.css';

function App () {
  return (
    <ScheduleComponent currentView='Day'>
      <Inject services={[Day, Week, WorkWeek, Agenda, Month]} />
    </ScheduleComponent>
  )
};

export default App;
import { ScheduleComponent, Day, Week, WorkWeek, Month, Agenda, Inject } from '@syncfusion/ej2-react-schedule';
import './App.css';
function App () {
return (
<ScheduleComponent currentView='Day'>
<Inject services={[Day, Week, WorkWeek, Agenda, Month]} />
</ScheduleComponent>
)
};
export default App;Populating appointments
To populate the Schedule with appointments, you can use either a local JSON array or a remote data service. Assign the data to the dataSource property, which is part of the eventSettings configuration.
The StartTime and EndTime fields are mandatory for each appointment. The following example uses the default field names: Id, Subject, StartTime, and EndTime.
import { ScheduleComponent, Day, Week, WorkWeek, Month, Agenda, Inject, type EventSettingsModel } from '@syncfusion/ej2-react-schedule';
import './App.css';

function App () {
  const data = [
    {
      Id: 1,
      Subject: 'Meeting - 1',
      StartTime: new Date(new Date().setHours(9,0,0)),
      EndTime: new Date(new Date().setHours(10,0,0)),
    }
  ];

  const eventSettings: EventSettingsModel = { dataSource: data };

  return (
    <ScheduleComponent eventSettings={eventSettings}>
      <Inject services={[Day, Week, WorkWeek, Month, Agenda]} />
    </ScheduleComponent>
  );
};

export default App;
import { ScheduleComponent, Day, Week, WorkWeek, Month, Agenda, Inject } from '@syncfusion/ej2-react-schedule';
import './App.css';
function App () {
const data = [
{
Id: 1,
Subject: 'Meeting - 1',
StartTime: new Date(new Date().setHours(9,0,0)),
EndTime: new Date(new Date().setHours(10,0,0)),
}
];
const eventSettings = { dataSource: data };
return (
<ScheduleComponent eventSettings={eventSettings}>
<Inject services={[Day, Week, WorkWeek, Month, Agenda]} />
</ScheduleComponent>
);
};
export default App;Troubleshooting
-
The Schedule is not visible — make sure you have set
widthandheightonScheduleComponent, and that the theme CSS has been imported. -
A view (Day/Week/WorkWeek/Month/Agenda) is missing — verify the corresponding module is included in the
Injectservicesarray. -
Appointments don’t render — confirm each item in
dataSourcehas validStartTimeandEndTimeDateobjects. -
Styles look broken in Vite — prefer importing the theme CSS in
src/main.tsxinstead of using a relative@importpath inApp.css.
Version compatibility
| Package | Minimum version |
|---|---|
| React | 18.0.0 |
| TypeScript (TypeScript workflow only) | 4.5 |
@syncfusion/ej2-react-schedule |
Latest |