Blazor Scheduler Component in WebAssembly App using Visual Studio
This article provides step-by-step instructions for building a Blazor WebAssembly app with the Blazor Scheduler component by using Visual Studio.
Prerequisites
Create a Blazor WebAssembly App in Visual Studio
You can create a Blazor WebAssembly App in Visual Studio by using Microsoft Templates or the Blazor Scheduler Extension.
Install Blazor Scheduler and Themes NuGet in the App
To add the Blazor Scheduler component to the app, open the NuGet Package Manager in Visual Studio (Tools → NuGet Package Manager → Manage NuGet Packages for Solution), then search for and install Syncfusion.Blazor.Schedule and Syncfusion.Blazor.Themes. Alternatively, you can use the following Package Manager commands.
Install-Package Syncfusion.Blazor.Schedule -Version 35.1.37

Install-Package Syncfusion.Blazor.Themes -Version 35.1.37
Blazor Scheduler components are available on nuget.org. Refer to the NuGet packages topic for the available package list and component details.
Register Blazor Scheduler Service
Open the ~/_Imports.razor file and import the Syncfusion.Blazor and Syncfusion.Blazor.Schedule namespaces.
@using Syncfusion.Blazor
@using Syncfusion.Blazor.Schedule
Now, register the Blazor Scheduler service in the ~/Program.cs file of your Blazor WebAssembly app.
using Microsoft.AspNetCore.Components.Web;
using Microsoft.AspNetCore.Components.WebAssembly.Hosting;
using Syncfusion.Blazor;

var builder = WebAssemblyHostBuilder.CreateDefault(args);
builder.RootComponents.Add<App>("#app");
builder.RootComponents.Add<HeadOutlet>("head::after");

builder.Services.AddScoped(sp => new HttpClient { BaseAddress = new Uri(builder.HostEnvironment.BaseAddress) });

builder.Services.AddSyncfusionBlazor();
await builder.Build().RunAsync();
....
Add stylesheet and script resources
The theme stylesheet and script can be accessed from NuGet through Static Web Assets. Reference the stylesheet and script in the <head> section of the main page as follows:
- For a Blazor WebAssembly app, include it in the ~/index.html file.
<head>
    ....
    <link href="_content/Syncfusion.Blazor.Themes/bootstrap5.css" rel="stylesheet" />
    <script src="_content/Syncfusion.Blazor.Core/scripts/syncfusion-blazor.min.js" type="text/javascript"></script>
</head>
Check out the Blazor Themes topic to discover various methods (Static Web Assets, CDN, and CRG) for referencing themes in your Blazor application. Also, check out the Adding Script Reference topic to learn different approaches for adding script references in your Blazor application.
Add Blazor Scheduler component
Add the Blazor Scheduler component in the ~/Pages/Index.razor file.
<SfSchedule TValue="AppointmentData" Height="650px" @bind-SelectedDate="@CurrentDate">
    <ScheduleEventSettings DataSource="@DataSource"></ScheduleEventSettings>
    <ScheduleViews>
        <ScheduleView Option="View.Day"></ScheduleView>
        <ScheduleView Option="View.Week"></ScheduleView>
        <ScheduleView Option="View.WorkWeek"></ScheduleView>
        <ScheduleView Option="View.Month"></ScheduleView>
        <ScheduleView Option="View.Agenda"></ScheduleView>
    </ScheduleViews>
</SfSchedule>

@code{
    DateTime CurrentDate = new DateTime(2020, 2, 14);
    List<AppointmentData> DataSource = new List<AppointmentData>
    {
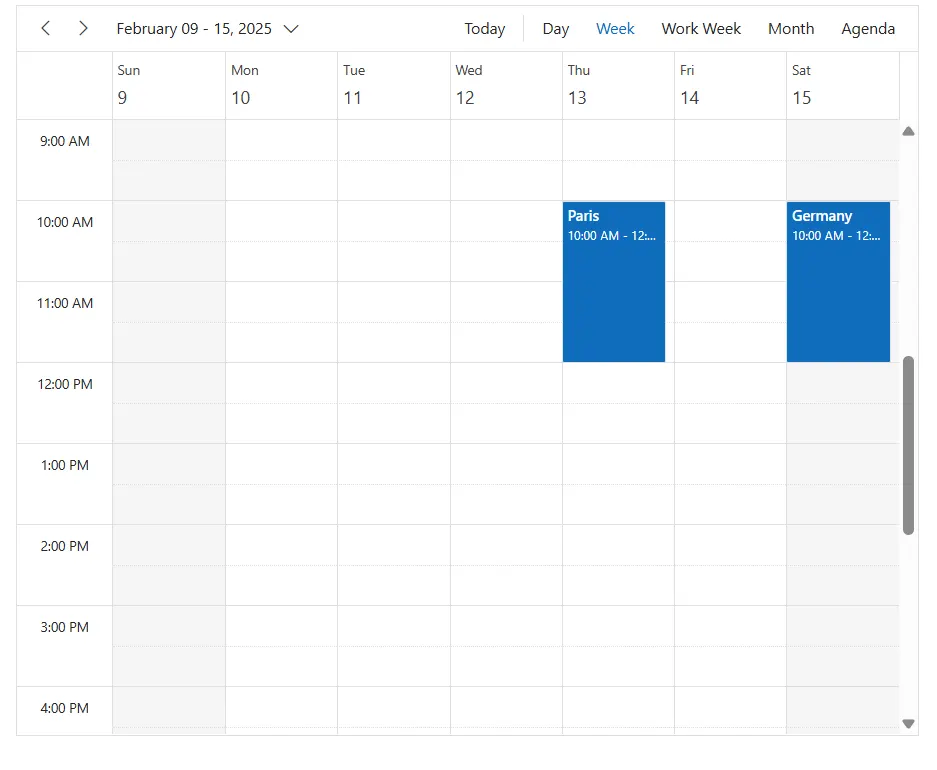
        new AppointmentData { Id = 1, Subject = "Paris", StartTime = new DateTime(2020, 2, 13, 10, 0, 0) , EndTime = new DateTime(2020, 2, 13, 12, 0, 0) },
        new AppointmentData { Id = 2, Subject = "Germany", StartTime = new DateTime(2020, 2, 15, 10, 0, 0) , EndTime = new DateTime(2020, 2, 15, 12, 0, 0) }
    };
    public class AppointmentData
    {
        public int Id { get; set; }
        public string Subject { get; set; }
        public string Location { get; set; }
        public DateTime StartTime { get; set; }
        public DateTime EndTime { get; set; }
        public string Description { get; set; }
        public bool IsAllDay { get; set; }
        public string RecurrenceRule { get; set; }
        public string RecurrenceException { get; set; }
        public Nullable<int> RecurrenceID { get; set; }
    }
}- Press Ctrl+F5 (Windows) or ⌘+F5 (macOS) to launch the application. This renders the Blazor Scheduler component in your default web browser.
Refer to the Blazor Scheduler feature tour page for a detailed overview of its features. You can also explore the Blazor Scheduler example to understand how to manage appointments with multiple resources.