Getting Started with Angular Scheduler
This section explains how to create Angular Scheduler and configure its features in an Angular environment.
Ready to streamline your Angular development? Discover the full potential of Angular components with AngularAI Coding Assistant. Effortlessly integrate, configure, and enhance your projects with intelligent, context-aware code suggestions, streamlined setups, and real-time insights—all seamlessly integrated into your preferred AI-powered IDEs like VS Code, Cursor, AngularCodeStudio and more. Explore AngularAI Coding Assistant
For a quick start with the Angular Schedule component using CLI and Schematics, you can watch this video:
Prerequisites
- Node.js 24+ (LTS recommended).
- Syncfusion CLI.
Install the Syncfusion CLI
Install the Syncfusion CLI globally using the following command:
npm install -g @syncfusion/syncfusion-cliCreate a new Angular application using Syncfusion CLI
You can create a Angular application using the Syncfusion CLI. The CLI provides two ways to create a project:
Non-interactive mode
Non-interactive mode allows you to create a project directly using a single command with the required command-line arguments.
sf new syncfusion-angular-app --framework angular --template schedulerIn this mode, the project configuration is passed directly in the command. The above command creates a Angular application configured with the Syncfusion® Schedule component.
Interactive mode
Interactive mode guides you through the project creation process with step-by-step prompts.
sfWhen you run the sf command, the CLI prompts you to select the required project configuration. To create a Angular application with the Syncfusion® Scheduler component, select the following options:
√ Project name? ... syncfusion-angular-app
√ Choose Framework: » Angular
√ Choose Template: » Schedule
√ Choose Theme: » Material3
√ Choose Style Format: » CSS
√ Would you like to integrate the Syncfusion MCP Server (AI Assistant) into this project? ... no
√ Would you like to install Syncfusion Component Skills for AI-powered development? ... no
√ Install dependencies and start app now? ... no
The above selections generate a Angular application configured with the Syncfusion® Scheduler component. You can choose different values for language, theme, style format, MCP setup, and skills installation based on your project requirements.
The Syncfusion® CLI creates the project with a predefined template. After the project is generated, you can customize or replace the component code based on your application requirements.
Run the project
Once the project is created, navigate to the project directory and run the following commands in your terminal.
cd syncfusion-angular-app
npm install
ng serve
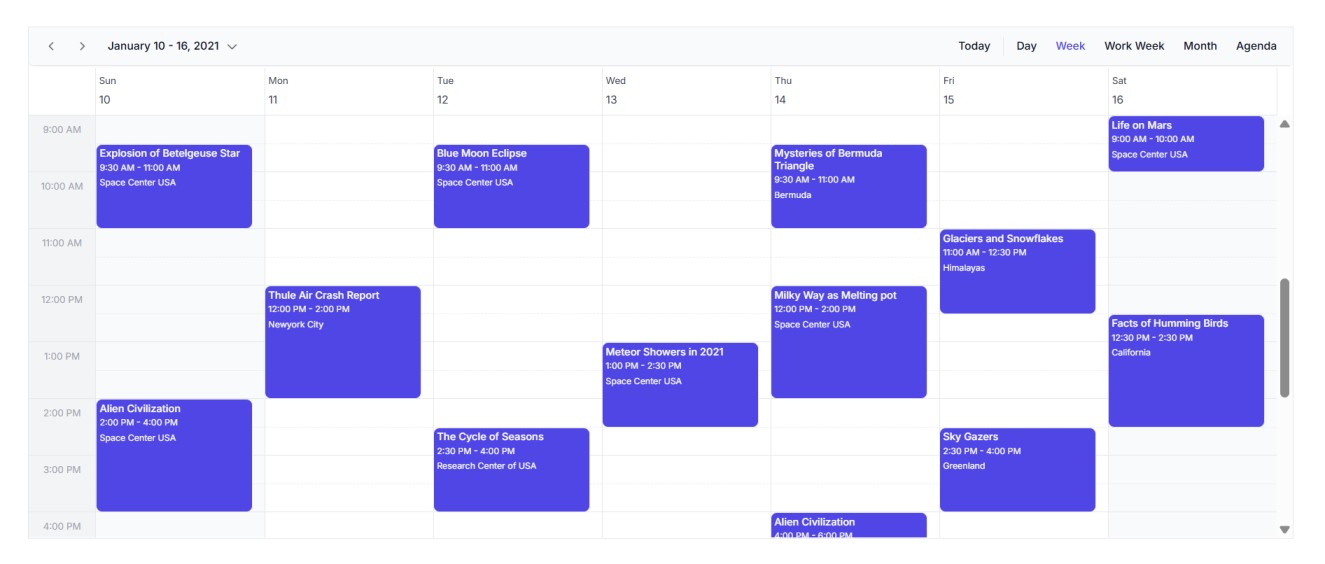
The output will appear as follows:
Prerequisites
| Requirement | Version |
|---|---|
| Angular | 12 and above |
| Node.js | 14.0.0 or above, Recommended: Latest Version |
Angular supported versions
| Angular Version | Minimum Syncfusion® Angular Scheduler Version |
|---|---|
| Angular v20 | 29.2.8 |
| Angular v19 | 26.1.35 |
| Angular v18 | 25.2.3 |
| Angular v17 | 23.2.4 |
| Angular v16 | 21.1.39 |
| Angular v15 | 20.4.38 |
| Angular v14 | 20.2.36 |
| Angular v13 | 19.4.38 and above |
| Angular v12 | 19.3.43 |
Browser Support
| Browser | Supported Versions |
|---|---|
| Google Chrome, including Android & iOS | Latest 2 versions |
| Mozilla Firefox | Latest version |
| Microsoft Edge | Latest 2 versions |
| Apple Safari, including iOS | Latest 2 versions |
You can use Angular CLI to set up your Angular applications. To install the Angular CLI, use the following command.
npm install -g @angular/cli
Create an Angular application
Create a new Angular application using the following Angular CLI command.
ng new my-app
This command will prompt you for a few settings for the new project, such as which stylesheet format to use.

By default, it will create a CSS-based application.
Then the CLI also displays an additional prompt whether to enable Server Side Rendering (SSR), and Static Site Generation (SSG) as shown below:

For this setup, when prompted for the Server-side rendering (SSR) option, select No for a standard Angular application.
Then the CLI displays another prompt related to AI tooling support, as shown below:

Any preferred option can be selected based on the development workflow or project needs.
Next, navigate to the project folder:
cd my-app
Installing Schedule package
Angular packages are distributed on npm as @syncfusion scoped packages. To use the Schedule component in your Angular application, install the @syncfusion/ej2-angular-schedule package from npm.
npm install @syncfusion/ej2-angular-schedule --save
Adding CSS reference
Themes for Syncfusion® Schedule components can be applied using CSS files provided through npm theme packages. Available themes include Bootstrap, Fabric, Material, Tailwind 3, and others. For the complete list and comparison, refer to the Themes documentation.
Install the Material 3 theme package using the following command:
npm install @syncfusion/ej2-material3-theme --saveThen add the following CSS reference to the src/style.css file:
@import "../node_modules/@syncfusion/ej2-material3-theme/styles/schedule/index.css";Initialize the Schedule component and configure module injection
This section explains how to set up the Syncfusion Angular Schedule component in your application by registering the necessary services (such as Day, Week, WorkWeek, Month, and Agenda) in the providers array, and rendering the Scheduler component in the template.
Setting up the component
Replace the contents of src/app/app.ts with the following code:
[src/app/app.ts]
import { Component } from '@angular/core';
import { ScheduleModule, DayService, WeekService, WorkWeekService, MonthService, AgendaService } from '@syncfusion/ej2-angular-schedule';

@Component({
	imports: [
		ScheduleModule
	],
	standalone: true,
	selector: 'app-root',
	providers: [DayService, WeekService, WorkWeekService, MonthService, AgendaService],
	// Specifies the template string for the Schedule component
	template: `<ejs-schedule></ejs-schedule>`
})
export class App { }
Running the development server
Run the following command in the terminal to start the development server. This compiles the project, launches a local server, and allows you to view changes in real-time during development.
ng serve
Note: If
ng servewas already running, restart it to apply the CSS theme changes and component imports.
Verification
Open your browser and navigate to http://localhost:4200/. You should see a blank calendar with the current week displayed and a Tailwind 3 theme applied.
Populating appointments
To populate the Schedule with appointments, you can use either a local JSON array or a remote data service. Assign the data to the dataSource property, which is part of the eventSettings configuration.
The StartTime and EndTime fields are mandatory for each appointment. The following example uses default fields like Id, Subject, StartTime, and EndTime.
[src/app/app.ts]
import { Component } from '@angular/core';
import { ScheduleModule, DayService, WeekService, WorkWeekService, MonthService, AgendaService, EventSettingsModel } from '@syncfusion/ej2-angular-schedule';

@Component({
	imports: [
		ScheduleModule
	],
	standalone: true,
	selector: 'app-root',
	providers: [DayService, WeekService, WorkWeekService, MonthService, AgendaService],
	// specifies the template string for the Schedule component
	template: `<ejs-schedule [eventSettings]='eventSettings'></ejs-schedule>`
})
export class App {
	public data: object[] = [{
		Id: 1,
		Subject: 'Meeting',
		StartTime: new Date(new Date().setHours(9, 0, 0)),
		EndTime: new Date(new Date().setHours(10, 0, 0))
	}];
	public eventSettings: EventSettingsModel = {
		dataSource: this.data
	};
}
Setting the date
By default, the Schedule component displays the current system date. To set a specific date, use the selectedDate property.
[src/app/app.ts]
import { Component } from '@angular/core';
import { ScheduleModule, DayService, WeekService, WorkWeekService, MonthService, AgendaService } from '@syncfusion/ej2-angular-schedule';

@Component({
	imports: [
		ScheduleModule
	],
	standalone: true,
	selector: 'app-root',
	providers: [DayService, WeekService, WorkWeekService, MonthService, AgendaService],
	// specifies the template string for the Schedule component
	template: `<ejs-schedule [selectedDate]='selectedDate'></ejs-schedule>`
})
export class App {
	public selectedDate: Date = new Date(2026, 4, 18);
}
Setting the view
The default view of the Schedule is Week. To change the current view, set the currentView property to one of the following default view names:
- Day — Shows a single day with hourly time slots
- Week — Shows a seven-day week with hourly time slots (default)
- WorkWeek — Shows Monday to Friday with hourly time slots
- Month — Shows a full month calendar view
- Agenda — Shows upcoming events in a list format
For detailed information on each view, see Explore available views and their customization options.
import { Component } from '@angular/core';
import { ScheduleModule, DayService, WeekService, WorkWeekService, MonthService, AgendaService, View } from '@syncfusion/ej2-angular-schedule';

@Component({
	imports: [
		ScheduleModule
	],
	standalone: true,
	selector: 'app-root',
	providers: [DayService, WeekService, WorkWeekService, MonthService, AgendaService],
	// specifies the template string for the Schedule component
	template: `<ejs-schedule [currentView]='currentView' ></ejs-schedule>`
})
export class App {
	public currentView: View = 'Day';
}