How can I help you?
The Syncfusion React components of Essential JavaScript 1 (jQuery-based widgets) are no longer actively developed, and the 2022 Volume 4 marked the last release. Users are encouraged to switch to the Syncfusion React components of the Essential JS 2 library, which has been specifically designed to be lightweight and modular. Its size can be further optimized by including only the necessary controls and features for your application. For more information, please check out the Syncfusion React of Essential JS 2 library’s documentation and demo.
Welcome to Syncfusion Essential React JS
React is an DOM management library that is used to create user interfaces, it computes the minimal set of changes that makes keep your DOM up-to-date.
Essential JavaScript components are supported to React JavaScript library through wrappers in ej.web.react.min.js file.
Getting started with React
This section briefly explains about how to create a web application with Syncfusion React components.
Create React Application layout
Include the following dependencies for render React components with Syncfusion widgets.
<!DOCTYPE html>
<html>
<head>
    <meta charset="UTF-8" />
    <title>React JS Getting started</title>
    <link href="http://cdn.syncfusion.com/14.3.0.49/js/web/flat-azure/ej.web.all.min.css" rel="stylesheet" />
    <script src="http://cdn.syncfusion.com/js/assets/external/react.min.js"></script>
    <script src="http://cdn.syncfusion.com/js/assets/external/react-dom.min.js"></script>
    <script src="https://cdnjs.cloudflare.com/ajax/libs/babel-core/5.8.34/browser.min.js"></script>
    <script src="http://cdn.syncfusion.com/js/assets/external/jquery-3.0.0.min.js"></script>
    <script src="http://js.syncfusion.com/demos/web/scripts/jsondata.min.js"></script>
    <script src="http://cdn.syncfusion.com/js/assets/external/jsrender.min.js"></script>
    <script src="http://cdn.syncfusion.com/14.3.0.49/js/web/ej.web.all.min.js"></script>
    <script src="http://cdn.syncfusion.com/14.3.0.49/js/common/ej.web.react.min.js"></script>
</head>
<body>
   <!--Add React JS components-->
</body>
</html>
IMPORTANT
From React v16.x.x, support for
React.createClasshas been removed. So if you are using react framework later versions then, you need to refercreate-react-classpackage separately.
Add React Components
React components are typically written in JSX. It is allowing quoting of HTML and using HTML tag’s syntax to render sub-components. HTML syntax is processed into JavaScript calls of the React library.
To translate JSX to plain JavaScript, we must use <script type=”text/babel”> and refer the browser.min.js file to perform the transformation in the browser.
To render the React components, you must have defined the HTML div element with id attribute in HTML file which is target element of React components.
Create a HTML file and paste the following content
<div id="container"></div>
<script type="text/babel" src="app.jsx">
</script>
Create a JSX file and paste the following content
ReactDOM.render(
		  <EJ.Grid dataSource = {window.gridData} pageSettings-currentPage={2} allowGrouping = {true}
allowPaging = {true} allowSorting= {true}>
                    <columns>
<column field="OrderID" headerText="Order ID" textAlign="right" width={90} />
<column field="EmployeeID" headerText="Employee ID" textAlign="right" width={90} />
                        <column field="Freight" headertext="Freight" width={90} />
</columns>
</EJ.Grid>,
document.getElementById('container')
);
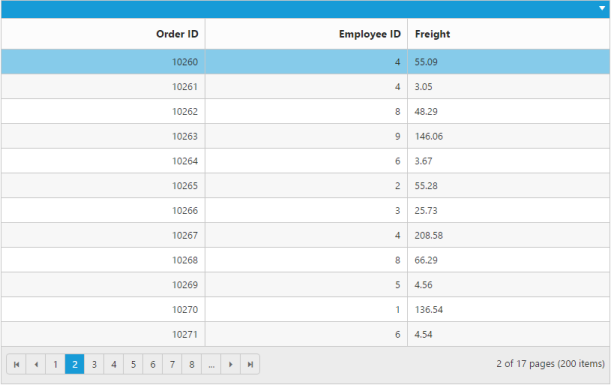
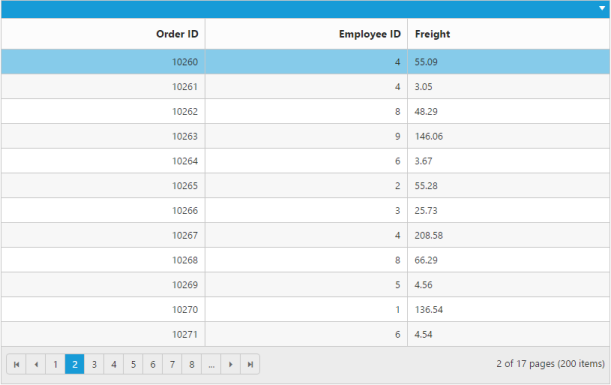
Output of above code

Content template
It provides to render the multiple components inside of single components. For example if you are using the EJ.Grid component inside the EJ.Dialog, it can be rendered as like mentioned in the below code example
<div id="container"></div>

    <script type="text/babel">
		ReactDOM.render(
		<EJ.Dialog title="dialog">
		  <EJ.Grid dataSource = {window.gridData} pageSettings-currentPage={2} allowGrouping = {true}
allowPaging = {true} allowSorting= {true}>
                    <columns>
<column field="OrderID" headerText="Order ID" textAlign="right" width={90} />
<column field="EmployeeID" headerText="Employee ID" textAlign="right" width={90} />
                        <column field="Freight" headertext="Freight" width={90} />
</columns>
</EJ.Grid>
</EJ.Dialog>,
document.getElementById('container')
);
    </script>
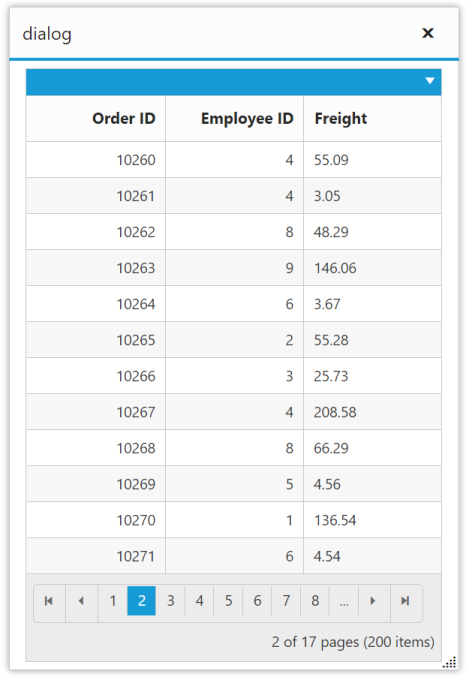
Output of above code

React application with NPM packages
We can create the React application with NPM packages.
Setup
Pre-requisites
We will need Node.js if you don’t have it installed on your machine, check the link from the table below.
| SN | Software | Description |
| 1 | Node.js and NPM | Node.js is the platform needed for the Cordova development. Checkout <a href=https://nodejs.org/en/download/package-manager/> Node.js package-manager </a> |
Gulp is a command line task runner using Node.js platform. It runs custom defined repetitious tasks.
To use Gulp, you need to install it as a global module through NPM.
- npm install –global gulp
Configuration
This section briefly explains about how to configure the package.json and gulpfile.js file.
package.json
Create a package.json file which is best way to manage locally installed packages.
NOTE
If we used the gulp-react plugin, we don’t need to include the browser.js file on the page either.
{
  "name": "ejreact",
  "version": "1.0.0",
   "devDependencies": {
    "browser-sync": "^2.14.3",
    "gulp": "^3.9.1",
    "gulp-clean": "^0.3.2",
    "gulp-react": "^3.1.0",
    "gulp-watch": "^4.3.9"
  }
}
gulpfile.js
This file will give you a taste of what gulp does.
var gulp = require('gulp');
var browserSync = require('browser-sync').create();
var react = require('gulp-react');
var watch = require('gulp-watch');
var clean = require('gulp-clean');
var reload = browserSync.reload;

gulp.task('build',['clean'], function () {
    //Convert jsx to js
    gulp.src('source/samples/**/*.jsx')
        .pipe(react())
        .pipe(gulp.dest('source/jsx'));

});

gulp.task('clean', function () {
   return gulp.src('app', {read: false})
        .pipe(clean());
});

// Static Server + watching html files
gulp.task('serve', function () {
    browserSync.init({
        server: {
            baseDir: "./"
        }
    });
});

// Files watching
gulp.task('watch', ['build', 'serve'], function () {
    gulp.watch(["source/samples/**/*.{js,jsx,html}"], ['build', reload]);
})

gulp.task('default', ['watch']);
Converting JSX to JavaScript with React
When building with React, you can write plain JavaScript or in JSX. JSX is a preprocessor that gives you a more concise syntax.
which is easier and more readable, but it’s needs to be converted to plain JavaScript through gulp-react plugin.
ReactDOM.render(
		  <EJ.Grid dataSource = {window.gridData} pageSettings-currentPage={2} allowGrouping = {true}
allowPaging = {true} allowSorting= {true}>
                    <columns>
<column field="OrderID" headerText="Order ID" textAlign="right" width={90} />
<column field="EmployeeID" headerText="Employee ID" textAlign="right" width={90} />
                        <column field="Freight" headertext="Freight" width={90} />
</columns>
</EJ.Grid>,
document.getElementById('container')
);
With the help of gulp-react and its gulp plugin, you can convert JSX to JavaScript by piping react() into the build task
gulp.task('build',['clean'], function () {
    //Convert jsx to js
    gulp.src('source/samples/**/*.jsx')
        .pipe(react())
        .pipe(gulp.dest('source/jsx'));

});
Watching JS, JSX and HTML files for changes
Let’s configure gulp’s watch task to watch for JS, JSX and HTML files, then execute build and serve tasks.
// Files watching
gulp.task('watch', ['build', 'serve'], function () {
    gulp.watch(["source/samples/**/*.{js,jsx,html}"], ['build', reload]);
})
Removing files and folders
Let’s configure gulp’s clean task to removing files and folders.
gulp.task('clean', function () {
   return gulp.src('app', {read: false})
        .pipe(clean());
});
Run Application
Create an index.html file, then include the following dependencies to render the React application with Essential JS widgets. This index.html will be act as a start page of the application.
<!DOCTYPE html>
<html>
<head>
    <meta charset="UTF-8" />
    <title>React JS Getting started</title>
    <link href="http://cdn.syncfusion.com/14.3.0.52/js/web/flat-azure/ej.web.all.min.css" rel="stylesheet" />
    <script src="http://cdn.syncfusion.com/js/assets/external/react.min.js"></script>
    <script src="http://cdn.syncfusion.com/js/assets/external/react-dom.min.js"></script>
    <script src="http://cdn.syncfusion.com/js/assets/external/jquery-3.0.0.min.js"></script>
    <script src="http://js.syncfusion.com/demos/web/scripts/jsondata.min.js"></script>
    <script src="http://cdn.syncfusion.com/js/assets/external/jsrender.min.js"></script>
    <script src="http://cdn.syncfusion.com/14.3.0.52/js/web/ej.web.all.min.js"></script>
    <script src="http://cdn.syncfusion.com/14.3.0.52/js/common/ej.web.react.min.js"></script>
</head>

<body>
    <div id="container"></div>
    <script src="source/samples/grid/grid.js">
    </script>
</body>
</html>
Create a JSX file and paste the following content.
ReactDOM.render(
		  <EJ.Grid dataSource = {window.gridData} pageSettings-currentPage={2} allowGrouping = {true}
allowPaging = {true} allowSorting= {true}>
                    <columns>
<column field="OrderID" headerText="Order ID" textAlign="right" width={90} />
<column field="EmployeeID" headerText="Employee ID" textAlign="right" width={90} />
                        <column field="Freight" headertext="Freight" width={90} />
</columns>
</EJ.Grid>,
document.getElementById('container')
);
Now type the below commands step by step for launching ReactJS application in browser.
-
npm install – To install the npm packages
-
gulp – To launch application in browser

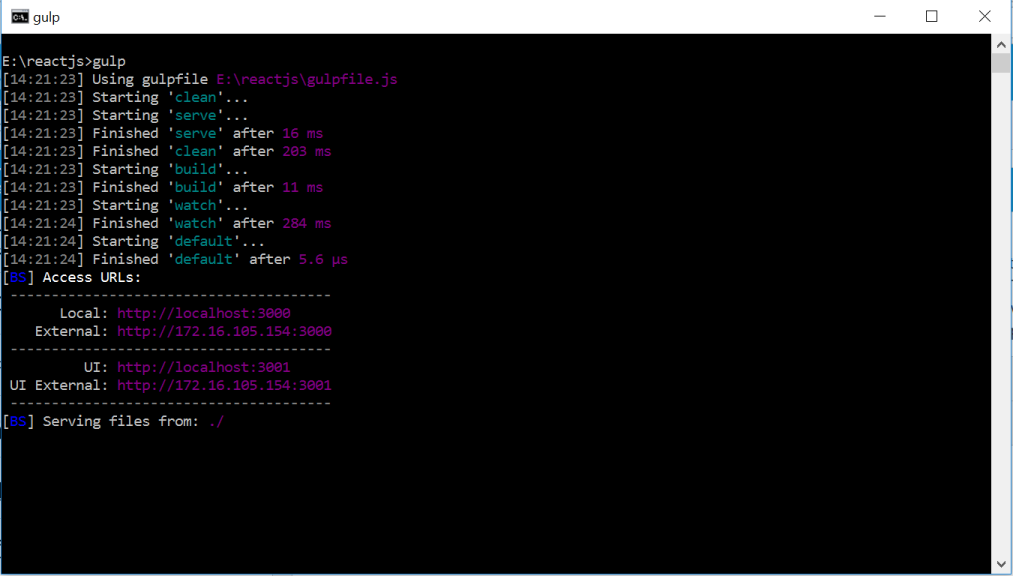
Screenshot of launching application
