UpDown Button in .NET MAUI Numeric Entry
18 Nov 201820 minutes to read
This section describes how to change the value of the Numeric Entry control using the keyboard, the mouse scroll wheel, and the on-screen up-down buttons. It also covers placement, alignment, ordering, color, template customization, and auto-reverse behavior.
Prerequisites
Before using the SfNumericEntry, ensure the following NuGet package is installed in your .NET MAUI project:
Syncfusion.Maui.Inputs
For a step-by-step setup, refer to the Getting Started documentation.
Increase or decrease value
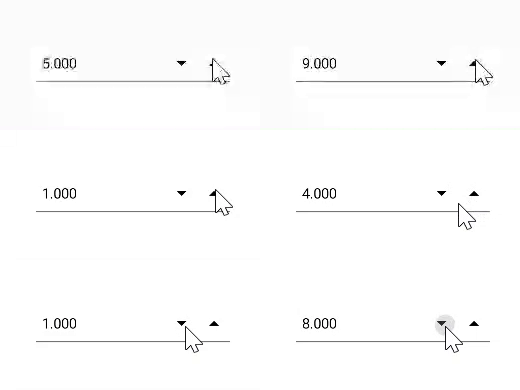
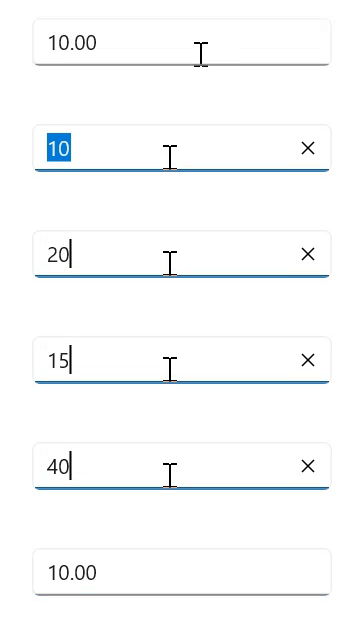
You can increment or decrement the value in the Numeric Entry control using the Up, Down, PageUp, and PageDown keys. Control the step size for the arrow keys with the SmallChange property, and for the page keys with the LargeChange property. Both properties accept double values. The default value of SmallChange is 1, and the default value of LargeChange is 10.
The value in the
Numeric Entrycan also be changed by mouse scrolling. The scroll wheel increments or decrements the value based on theSmallChangeproperty.
<editors:SfNumericEntry WidthRequest="200"
                        HorizontalOptions="Center"
                        VerticalOptions="Center"
                        SmallChange="5"
                        Value="10"
                        LargeChange="20" />
SfNumericEntry sfNumericEntry = new SfNumericEntry
{
Value = 10,
WidthRequest = 200,
SmallChange = 5,
LargeChange = 20,
HorizontalOptions = LayoutOptions.Center,
VerticalOptions = LayoutOptions.Center,
};
UpDown button placement
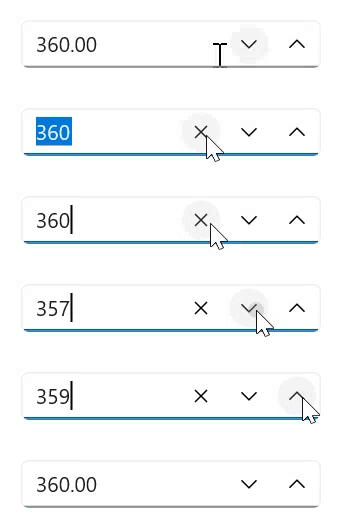
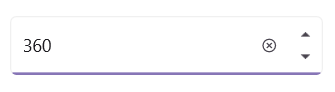
You can increase or decrease the value of the Numeric Entry control using the on-screen up-down buttons. By default, the value of the UpDownPlacementMode property is Hidden (the buttons are not displayed). Set UpDownPlacementMode to Inline for a horizontal layout, or to InlineVertical for a vertical layout.
When the up-down buttons are visible, the value changes by the
SmallChangestep each time a button is pressed.
UpDown button placement: Inline
<editors:SfNumericEntry WidthRequest="200"
                        HorizontalOptions="Center"
                        VerticalOptions="Center"
                        Value="360"
                        UpDownPlacementMode="Inline" />
SfNumericEntry sfNumericEntry = new SfNumericEntry
{
WidthRequest = 200,
HorizontalOptions = LayoutOptions.Center,
VerticalOptions = LayoutOptions.Center,
Value = 360,
UpDownPlacementMode = NumericEntryUpDownPlacementMode.Inline,
};
UpDown button placement: InlineVertical
<editors:SfNumericEntry Value="360"
                        WidthRequest="200"
                        VerticalOptions="Center"
                        HorizontalOptions="Center"
                        UpDownPlacementMode="InlineVertical" />
SfNumericEntry sfNumericEntry = new SfNumericEntry
{
WidthRequest = 200,
HorizontalOptions = LayoutOptions.Center,
VerticalOptions = LayoutOptions.Center,
Value = 360,
UpDownPlacementMode = NumericEntryUpDownPlacementMode.InlineVertical,
};
UpDown button alignment
You can adjust the alignment of the up-down buttons in the Numeric Entry control using the UpDownButtonAlignment property. Set its value to Left, Right, or Both to position the buttons on the left, right, or both sides of the entry field, respectively. The default value of UpDownButtonAlignment is Right.
UpDown button alignment: Left
<editors:SfNumericEntry Value="123"
                        HorizontalTextAlignment="End"
                        WidthRequest="200"
                        UpDownPlacementMode="Inline"
                        UpDownButtonAlignment="Left" />
SfNumericEntry sfNumericEntry = new SfNumericEntry
{
WidthRequest = 200,
Value = 123,
HorizontalTextAlignment = TextAlignment.End,
UpDownPlacementMode = NumericEntryUpDownPlacementMode.Inline,
UpDownButtonAlignment = UpDownButtonAlignment.Left,
};
UpDown button alignment: Right (default)
<editors:SfNumericEntry Value="123"
                        HorizontalTextAlignment="Start"
                        WidthRequest="200"
                        UpDownPlacementMode="Inline"
                        UpDownButtonAlignment="Right" />
SfNumericEntry sfNumericEntry = new SfNumericEntry
{
WidthRequest = 200,
Value = 123,
HorizontalTextAlignment = TextAlignment.Start,
UpDownPlacementMode = NumericEntryUpDownPlacementMode.Inline,
UpDownButtonAlignment = UpDownButtonAlignment.Right,
};UpDown button alignment: Both
<editors:SfNumericEntry Value="123"
                        HorizontalTextAlignment="Center"
                        WidthRequest="200"
                        UpDownPlacementMode="Inline"
                        UpDownButtonAlignment="Both" />
SfNumericEntry sfNumericEntry = new SfNumericEntry
{
WidthRequest = 200,
Value = 123,
HorizontalTextAlignment = TextAlignment.Center,
UpDownPlacementMode = NumericEntryUpDownPlacementMode.Inline,
UpDownButtonAlignment = UpDownButtonAlignment.Both,
};
UpDown button order
You can change the order of the up-down buttons in the Numeric Entry control using the UpDownOrder property. Set its value to UpThenDown or DownThenUp to position the up button above the down button, or vice-versa.
The default value of
UpDownOrderisUpThenDown.
UpDown button order: UpThenDown
<editors:SfNumericEntry Value="123"
                        WidthRequest="200"
                        UpDownOrder="UpThenDown"
                        UpDownPlacementMode="Inline"
                        UpDownButtonAlignment="Right" />
SfNumericEntry sfNumericEntry = new SfNumericEntry
{
WidthRequest = 200,
Value = 123,
UpDownOrder = UpDownOrder.UpThenDown,
UpDownPlacementMode = NumericEntryUpDownPlacementMode.Inline,
UpDownButtonAlignment = UpDownButtonAlignment.Right,
};
UpDown button order: DownThenUp
<editors:SfNumericEntry Value="123"
                        WidthRequest="200"
                        UpDownOrder="DownThenUp"
                        UpDownPlacementMode="Inline"
                        UpDownButtonAlignment="Right" />
SfNumericEntry sfNumericEntry = new SfNumericEntry
{
WidthRequest = 200,
Value = 123,
UpDownOrder = UpDownOrder.DownThenUp,
UpDownPlacementMode = NumericEntryUpDownPlacementMode.Inline,
UpDownButtonAlignment = UpDownButtonAlignment.Right,
};
UpDown button color
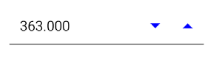
Customize the color of the up-down buttons using the UpDownButtonColor property. The property accepts a Microsoft.Maui.Graphics.Color value (or a color string in XAML).
<editors:SfNumericEntry HeightRequest="50"
                        WidthRequest="200"
                        HorizontalOptions="Center"
                        VerticalOptions="Center"
                        Value="360"
                        UpDownPlacementMode="Inline"
                        UpDownButtonColor="Blue" />
SfNumericEntry sfNumericEntry = new SfNumericEntry
{
WidthRequest = 200,
HorizontalOptions = LayoutOptions.Center,
VerticalOptions = LayoutOptions.Center,
Value = 360,
UpDownPlacementMode = NumericEntryUpDownPlacementMode.Inline,
UpDownButtonColor = Colors.Blue,
};
UpDown button template
Customize the appearance of the up-down buttons using the UpButtonTemplate and DownButtonTemplate properties, which accept a DataTemplate.
The custom font used in the following example (
FontIcons) must be registered in your project before it can be referenced. Add the font file underResources/Fontsand include it in theMauiProgram.cscall to.ConfigureFonts(fonts => { ... }).
<VerticalStackLayout Spacing="10" VerticalOptions="Center">
<editors:SfNumericEntry x:Name="numericEntry"
WidthRequest="200"
HeightRequest="40"
VerticalOptions="Center"
UpDownPlacementMode="Inline"
Value="50">
<editors:SfNumericEntry.UpButtonTemplate>
<DataTemplate>
<Grid>
<Label Padding="10, 3, 15, 10"
FontFamily="FontIcons"
HorizontalOptions="Center"
Text="↑"
TextColor="Green"
FontSize="20" />
</Grid>
</DataTemplate>
</editors:SfNumericEntry.UpButtonTemplate>
<editors:SfNumericEntry.DownButtonTemplate>
<DataTemplate>
<Grid>
<Label Padding="10, 3, 15, 10"
FontFamily="FontIcons"
HorizontalOptions="Center"
Text="↓"
TextColor="Red"
FontSize="20" />
</Grid>
</DataTemplate>
</editors:SfNumericEntry.DownButtonTemplate>
</editors:SfNumericEntry>
</VerticalStackLayout>var verticalStackLayout = new VerticalStackLayout
{
Spacing = 10,
VerticalOptions = LayoutOptions.Center,
};
var numericEntry = new SfNumericEntry
{
WidthRequest = 200,
HeightRequest = 40,
VerticalOptions = LayoutOptions.Center,
UpDownPlacementMode = NumericEntryUpDownPlacementMode.Inline,
Value = 50,
};
var upButtonTemplate = new DataTemplate(() =>
{
var grid = new Grid();
var label = new Label
{
Padding = new Thickness(10, 3, 15, 10),
FontFamily = "FontIcons",
HorizontalOptions = LayoutOptions.Center,
Text = "\u2191",
TextColor = Colors.Green,
FontSize = 20,
};
grid.Children.Add(label);
return grid;
});
var downButtonTemplate = new DataTemplate(() =>
{
var grid = new Grid();
var label = new Label
{
Padding = new Thickness(10, 3, 15, 10),
FontFamily = "FontIcons",
HorizontalOptions = LayoutOptions.Center,
Text = "\u2193",
TextColor = Colors.Red,
FontSize = 20,
};
grid.Children.Add(label);
return grid;
});
numericEntry.UpButtonTemplate = upButtonTemplate;
numericEntry.DownButtonTemplate = downButtonTemplate;
verticalStackLayout.Add(numericEntry);
Content = verticalStackLayout;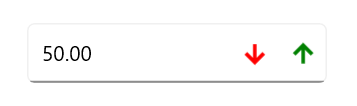
Auto reverse in Numeric Entry
The AutoReverse property causes the Numeric Entry control to automatically switch direction when it reaches the Minimum or Maximum value. When incrementing, the value progresses from Minimum to Maximum; when decrementing, it progresses from Maximum to Minimum. The default value of AutoReverse is false.
<editors:SfNumericEntry WidthRequest="200"
                        UpDownPlacementMode="Inline"
                        AutoReverse="True"
                        Minimum="0"
                        Maximum="10" />
SfNumericEntry sfNumericEntry = new SfNumericEntry
{
WidthRequest = 200,
UpDownPlacementMode = NumericEntryUpDownPlacementMode.Inline,
AutoReverse = true,
Minimum = 0,
Maximum = 10,
};