Display View in .NET MAUI Color Picker
18 Nov 201810 minutes to read
The display view of the .NET MAUI Color Picker is the header area that shows the currently selected color, a drop-down button that opens the picker, and optional icons. This section explains how to customize that header - its icon, template, dimensions, and border.
Prerequisites
Before using the SfColorPicker, ensure the following NuGet package is installed in your .NET MAUI project:
Syncfusion.Maui.Inputs
For a step-by-step setup, refer to the Getting Started documentation.
Selected color customization
Use the following properties to customize how the currently selected color is displayed in the color picker’s display view:
These properties allow you to customize the appearance of the selected color by configuring the icon, its size, or providing a custom template to display the selected color according to your application’s design requirements.
Selected color icon
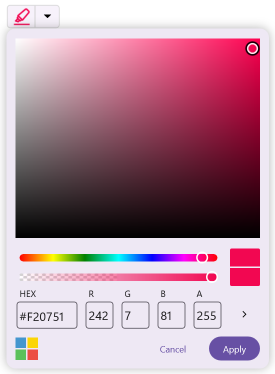
You can customize the selected color icon in the Color Picker using the SelectedColorIcon property.
<inputs:SfColorPicker x:Name="colorPicker">
<inputs:SfColorPicker.SelectedColorIcon>
<FontImageSource FontFamily="MauiMaterialAssets"
Glyph=""
Color="{Binding Source={x:Reference colorPicker},Path=SelectedColor}"/>
</inputs:SfColorPicker.SelectedColorIcon>
</inputs:SfColorPicker>SfColorPicker colorPicker = new SfColorPicker();
var fontIcon = new FontImageSource
{
FontFamily = "MauiMaterialAssets",
Glyph = "\ue760",
Color = colorPicker.SelectedColor
};
colorPicker.SelectedColorIcon = fontIcon;
colorPicker.ColorChanged += (s, e) =>
{
fontIcon.Color = e.NewColor;
};
this.Content = colorPicker;Subscribe to the ColorChanged event when you update the icon color in code-behind, so the icon stays in sync with the user-selected color.
Selected color icon size
You can customize the size of the selected color icon displayed in the Color Picker using the SelectedColorIconSize property.
<inputs:SfColorPicker x:Name="colorPicker"
SelectedColorIconSize="32">
<inputs:SfColorPicker.SelectedColorIcon>
<FontImageSource FontFamily="MauiMaterialAssets"
Glyph=""
Color="{Binding Source={x:Reference colorPicker},Path=SelectedColor}"/>
</inputs:SfColorPicker.SelectedColorIcon>
</inputs:SfColorPicker>SfColorPicker colorPicker = new SfColorPicker();
var fontIcon = new FontImageSource
{
FontFamily = "MauiMaterialAssets",
Glyph = "\ue760",
Color = colorPicker.SelectedColor
};
colorPicker.SelectedColorIcon = fontIcon;
colorPicker.SelectedColorIconSize = 32;
colorPicker.ColorChanged += (s, e) =>
{
fontIcon.Color = e.NewColor;
};
this.Content = colorPicker;Selected color template
To customize the appearance of the selected color, use the SelectedColorTemplate property to define a custom template.
<inputs:SfColorPicker x:Name="colorPicker">
    <inputs:SfColorPicker.SelectedColorTemplate>
        <DataTemplate>
            <VerticalStackLayout WidthRequest="70" Background="White">
                <Label Text="A" HorizontalOptions="Center" TextColor="Black"/>
                <BoxView HeightRequest="5" WidthRequest="30" Background="{Binding Source={x:Reference colorPicker},Path=SelectedColor}" />
            </VerticalStackLayout>
        </DataTemplate>
    </inputs:SfColorPicker.SelectedColorTemplate>
</inputs:SfColorPicker>
SfColorPicker colorPicker = new SfColorPicker();
colorPicker.SelectedColorTemplate = new DataTemplate(() =>
{
var label = new Label
{
Text = "A",
HorizontalOptions = LayoutOptions.Center,
TextColor = Colors.Black
};
// Create the box view and bind its Background to colorPicker.SelectedColor.
var boxView = new BoxView
{
HeightRequest = 5,
WidthRequest = 30
};
boxView.SetBinding(BoxView.BackgroundProperty, new Binding
{
Source = colorPicker,
Path = "SelectedColor",
Mode = BindingMode.OneWay
});
// Create the layout.
var stackLayout = new VerticalStackLayout
{
WidthRequest = 70,
BackgroundColor = Colors.White,
Children = { label, boxView }
};
return stackLayout;
});
this.Content = colorPicker;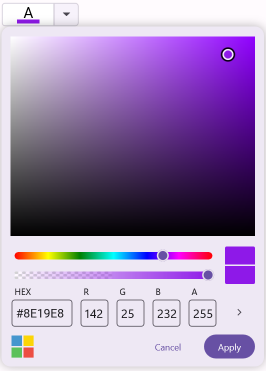
Drop-down icon customization
Use the following properties to customize the drop-down button that opens the color picker:
These properties allow you to customize the appearance and size of the drop-down button. You can define a custom button template using DropDownButtonTemplate and control the button width with DropDownWidth to align the color picker with your application’s design.
Drop-down icon
The drop-down icon of the Color Picker can be customized using the DropDownButtonTemplate property.
<inputs:SfColorPicker x:Name="colorPicker">
<inputs:SfColorPicker.DropDownButtonTemplate>
<DataTemplate>
<Label Text=""
FontFamily="MauiMaterialAssets"
FontSize="14"
TextColor="Black"
VerticalTextAlignment="Center"
HorizontalTextAlignment="Center" />
</DataTemplate>
</inputs:SfColorPicker.DropDownButtonTemplate>
</inputs:SfColorPicker>SfColorPicker colorPicker = new SfColorPicker();
var dropDownTemplate = new DataTemplate(() =>
{
return new Label
{
Text = "\ue705",
FontFamily = "MauiMaterialAssets",
TextColor = Colors.Black,
FontSize = 14,
VerticalTextAlignment = TextAlignment.Center,
HorizontalTextAlignment = TextAlignment.Center
};
});
colorPicker.DropDownButtonTemplate = dropDownTemplate;
this.Content = colorPicker;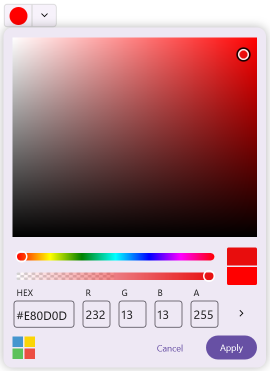
Drop-down width
You can set the width of the drop-down button displayed in the Color Picker using the DropDownWidth property.
<inputs:SfColorPicker DropDownWidth="48" />SfColorPicker colorPicker = new SfColorPicker()
{
DropDownWidth = 48
};
this.Content = colorPicker;Display view appearance
Use the properties in this section to control the size and border of the display view.
Display view height
You can control the height of the display view shown in the Color Picker using the DisplayViewHeight property.
<inputs:SfColorPicker DisplayViewHeight="48" />SfColorPicker colorPicker = new SfColorPicker()
{
DisplayViewHeight = 48
};
this.Content = colorPicker;Display view stroke color
You can customize the border color of the display view in the Color Picker using the DisplayViewStroke property.
<inputs:SfColorPicker DisplayViewStroke="Red" />SfColorPicker colorPicker = new SfColorPicker()
{
DisplayViewStroke = Colors.Red
};
this.Content = colorPicker;Display view stroke thickness
You can define the thickness of the display view border using the DisplayViewStrokeThickness property.
<inputs:SfColorPicker DisplayViewStrokeThickness="3" />SfColorPicker colorPicker = new SfColorPicker()
{
DisplayViewStrokeThickness = 3
};
this.Content = colorPicker;