Entity Framework in Blazor Pivot Table
The Blazor Pivot Table can be connected to a Microsoft SQL Server database using Entity Framework Core. This approach provides a clean and maintainable data-access layer for Blazor applications while keeping the Pivot Table integration simple and scalable.
What is Entity Framework Core?
Entity Framework Core is a modern object-relational mapper (ORM) for .NET. It lets developers work with strongly typed .NET objects while EF Core translates these operations into SQL statements for SQL Server. This makes the application easier to maintain and reduces the amount of manual SQL code required.
Key Benefits of Entity Framework Core
- Structured Data Access: Work with entities and DbContext instead of manually composing SQL statements.
- Strongly Typed Models: Build applications around C# classes that map directly to database tables.
- Simplified CRUD: Perform create, read, update, and delete operations through EF Core methods.
- Database Abstraction: Focus on application logic while EF Core handles the database interaction.
- Scalable Architecture: Separate models, DbContext, and controllers for cleaner application design.
Prerequisites
Ensure the following software and packages are installed before proceeding:
| Software/Package | Version | Purpose |
|---|---|---|
| Visual Studio 2022 / VS Code | Visual Studio 2022 17.14+ or current VS Code | Development environment; Visual Studio requires the ASP.NET and web development workload |
| .NET SDK | .NET 10 SDK (net10.0 target framework) |
Runtime and build tools |
| SQL Server | 2019 or later | Database server |
| Syncfusion.Blazor.PivotTable | 35.1.37 |
Pivot Table UI component |
| Syncfusion.Blazor.Themes | 35.1.37 |
Styling for Pivot Table components |
| Microsoft.EntityFrameworkCore.SqlServer | 10.0.10 | SQL Server provider for EF Core |
The versions above are the tested combination for this guide. Keep all Syncfusion packages on the same version and all Microsoft EF Core packages on the same version if you update them.
You also need:
- A Syncfusion account and a valid license key when using packages from NuGet.org or a trial installer. See Register a Syncfusion license key.
- A SQL Server login that can connect to
OrderDBand read, insert, update, and delete rows indbo.Orders. - Permission to create a database and table for Step 1. Otherwise, ask a database administrator to run the script and grant the application login access.
Architecture and Data Flow
The sample follows a remote data binding architecture where the Blazor Pivot Table does not communicate with SQL Server directly.
Syncfusion Blazor Pivot Table
       ↓
ASP.NET Core Controller
       ↓
ApplicationDbContext
       ↓
Entity Framework Core
       ↓
SQL Server
The request flow is as follows:
- The Pivot Table sends data requests through the URL adaptor.
- The ASP.NET Core controller receives the request and uses ApplicationDbContext.
- For reads, the sample queries all rows through Entity Framework Core. For writes, the controller performs the requested insert, update, or delete operation.
- The returned rows are mapped to C# entity objects and sent back to the Pivot Table.
SQL Server and Entity Framework Core Setup
Step 1: Create the database and table in SQL Server
First, create the SQL Server database structure that will store the order records used by the Pivot Table.
Instructions
- Open SQL Server Management Studio (SSMS) and connect to your local SQL Server instance.
- Open a new query window and run the SQL script below.
- If you use SQL authentication, confirm that SQL Server authentication is enabled and that the application login is mapped to
OrderDB. - Run the validation query shown after the sample-data script and confirm that it returns the expected rows.
Run the following SQL script:
IF DB_ID('OrderDB') IS NULL
BEGIN
    CREATE DATABASE OrderDB;
END
GO

USE OrderDB;
GO

IF OBJECT_ID('dbo.Orders', 'U') IS NULL
BEGIN
    CREATE TABLE Orders
    (
        OrderID        INT IDENTITY(1, 1) PRIMARY KEY,
        CustomerName   VARCHAR(100) NULL,
        EmployeeID     INT NULL,
        ShipCity       VARCHAR(100) NULL,
        Freight        DECIMAL(10, 2) NULL
    );
END
GO
Optional sample data:
IF NOT EXISTS (SELECT 1 FROM Orders)
BEGIN
    INSERT INTO Orders (CustomerName, EmployeeID, ShipCity, Freight) VALUES
    ('Toms',   1, 'New York',  35.30),
    ('Ravi',   2, 'London',    80.20),
    ('Sven',   1, 'Berlin',    52.10),
    ('Sara',   3, 'Madrid',    18.40),
    ('Paul',   2, 'Tokyo',     64.75);
END
GO
Run the following validation query:
SELECT OrderID, CustomerName, EmployeeID, ShipCity, Freight
FROM Orders
ORDER BY OrderID;
Confirm that the query returns the five sample rows (or your existing rows). This verifies that the table is available before connecting the Blazor application.
Step 2: Create the Blazor Web App
Create a Blazor Web App if you do not already have one:
dotnet new blazor -n PivotTableMSSQLEFCore --framework net10.0 --interactivity Server
cd PivotTableMSSQLEFCore
In Visual Studio, create a new Blazor Web App project and select Interactive render mode: Server.
Step 3: Install Required NuGet Packages
The Blazor Web App project is the one that will receive the Syncfusion and EF Core packages.
Method 1: Using the .NET CLI
dotnet add package Syncfusion.Blazor.PivotTable --version 35.1.37
dotnet add package Syncfusion.Blazor.Themes --version 35.1.37
dotnet add package Microsoft.EntityFrameworkCore.SqlServer --version 10.0.10
Method 2: Using NuGet Package Manager UI
- Open Visual Studio and navigate to Tools > NuGet Package Manager > Manage NuGet Packages for Solution.
- Search for and install each package individually:
Syncfusion.Blazor.PivotTableSyncfusion.Blazor.ThemesMicrosoft.EntityFrameworkCore.SqlServer
All required packages are now installed.
Project file reference: The installed packages appear in the project file as package references for the Syncfusion UI components and EF Core SQL provider.
Step 4: Configure the Connection String
The connection string is stored in appsettings.json under the ConnectionStrings section.
{
  "ConnectionStrings": {
    "SQLServer": "Server=<SERVER_NAME>;Database=OrderDB;User Id=<USER_ID>;Password=<PASSWORD>;TrustServerCertificate=True;"
  },
  "Logging": {
    "LogLevel": {
      "Default": "Information",
      "Microsoft.AspNetCore": "Warning"
    }
  },
  "AllowedHosts": "*"
}
Replace the placeholder values with the values that match your SQL Server environment:
-
Server: SQL Server host name or instance name. -
Database: Database name, such asOrderDB. -
User Id: SQL Server login name. -
Password: SQL Server login password. -
TrustServerCertificate: Set toTruefor local development scenarios when needed.
Connection string components:
| Component | Description |
|---|---|
| Server | The name of the SQL Server instance or host address |
| Database | The database that contains the Orders table |
| User Id | The SQL login used to connect to the database |
| Password | The password for that SQL login |
| TrustServerCertificate | Enables trusted local-development connections when required |
Store credentials safely
Do not store production credentials in source control. For local development, store the connection string with user secrets:
dotnet user-secrets init
dotnet user-secrets set "ConnectionStrings:SQLServer" "Server=<SERVER_NAME>;Database=OrderDB;User Id=<USER_ID>;Password=<PASSWORD>;TrustServerCertificate=True;"
In deployed environments, use the ConnectionStrings__SQLServer environment variable or a managed secret store.
For Windows authentication, use a trusted connection string instead:
"SQLServer": "Server=<SERVER_NAME>;Database=OrderDB;Trusted_Connection=True;TrustServerCertificate=True;"Named instances use a server value such as localhost\SQLEXPRESS; a TCP endpoint can use localhost,1433. See SQL Server connection-string syntax.
Step 5: Create the Entity Model
The sample uses an Order entity model to represent each row in the Orders table. This model is defined in the Models folder.
Create a file named Models/Order.cs with the following implementation:
using System.ComponentModel.DataAnnotations;

namespace PivotTableMSSQLEFCore.Models
{
    public class Order
    {
        [Key]
        public int OrderID { get; set; }

        public string? CustomerName { get; set; }

        public int? EmployeeID { get; set; }

        public decimal? Freight { get; set; }

        public string? ShipCity { get; set; }
    }
}
This model is the shape used by EF Core when reading data from and writing data to the Orders table.
Important details
- The property names should align closely with the SQL column names to reduce mapping confusion.
- The
[Key]attribute marksOrderIDas the primary key and helps the CRUD operations identify the record to update or delete. - Nullable properties are used here because the sample table allows null values for several columns.
OrderIDis not nullable because it is the primary key.
Step 6: Create the DbContext
Entity Framework Core uses DbContext to manage the entity model and expose the database set. Create a Data/ApplicationDbContext.cs file with the following implementation:
using Microsoft.EntityFrameworkCore;
using PivotTableMSSQLEFCore.Models;

namespace PivotTableMSSQLEFCore.Data
{
    public class ApplicationDbContext : DbContext
    {
        public ApplicationDbContext(
            DbContextOptions<ApplicationDbContext> options)
            : base(options)
        {
        }

        public DbSet<Order> Orders => Set<Order>();
    }
}
The DbSet<Order> property maps the Order entity to the Orders table in SQL Server.
Why this matters: The DbContext is the bridge between the ASP.NET Core application and SQL Server. It tracks entities, generates SQL commands, and exposes the Orders set that the controller uses for reading and writing data.
Step 7: Configure Application Services and Static Assets
Update Program.cs to register the required Syncfusion, Razor component, API controller, and Entity Framework Core services.
Store the Syncfusion license key outside source control:
dotnet user-secrets init
dotnet user-secrets set "SyncfusionLicenseKey" "<YOUR_LICENSE_KEY>"
using Microsoft.EntityFrameworkCore;
using PivotTableMSSQLEFCore.Components;
using PivotTableMSSQLEFCore.Data;
using Syncfusion.Blazor;
using Syncfusion.Licensing;
var builder = WebApplication.CreateBuilder(args);
string syncfusionLicenseKey = builder.Configuration["SyncfusionLicenseKey"]
?? throw new InvalidOperationException(
"Configuration value 'SyncfusionLicenseKey' is missing.");
SyncfusionLicenseProvider.RegisterLicense(syncfusionLicenseKey);
builder.Services.AddSyncfusionBlazor();
builder.Services.AddRazorComponents()
.AddInteractiveServerComponents();
builder.Services.AddControllers();
string connectionString = builder.Configuration.GetConnectionString("SQLServer")
?? throw new InvalidOperationException(
"Connection string 'SQLServer' is missing.");
builder.Services.AddDbContext<ApplicationDbContext>(options =>
options.UseSqlServer(connectionString));
var app = builder.Build();
if (!app.Environment.IsDevelopment())
{
app.UseExceptionHandler("/Error", createScopeForErrors: true);
app.UseHsts();
}
app.UseHttpsRedirection();
app.MapControllers();
app.UseAntiforgery();
app.MapStaticAssets();
app.MapRazorComponents<App>()
.AddInteractiveServerRenderMode();
app.Run();This registration ensures that the controller receives an ApplicationDbContext instance that is already configured to use the SQL Server connection string.
Service registrations
-
AddSyncfusionBlazor()enables the Pivot Table component and its supporting services. -
AddRazorComponents()andAddInteractiveServerComponents()prepare the Blazor app for interactive rendering. -
AddControllers()exposes the API endpoints used by the URL Adaptor. -
AddDbContext<ApplicationDbContext>()wires EF Core to the SQL Server connection string supplied by the application configuration providers.
Add the Syncfusion theme stylesheet inside the <head> element and the script before the closing <body> element in Components/App.razor:
<link href="_content/Syncfusion.Blazor.Themes/bootstrap5.css" rel="stylesheet" />
<script src="_content/Syncfusion.Blazor.Core/scripts/syncfusion-blazor.min.js"
        type="text/javascript"></script>
Step 8: Create the Controller with Entity Framework Core
The controller acts as the bridge between the Blazor Pivot Table and the EF Core data layer. It exposes the API endpoints that the SfDataManager uses for reading and CRUD operations. By keeping the database logic in the controller and the entity mapping in the model and DbContext, the sample remains clean and easy to extend.
The Pivot Table sample uses an ASP.NET Core controller to expose REST endpoints for the Pivot Table. The controller uses ApplicationDbContext and EF Core to read and write records. The read action returns the data in the { result, count } format expected by the URL Adaptor, while the insert, update, and delete actions accept CRUDModel<Order> payloads sent by the pivot table.
Create a controller named OrderController in the Controllers folder with the following implementation:
using System.Text.Json.Serialization;
using Microsoft.AspNetCore.Mvc;
using PivotTableMSSQLEFCore.Data;
using PivotTableMSSQLEFCore.Models;
using Syncfusion.Blazor.Data;

namespace PivotTableMSSQLEFCore.Controllers
{
    [ApiController]
    [Route("api/[controller]")]
    public class OrderController : ControllerBase
    {
        private readonly ApplicationDbContext context;

        public OrderController(ApplicationDbContext context)
        {
            this.context = context;
        }

        [HttpPost]
        public object Post([FromBody] DataManagerRequest request)
        {
            _ = request;

            List<Order> dataSource = GetOrderData();

            return new
            {
                result = dataSource,
                count = dataSource.Count
            };
        }

        private List<Order> GetOrderData()
        {
            return context.Orders
                .OrderBy(o => o.OrderID)
                .ToList();
        }

        [HttpPost("Insert")]
        public IActionResult Insert([FromBody] CRUDModel<Order>? value)
        {
            if (value?.Value is not Order order
                || string.IsNullOrWhiteSpace(order.CustomerName)
                || !order.EmployeeID.HasValue)
            {
                return BadRequest(
                    "CustomerName and EmployeeID are required.");
            }

            context.Orders.Add(order);
            context.SaveChanges();

            return Ok(order);
        }

        [HttpPost("Update")]
        public IActionResult Update([FromBody] CRUDModel<Order>? value)
        {
            if (value?.Value is not Order order
                || order.OrderID <= 0
                || string.IsNullOrWhiteSpace(order.CustomerName)
                || !order.EmployeeID.HasValue)
            {
                return BadRequest(
                    "OrderID, CustomerName and EmployeeID are required.");
            }

            Order? existingOrder = context.Orders
                .FirstOrDefault(o => o.OrderID == order.OrderID);

            if (existingOrder == null)
            {
                return NotFound();
            }

            existingOrder.CustomerName = order.CustomerName;
            existingOrder.EmployeeID = order.EmployeeID;
            existingOrder.Freight = order.Freight;
            existingOrder.ShipCity = order.ShipCity;

            context.SaveChanges();

            return Ok(existingOrder);
        }

        [HttpPost("Delete")]
        public IActionResult Delete([FromBody] CRUDModel<Order>? value)
        {
            if (!int.TryParse(value?.Key?.ToString(), out int orderId))
            {
                return BadRequest(
                    "A numeric order key is required.");
            }

            Order? order = context.Orders
                .FirstOrDefault(o => o.OrderID == orderId);

            if (order == null)
            {
                return NotFound();
            }

            context.Orders.Remove(order);
            context.SaveChanges();

            return NoContent();
        }

        public class CRUDModel<T> where T : class
        {
            [JsonPropertyName("action")]
            public string? Action { get; set; }

            [JsonPropertyName("keyColumn")]
            public string? KeyColumn { get; set; }

            [JsonPropertyName("key")]
            public object? Key { get; set; }

            [JsonPropertyName("value")]
            public T? Value { get; set; }

            [JsonPropertyName("added")]
            public List<T>? Added { get; set; }

            [JsonPropertyName("changed")]
            public List<T>? Changed { get; set; }

            [JsonPropertyName("deleted")]
            public List<T>? Deleted { get; set; }

            [JsonPropertyName("params")]
            public IDictionary<string, object>? Params { get; set; }
        }
    }
}
The read action intentionally returns all records because the Pivot Table needs the raw rows for client-side aggregation. The DataManagerRequest is accepted to satisfy the URL Adaptor contract but is not used by this small sample. For a large dataset, do not use this implementation unchanged; design a server-side aggregation or virtualization strategy appropriate to the required Pivot Table features.
The CRUDModel<T> payload uses value for insert and update and key for delete. The URL Adaptor can also send action, keyColumn, and custom params; added, changed, and deleted are used by batch requests, which this Normal edit-mode sample does not support. Successful inserts and updates return the saved entity, successful deletes return HTTP 204, invalid payloads return HTTP 400, and unknown keys return HTTP 404.
The sample lets unexpected DbUpdateException failures reach ASP.NET Core’s exception handler and logs. In a production API, catch database exceptions at an application boundary, log the complete exception, and return a safe Problem Details response. Add a concurrency token if multiple users can edit the same rows.
How Entity Framework Core maps data to C# objects
Entity Framework Core maps rows from the Orders table into the Order class using the DbSet<Order> exposed by ApplicationDbContext. The controller retrieves the data by calling context.Orders and uses LINQ to order the results before materializing them into Order objects.
This means the following table columns:
OrderIDCustomerNameEmployeeIDFreightShipCity
are mapped directly to the corresponding properties of the Order model.
The benefit of this approach is that the controller does not need to manually build a data table or manually map each column. EF Core handles the translation between SQL rows and .NET objects so the application code stays focused on business and UI logic.
Step 9: Configure the Pivot Table with the URL Adaptor
The pivot table binds to the SQL Server-backed API through the SfDataManager configured with Adaptors.UrlAdaptor. The Url, InsertUrl, UpdateUrl, and RemoveUrl properties point at the controller actions created in the previous step.
Open the file named Home.razor in the Components/Pages folder and replace its contents with the following markup:
@page "/"
@using PivotTableMSSQLEFCore.Models
@using Syncfusion.Blazor.Data
@using Syncfusion.Blazor.PivotView

<SfPivotView TValue="Order" Width="1000" Height="300" ShowFieldList="true" AllowDrillThrough="true">
    <PivotViewDataSourceSettings TValue="Order" ExpandAll="false" EnableSorting="true">
        <SfDataManager Url="api/Order"
                       InsertUrl="api/Order/Insert"
                       UpdateUrl="api/Order/Update"
                       RemoveUrl="api/Order/Delete"
                       Adaptor="Adaptors.UrlAdaptor"></SfDataManager>
        <PivotViewColumns>
            <PivotViewColumn Name="EmployeeID"></PivotViewColumn>
        </PivotViewColumns>
        <PivotViewRows>
            <PivotViewRow Name="CustomerName"></PivotViewRow>
        </PivotViewRows>
        <PivotViewValues>
            <PivotViewValue Name="Freight" Caption="Freight"></PivotViewValue>
        </PivotViewValues>
    </PivotViewDataSourceSettings>
    <PivotViewGridSettings ColumnWidth="120"></PivotViewGridSettings>
    <PivotViewEvents TValue="Order" BeginDrillThrough="BeginDrillThrough"></PivotViewEvents>
    <PivotViewCellEditSettings AllowEditing="true" AllowAdding="true" AllowDeleting="true"
                               Mode="EditMode.Normal"></PivotViewCellEditSettings>
</SfPivotView>

@code{
    private void BeginDrillThrough(BeginDrillThroughEventArgs args)
    {
        for (int i = 0; i < args.GridObj.Columns.Count; i++)
        {
            if (args.GridObj.Columns[i].Field == "OrderID")
            {
                args.GridObj.Columns[i].IsPrimaryKey = true;
            }
            else
            {
                args.GridObj.Columns[i].Visible = true;
            }
        }
    }
}
The Home component has been updated successfully with the Pivot Table.
Important implementation details
- Relative URLs such as
api/Orderwork when the Blazor app and API share the same origin. If the API runs on another origin, use the full URL and configure CORS. - The
BeginDrillThroughevent is essential for CRUD because it marksOrderIDas the primary key of the edit dialog grid so update and delete operations can target the correct record. - The field arrangement in
PivotViewDataSourceSettingsdefines the default layout that the Pivot Table uses when it first renders.
Pivot Table editing applies to relational data sources. Double-click a value cell to open its drill-through grid; use that grid’s Add, Edit, Delete, Update, and Cancel commands. See Editing in the Blazor Pivot Table for supported modes and limitations.
Component explanation
-
<SfPivotView TValue="Order">: The pivot table component bound to theOrdertype. -
ShowFieldList="true": Displays the field list UI so end users can drag fields between rows, columns, and values at runtime. -
<PivotViewDataSourceSettings>: Defines the default field arrangement:EmployeeIDas a column,CustomerNameas a row, andFreightas a value. -
<SfDataManager>: Wires the pivot table to the API through the URL Adaptor. The four URLs map directly to the controller actions. -
<PivotViewCellEditSettings>: Enables cell-level editing, adding, and deleting inNormaledit mode. -
BeginDrillThroughevent: When a user opens the edit dialog from a pivot cell, this handler runs and marksOrderIDas the primary key so insert, update, and delete operations can target the correct record.
Step 10: Run the Application
URL note: The sample uses relative URLs such as
api/Orderbecause the API and Blazor app share an origin. If they are hosted on different origins, use absolute API URLs and configure a named CORS policy with the exact Blazor origin by following ASP.NET Core CORS guidance. Register the policy withAddCors, and callUseCorsbeforeMapControllers. Do not useAllowAnyOriginwith credentials.
Build and run the application from the project directory.
dotnet restore
dotnet build
dotnet run
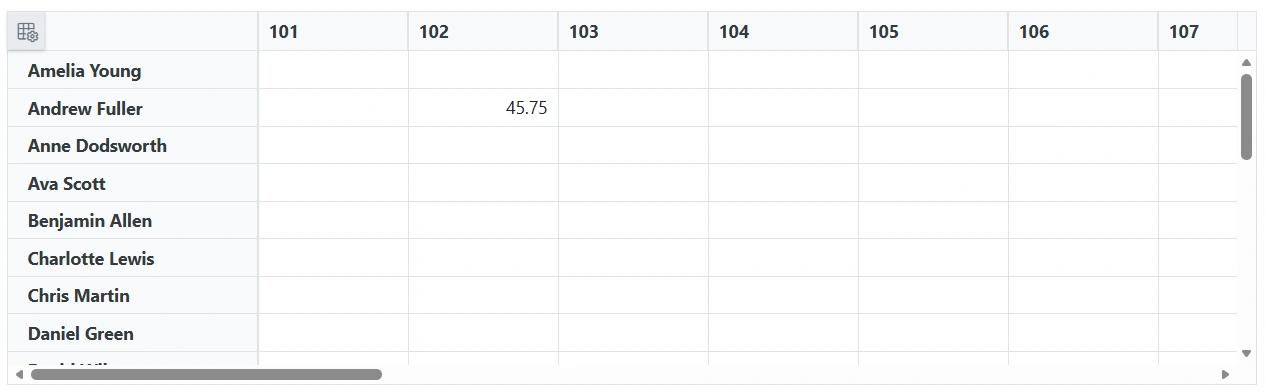
Open the application in your browser and navigate to the local development URL. The Pivot Table loads data from SQL Server through the controller and Entity Framework Core.
Verify the complete flow:
- Confirm that the Pivot Table displays the sample rows as aggregated values.
- Double-click a value cell to open the drill-through grid.
- Add a row, edit it, and then delete it using the grid commands.
- Run the validation query from Step 1 after each operation and confirm that SQL Server contains the expected change.
URL Adaptor Configuration
The URL Adaptor is the contract between the Blazor Pivot Table and the SQL Server-backed API. It works as follows:
- The Pivot Table serializes its current data state into a
DataManagerRequest. - The
SfDataManagerposts that object to theUrlendpoint. - The controller processes the request, uses EF Core to read or change data, and returns the response in the format expected by the Pivot Table.
- For write operations, the Pivot Table posts a
CRUDModel<Order>payload to the matching insert, update, or remove endpoint.
<SfDataManager Url="api/Order"
               InsertUrl="api/Order/Insert"
               UpdateUrl="api/Order/Update"
               RemoveUrl="api/Order/Delete"
               Adaptor="Adaptors.UrlAdaptor">
</SfDataManager>| Property | Purpose | Controller Action |
|---|---|---|
Url |
Reads data from the server | POST /api/Order |
InsertUrl |
Adds a new record | POST /api/Order/Insert |
UpdateUrl |
Updates an existing record | POST /api/Order/Update |
RemoveUrl |
Deletes a record | POST /api/Order/Delete |
API Endpoints
The OrderController exposes the following REST endpoints:
| Method | Route | Payload | Description |
|---|---|---|---|
POST |
/api/Order |
DataManagerRequest |
Returns all order records as { result, count }. |
POST |
/api/Order/Insert |
CRUDModel<Order> |
Inserts a new order into the Orders table. |
POST |
/api/Order/Update |
CRUDModel<Order> |
Updates an existing order filtered by OrderID. |
POST |
/api/Order/Delete |
CRUDModel<Order> |
Deletes an order using the numeric key. |
Sample read response:
{
  "result": [
    { "orderID": 1, "customerName": "Toms", "employeeID": 1, "shipCity": "New York", "freight": 35.30 },
    { "orderID": 2, "customerName": "Ravi", "employeeID": 2, "shipCity": "London", "freight": 80.20 }
  ],
  "count": 2
}
CRUD Operations
The Pivot Table performs CRUD operations through the edit dialog in normal edit mode. Each operation calls the corresponding controller endpoint, which uses Entity Framework Core to persist the change to SQL Server.
The flow is consistent for every action:
- The user edits or adds data in the Pivot Table UI.
- The Pivot Table posts the relevant payload to the controller endpoint.
- The controller validates the payload and uses
ApplicationDbContextto interact with SQL Server. - EF Core executes the appropriate database operation and returns a response to the client.
Data Retrieval Operation
Purpose:
The read operation loads the SQL Server rows into the Pivot Table so the summarized view can render. The controller receives the request from the URL Adaptor and executes a LINQ query through ApplicationDbContext.
Request flow:
- The Pivot Table sends a
DataManagerRequestto theUrlendpoint. - The controller receives the request and calls
GetOrderData(). - EF Core executes the query against the
Orderstable and maps the rows toOrderentities. - The controller returns
{ result, count }to the Pivot Table.
How it works:
The GetOrderData() helper uses the Orders DbSet to query the database in a strongly typed way. The result is materialized as a list of Order objects and returned to the Pivot Table.
Controller code snippet:
private List<Order> GetOrderData()
{
    return context.Orders
        .OrderBy(o => o.OrderID)
        .ToList();
}
This code sample shows how the controller executes the EF Core query, materializes the results into Order entities, and returns them to the Pivot Table.
Insert Operation
Purpose:
The insert operation adds a new order to the SQL Server database from the Pivot Table edit dialog. The request is posted to /api/Order/Insert, where the controller validates the payload and asks EF Core to add the entity.
Request flow:
- The user adds a row in the Pivot Table edit dialog.
- The Pivot Table posts the
CRUDModel<Order>payload to theInsertUrlendpoint. - The controller validates the values and calls
context.Orders.Add(order). - EF Core persists the new record to SQL Server and the Pivot Table refreshes its summarized view.
How it works:
The insert action receives the new row through the value property of the CRUDModel<Order>. The posted object has the default OrderID value; because SQL Server generates this identity column, EF Core omits it from the generated INSERT statement and populates it after SaveChanges(). On success, the action returns the saved entity.
Controller code snippet:
[HttpPost("Insert")]
public IActionResult Insert([FromBody] CRUDModel<Order>? value)
{
    if (value?.Value is not Order order
        || string.IsNullOrWhiteSpace(order.CustomerName)
        || !order.EmployeeID.HasValue)
    {
        return BadRequest(
            "CustomerName and EmployeeID are required.");
    }

    context.Orders.Add(order);
    context.SaveChanges();

    return Ok(order);
}
Update Operation
Purpose:
The update operation modifies an existing order directly from the Pivot Table edit dialog. The request is posted to /api/Order/Update, where the controller locates the entity and applies the changes through EF Core.
Request flow:
- The user edits a row in the edit dialog and saves the change.
- The Pivot Table posts the edited row to the
UpdateUrlendpoint. - The controller loads the tracked entity from
context.Orders, updates its values, and callsSaveChanges(). - SQL Server updates the matching record and the Pivot Table refreshes the aggregated view.
How it works:
The update action uses the edited row from the value property and relies on OrderID as the key to identify the existing record. This is why the drill-through grid must mark OrderID as the primary key before the edit dialog is used. EF Core tracks the entity and generates the appropriate SQL update when SaveChanges() is called.
Controller code snippet:
[HttpPost("Update")]
public IActionResult Update([FromBody] CRUDModel<Order>? value)
{
    if (value?.Value is not Order order
        || order.OrderID <= 0
        || string.IsNullOrWhiteSpace(order.CustomerName)
        || !order.EmployeeID.HasValue)
    {
        return BadRequest(
            "OrderID, CustomerName and EmployeeID are required.");
    }

    Order? existingOrder = context.Orders
        .FirstOrDefault(o => o.OrderID == order.OrderID);

    if (existingOrder == null)
    {
        return NotFound();
    }

    existingOrder.CustomerName = order.CustomerName;
    existingOrder.EmployeeID = order.EmployeeID;
    existingOrder.Freight = order.Freight;
    existingOrder.ShipCity = order.ShipCity;

    context.SaveChanges();

    return Ok(existingOrder);
}
Delete Operation
Purpose:
The delete operation removes an order from the SQL Server table. The Pivot Table posts a key value to /api/Order/Delete, and the controller uses EF Core to remove the entity.
Request flow:
- The user selects a row in the edit dialog and deletes it.
- The Pivot Table posts the primary key to the
RemoveUrlendpoint. - The controller loads the entity and calls
context.Orders.Remove(order). - EF Core deletes the matching row in SQL Server and the Pivot Table refreshes to reflect the change.
How it works:
The delete action receives the primary key in the key property of the CRUDModel<Order>. The controller parses that value, finds the matching entity, removes it from the EF Core context, and commits the change with SaveChanges(). If the key does not match any row, the action returns NotFound.
Controller code snippet:
[HttpPost("Delete")]
public IActionResult Delete([FromBody] CRUDModel<Order>? value)
{
    if (!int.TryParse(value?.Key?.ToString(), out int orderId))
    {
        return BadRequest(
            "A numeric order key is required.");
    }

    Order? order = context.Orders
        .FirstOrDefault(o => o.OrderID == orderId);

    if (order == null)
    {
        return NotFound();
    }

    context.Orders.Remove(order);
    context.SaveChanges();

    return NoContent();
}
Enabling CRUD Through the Edit Dialog
For CRUD operations to work correctly, the primary key column must be marked. The BeginDrillThrough event handler does this dynamically when the edit dialog opens:
private void BeginDrillThrough(BeginDrillThroughEventArgs args)
{
    for (int i = 0; i < args.GridObj.Columns.Count; i++)
    {
        if (args.GridObj.Columns[i].Field == "OrderID")
        {
            args.GridObj.Columns[i].IsPrimaryKey = true;
        }
        else
        {
            args.GridObj.Columns[i].Visible = true;
        }
    }
}
This step is required so the URL Adaptor knows which column to send as the key for update and delete operations.
Troubleshooting
| Symptom | Likely Cause | Resolution |
|---|---|---|
| Pivot Table shows no data | Controller not reachable or API returned an error | Verify the application is running and inspect the browser network panel. |
405 Method Not Allowed on read |
The POST /api/Order action is missing or routed incorrectly |
Confirm OrderController is decorated with [ApiController], the Post action has [HttpPost], and AddControllers() + MapControllers() are present in Program.cs. |
SqlException or Cannot connect to server
|
SQL Server is not running or configuration is wrong | Start the SQL Server service and confirm the Server, Database, User Id, and Password values in the connection string. |
Invalid object name 'Orders' |
Table not created or wrong database | Run the SQL script in Step 1 against the OrderDB database. |
| Insert/Update/Delete does nothing | The drill-through grid is not sending a valid primary key | Confirm that BeginDrillThrough sets the OrderID grid column’s IsPrimaryKey property and inspect the outgoing payload. |
| CRUD changes do not persist | Validation or database command failed | Inspect the API response and server logs; verify required fields and table permissions. |
DbUpdateException on save |
SQL Server rejected the insert, update, or delete | Inspect the inner exception and verify column types, nullability, identity settings, and table permissions. |
Login failed for user '<USER_ID>' |
SQL Server login not mapped to a database user, or wrong credentials | Verify the SQL Server login exists and has the required permissions on OrderDB.Orders. |
| Syncfusion license warning | The license key is missing, invalid, or registered too late | Set SyncfusionLicenseKey and register it before calling AddSyncfusionBlazor(). |
| Browser reports a CORS error | The API is on another origin without an allowed-origin policy | Add a named CORS policy for the exact Blazor origin and call UseCors before mapping controllers. |
| API returns HTTP 400 | The URL Adaptor payload failed validation or deserialization | Inspect the response body and browser network payload; verify property names, types, and required values. |
| API returns an antiforgery error | Antiforgery validation was added to the API without a token in the request | Either supply the antiforgery token from the client or apply validation only to endpoints designed for it. |
Complete Sample Repository
A complete sample implementation is available in the GitHub repository. Verify package versions in the repository before comparing it with this article.
Summary
This guide demonstrates how to:
- Create a SQL Server database with order records using SQL Server Management Studio.
- Create the Blazor Web App and install the Syncfusion and Entity Framework Core packages.
- Configure the connection string in
appsettings.jsonand read it through the EF Core service registration. - Implement an
OrderControllerwith read and CRUD endpoints using Entity Framework Core. - Register Syncfusion Blazor services, Razor components, and EF Core in
Program.cs. - Configure the Pivot Table with
SfDataManagerandAdaptors.UrlAdaptor. - Run the application and verify the Pivot Table with the troubleshooting steps.
The application now provides a complete sample for summarizing and editing SQL Server data with a modern Pivot Table interface using Entity Framework Core.