Getting Started
5 Mar 20213 minutes to read
This section helps to understand the getting started of the AutoComplete widget with the step-by-step instructions. Before going to getting started with Autocomplete widget please refer Getting Started with Syncfusion EmberJS application to know how to create simple Essential EmberJS application.
If you want to know individual script reference to create Autocomplete Please Refer under [Requires] (https://help.syncfusion.com/api/js/ejautocomplete)
Create an AutoComplete
- Use below code in
default.hbsin templates folder to render the Autocomplete widget.
<div class="e-control">

        {{ej-autocomplete id="autocomplete"}}

</div>- Use the below code in
default.jsin routes folder to bind the model to the Autocomplete and initialize widget.
export default Ember.Route.extend({
         model(){
          return { }
               }
          });
Data binding
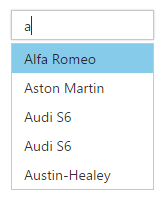
The data for the suggestion list can be populated using the e-dataSource property.
See Also
export default Ember.Route.extend({
         model(){
          return {
            dataSource: [
                   "Anemone Galilee", "Allium drumstick", "Artichoke thistle",
                   "Boronia ", "Bouvardia", "Blue lace flower", "Bird of paradise",
                   "Cone flower", "Cosmos", "Calla lily white", "Common Yarrow",
                   "Dahlia", "Daffodil", "Eucalyptus seeded", "Freesia", "Foxtail fern", "Feverfew",
                   "Godetia", "Gardenia", "Gayfeather", "Heather", "Hydrangea","Ivy",
                   "Japhette orchid", "Kangaroo paw yellow","Lace fern", "Lumex", "Lavender" ]
            }
           }
        });
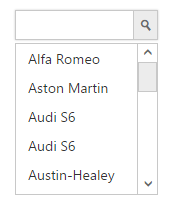
Enable Popup Button
This button helps you to show all the available suggestions by clicking on it instead of the search text.
<div class="e-control">

    {{ej-autocomplete id="autocomplete" e-dataSource=model.dataSource e-showPopupButton=true}}

	</div>