Getting Started with Syncfusion Document SDK AI Agent Tool Library
24 Jul 202619 minutes to read
The Syncfusion Document SDK AI Agent Tool library exposes Word, Excel, PDF, PowerPoint, and Smart Data Extractor operations as AI-callable tools. It integrates with the Microsoft Agent Framework and works with any IChatClient provider, such as OpenAI, Claude, or Gemini.
Document Manager Modes
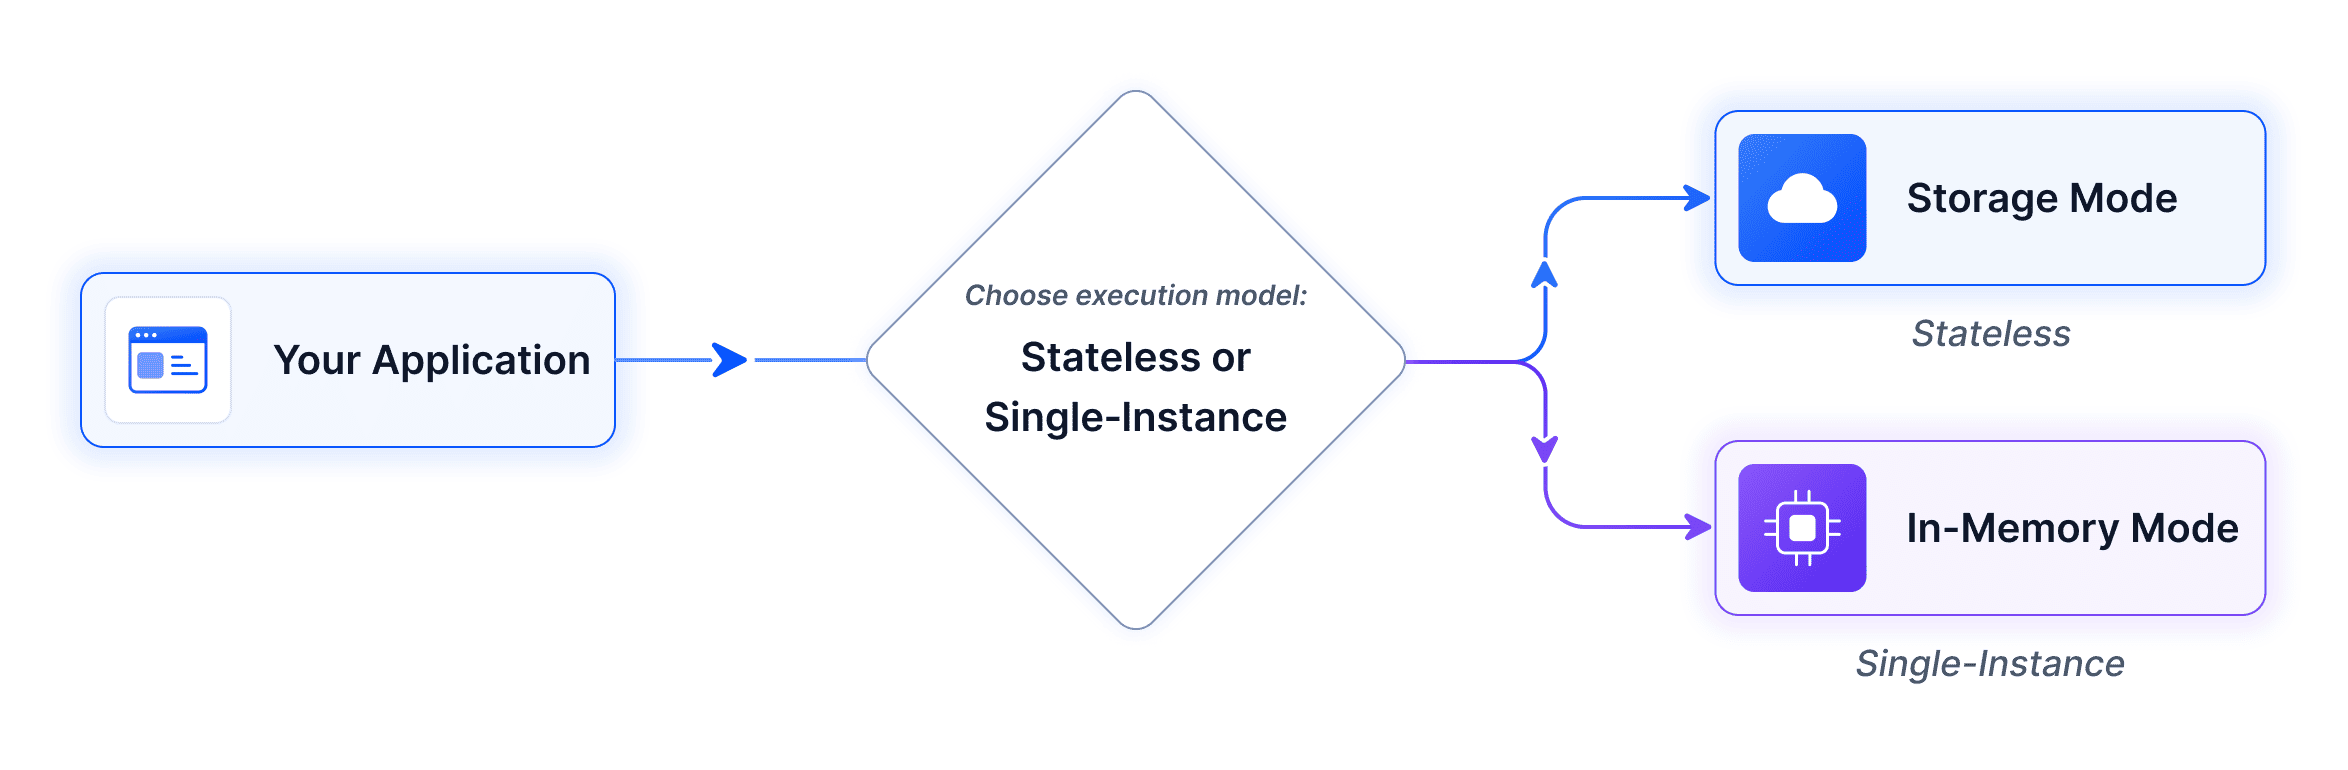
The library supports two modes for managing document state during agent tool invocations. Both modes expose the same AI agent tools; the difference is in how and where documents are stored between tool calls.
The diagram below shows the two available execution paths. The application always interacts with the AI agent; the AI agent invokes the registered tools, and the tools read and write documents either through the in-memory managers or through the storage back end.
Use the table below to choose the appropriate mode for your application and follow the corresponding guide.
| Use Cases | Execution Mode |
|---|---|
|
In-Memory |
|
Storage |
In-Memory Mode
Documents are held as live objects in an in-memory dictionary. Each tool accesses and modifies the object directly without opening or saving files on each call. Unused documents are cleaned up automatically after a configurable timeout (default: 10 minutes).
The example below uses the Microsoft Agents Framework with OpenAI. The same steps apply to any provider that implements IChatClient.
Prerequisites
| Requirement | Details |
|---|---|
| .NET SDK | .NET 8.0 or later |
| AI Provider API Key | Required to authenticate requests to the AI provider. This page uses OpenAI. |
| NuGet Packages | Microsoft.Agents.AI.OpenAI |
Integration
Step 1: Install and License
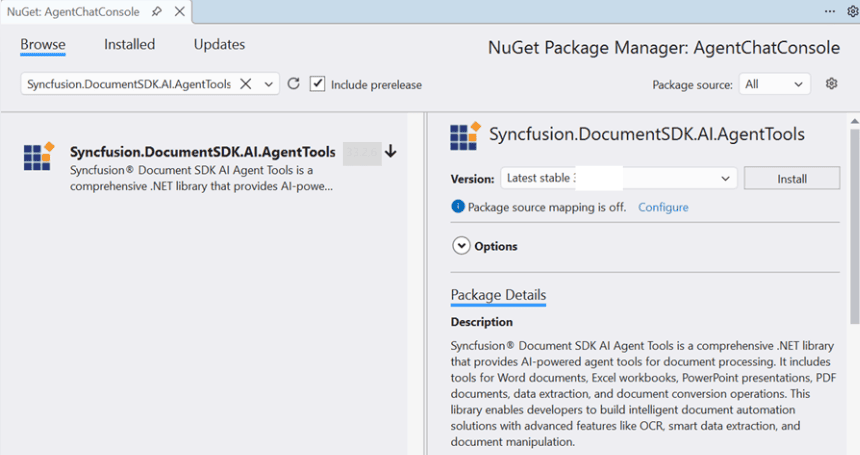
Install the Syncfusion.DocumentSDK.AI.AgentTools NuGet package, then register your license key at application startup:
After the packages are installed, register your license key at application startup:
string? licenseKey = Environment.GetEnvironmentVariable("SYNCFUSION_LICENSE_KEY");
if (!string.IsNullOrEmpty(licenseKey))
    Syncfusion.Licensing.SyncfusionLicenseProvider.RegisterLicense(licenseKey);
Step 2: Create Managers and Collection
Create one document manager per supported document type (DocumentType.Word, DocumentType.Excel, DocumentType.PDF, DocumentType.PowerPoint). The timeout controls how long an unused document stays in memory before automatic eviction (default in samples: 5 minutes; library default: 10 minutes). Register all managers in a DocumentManagerCollection so cross-format tools (such as OfficeToPdfAgentTools) can resolve the correct manager at runtime:
using Syncfusion.AI.AgentTools.Core;
using Syncfusion.AI.AgentTools.Word;
using Syncfusion.AI.AgentTools.Excel;
using Syncfusion.AI.AgentTools.PDF;
using Syncfusion.AI.AgentTools.PowerPoint;

var timeout = TimeSpan.FromMinutes(5);
var wordManager         = new WordDocumentManager(timeout);
var excelManager        = new ExcelWorkbookManager(timeout);
var pdfManager          = new PdfDocumentManager(timeout);
var presentationManager = new PresentationManager(timeout);

var repoCollection = new DocumentManagerCollection();
repoCollection.AddManager(DocumentType.Word,       wordManager);
repoCollection.AddManager(DocumentType.Excel,      excelManager);
repoCollection.AddManager(DocumentType.PDF,        pdfManager);
repoCollection.AddManager(DocumentType.PowerPoint, presentationManager);
NOTE
Tools that operate on a single document type are initialized directly with their own manager. Only cross-format tools like OfficeToPdfAgentTools require the DocumentManagerCollection.
NOTE
Each manager is thread-safe. When the application shuts down, dispose the
DocumentManagerCollection(or callDisposeon each manager) to release the in-memory objects immediately rather than waiting for the eviction timer.
Step 3: Instantiate Tools
Initialize each tool class with its manager and call GetTools() to collect AITool objects:
using Syncfusion.AI.AgentTools.DataExtraction;
using Syncfusion.AI.AgentTools.OfficeToPDF;
using AITool = Syncfusion.AI.AgentTools.Core.AITool;

string outputDir = Environment.GetEnvironmentVariable("OUTPUT_DIR") ?? @"D:\Output";
Directory.CreateDirectory(outputDir);

var allTools = new List<AITool>();

// Word tools
allTools.AddRange(new WordDocumentAgentTools(wordManager, outputDir).GetTools());
allTools.AddRange(new WordOperationsAgentTools(wordManager).GetTools());
allTools.AddRange(new WordSecurityAgentTools(wordManager).GetTools());

// Excel tools
allTools.AddRange(new ExcelWorkbookAgentTools(excelManager, outputDir).GetTools());
allTools.AddRange(new ExcelWorksheetAgentTools(excelManager).GetTools());
allTools.AddRange(new ExcelSecurityAgentTools(excelManager).GetTools());

// PDF tools
allTools.AddRange(new PdfDocumentAgentTools(pdfManager, outputDir).GetTools());
allTools.AddRange(new PdfOperationsAgentTools(pdfManager).GetTools());
allTools.AddRange(new PdfSecurityAgentTools(pdfManager).GetTools());

// PowerPoint tools
allTools.AddRange(new PresentationDocumentAgentTools(presentationManager, outputDir).GetTools());
allTools.AddRange(new PresentationOperationsAgentTools(presentationManager).GetTools());
allTools.AddRange(new PresentationSecurityAgentTools(presentationManager).GetTools());

// Conversion and data extraction
allTools.AddRange(new OfficeToPdfAgentTools(repoCollection, outputDir).GetTools());
allTools.AddRange(new DataExtractionAgentTools(outputDir).GetTools());
NOTE
Register only the tool classes your app needs. See the full list in the Tools Reference.
Step 4: Convert and Register Tools
Wrap each Syncfusion.AI.AgentTools.Core.AITool into a framework-compatible function using AIFunctionFactory.Create. The AIFunctionFactoryOptions class accepts Name, Description, and AdditionalProperties; for the full list see the AIFunctionFactoryOptions API reference.
using Microsoft.Extensions.AI;

var aiTools = allTools
    .Select(t => AIFunctionFactory.Create(
        t.Method,
        t.Instance,
        new AIFunctionFactoryOptions { Name = t.Name, Description = t.Description }))
    .Cast<Microsoft.Extensions.AI.AITool>()
    .ToList();
NOTE
AI agents support a maximum of 128 tools. Register only the tools relevant to your scenario; group them by document type and drop the ones your app will never need.
Step 5: Define the System Prompt
The system prompt sets the rules for how the agent works: which folders to read from, which folders to write to, and how to call the registered tools. The following example is the minimum viable version:
static string BuildSystemPrompt(string inputDir, string outputDir) =>
    $"""
    You are a document-processing agent with access to Syncfusion Document SDK tools.

    - Read input files from:  {inputDir}
    - Write output files to: {outputDir}
    - When you produce a file, always include its full path in the final reply.
    - If a tool call fails, surface the error message verbatim and stop.
    """;
For the full production prompt used by the console sample, see the AgentChatConsole sample on GitHub.
Step 6: Build the Agent
Create the agent with the chat client, system prompt, and registered tools:
using Microsoft.Agents.AI;
using OpenAI;

string apiKey    = Environment.GetEnvironmentVariable("OPENAI_API_KEY")!;
string model     = Environment.GetEnvironmentVariable("OPENAI_MODEL") ?? "gpt-4o";
string inputDir  = Environment.GetEnvironmentVariable("INPUT_DIR")  ?? @"D:\Input";
string outputDir = Environment.GetEnvironmentVariable("OUTPUT_DIR") ?? @"D:\Output";

AIAgent agent = new OpenAIClient(apiKey)
    .GetChatClient(model)
    .AsIChatClient()
    .AsAIAgent(
        instructions: BuildSystemPrompt(inputDir, outputDir),
        tools: aiTools);
The system prompt sets the rules for how the agent works. For the full system prompt, see here.
Complete Example
You can download a complete working sample from GitHub.
Storage Mode
Documents are read from and written to storage (Azure Blob, S3, local disk, etc.) on each tool invocation. No in-memory objects are maintained between tool calls - each operation opens the document from storage, processes it, and saves it back. This mode is ideal for distributed systems, serverless architectures, and scenarios where document persistence is required.
The example below uses Azure Blob Storage. The same pattern works with any storage back end by implementing the IDocumentStorage interface.
Prerequisites
| Requirement | Details |
|---|---|
| .NET SDK | .NET 8.0, 9.0, or 10.0 |
| AI Provider API Key | Required to authenticate requests to the AI provider. This page uses OpenAI. |
| Azure Storage Account | Create from Azure Portal with a blob container |
| NuGet Packages | Microsoft.Agents.AI.OpenAI, Azure.Storage.Blobs |
The package compatibility table at the top of the In-Memory Mode section also applies here.
Integration
Step 1: Install and License
Install the Syncfusion.DocumentSDK.AI.AgentTools NuGet package, then register your license key at application startup:
string? licenseKey = Environment.GetEnvironmentVariable("SYNCFUSION_LICENSE_KEY");
if (!string.IsNullOrEmpty(licenseKey))
    Syncfusion.Licensing.SyncfusionLicenseProvider.RegisterLicense(licenseKey);
Step 2: Implement Storage
Implement IDocumentStorage for your storage back end. The interface contract is:
| Method | Returns | Contract |
|---|---|---|
Read(string filePath) |
Stream |
Returns a readable stream positioned at the start. The caller owns the stream and is responsible for disposing it. |
Write(string filePath, Stream documentStream) |
bool |
Returns true on success, false on failure. The stream’s position is not modified by the call. |
Exists(string filePath) |
bool |
Returns true if the file is present in storage, otherwise false. |
Below is the class signature and method placeholders for Azure Blob Storage. You can download a complete working sample from GitHub.
using Azure.Storage.Blobs;
using Azure.Storage.Blobs.Models;
using Syncfusion.AI.AgentTools.Core;

public class AzureBlobStorage : IDocumentStorage
{
    private readonly BlobContainerClient _containerClient;

    public AzureBlobStorage(string connectionString, string containerName)
    {
        _containerClient = new BlobContainerClient(connectionString, containerName);
        _containerClient.CreateIfNotExists(PublicAccessType.None);
    }

    public Stream Read(string filePath)
    {
        ArgumentException.ThrowIfNullOrEmpty(filePath);
        var blob = _containerClient.GetBlobClient(filePath);
        var ms = new MemoryStream();
        blob.DownloadTo(ms);
        ms.Position = 0;
        return ms;
    }

    public bool Write(string filePath, Stream documentStream)
    {
        ArgumentException.ThrowIfNullOrEmpty(filePath);
        ArgumentNullException.ThrowIfNull(documentStream);
        try
        {
            documentStream.Position = 0;
            var blob = _containerClient.GetBlobClient(filePath);
            blob.Upload(documentStream, overwrite: true);
            return true;
        }
        catch
        {
            return false;
        }
    }

    public bool Exists(string filePath)
    {
        ArgumentException.ThrowIfNullOrEmpty(filePath);
        return _containerClient.GetBlobClient(filePath).Exists();
    }
}
Then initialize it with your connection string and container:
string connectionString = Environment.GetEnvironmentVariable("AZURE_BLOB_CONNECTION_STRING")!;
string containerName    = Environment.GetEnvironmentVariable("AZURE_BLOB_CONTAINER") ?? "documents";

IDocumentStorage storage = new AzureBlobStorage(connectionString, containerName);
NOTE
The example above uses a connection string for simplicity. For production deployments, prefer Managed Identity (
DefaultAzureCredential) or a SAS token over a shared key to reduce credential exposure.
NOTE
For other storage providers (AWS S3, local disk, etc.), implement the same IDocumentStorage interface with the appropriate SDK or file system operations.
Step 3: Create DocumentStorageManager
In-Memory Mode uses separate managers per document type. Storage Mode instead uses a single DocumentStorageManager for all document types. The DocumentStorageManager reads and writes through the IDocumentStorage instance on every tool call, so no in-memory document objects are retained between calls.
using Syncfusion.AI.AgentTools.DocumentManagers;

var storageManager = new DocumentStorageManager(storage);
Step 4: Instantiate Tools
Initialize each tool class with the storage manager and collect AITool objects:
using Syncfusion.AI.AgentTools.Word;
using Syncfusion.AI.AgentTools.Excel;
using Syncfusion.AI.AgentTools.PDF;
using Syncfusion.AI.AgentTools.PowerPoint;
using Syncfusion.AI.AgentTools.OfficeToPDF;
using Syncfusion.AI.AgentTools.DataExtraction;
using AITool = Syncfusion.AI.AgentTools.Core.AITool;

var allTools = new List<AITool>();

// Word tools
allTools.AddRange(new WordImportExportAgentTools(storageManager).GetTools());
allTools.AddRange(new WordOperationsAgentTools(storageManager).GetTools());
allTools.AddRange(new WordSecurityAgentTools(storageManager).GetTools());

// Excel tools
allTools.AddRange(new ExcelWorksheetAgentTools(storageManager).GetTools());
allTools.AddRange(new ExcelSecurityAgentTools(storageManager).GetTools());
allTools.AddRange(new ExcelDataValidationAgentTools(storageManager).GetTools());

// PDF tools
allTools.AddRange(new PdfOperationsAgentTools(storageManager).GetTools());
allTools.AddRange(new PdfSecurityAgentTools(storageManager).GetTools());
allTools.AddRange(new PdfContentExtractionAgentTools(storageManager).GetTools());

// PowerPoint tools
allTools.AddRange(new PresentationOperationsAgentTools(storageManager).GetTools());
allTools.AddRange(new PresentationSecurityAgentTools(storageManager).GetTools());
allTools.AddRange(new PresentationContentAgentTools(storageManager).GetTools());
allTools.AddRange(new PresentationFindAndReplaceAgentTools(storageManager).GetTools());

// Conversion and data extraction
allTools.AddRange(new OfficeToPdfAgentTools(storageManager).GetTools());
allTools.AddRange(new DataExtractionAgentTools().GetTools());
NOTE
The following tool classes are not supported in Storage mode because they require an in-memory document instance:
All other tool classes work identically in both modes. The fully qualified
Syncfusion.AI.AgentTools.Core.AIToolis used directly to avoid CS0436 ambiguity withMicrosoft.Extensions.AI.AITool. Register only the tool classes your app needs. See the full list in the Tools Reference.
Step 5: Convert and Register Tools
Wrap each Syncfusion.AI.AgentTools.Core.AITool into a framework-compatible function using AIFunctionFactory.Create. The AIFunctionFactoryOptions class accepts Name, Description, and AdditionalProperties; for the full list see the AIFunctionFactoryOptions API reference.
using Microsoft.Extensions.AI;

var aiTools = allTools
    .Select(t => AIFunctionFactory.Create(
        t.Method,
        t.Instance,
        new AIFunctionFactoryOptions { Name = t.Name, Description = t.Description }))
    .Cast<Microsoft.Extensions.AI.AITool>()
    .ToList();
NOTE
AI agents support a maximum of 128 tools. Register only the tools relevant to your scenario.
Step 6: Define the System Prompt
The system prompt sets the rules for how the agent works. In Storage Mode the inputDir and outputDir parameters are logical folder prefixes inside the blob container (for example, input/ and output/), not local file system paths.
static string BuildSystemPrompt(string inputDir, string outputDir) =>
    $"""
    You are a document-processing agent with access to Syncfusion Document SDK tools.

    - Read input files from:  {inputDir}
    - Write output files to: {outputDir}
    - When you produce a file, always include its full path in the final reply.
    - If a tool call fails, surface the error message verbatim and stop.
    """;
For the full production prompt used by the ASP.NET Core sample, see the AgentChatWeb sample on GitHub.
Step 7: Build the Agent
Create the agent with the chat client, system prompt, and registered tools:
using Microsoft.Agents.AI;
using OpenAI;

string apiKey = Environment.GetEnvironmentVariable("OPENAI_API_KEY")!;
string model  = Environment.GetEnvironmentVariable("OPENAI_MODEL") ?? "gpt-4o";

AIAgent agent = new OpenAIClient(apiKey)
    .GetChatClient(model)
    .AsIChatClient()
    .AsAIAgent(
        instructions: BuildSystemPrompt(@"Input\", @"Output\"),
        tools: aiTools);
The system prompt sets the rules for how the agent works. For the full system prompt, see here.
Complete Example
You can download a complete working sample from GitHub.