Getting Started with ASP.NET Core Diagram
This section briefly explains how to include the ASP.NET Core Diagram control in your ASP.NET Web App using Visual Studio and Visual Studio Code.
Ready to streamline your ASP.NET Core development? Discover the full potential of ASP.NET Core controls with AI Coding Assistant. Effortlessly integrate, configure, and enhance your projects with intelligent, context-aware code suggestions, streamlined setups, and real-time insights—all seamlessly integrated into your preferred AI-powered IDEs like Visual Studio, Visual Studio Code, Cursor, CodeStudio and more. Explore AI Coding Assistant
Create an ASP.NET Core Web App with Razor Pages
Create an ASP.NET Core Web App using Visual Studio via Microsoft Templates or the ASP.NET Core Extension.
Run the following command to create a new ASP.NET Core Web App.
dotnet new webapp -o MyDiagramApp
code -r MyDiagramApp
Alternatively, create an ASP.NET Core Web App using Visual Studio Code via Microsoft Templates or the ASP.NET Core Extension, or the C# Dev Kit extension.
Install the required ASP.NET Core packages
Install the Syncfusion.AspNetCore.Diagram and Syncfusion.AspNetCore.Themes NuGet packages. All Syncfusion ASP.NET Core packages are available on nuget.org. See the NuGet packages topic for details.
- Go to Tools → NuGet Package Manager → Manage NuGet Packages for Solution.
- Search the required NuGet packages (
Syncfusion.AspNetCore.DiagramandSyncfusion.AspNetCore.Themes) and install them.
Alternatively, you can install the same packages using the Package Manager Console with the following commands.
Install-Package Syncfusion.AspNetCore.Diagram -Version 35.1.37
Install-Package Syncfusion.AspNetCore.Themes -Version 35.1.37
Open the terminal and run the following commands.
dotnet add package Syncfusion.AspNetCore.Diagram --version 35.1.37
dotnet add package Syncfusion.AspNetCore.Themes --version 35.1.37
Add ASP.NET Core tag helpers
After the packages are installed, open the ~/Pages/_ViewImports.cshtml file and import the Syncfusion.AspNetCore.Diagram and Syncfusion.AspNetCore.Base tag helpers.
@addTagHelper *, Syncfusion.AspNetCore.Diagram
@addTagHelper *, Syncfusion.AspNetCore.Base
Add stylesheet and script references
The theme stylesheet and script can be referenced from NuGet through Static Web Assets. Include the stylesheet and script references inside the <head> of ~/Pages/Shared/_Layout.cshtml file.
<head>
    ...
    <link rel="stylesheet" href="_content/Syncfusion.AspNetCore.Themes/styles/fluent2.css" />
    <script src="_content/Syncfusion.AspNetCore.Diagram/scripts/sf-diagram.min.js"></script>
</head>
Register the script manager
Open the ~/Pages/Shared/_Layout.cshtml file and register the script manager (<ejs-scripts>) at the end of the <body> element as shown below.
<body>
    ...
    <!-- Syncfusion ASP.NET Core Script Manager -->
    <ejs-scripts></ejs-scripts>
</body>
Add the ASP.NET Core Diagram control
Add the ASP.NET Core Diagram control in the ~/Pages/Index.cshtml file.
@page
@model IndexModel

<ejs-diagram id="diagram" width="100%" height="580px"></ejs-diagram>
The ASP.NET Core Diagram control must have a valid height. If the height is not set, the Diagram canvas may not be visible.
Step 7: Create your first Diagram with nodes and connectors
This section explains how to create a simple flowchart by adding nodes, customizing their appearance, and connecting them using connectors.
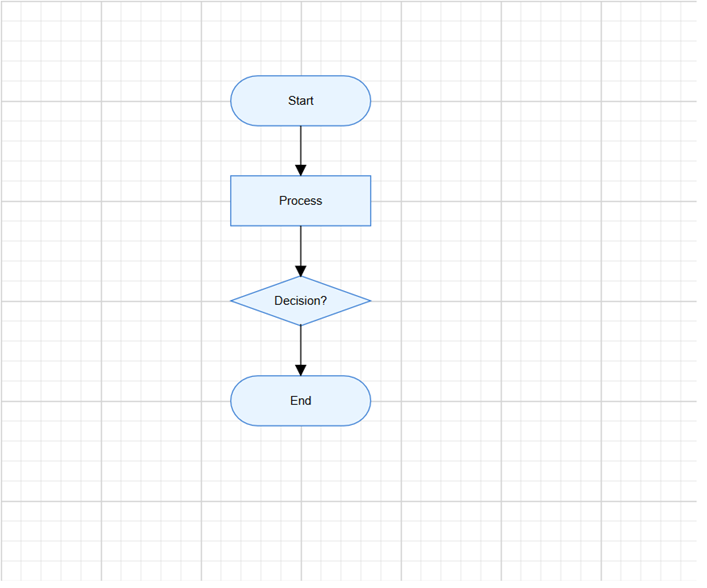
The following example creates a flowchart with four nodes: Start, Process, Decision, and End. Nodes and connectors are defined in Index.cshtml.cs as public properties on the page model and accessed in the view via @Model. The view then binds them to the <ejs-diagram> tag helper.
Define nodes and connectors
Open ~/Pages/Index.cshtml.cs and declare nodes and connectors as public properties on the page model. Populate them inside the OnGet method so they are available to the view when the page loads.
using Microsoft.AspNetCore.Mvc.RazorPages;
using Syncfusion.EJ2.Diagrams;
using System.Collections.Generic;

public class IndexModel : PageModel
{
    public List<DiagramNode> nodes { get; set; }
    public List<DiagramConnector> connectors { get; set; }

    public void OnGet()
    {
        // Define nodes
        nodes = new List<DiagramNode>()
        {
            new DiagramNode()
            {
                Id = "node1", OffsetX = 300, OffsetY = 100,
                Shape = new { type = "Flow", shape = "Terminator" },
                Annotations = new List<DiagramNodeAnnotation>()
                {
                    new DiagramNodeAnnotation() { Content = "Start" }
                }
            },
            new DiagramNode()
            {
                Id = "node2", OffsetX = 300, OffsetY = 200,
                Shape = new { type = "Flow", shape = "Process" },
                Annotations = new List<DiagramNodeAnnotation>()
                {
                    new DiagramNodeAnnotation() { Content = "Process" }
                }
            },
            new DiagramNode()
            {
                Id = "node3", OffsetX = 300, OffsetY = 300,
                Shape = new { type = "Flow", shape = "Decision" },
                Annotations = new List<DiagramNodeAnnotation>()
                {
                    new DiagramNodeAnnotation() { Content = "Decision?" }
                }
            },
            new DiagramNode()
            {
                Id = "node4", OffsetX = 300, OffsetY = 400,
                Shape = new { type = "Flow", shape = "Terminator" },
                Annotations = new List<DiagramNodeAnnotation>()
                {
                    new DiagramNodeAnnotation() { Content = "End" }
                }
            }
        };

        // Define connectors
        connectors = new List<DiagramConnector>()
        {
            new DiagramConnector() { Id = "connector1", SourceID = "node1", TargetID = "node2" },
            new DiagramConnector() { Id = "connector2", SourceID = "node2", TargetID = "node3" },
            new DiagramConnector() { Id = "connector3", SourceID = "node3", TargetID = "node4" }
        };
    }
}
Bind the data
To render the diagram using data from the model, bind @Model.nodes and @Model.connectors to the <ejs-diagram> tag helper. When specifying JavaScript callback functions such as getNodeDefaults and getConnectorDefaults, pass the function names as string variables from the Razor @{ } block.
@page
@model IndexModel
@{
    var getNodeDefaults = "getNodeDefaults";
    var getConnectorDefaults = "getConnectorDefaults";
}
<ejs-diagram id="diagram" width="100%" height="580px"
             nodes="@Model.nodes"
             connectors="@Model.connectors"
             getNodeDefaults="getNodeDefaults"
             getConnectorDefaults="getConnectorDefaults">
</ejs-diagram>

<script>
    function getNodeDefaults(node) {
        node.width = 140;
        node.height = 50;
        node.style = {
            fill: '#E8F4FF',
            strokeColor: '#357BD2'
        };
        return node;
    }

    function getConnectorDefaults(connector) {
        connector.type = 'Orthogonal';
        connector.targetDecorator = {
            shape: 'Arrow',
            width: 10,
            height: 10
        };
        return connector;
    }
</script>
In this example:
-
nodesandconnectorsare public properties onIndexModel, populated inOnGet()and accessed in the view via@Model. -
OffsetXandOffsetYdefine the position of each node. -
Shapesets the flowchart shape type, such asTerminator,Process, orDecision. -
Annotationsadds a text label inside each node using theContentproperty. -
SourceIDandTargetIDconnect one node to another. -
getNodeDefaultsapplies common width, height, fill color, and stroke color to all nodes. -
getConnectorDefaultsapplies common connector settings such as orthogonal routing and target arrows.
Run the application
Press Ctrl+F5 (Windows) or ⌘+F5 (macOS) to launch the application. The ASP.NET Core Diagram control will render in your default web browser.
Open the terminal and run the following command.
dotnet run