How can I help you?
Skills in Code Studio
15 May 20265 minutes to read
Overview
Skills let you extend Code Studio with reusable, task-focused capabilities packaged as a structured folder. Each Skill bundles a SKILL.md file alongside any supporting assets—scripts, templates, and examples—that Code Studio loads when the Skill becomes relevant.
Unlike one-off instructions or prompts, Skills encapsulate complete workflows: testing routines, deployment steps, debugging procedures, UI generation patterns, or domain-specific automation. Skills are portable and work across any skills-compatible agent.
When to Use
Use Skills when you need to:
- Standardize a multi-step workflow that you repeat across projects (for example, a testing routine or a code-review checklist).
- Share team-wide AI workflows by storing Skills in the repository under version control.
- Automate domain-specific tasks—such as security scanning, UI generation, or documentation generation—without re-entering the same context in every chat session.
- Override or supplement default AI behavior for a specific class of tasks.
- Create portable capabilities that work across different AI tools, not just Code Studio.
Steps to Create a Skill
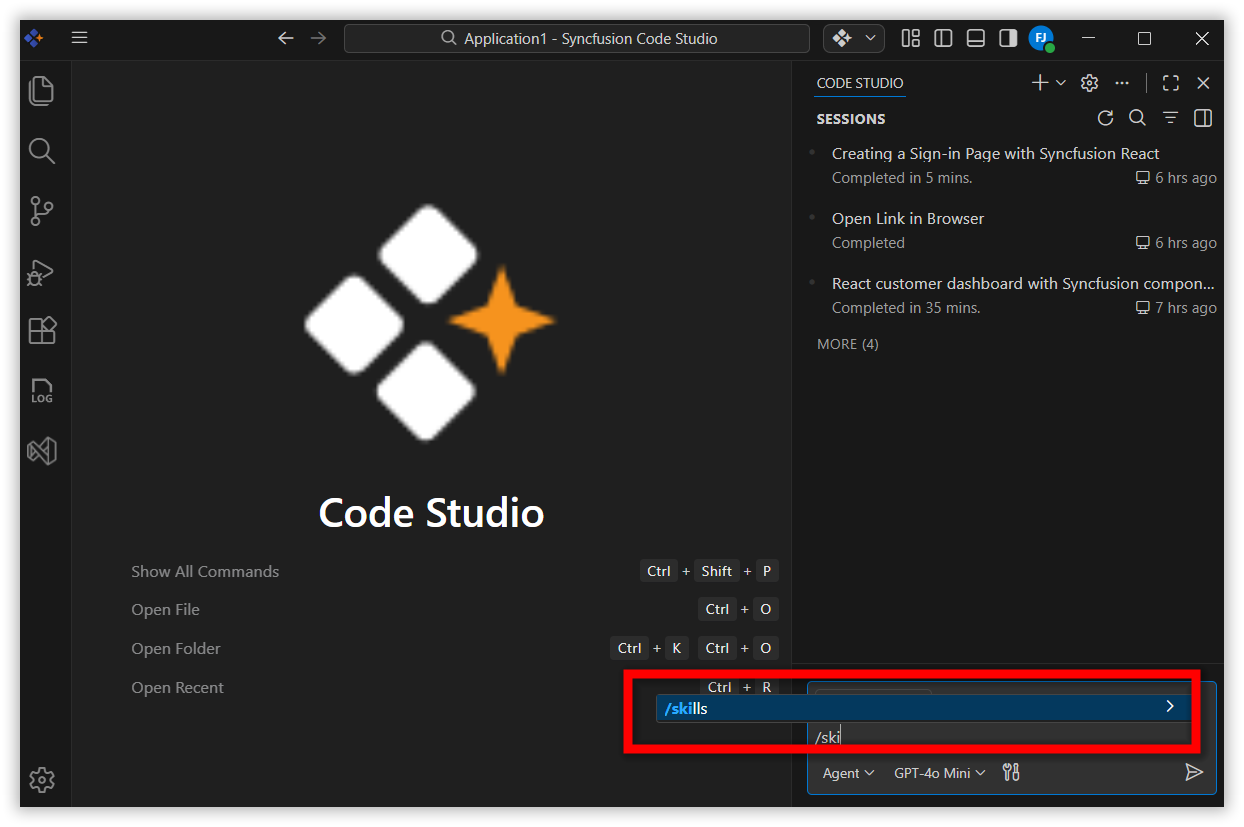
Tip: Type
/skillsin the chat input to quickly open the Configure Skills menu.
Skills are stored in directories with a SKILL.md file. Code Studio supports two storage scopes:
| Scope | Supported paths |
|---|---|
| Project Skills (stored in the repository) |
.codestudio/skills/, .github/skills/, .claude/skills/, .agents/skills/
|
| Personal Skills (stored in your user profile) |
~/.codestudio/skills/, ~/.copilot/skills/, ~/.claude/skills/, ~/.agents/skills/
|
Step 1: Open the Skills Menu
Open your project in Code Studio. Open the chat box and type /skills in the chat input.
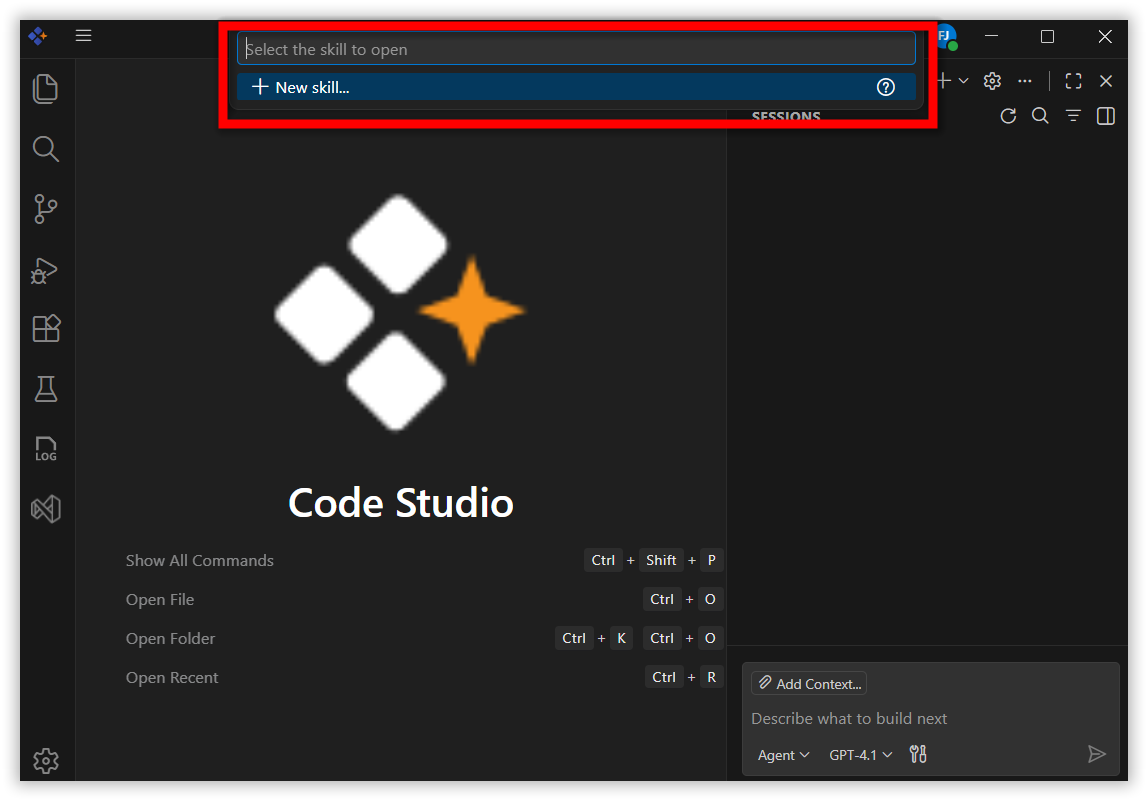
Step 2: Create a New Skill
Click + New Skill from the command palette.
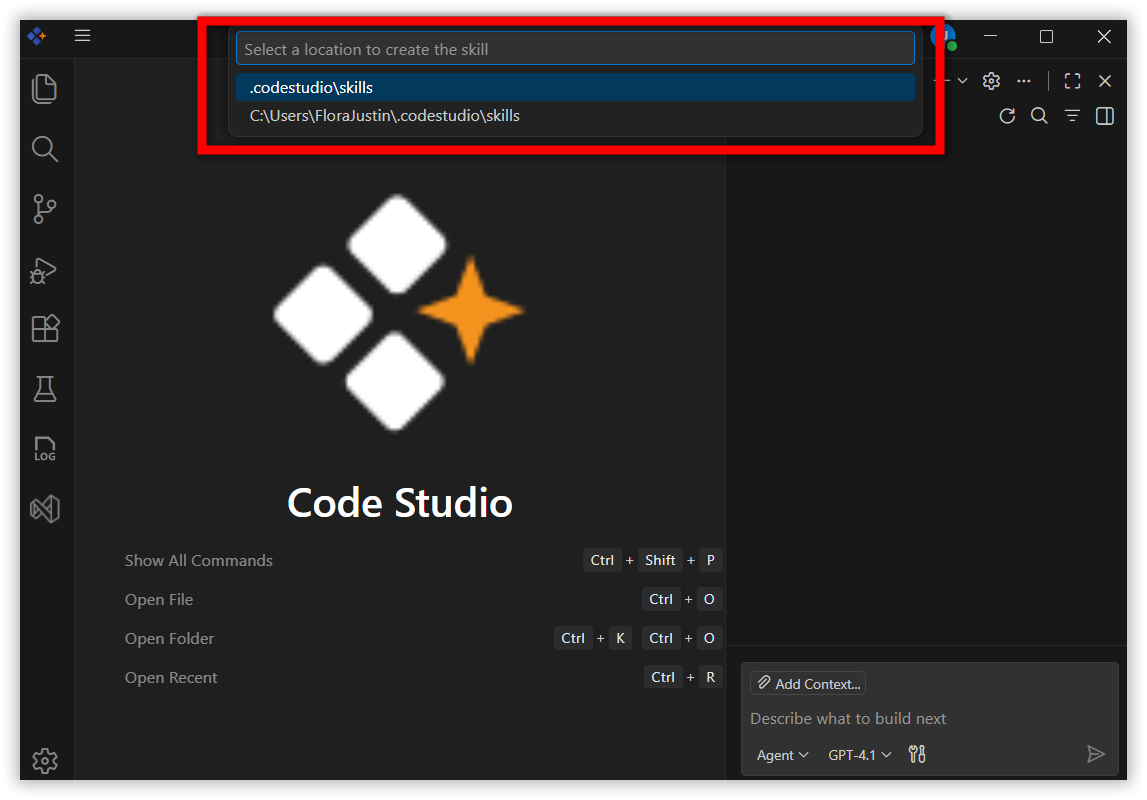
Step 3: Choose the Save Location
Select where to store your Skill:
| Location | Where it is saved | Who can use it |
|---|---|---|
| Project Skills | Inside the repository | Anyone with repository access |
| Personal Skills | Your personal profile | Only you, across all projects |
Step 4: Name the Skill Folder
Enter a name for your Skill folder. The directory name must match the name field you will set in SKILL.md. Code Studio creates the folder structure automatically.
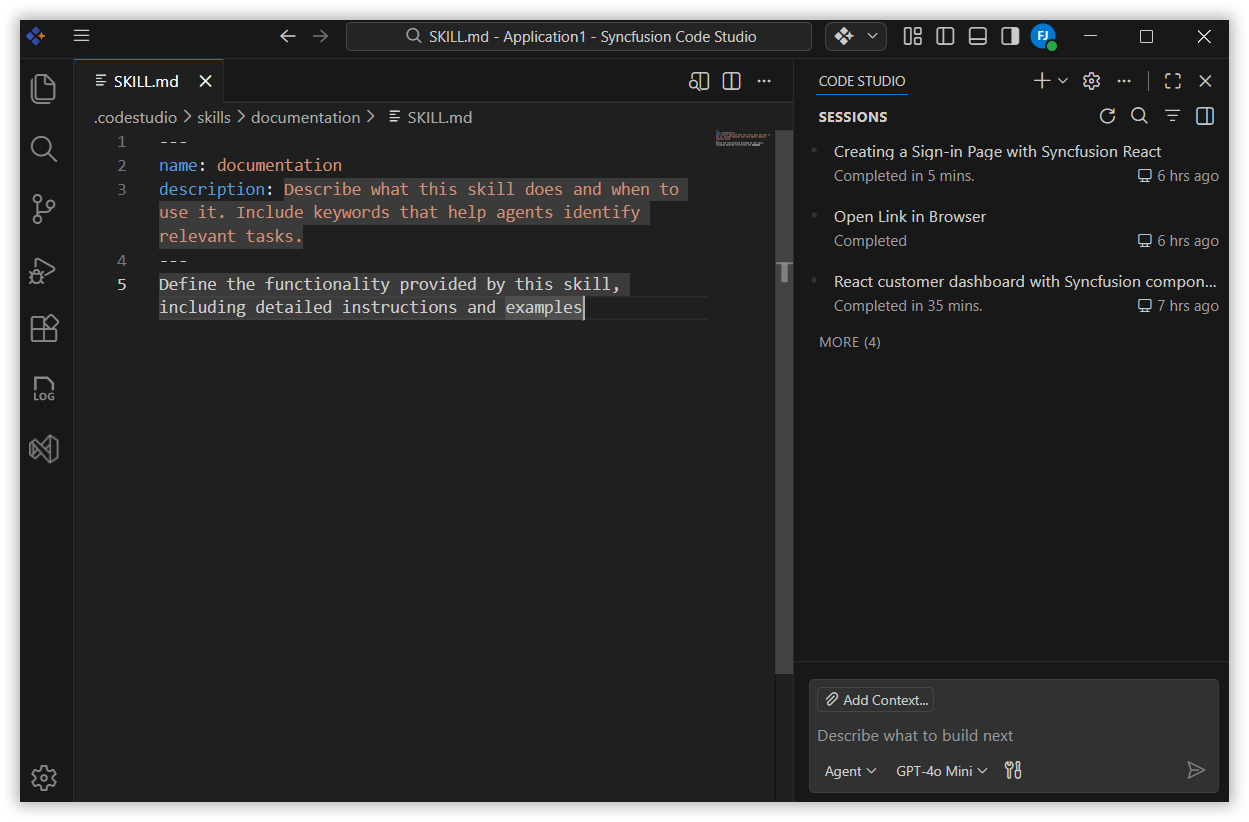
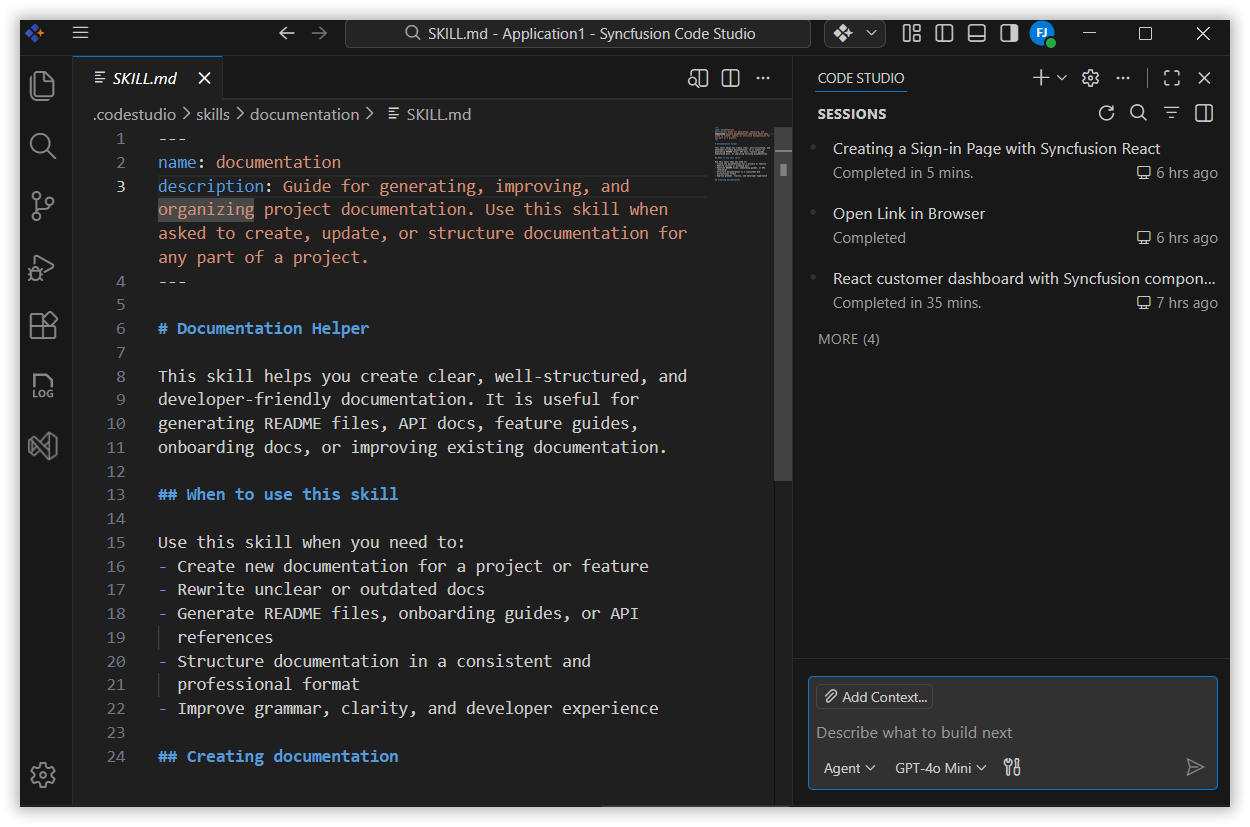
Step 5: Create the SKILL.md File
Code Studio creates a SKILL.md file inside the Skill folder. Edit it with the following structure:
Step 6: Add Optional Resources
Place any supporting files the AI should reference inside the same Skill folder:
- Scripts
- Templates
- Examples
- Notes
For example, a Skill for fixing documentation gaps might include:
-
SKILL.md— Instructions for reviewing and improving documentation
Step 7: Use the Skill
Type / in the chat input to see all available Skills as slash commands. Select a Skill to invoke it, or add extra context after the slash command (for example, /documentation for the getting-started guide).
Skills also load automatically when your prompt clearly matches what a Skill is designed to handle—no manual command required.

Tip: You can also generate a Skill with AI. Type
/create-skillin chat and describe the capability you want. The agent asks clarifying questions and generates aSKILL.mdfile with the directory structure, instructions, and frontmatter.
Configuration Options
Each Skill is defined by a SKILL.md file consisting of a YAML frontmatter header and a Markdown body.
Header (Required)
| Field | Required | Description |
|---|---|---|
name |
Yes | Unique identifier for the Skill, used in slash commands. Must be lowercase with hyphens (for example, documentation). Must match the parent directory name. Maximum 64 characters. |
description |
Yes | Description of what the Skill does and when to use it. Be specific about both capabilities and use cases so Code Studio can decide when to load the Skill automatically. Maximum 1024 characters. |
Body
The body contains free-form Markdown with the instructions, guidelines, and examples Code Studio follows when using the Skill. Include:
- What the Skill accomplishes.
- When to use the Skill.
- Step-by-step procedures to follow.
- Expected input and output examples.
- References to any scripts or templates included in the Skill folder.
You can reference files within the Skill directory using relative paths. For example: [documentation template](./doc-template.md).
How Code Studio Uses Skills
Skills load content progressively to keep context efficient:
-
Discovery — Code Studio reads the Skill’s
nameanddescriptionfrom the YAML frontmatter. When you send a prompt such as “review the getting-started guide for gaps”, Code Studio matches it to thedocumentationSkill based on its description. -
Instructions loading — Code Studio loads the
SKILL.mdbody into its context, giving it access to the detailed review procedures and guidelines. You can also trigger this step directly by typing/documentationin chat. -
Resource access — As Code Studio works through the instructions, it accesses additional files in the Skill directory (such as
doc-template.mdor example improvements) only when referenced.
This three-level loading system means you can install many Skills without consuming unnecessary context—only what is relevant for each task is loaded.
Notes / Limitations
-
namemust match the directory name. If thenamefield inSKILL.mddoes not match the parent directory name, the Skill is not loaded. -
namemust be lowercase with hyphens. For example,documentation. Maximum 64 characters. -
descriptionmaximum length is 1024 characters. Vague descriptions reduce auto-loading accuracy; use precise, task-specific language. -
SKILL.mdis required. A folder withoutSKILL.mdis not recognized as a Skill. - Personal Skills are not version-controlled. Changes to Personal Skills are local to your profile and are not shared with other team members.
- Project Skills are committed to the repository. Avoid storing sensitive data—credentials, tokens, or private keys—inside Skill files.
- Always review shared Skills before using them to ensure they meet your security requirements. Shared Skills may contain scripts that execute in your terminal.