How can I help you?
MCP Marketplace
15 Jun 20267 minutes to read
Purpose
The MCP Marketplace is a centralized platform for server management, helping users discover, install, and connect the right servers for their needs through an easy-to-use interface. It showcases a variety of available MCP servers. Users can explore server options and configure them for use by simply clicking the Install button, which initiates an automated setup process to integrate the server with the Code Studio extension. Users can download servers either globally across all projects or for a specific workspace.
When to Use
MCP servers are essential in the following scenarios:
- Dynamic Backend Integration: When your IDE requires secure connections to external services without hardcoded configurations, enabling flexible and scalable integrations.
- Enhanced AI Capabilities: When you need to extend the AI assistant’s functionality with additional tools, resources, or real-time metadata access for improved context awareness and response quality.
- Service Orchestration: When managing multiple external services that require coordinated access through a unified interface.
Prerequisites
Before installing MCP servers from the marketplace, ensure that:
- You are using the latest version of Syncfusion Code Studio
- You have any required authentication credentials ready (Personal Access Tokens, API keys, or other tokens as needed by specific servers)
- Node.js and npm are installed on your system, as certain MCP servers depend on npm packages for functionality
- Help Link for installing Node.js and npm : Install Node.js
Steps to Install an MCP Server from Marketplace
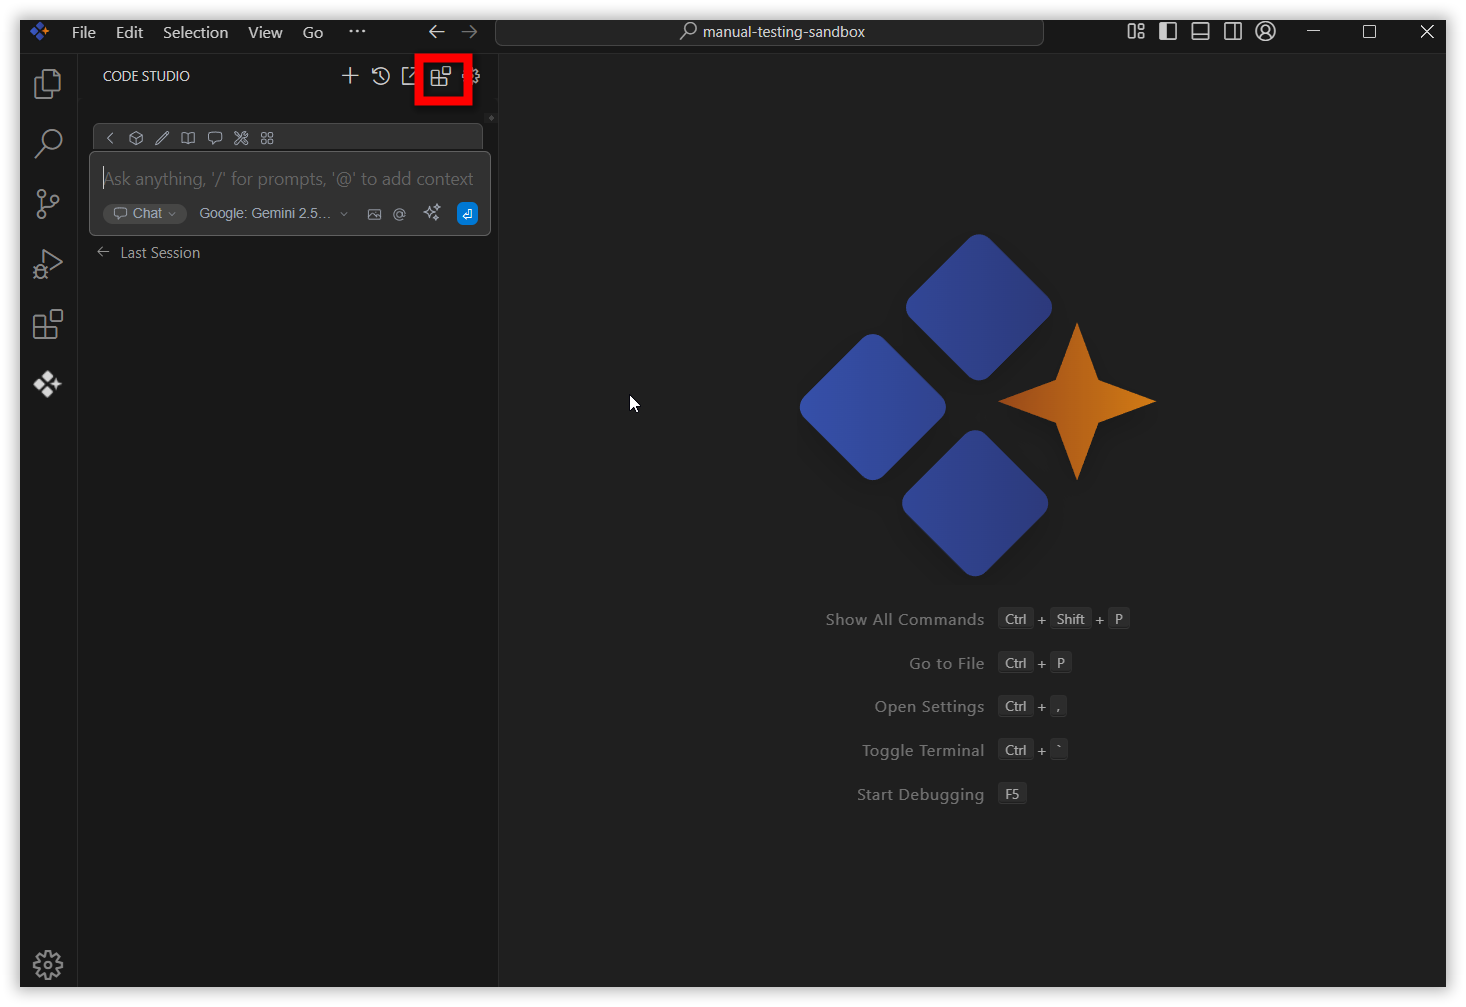
-
Click the Syncfusion Code Studio icon on the top right side to open the Syncfusion Code Studio chat window.
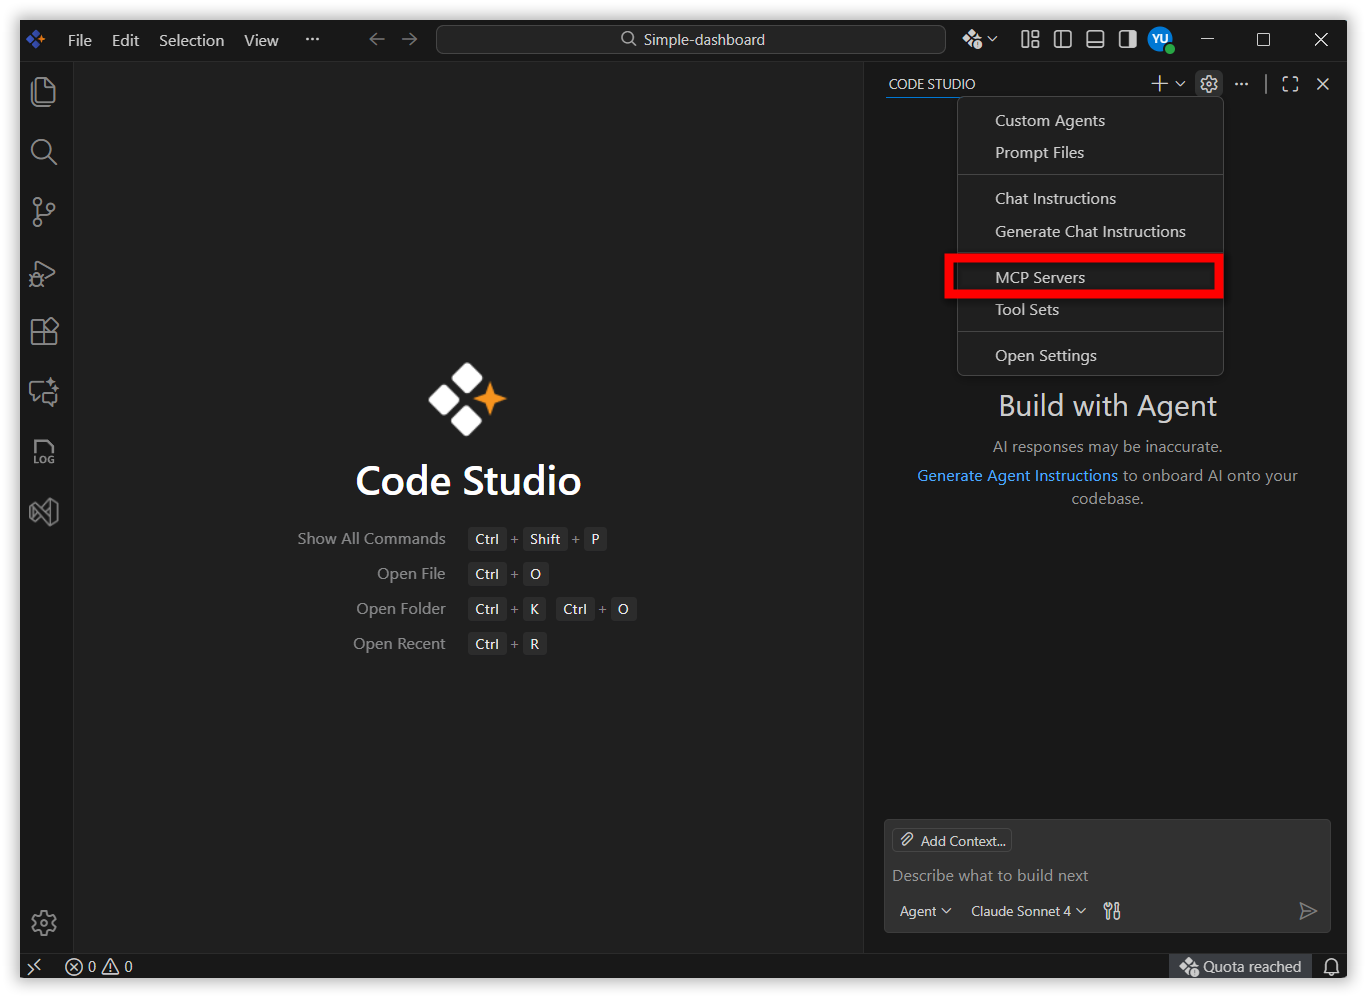
-
Navigate to Configure Chat by clicking the manage icon.
-
Select MCP Servers from the drop-down menu.
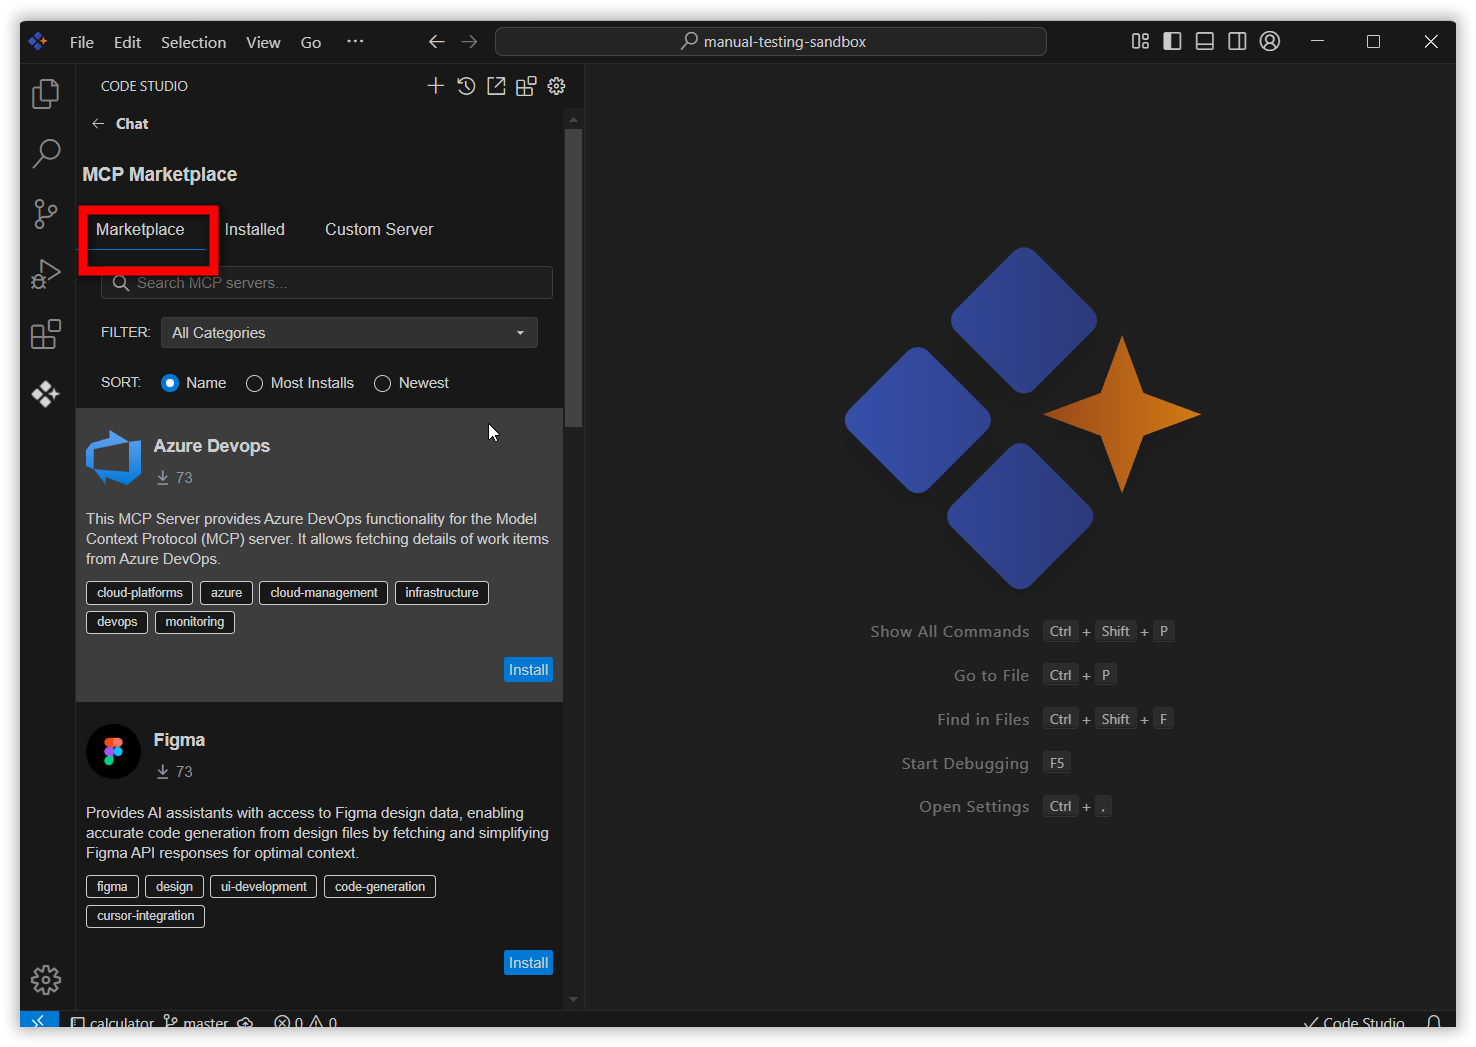
-
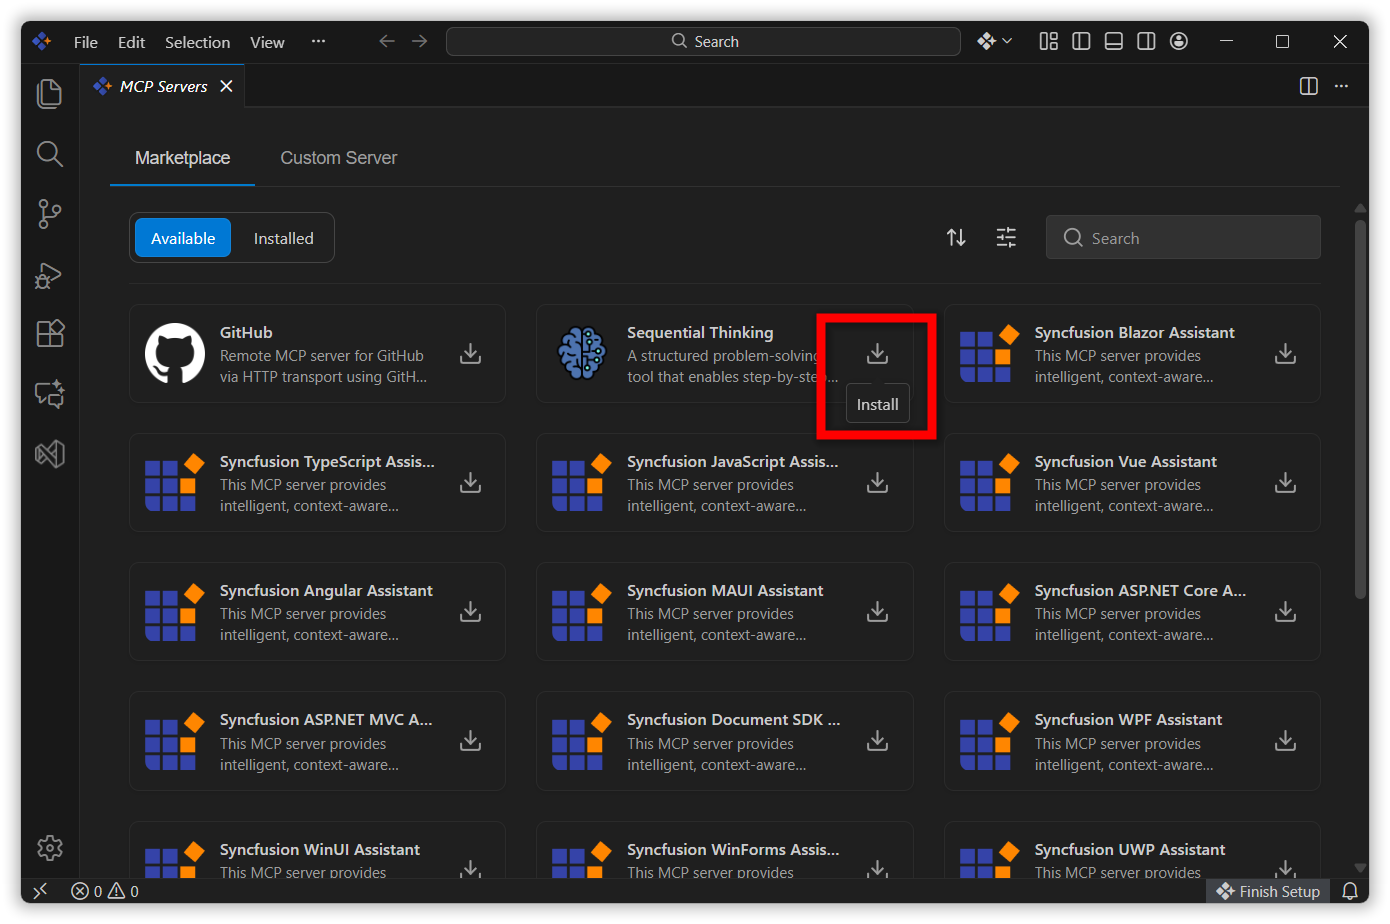
After selecting MCP Servers, it navigates to the Marketplace tab:
- You can find predefined MCP servers such as Azure DevOps, Figma, MongoDB, Playwright, Postgres,etc.
- Choose and install any of them.
-
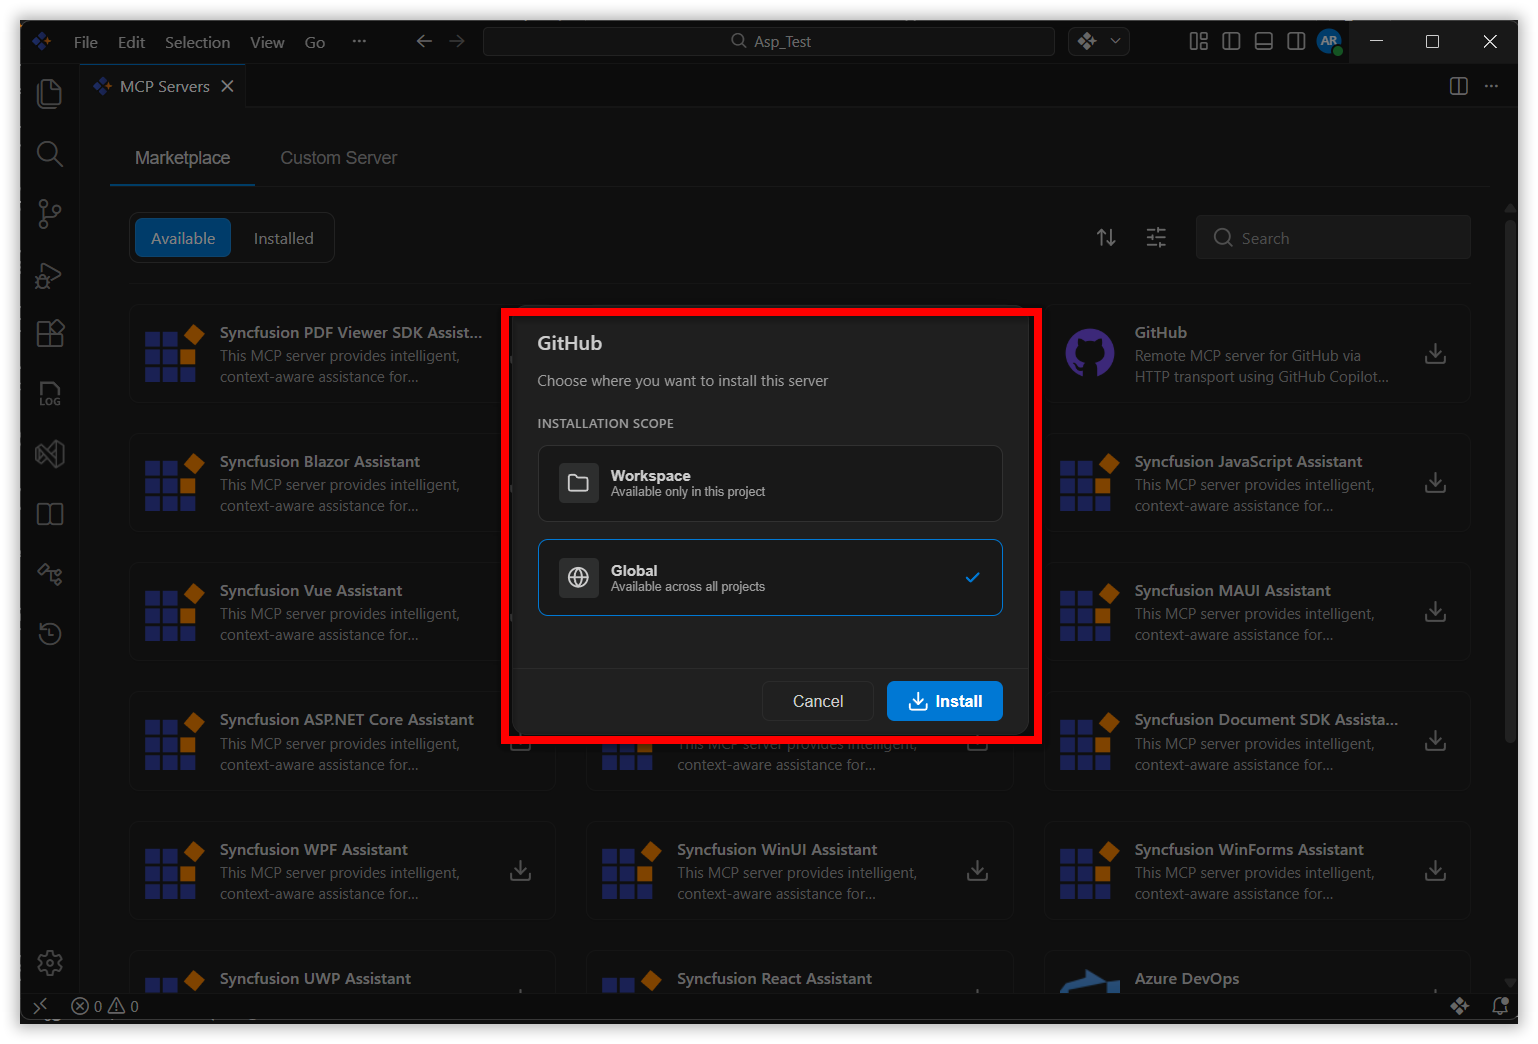
Click the Install button to install the MCP server.
-
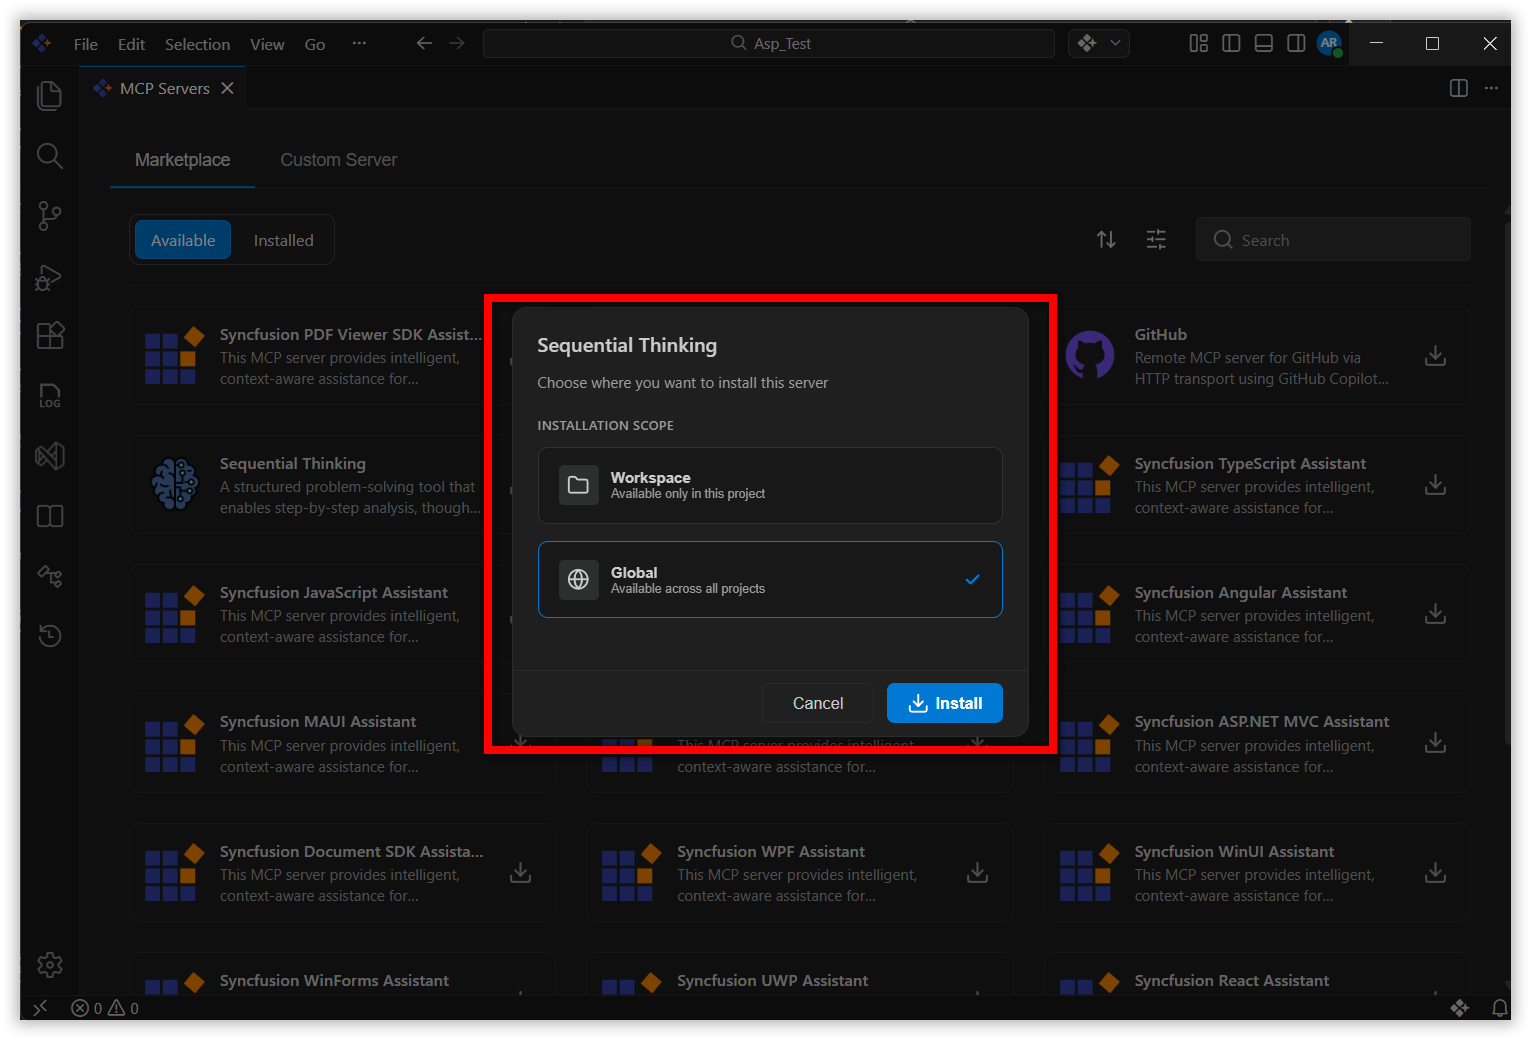
It will show two options
- Workspace - Install the MCP server for the current project only. The server will be available exclusively within this workspace.
- Global - Install the MCP server globally across all projects. The server will be accessible in all your workspaces.
Note: You must have a folder or workspace open to see the workspace installation option. If no folder is open, the MCP server will automatically install globally without displaying the installation option dialog.
-
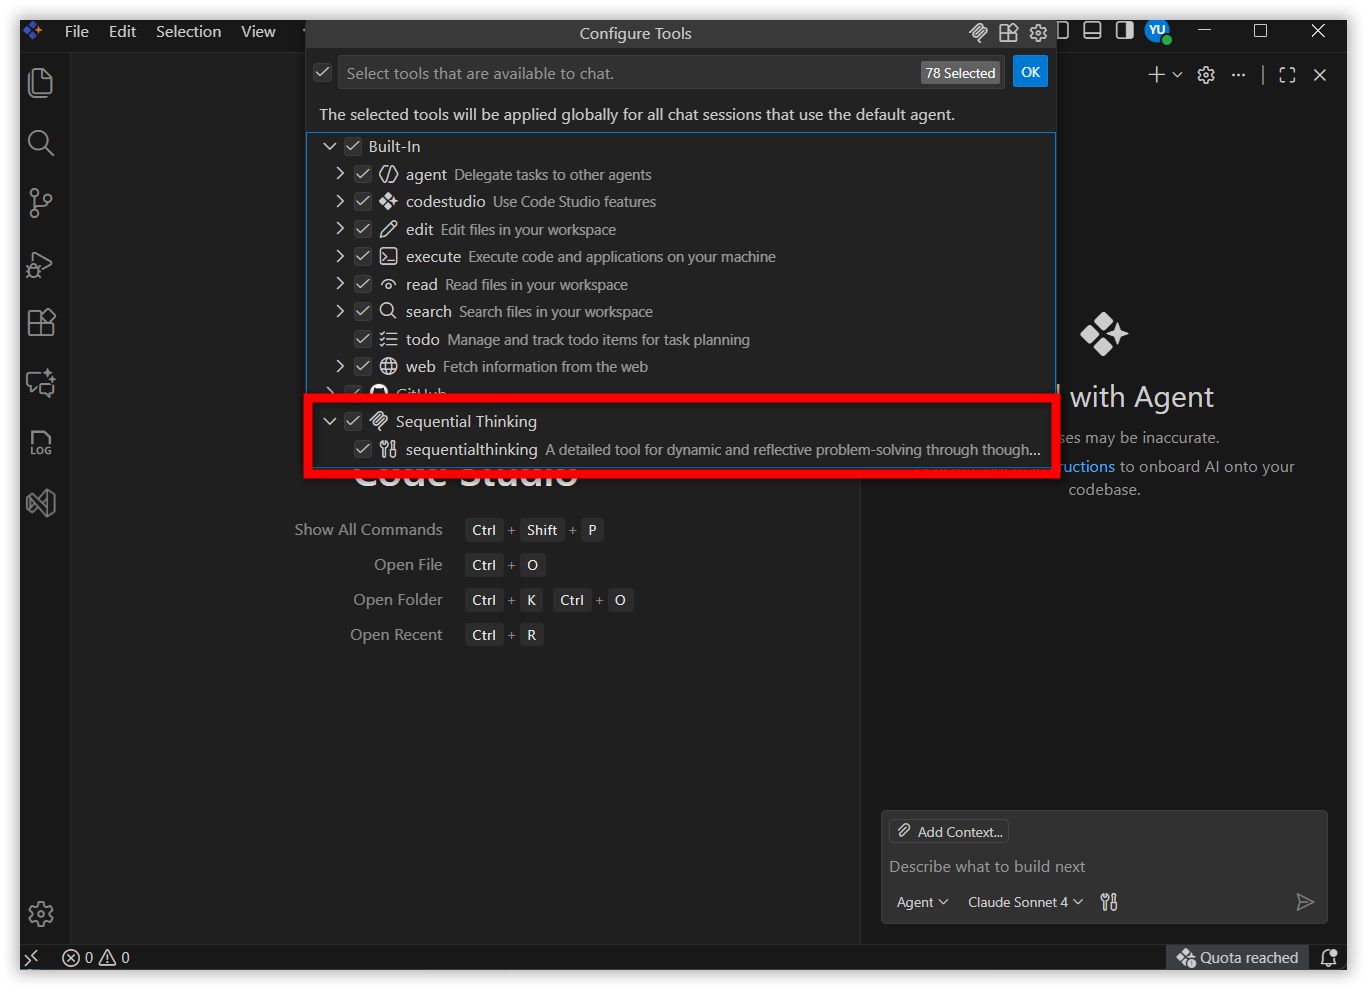
After installation, the MCP tools appear in the Tools section:
- Select Configure Tools.
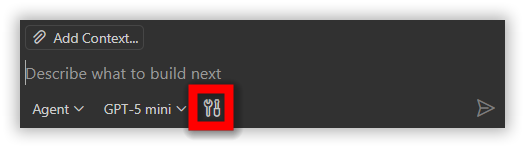
- Verify the tools added in the dropdown list.
-
Open the Marketplace and select Installed to check the servers you’ve added.
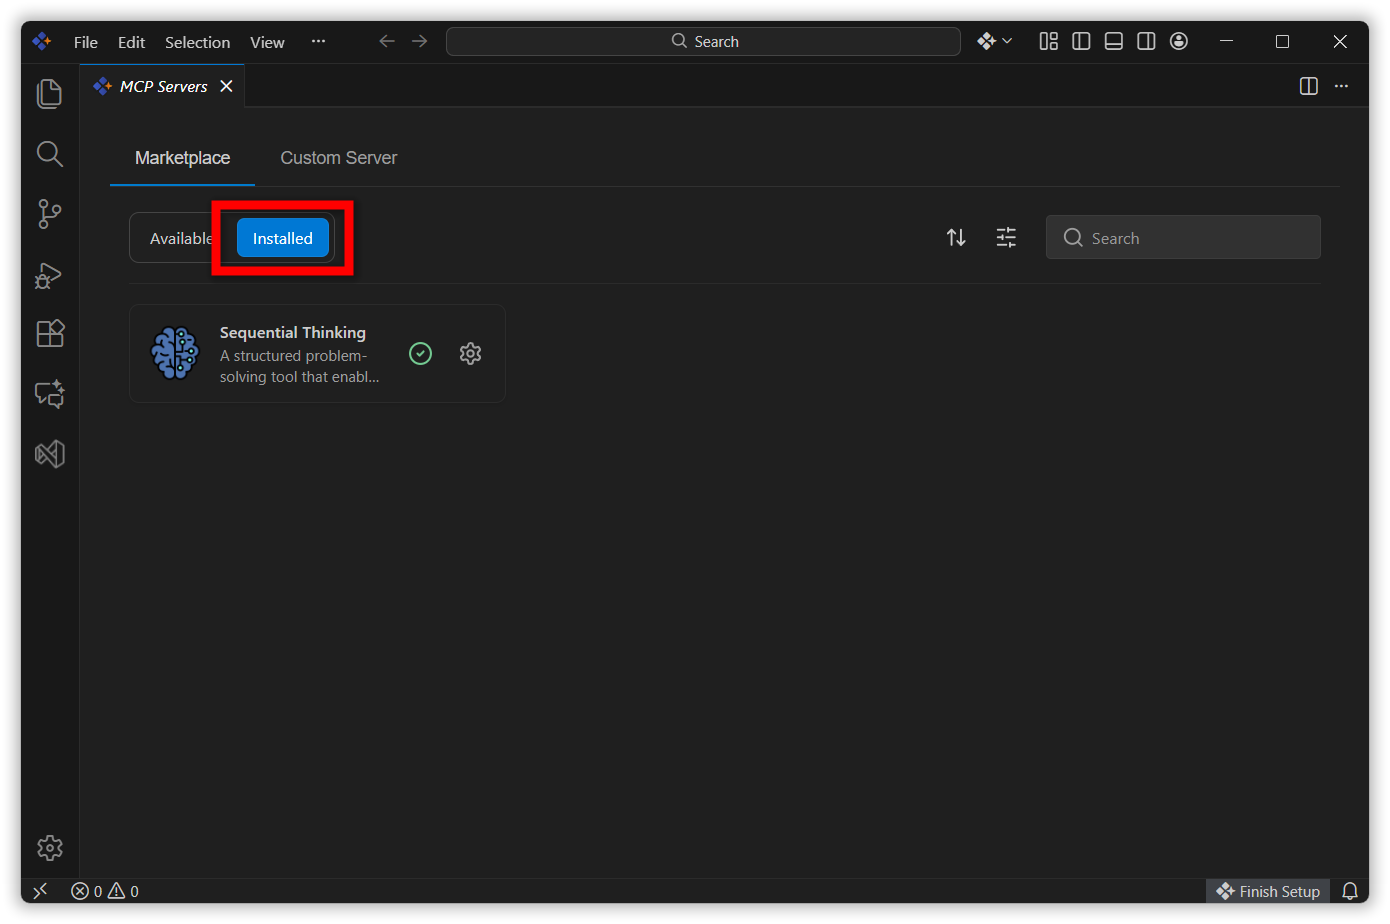
- If you have a globally installed server and want to download the same server for the current workspace, click the manage icon next to the global server in the Installed tab and select Download for Workspace.
-
After installing the workspace server from the installed global server, the global server will automatically disconnect.
Note: You can verify that a server is installed for the workspace by checking for the file icon displayed next to the server name icon.
-
Once you uninstall the workspace server, the same global server will automatically reconnect.
Filter Support in Marketplace
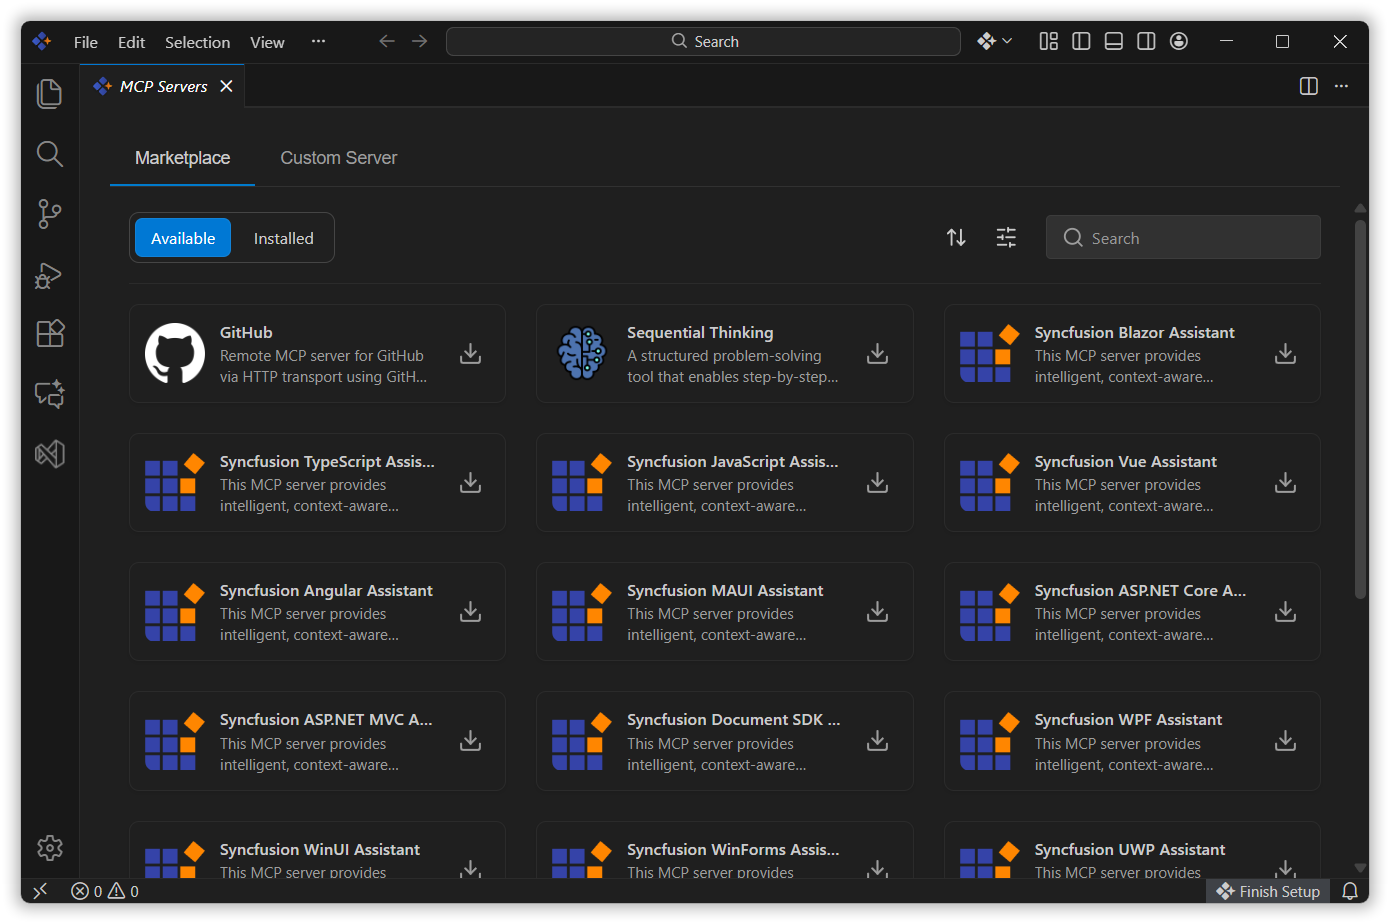
-
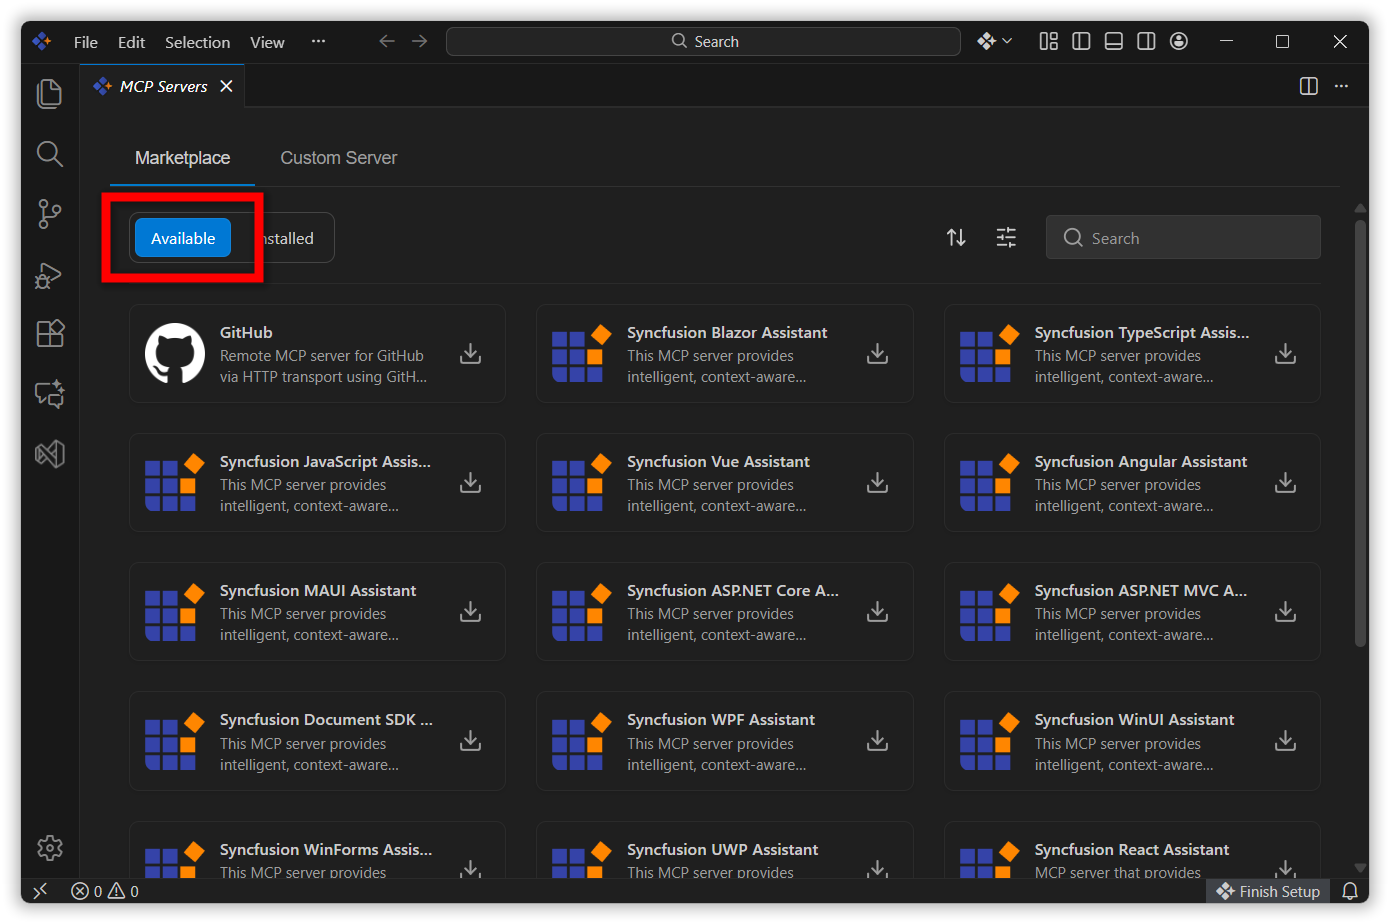
The Marketplace allows you to apply filters to quickly narrow down and find the servers you need:
- By selecting Available, it will show the MCP servers currently available.
- By selecting Installed, it will narrow down to show only the installed servers.
-
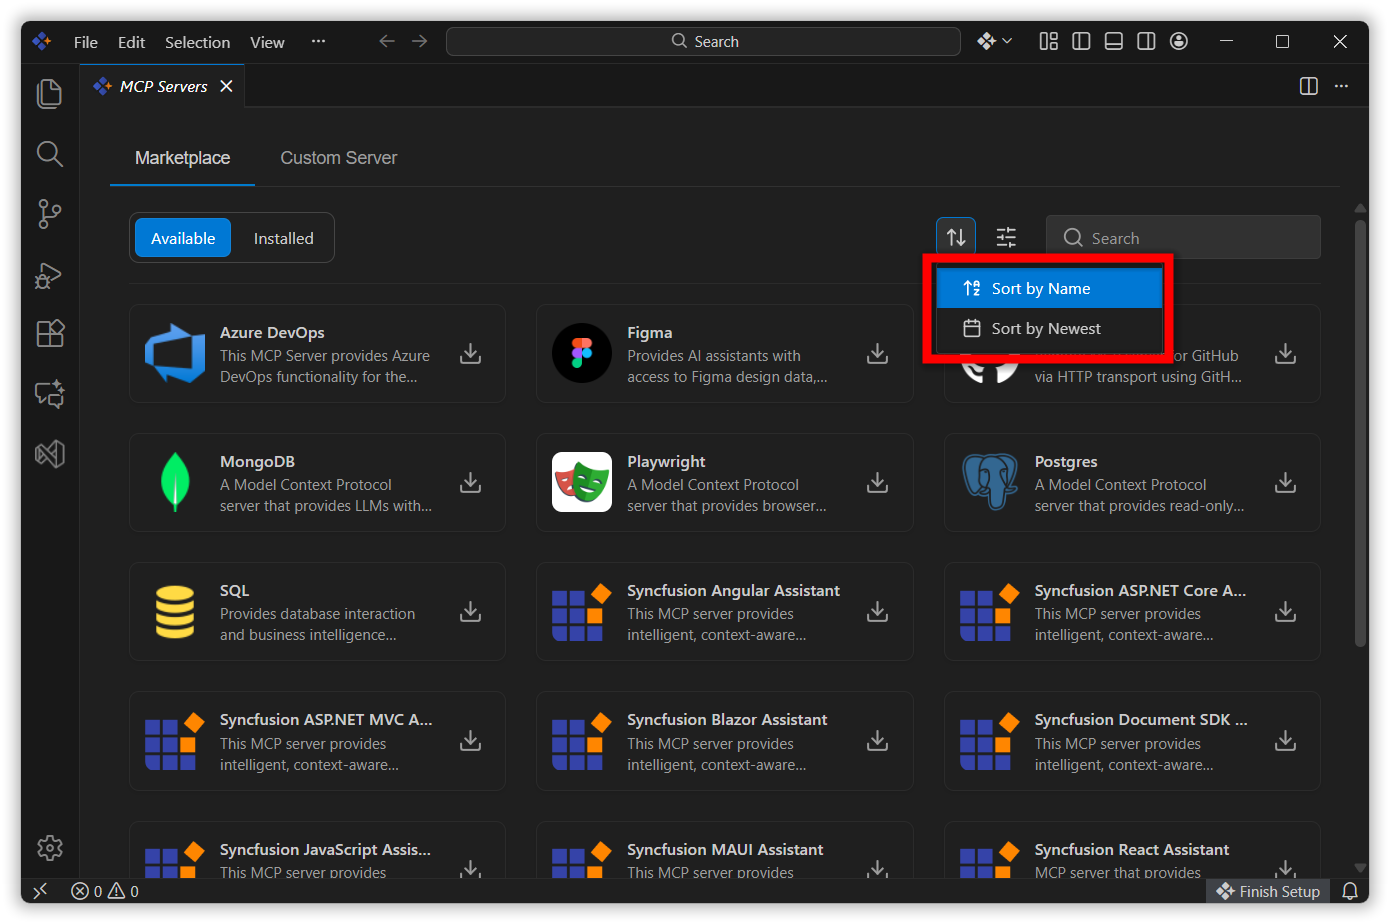
By sorting by Name, it will list servers alphabetically.
-
By sorting by Newest, it will show the most recently added MCP servers.
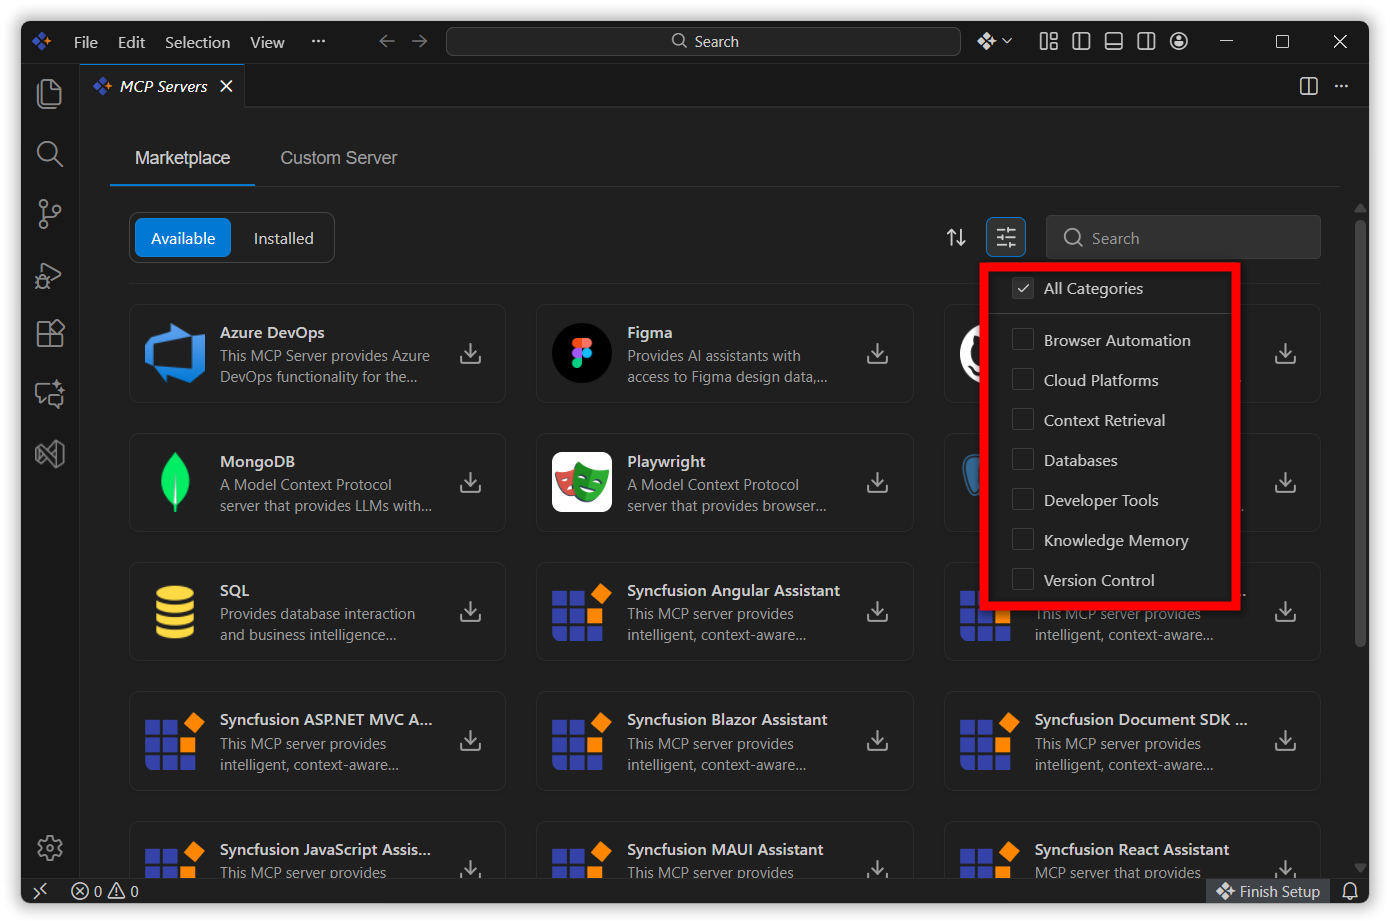
- By filtering Categories, you can easily narrow down to specific categories (e.g., Database, Cloud Platform), and it will display all available servers in those categories.
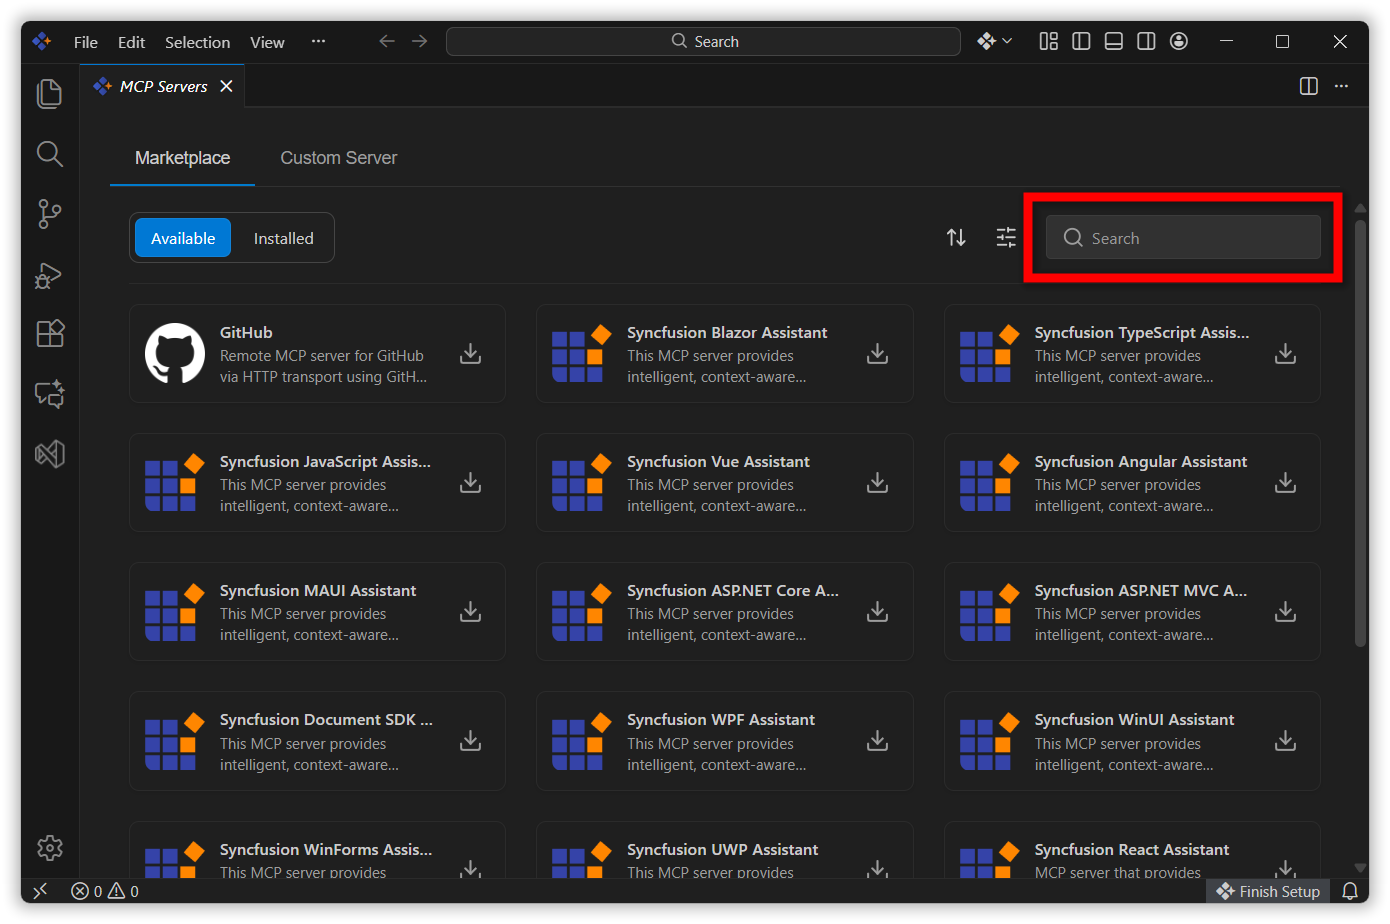
- Using the Search option, you can quickly find the desired MCP server.
Example Usage of GitHub MCP Server
Step 1: Installation of GitHub MCP Server
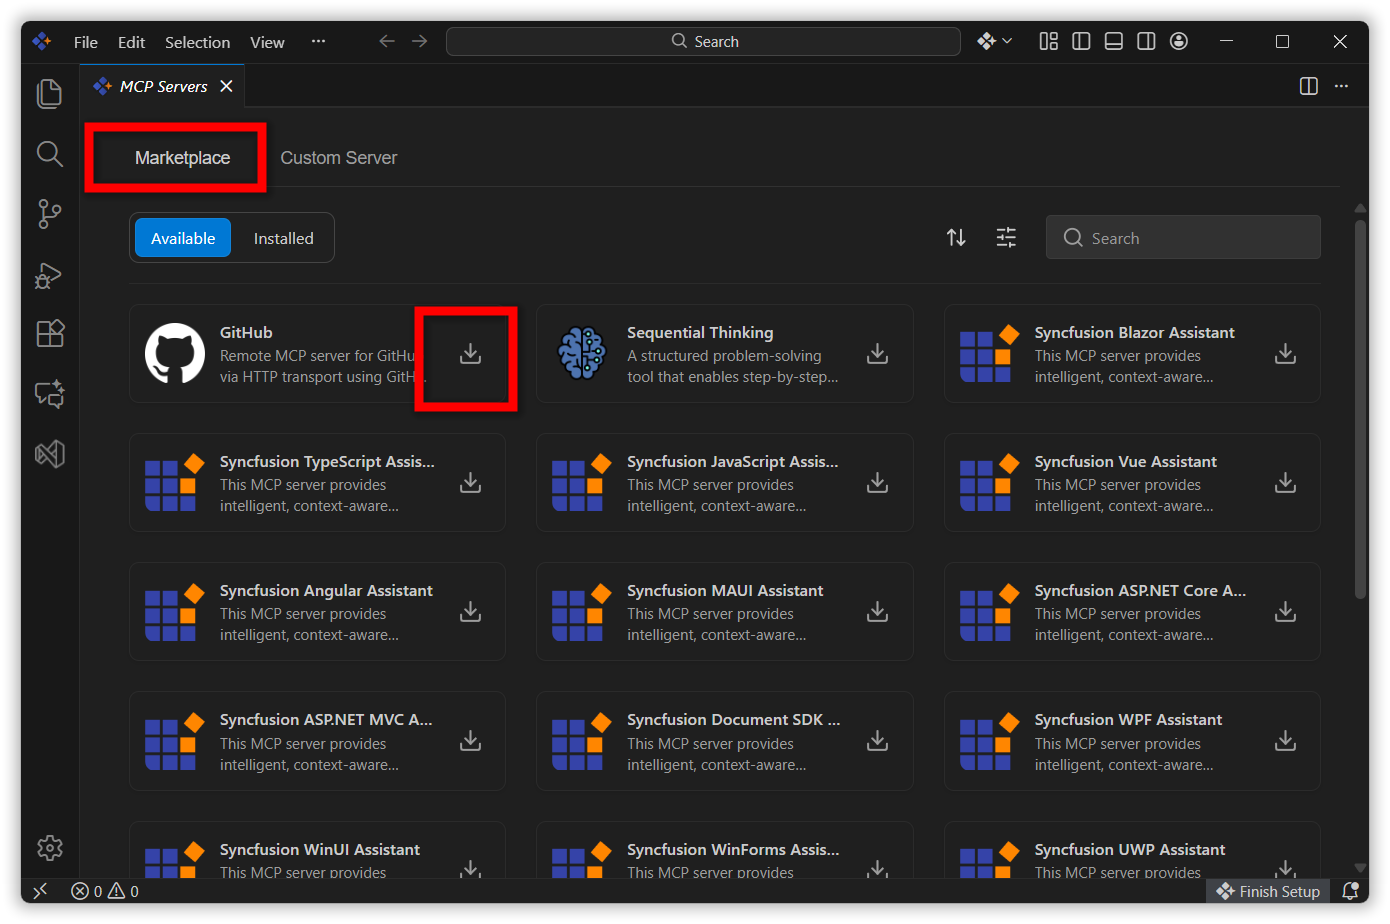
- Open the Marketplace tab.
-
There you can find GitHub and click install
Step 2: Select Installation Option
- Choose between Workspace or Global installation based on your needs.
- Select Workspace to install the server for the current project only.
-
Select Global to install the server across all your projects.
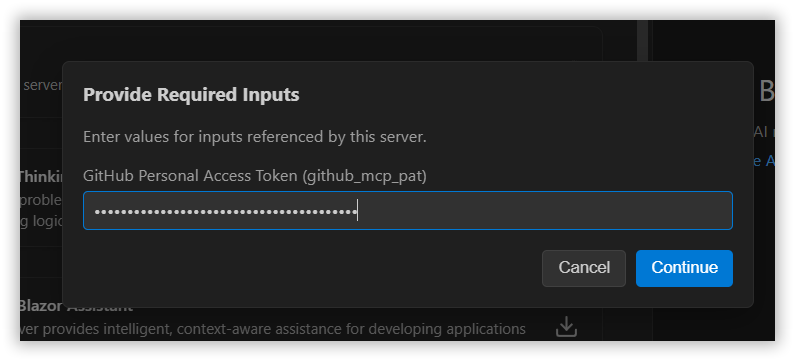
Step 3: Provide Access Token
- After clicking Install, you will be prompted to enter a GitHub Personal Access Token.
- Enter a valid access token generated from your GitHub account.
- After entering the access token, click Continue to complete the installation successfully
- Help Link for creating a access token : Personal Access Tokens.
Note: Authentication requirements vary across different MCP servers. While some servers require Personal Access Tokens (like GitHub), others may need API keys or specific credentials. Certain servers offer automatic installation without requiring any authentication. The installation process will prompt you for the appropriate credentials based on the selected server’s requirements.
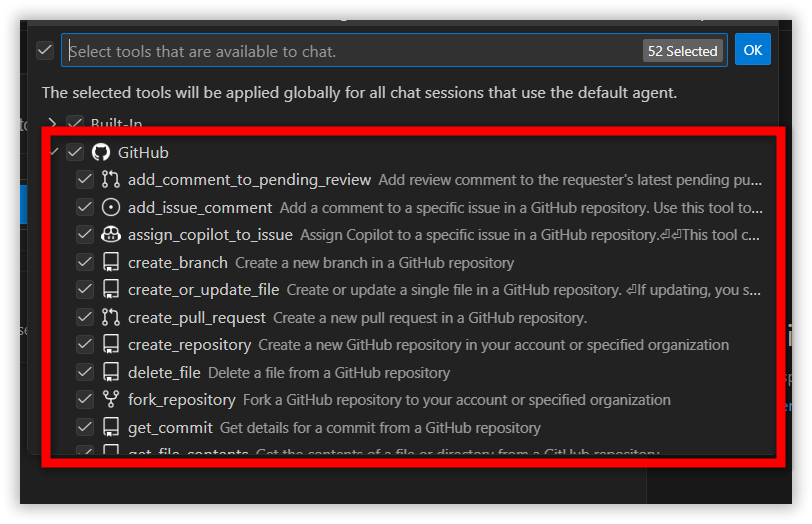
Step 4: Select the Installed Tool
- Identify the GitHub MCP server from Configure Tool.
-
Select the tools you need from the GitHub MCP server and add them.
Step 5: Formulate Your Prompt
- Decide what action you want the tool to perform.
-
Write the prompt in the chat panel.
Example :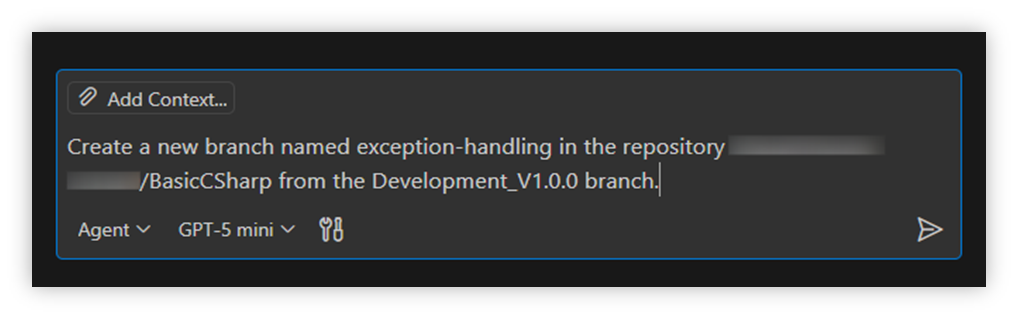
Step 6: Execute the Command
- Hit Enter to run the command.
- The MCP system parses your request and prepares execution.
Step 7: Allow or Skip Permissions
-
The system may ask you to allow or skip execution (for security reasons).
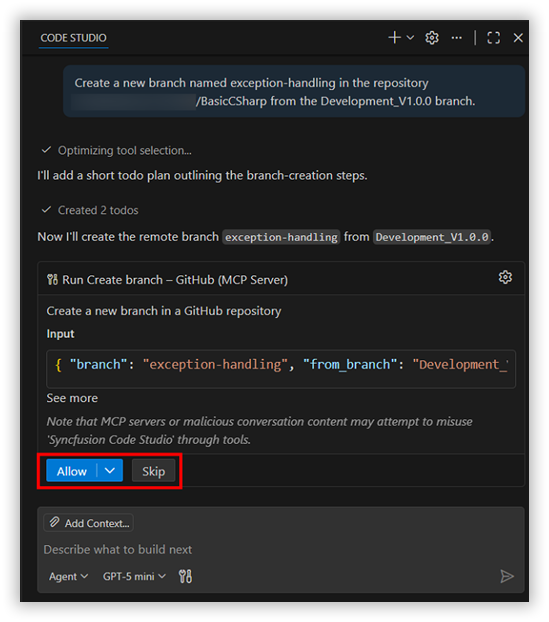
- If you choose Allow, the tool proceeds.
- If you choose Skip, the action is canceled.
Step 8: Confirm Branch Availability
- Once allowed, the tool executes the action.
- After that check the Branches section in your GitHub repository.
- Ensure the newly created branch (e.g.,
exception-handling) appears in the list.
Uninstalling an MCP Server
- Go to the Marketplace tab.
- Select the Installed filter to view all installed MCP servers.
- Choose the MCP server you want to uninstall.
-
Click Uninstall to remove the selected server.

Best Practices
- Clear Service Boundaries: Keep each MCP server focused on a single responsibility.responsibility (e.g., database, browser automation, API gateway) to simplify scaling and maintenance.
- Strong Security Controls: Enforce authentication, authorization, and encrypted communication. Apply the principle of least privilege and maintain audit logs.
- Resilience & Reliability: Implement health checks, retries, and circuit breakers. Design for graceful degradation so services remain usable under stress.
- Observability & Monitoring: Provide metrics, structured logs, and tracing. Use tools like Prometheus/Grafana for visibility into performance and failures.
- Developer Friendly Documentation: Offer clear onboarding guides, versioned APIs, and examples. Good documentation accelerates adoption and reduces support overhead.
Note
If you want to add a new MCP server, you can request it by creating a support ticket using the link provided below. This ensures your request is tracked, reviewed, and considered for inclusion.
Link: Create Ticket