How can I help you?
Custom Instructions
15 Jun 20268 minutes to read
Purpose
Custom Instructions allow you to define guidelines and rules that automatically influence how the AI generates code and handles development tasks in Syncfusion Code Studio.
They serve the following key purposes:
- Provide durable, project-specific guidance that the assistant follows automatically in every relevant interaction.
- Reduce repeated context and instructions by specifying them once in a Markdown file instead of including them in every chat prompt.
- Cut down on repetitive chat instructions by setting default behavior, coding style, preferred tools, naming conventions, project context, architecture rules, and more.
- Give you the flexibility to manually attach instructions to a specific chat prompt when needed, while still benefiting from persistent repo-level defaults.
Types of Instruction Files
There are two types of instruction files:
1. Project-wise Instructions
- Apply rules to the entire project.
- Once configured, the AI assistant automatically follows these guidelines for all chats and code contexts in the repo.
- use this when you want one consistent set of standards across the whole project.
-
File Type:
codestudio-instructions.md -
Location:
.codestudio/codestudio-instructions.md(at the project root)
2. Path-specific Instructions
- Apply rules only when certain files or folders are in context.
- Useful when different parts of your project (e.g., frontend vs backend) need different coding standards.
-
File Type:
*.instructions.md -
Location:
.codestudio/instructions/- Example:
.codestudio/instructions/python.instructions.md - Example:
.codestudio/instructions/frontend.instructions.md
- Example:
When to use Custom Instructions
Use Custom Instructions when you want to:
- Set clear, permanent coding rules for the project (naming conventions, formatting style, folder structure, file organization)
- Make sure the AI always follows the same standards in every chat and code suggestion, without explaining the rules again and again
- Enforce important non-functional requirements automatically, such as:
- Security rules (never use inline scripts, always sanitize inputs, prefer prepared statements…)
- Performance best practices (avoid nested loops in hot paths, prefer memoization…)
- Accessibility guidelines (always add alt text, use semantic HTML…)
Enabling Custom Instruction Files
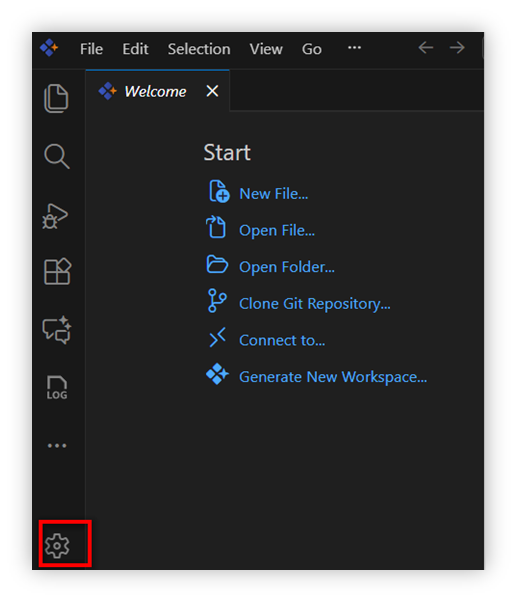
Step 1: Open settings at the bottom left in Code Studio.
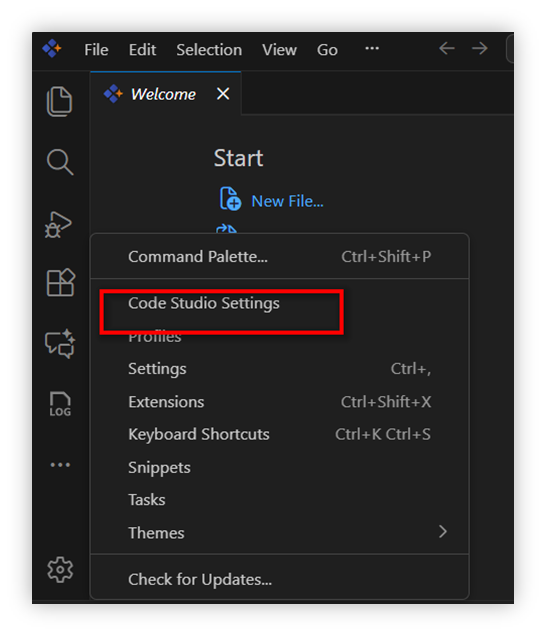
Step 2: Select Code Studio Settings in the pop-up options.
Step 3: Click Instructions & Skills in the settings options.
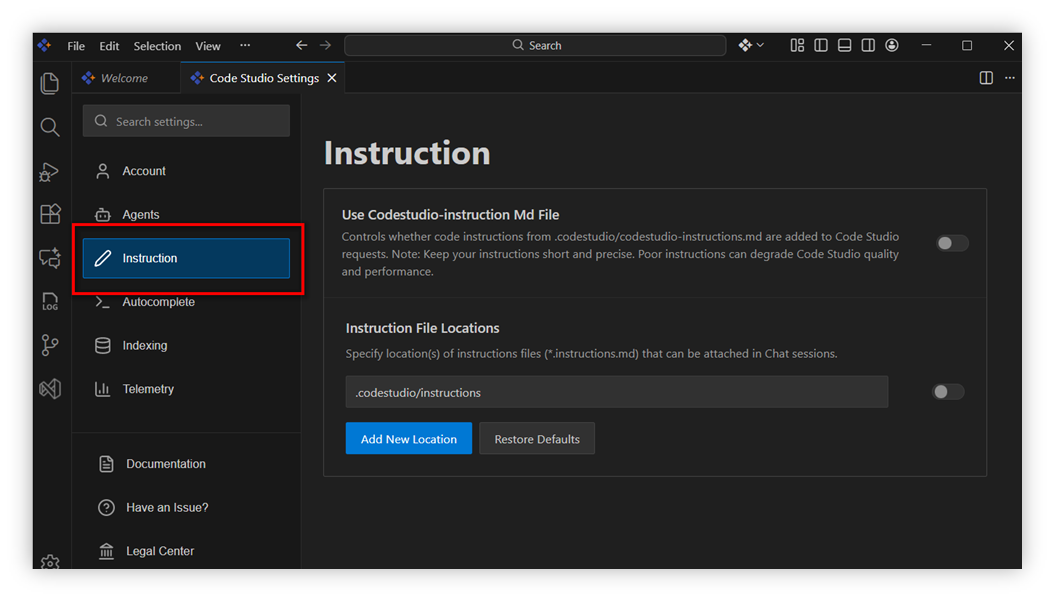
You will see three options:
-
Option 1: Project-wise instructions
- Use this option when you want one set of rules for the entire project.
- Switch ON the repo path to enable the file.
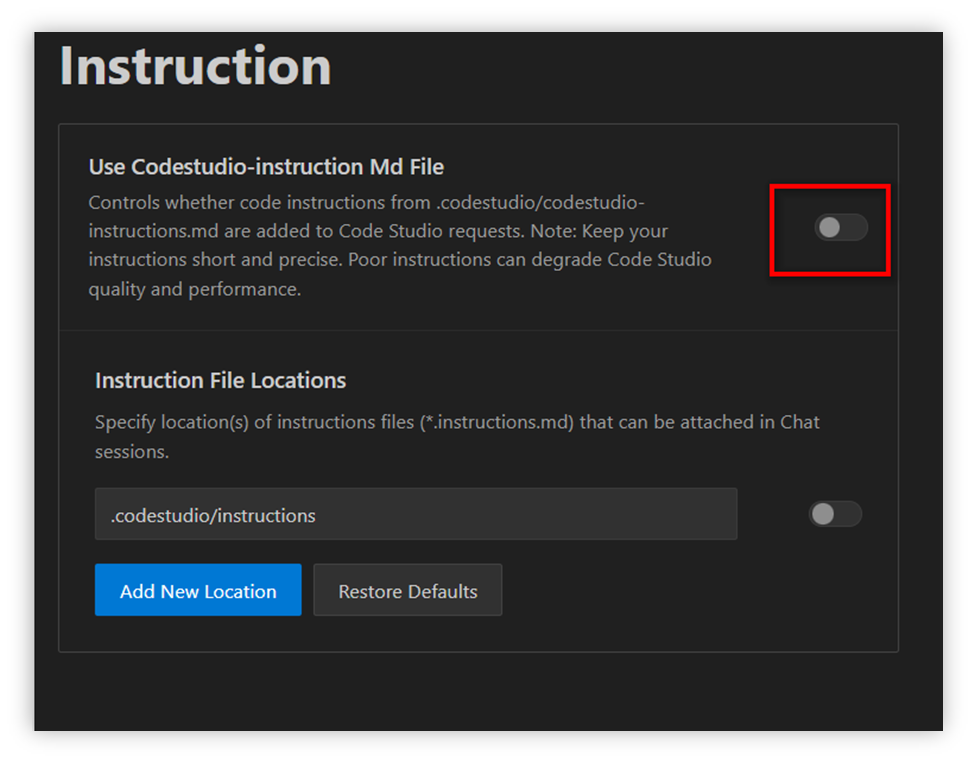
- Once enabled, the AI assistant will automatically apply these instructions to all chats and code contexts in your project.
-
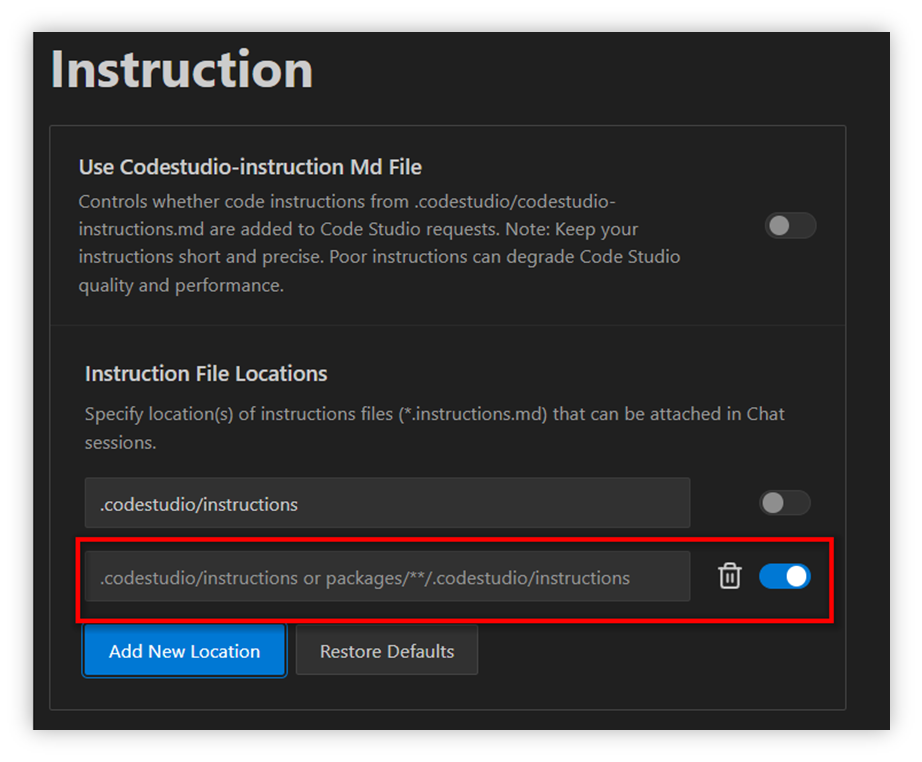
Option 2: Path-specific instructions
- Use this option when you want different rules for different file types or folders.
- Switch ON the repo path to enable the file.

-
Option 3: Add New Path-specific Location
- Click the Add New Location in the instruction settings page.
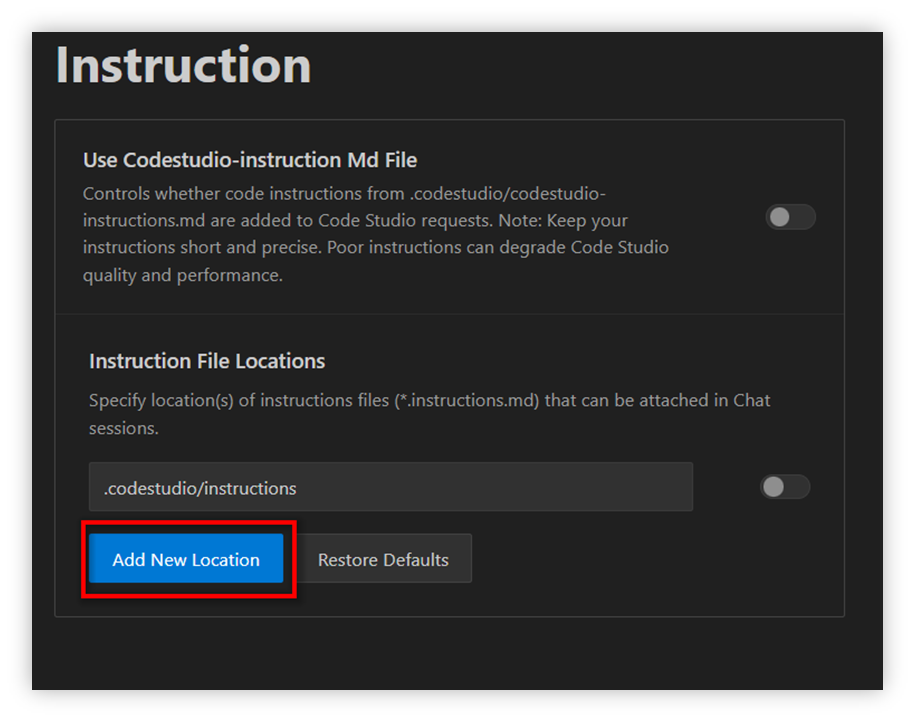
- You can add a new custom file path and switch ON the path specific settings.
- Use this option when you want to create a new instruction file for a custom path.
How to Configure Project-wise Instruction File
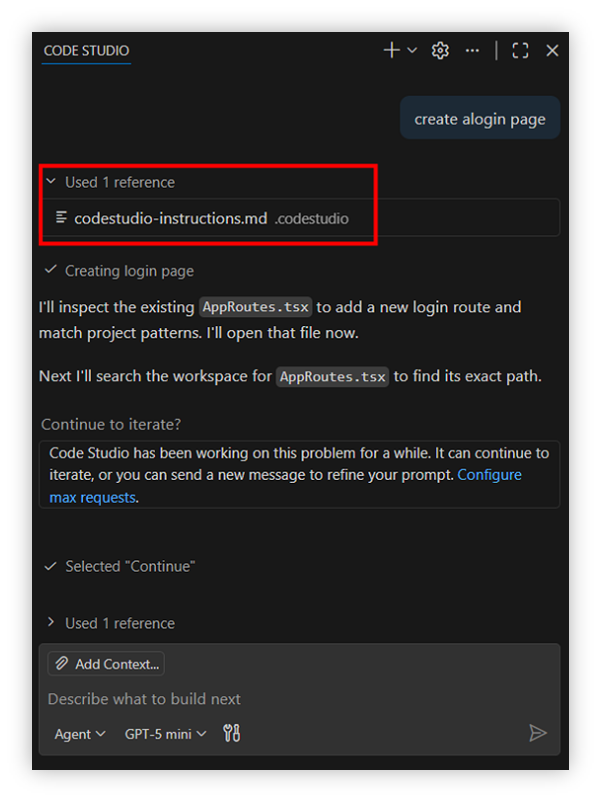
Step 1: Open the codestudio-instructions.md file.
-
Open your project in Code studio. Click the settings option at the top in the chat and select agent customizations.
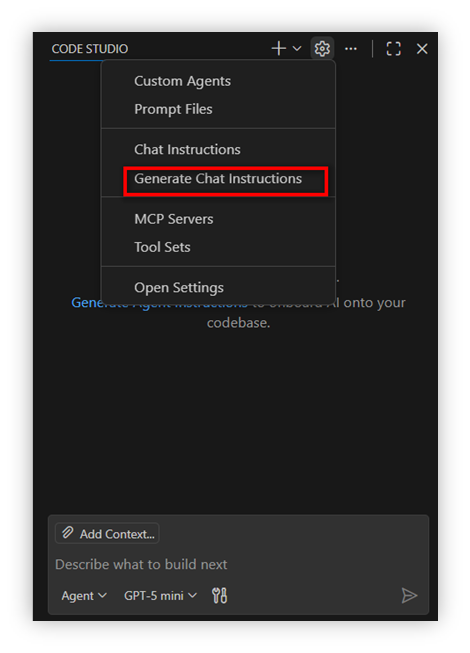
-
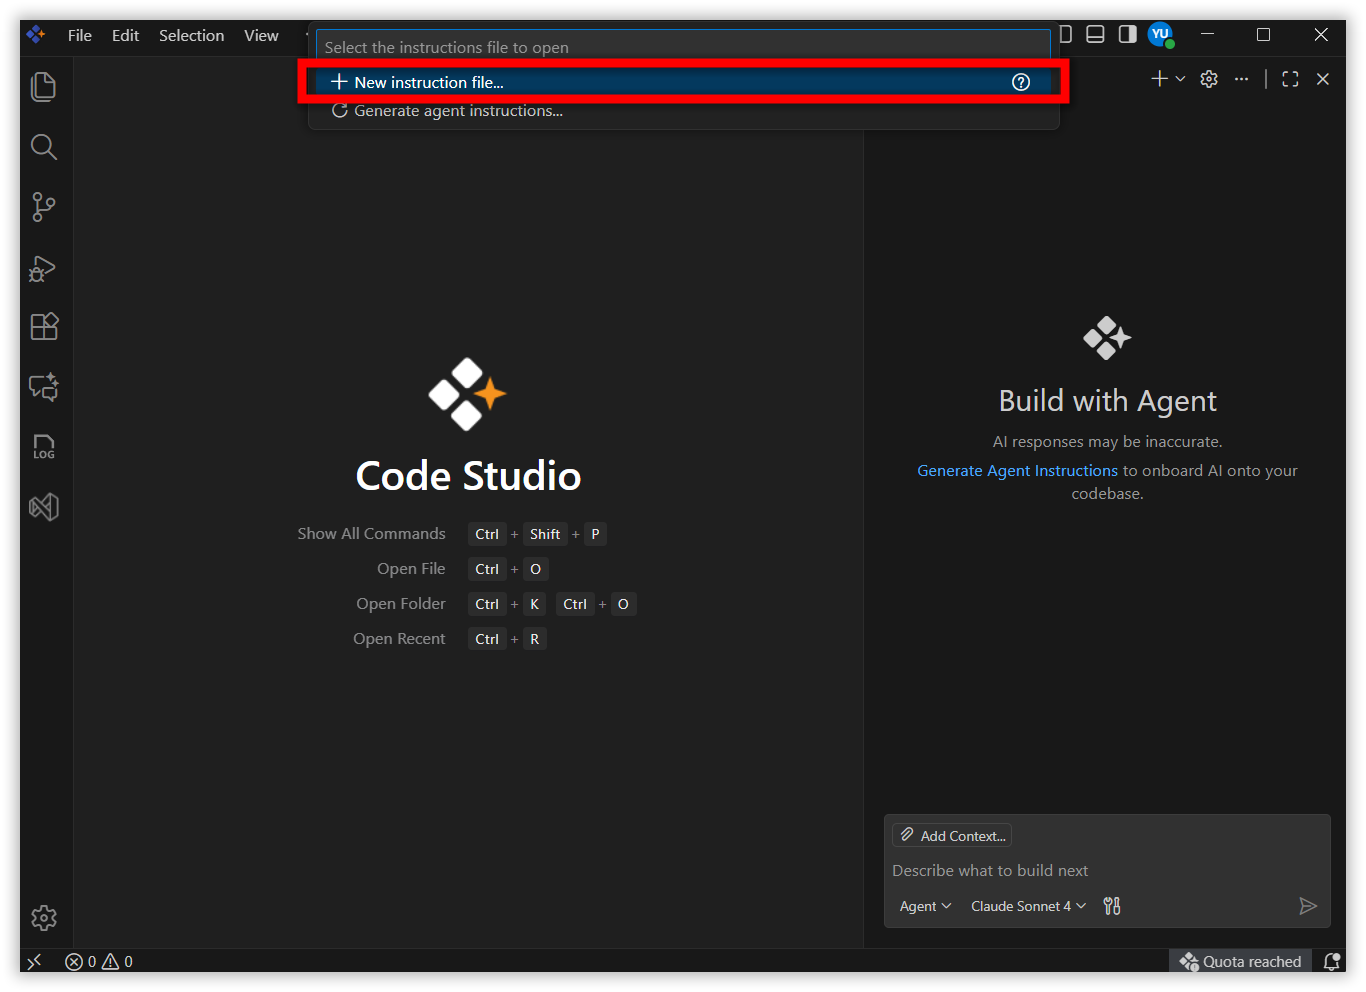
Click the “Generate instructions” and select New instruction(workspace) in the pop up.
Step 2: Now Code Studio will automatically create and open codestudio-instructions.md.
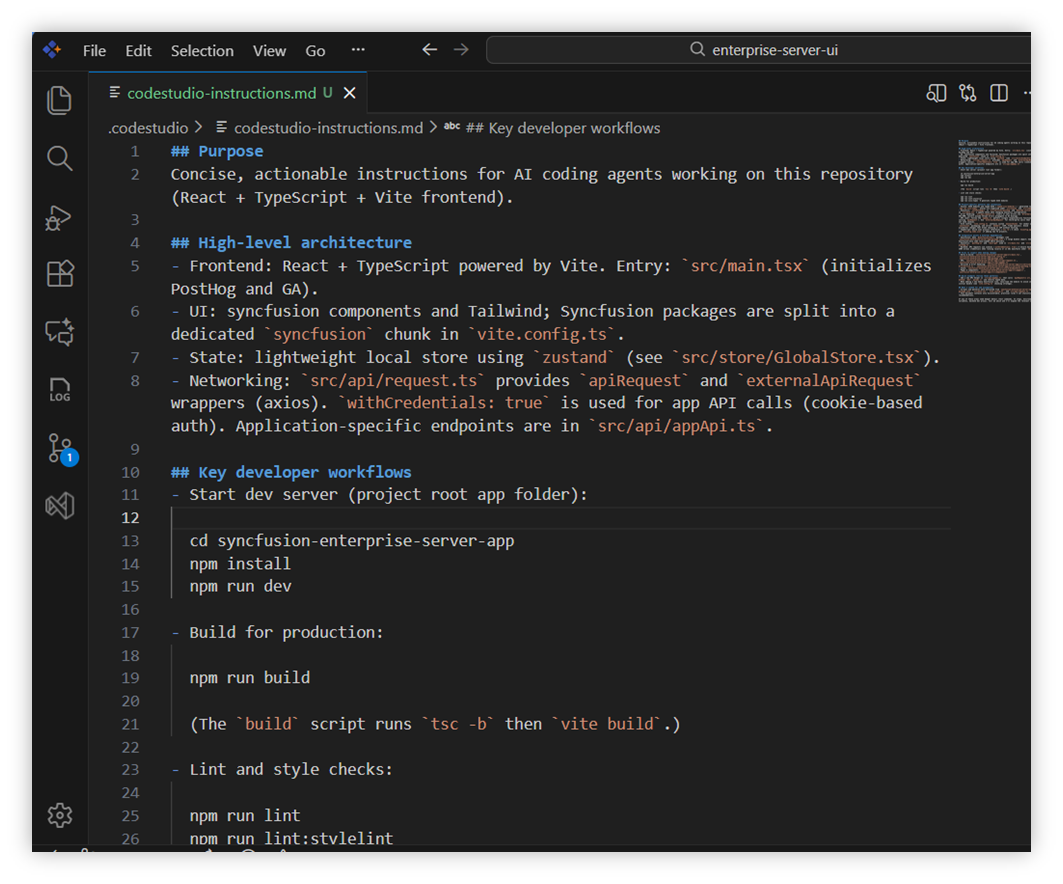
Step 3: Customize the file to fit your project needs.
Step 4: Open chat view and send a message. Now the instruction file will be referenced automatically.
How to Configure Path-specific Instruction File
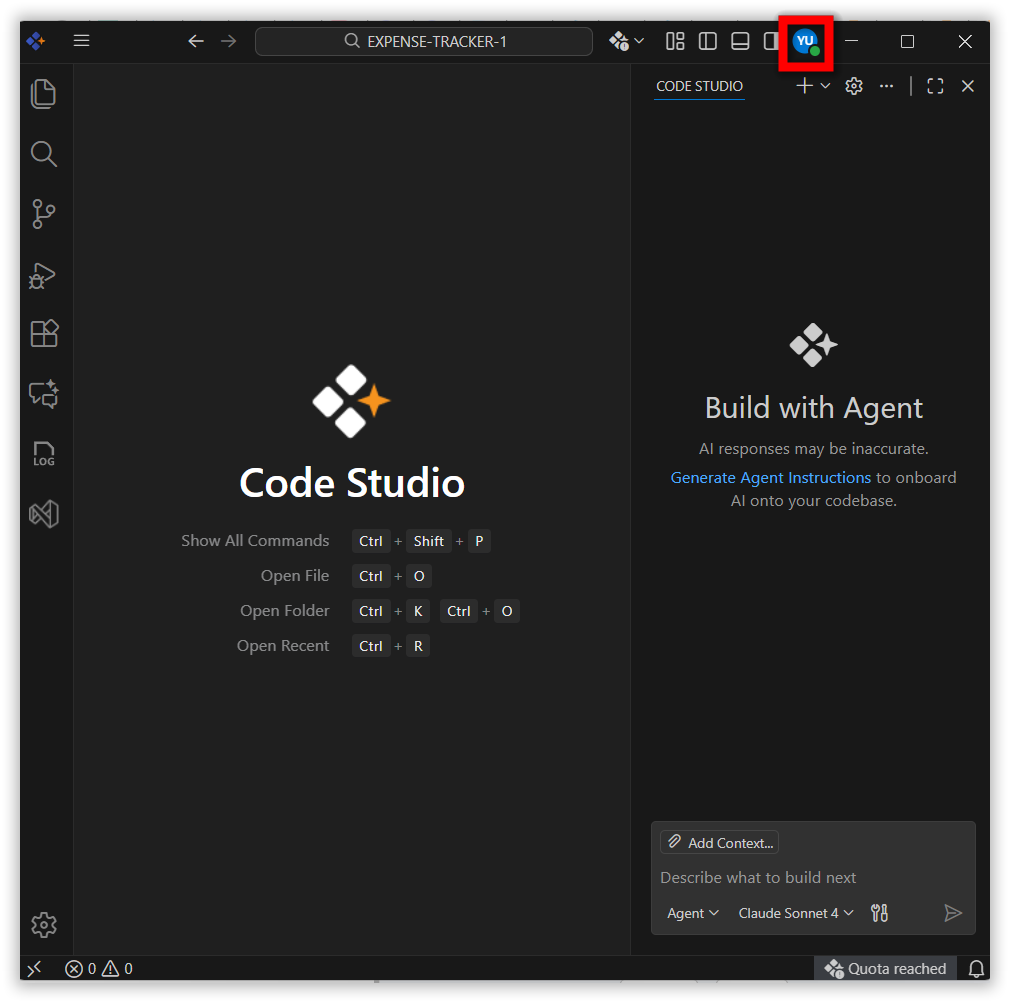
Step 1: Click the Code Studio Account icon
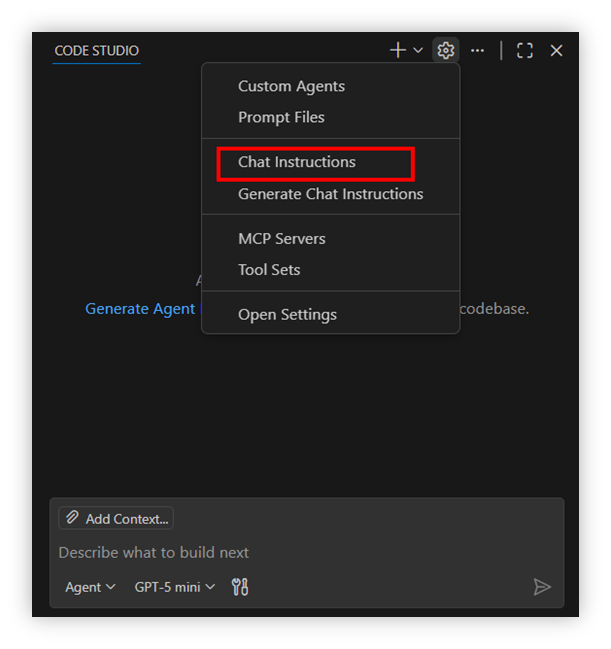
Step 2: Click Instruction & SKills and select Add Location
Step 2: Enter Name for Instruction File.
Step 3: Choose where to save your file
-
There are two options to save your instruction. You can choose any one of them based on your preference.
-
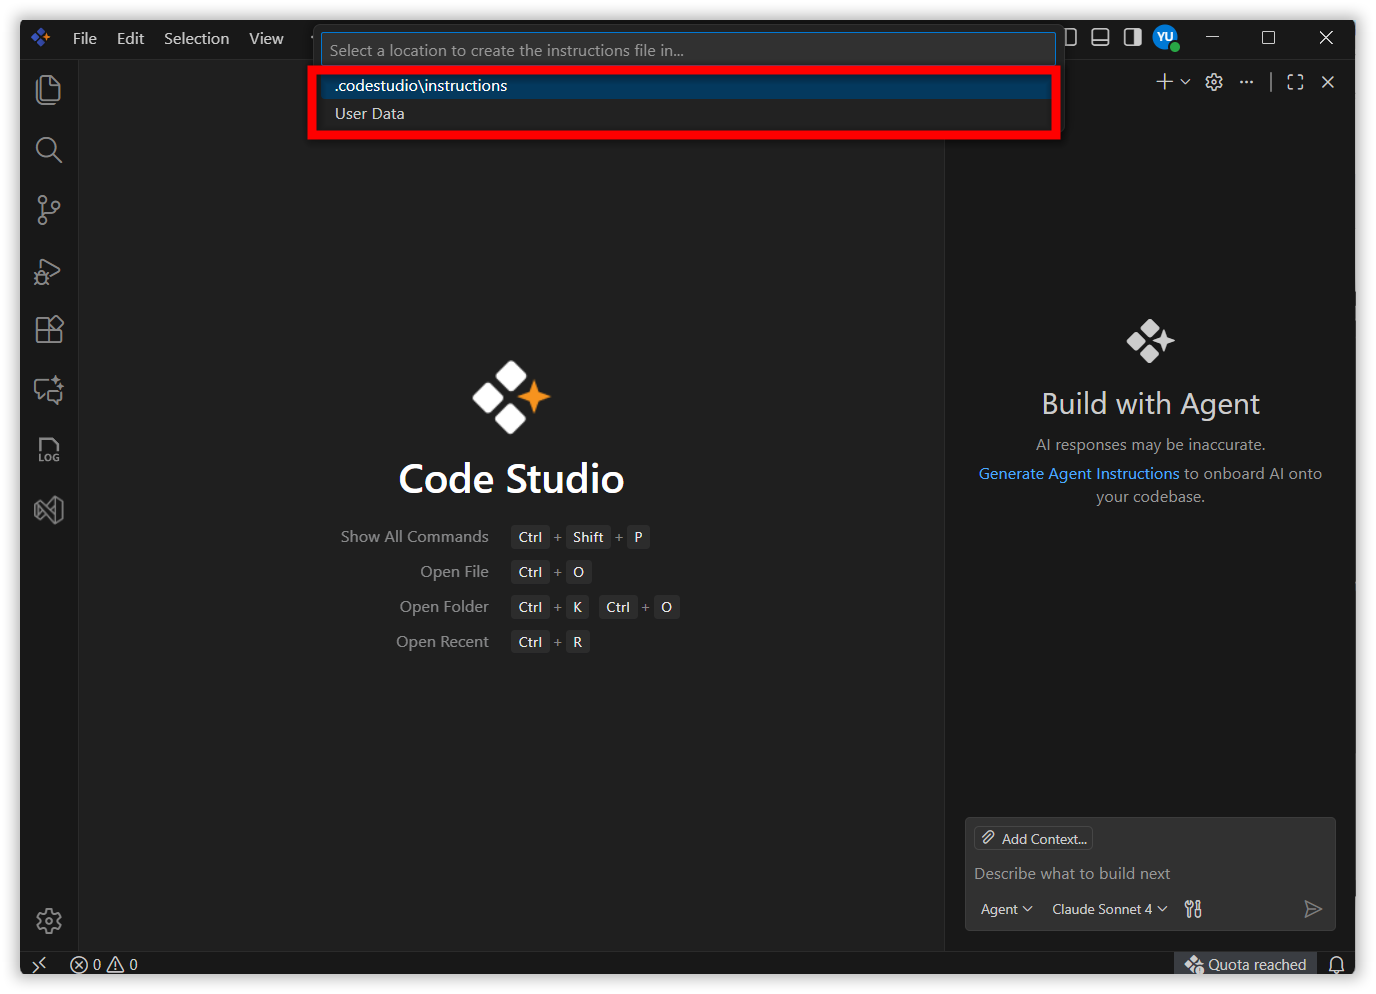
Option 1: Workspace:
- Save to
.codestudio/instructions/folder in your project. - Use when: Sharing with your team while committing your source.
- Location:
YOUR-PROJECT/.codestudio/instructions instruction-name.instructions.md.
- Save to
-
Option 2: User Profile:
- Saves to: Your user profile folder.
- Use when: Using across multiple projects.
- Benefit: Available in all workspaces.
- Select your preferred location and click to Continue.
-
Option 1: Workspace:
Step 4: Name your instruction file
- For example, here the instruction file name entered is
test.instructions.md.
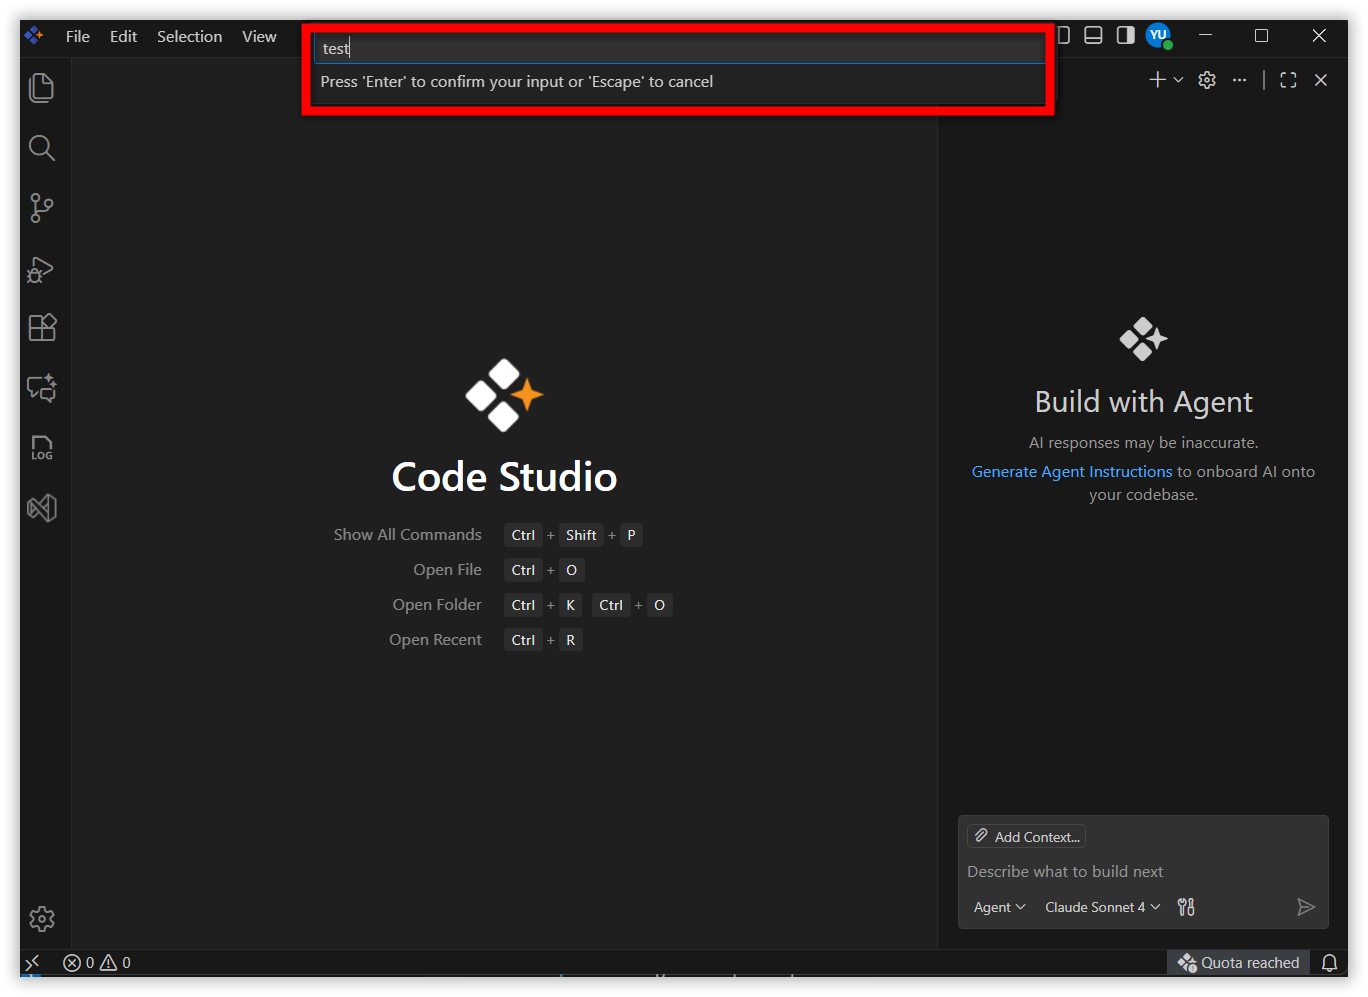
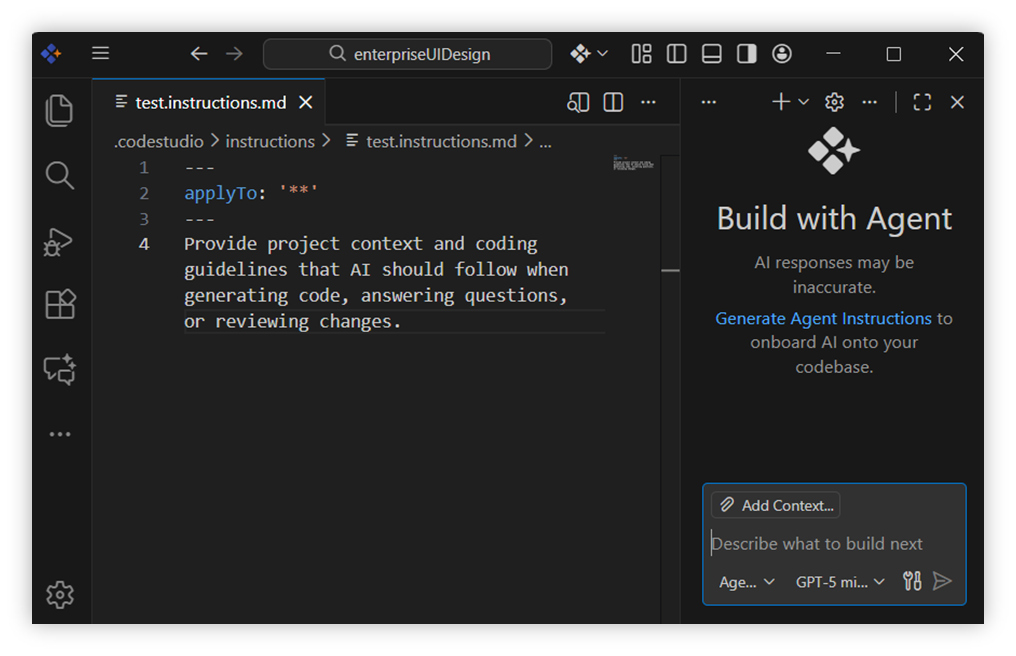
Step 5: The new file will be open automatically for editing.
Step 6: Target the path-specific instructions file
-
For example, here target the
test.instructions.mdfile. -
There are two options to target your path specific instruction. You can choose any one of them based on your preference.
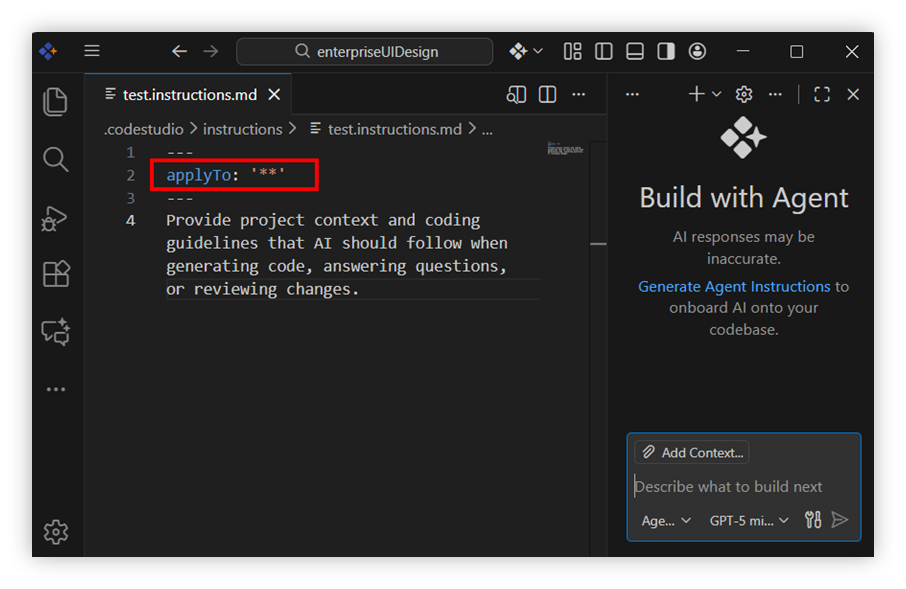
Option 1: Global Path Targeting
-
Definition:
applyTo: '**' - Applies rules globally to all files in the project.
-
Best when you want rules to apply across every file types
(e.g.,.ts, .scss, .js, .html). - Steps to target the global path:
- Step 1: Use path Like
'**'
- Step 2: Add instructions in the test-instructions.md.
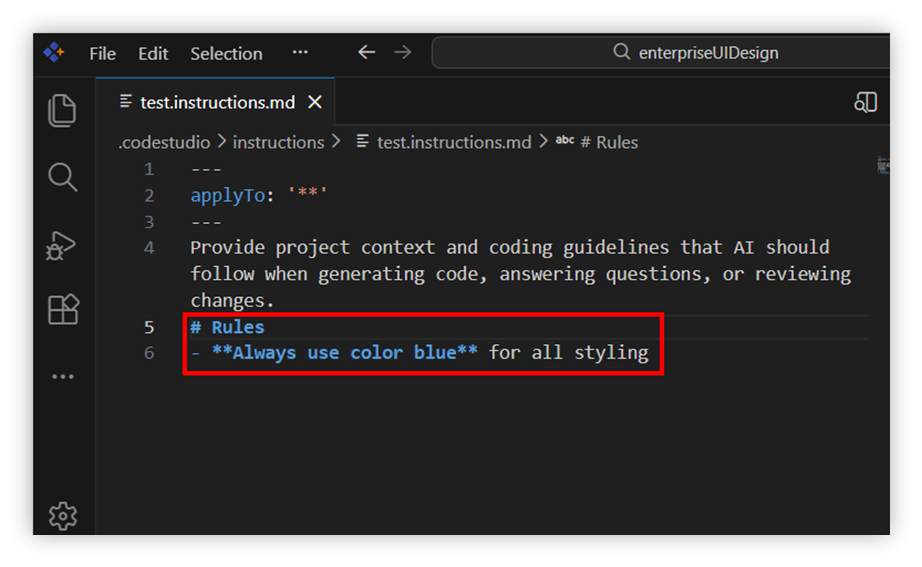
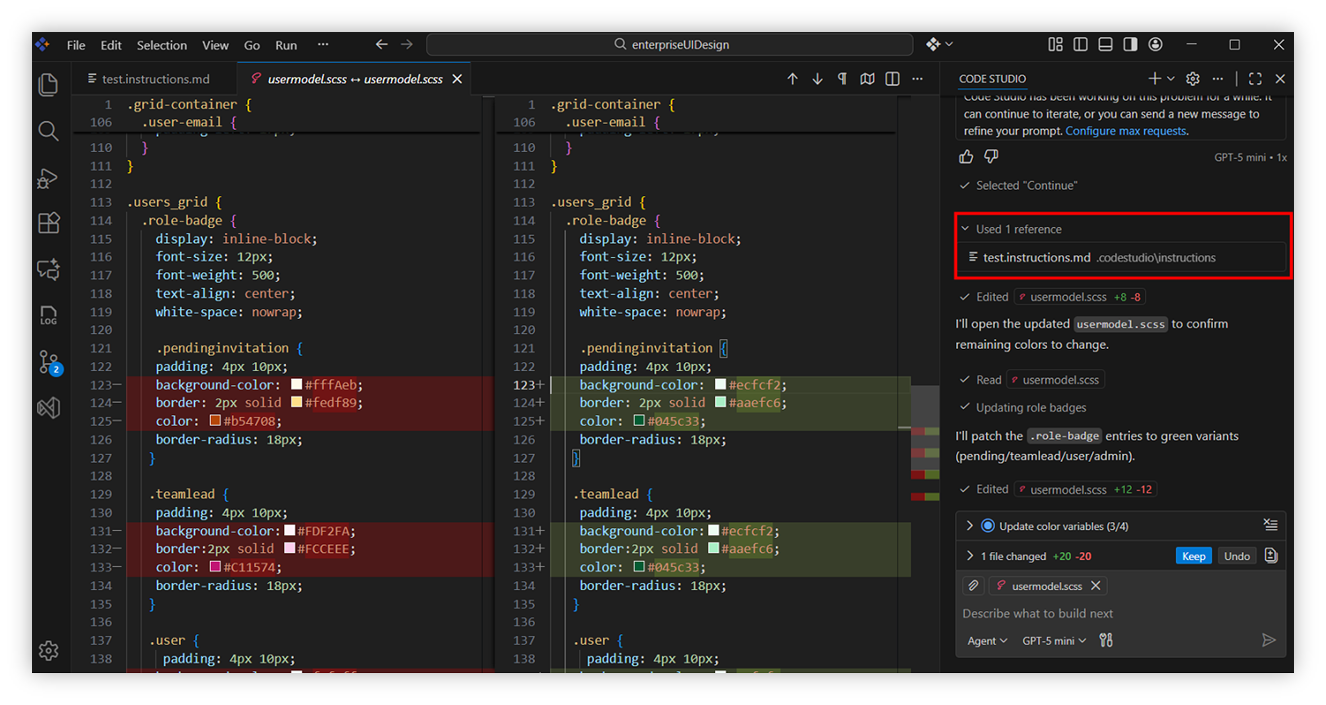
- Step 3: Open chat and send message your instruction will come in the used reference.
- Step 1: Use path Like
Option 2: Pattern-specific Targeting
-
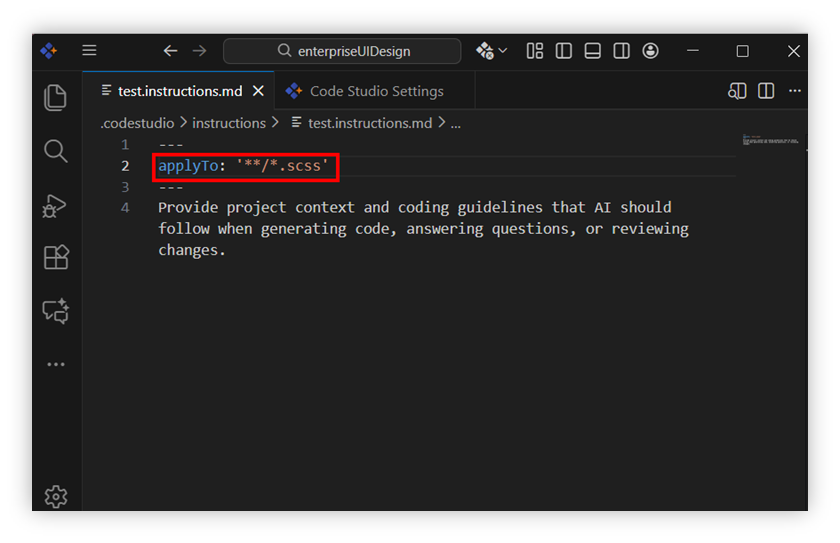
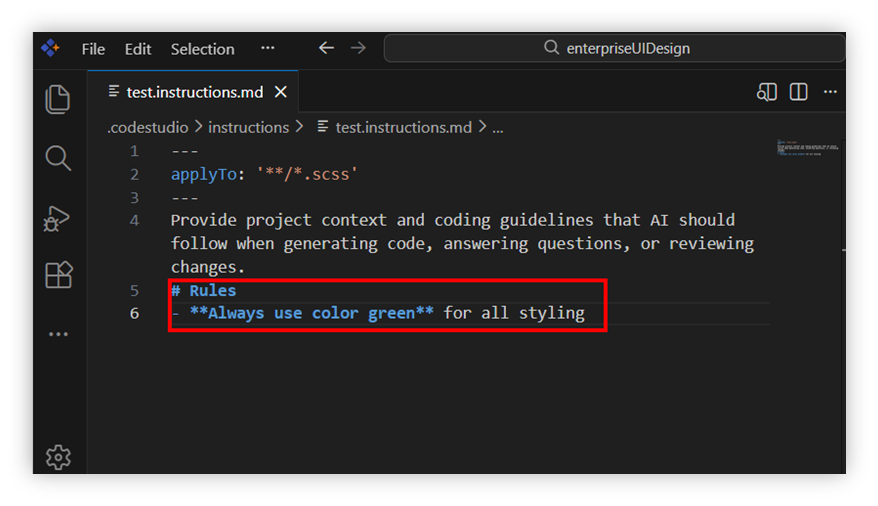
Definition:
applyTo: **/*.scssor other patterns. for example(**/*.ts, **/*.css) - Applies rules only to files matching the given pattern (e.g., “Use */.scss if you only want rules applied to SCSS files”).
-
Best for adding rules to certain file types or directories.
- Steps to target the pattern specific path
- Step 1: Use any specific path like
‘**/*.scss’.
- Step 2: Add instructions in the test-instructions.md.
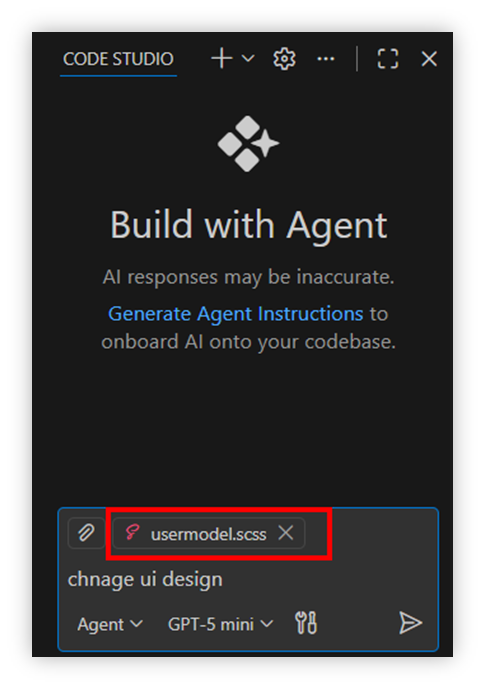
- Step 3: Include the file in the chat context which you want to edit.
- Step 4: Open chat and send message your instruction file will come in the used reference.
- Step 1: Use any specific path like
## Custom Instructions Example
The following examples show how custom instructions can be used.
---
applyTo: "docs/**/*.md"
---
# Technical Documentation Style Guide

## Writing Principles
- Communicate concepts with clarity and precision.
- Prioritize simplicity over complexity whenever possible.
- Maintain uniform structure across all documentation pages.
- Provide practical examples to reinforce understanding.

## Tone & Style
* Use a professional and friendly tone.
* Prefer short, direct sentences.
* Avoid filler words and unnecessary explanations.
* Focus on actionable information that helps readers immediately.

## Formatting Standards
- Use descriptive headings to break content into logical sections.
- Use numbered lists for step‑by‑step instructions.
- Highlight important terms with **bold** formatting.
- Use inline code formatting (`example`) for commands, arguments, and filenames.

## Code & Examples
- Include language‑specific code fences for syntax highlighting.
- Add comments in examples to clarify purpose.
- Provide both input and expected output wherever relevant.
- Keep code examples minimal, runnable, and directly associated with the topic.

## Links & References
- Link to related guides, API references, and external standards.
- Use descriptive link text instead of generic labels like “here”.
- Ensure all referenced content is up‑to‑date.