GettingStarted
27 Dec 20168 minutes to read
This section discloses the details on how to render and configure CheckBox component in an Aurelia application.
Create CheckBox
You can create an Aurelia application and add necessary scripts and styles with the help of the given Aurelia Getting Started Documentation.
We have already configured a template project in GitHub repository syncfusion-template-repository. Run the below set of commands to clone the repository and install the required packages for Syncfusion Aurelia application.
*	git clone "https://github.com/aurelia-ui-toolkits/syncfusion-template-repository"
*	cd syncfusion-template-repository
*	npm install
*	jspm install
The below steps describes the steps to create Syncfusion Aurelia Checkbox component.
Create Checkbox folder inside src/samples/ location in sample files folder.
Create an HTML file (here Checkbox.html file) inside newly created folder and use the below code example to render the Checkbox component.
<div>
    Hobbies <br /><br />
    <table>
        <tr>
            <td>
                <ej-checkbox id="music" ej-check-box="e-checked.bind:value; e-text:Music; e-size: 'small'; e-name='music'"></ej-checkbox>
            </td>
            <td>
                <ej-checkbox id="sports" ej-check-box="e-text:Sports; e-size: 'small'; e-name='sports'"></ej-checkbox>
            </td>
            <td>
                <ej-checkbox id="bike" ej-check-box="e-text:Bike Riding; e-size: 'small'; e-name='bikeriding'"> </ej-checkbox>
            </td>
        </tr>
    </table><br /><br />
    Favorite Search Engines<br /><br />
    <table>
        <tr>
            <td>
                <ej-checkbox id="google" ej-check-box="e-checked.bind:value; e-text:Google; e-size: 'medium'; e-name='google'"> </ej-checkbox>
            </td>
            <td>
                <ej-checkbox id="yahoo" ej-check-box="e-text:Yahoo; e-size: 'medium'; e-name='yahoo'"> </ej-checkbox>
            </td>
            <td>
                <ej-checkbox id="bing" ej-check-box="e-text:Bing; e-size: 'medium'; e-name='bing'"> </ej-checkbox>
            </td>
        </tr>
    </table>
</div>
Create a javascript file in Aurelia application and add the Model class for binding with Checkbox component as given below.
Here, for example, we created the checkbox.js file with the below code snippet inside src/samples/CheckBox folder.
export class CheckBox{
    constructor(){
        this.value = true;
    }
}
Configure Router
Now that, we are done with adding CheckBox component, let us see how to configure our Aurelia application to add additional tab for showcasing CheckBox component.
The Routing configuration is available inside ‘src/app.js’ file.
Add the below code to the config.map method.
{ route: 'checkbox', name: 'checkbox', moduleId: 'samples/checkbox/checkbox', nav: true, title: 'CheckBox' }Run the application
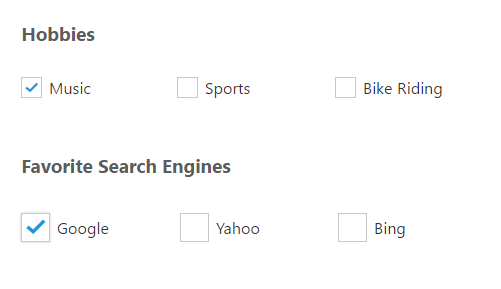
Execute the following command to run the application
gulp watchExecution of above code will render the following output.
Model binding
CheckBox can be bound to both Boolean or Array of String typed model values to synchronize the checked state between view and model.
Check Below code example to know about two way binding
<div>
            Hobbies <br /><br />
            <table>
                <tr>
                    <td>
                        <ej-checkbox id="music" ej-check-box="e-checked.bind:hobbies;e-text:Music; e-size: 'small'; e-name:'music';e-value: music"></ej-checkbox>
                    </td>
                    <td>
                        <ej-checkbox id="sports" ej-check-box="e-checked.bind:hobbies;e-text:Sports; e-size: 'small'; e-name:'sports';e-value: sports;"></ej-checkbox>
                    </td>
                    <td>
                        <ej-checkbox id="bike" ej-check-box="e-checked.bind:hobbies;e-text:Bike Riding; e-size: 'small'; e-name:'bikeriding';e-value: bikeriding;"> </ej-checkbox>
                    </td>
                </tr>
            </table><br /><br />
            Favorite Search Engines<br /><br />
            <table>
                <tr>
                    <td>
                        <ej-checkbox id="google" ej-check-box="e-checked.bind:search_engines; e-text:Google; e-size: 'medium'; e-name:'google';e-value: google"> </ej-checkbox>
                    </td>
                    <td>
                        <ej-checkbox id="yahoo" ej-check-box="e-checked.bind:search_engines;e-text:Yahoo; e-size: 'medium'; e-name:'yahoo';e-value: yahoo"> </ej-checkbox>
                    </td>
                    <td>
                        <ej-checkbox id="bing" ej-check-box="e-checked.bind:search_engines;e-text:Bing; e-size: 'medium'; e-name:'bing';e-value: bing"> </ej-checkbox>
                    </td>
                </tr>
            </table>
        </div>
In script section set the Model values,
export class CheckBox {
    constructor(){
        //Array of String -> value based mapping
        this.hobbies = ["music", "sports"];
        this.search_engines = ["google"];
    }
}
The following screenshot illustrates the output of above code.
