Getting Started with ASP.NET MVC Captcha
20 Apr 202315 minutes to read
Create your first Captcha in ASP.NET MVC
This section enables you to configure the Captcha control in your ASP.NET MVC application and also in learning how to use captcha with auto validation in Web Forms.

Captcha control with AutoValidation
Create Captcha Control
The Captcha is one of the way to prevent dictionary attacks, it basically comes with the random text. The following steps are used to create Captcha control.
- You can create an MVC Project and add necessary assembly and script with the given MVC-Getting Started Documentation.
-
Add the following code to the corresponding view page for Captcha rendering.
<div> @Html.EJ().Captcha("SignUpCaptcha") </div> -
Add the following handler codes to the web.config file for Captcha image rendering.
 <!--add the following code in <system.web>-->

 <system.web>

     <httpHandlers>

         <add verb="*" path="captimage.axd" type="Syncfusion.JavaScript.ImageHandler, Syncfusion.EJ, Version=XX.XXXX.X.XX, Culture=neutral, PublicKeyToken=3D67ED1F87D44C89" />

     </httpHandlers>

 </system.web>

 <!--add the following code in <system.webserver>-->

 <system.webserver>


     <handlers>

         <add verb="*" path="captimage.axd" name="syncfusion_generatetools" type="Syncfusion.JavaScript.ImageHandler, Syncfusion.EJ, Version=XX.XXXX.X.XX, Culture=neutral, PublicKeyToken=3d67ed1f87d44c89" />

     </handlers>

 </system.webserver>
NOTE
Version=XX.XXXX.X.X - It will vary depend up on .NET Framework version and Essential Studio version you have using. If you are using Essential Studio version as-12.3.0.36 and .NET Framework is 4.5 use like following Version=12.3450.0.36
The following screen shot displays the output of the above codes.

Captcha control with initial render
Enable Audio and Refresh
The Captcha control supports captcha in the form of audio and when you click the audio button it readouts the captcha characters. You can achieve this by setting “EnableAudio” property to true. Enable refresh is used to refresh or change the captcha image without full page refresh. This is achieved by adding “EnableRefreshImage” property to true. Also include RequestMapper for refresh support.
-
Add the following code example to view page to render captcha with Audio and Refresh.
<div> @Html.EJ().Captcha("SignUpCaptcha").EnableAudio(true).EnableRefreshImage(true).RequestMapper("Refresh") </div> -
Add the following code example to corresponding controller page to render captcha with Audio and Refresh.
  public ActionResult Refresh(CaptchaParams parameters)

  {

     return parameters.CaptchaActions();

  }
The following screenshot displays the output of the above codes.

Captcha control with refresh and audio support
Auto Validation
The Captcha supports automatic validation by enabling the property EnableAutoValidation. When you set this property to true, captcha validation is done automatically. When the validation fails, CustomErrorMessage property supports to display the customized error message.
-
Add the following code example to view page for auto validation.
( CaptchaFeatures) @using (Html.BeginForm("CaptchaFeatures", "Captcha", FormMethod.Post)) { <div class="frame" style="width: 500px"> <div class="control" style="width: 560px;"> <table class="tableprop"> <tr> <td> <h2 style="text-align:center"> Sign Up</h2> <br> </td> </tr> <tr> <td> <span class="NodeText">Enter Your Name</span> </td> <td> <input type="text" name="username" /> @if (!(bool)ViewBag.NameStatus) {<span style="color: red">Invalid Value</span>} </td> </tr> <tr> <td> <span class="NodeText">Email</span> </td> <td> <input type="text" name="email" /> @if (!(bool)ViewBag.EmailStatus) {<span style="color: red">Invalid Value</span>} </td> </tr> <tr> <td> <span class="NodeText">Enter Your Password</span> </td> <td> <input type="password" name="password" /> @if (!(bool)ViewBag.PasswordStatus) {<span style="color: red">Invalid Password</span>} </td> </tr> <tr> <td> <span class="NodeText">Re-Enter Your Password</span> </td> <td> <input type="password" name="repassword" /> </td> </tr> <tr> <td> </td> <td> <div> @Html.EJ().Captcha("myCaptcha").EnableRefreshImage(true).EnableAudio(true).EnableAutoValidation(true).RequestMapper("Refresh").CustomErrorMessage("Invalid captcha code entered. Please try again.").TargetButton("submit") </div> <br /> <br /> </td> </tr> <tr> <td> </td> <td> @Html.EJ().Button("submit").Size(ButtonSize.Large).Text("Submit").Type(ButtonType.Submit) </td> </tr> </table> </div> </div> } ( CaptchaSuccess) <div class="frame" style="height: 300px; width: 500px; border: 1px solid gray; padding: 10px; background: #f9f9f9"> <div class="control"> <table> <tr> <td style="padding: 50px;"> <br> <br> <h2> Thank you for registering.</h2> <br> </td> </tr> </table> </div> </div> -
Add the following code example to corresponding controller page for captcha with Auto-Validation support.
     public ActionResult CaptchaFeatures()

     {

         ViewBag.NameStatus = true;

         ViewBag.PasswordStatus = true;

         ViewBag.EmailStatus = true;

         return View();

     }


     public ActionResult CaptchaFeatures(FormCollection Values)

     {

         if (!string.IsNullOrEmpty(Values["username"].ToString()) && (Values["username"].ToString().Length > 3))

             ViewBag.NameStatus = true;

         else

             ViewBag.NameStatus = false;

         if (!string.IsNullOrEmpty(Values["email"].ToString()) && (Values["email"].ToString().Length > 3))

             ViewBag.EmailStatus = true;

         else

             ViewBag.EmailStatus = false;

         if ((!string.IsNullOrEmpty(Values["password"].ToString())) && (Values["password"].ToString().Length > 3) && (Values["password"].ToString().Equals(Values["repassword"].ToString())))

             ViewBag.PasswordStatus = true;

         else

             ViewBag.PasswordStatus = false;

         if ((bool)ViewBag.NameStatus && (bool)ViewBag.PasswordStatus && (bool)ViewBag.EmailStatus)

             return View("CaptchaSuccess");

         else

             return View();

     }


     public ActionResult Refresh(CaptchaParams parameters)

     {

         return parameters.CaptchaActions();

     }


     public ActionResult CaptchaSuccess()

     {

         return View();

     }
The following screenshot is the output for the above code example.

Captcha control with failed Auto Validation

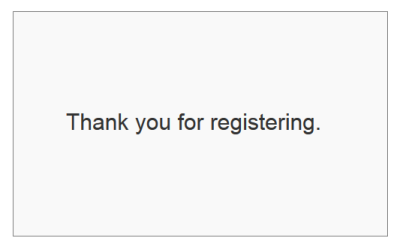
Captcha control with successful AutoValidation