Contents
- Create a Tooltip
- Setting Dimensions
- Tooltip Appearance
Having trouble getting help?
Contact Support
Contact Support
Getting started
5 Oct 20165 minutes to read
Create a Tooltip
Using the following steps, you can create a Tooltip control. The basic rendering of ASP.NET Tooltip is achieved with default functionality.
-
You can create an ASP.NET Project and add necessary assembly and script with the help of the given WebForms-Getting Started Documentation.
-
Add the mentioned code to the corresponding ASPX page for Tooltip rendering.
<div class="frame">
        <div class="img" id="sample">
            <a target="_blank" href="image/taj.png">
            <img src="http://asp.syncfusion.com/demos/web/content/images/tooltip/template-05.png" alt="Delphi">
            </a>
            <div class="desc">Delphi Succinctly</div>
        </div>
    </div>

    <ej:Tooltip For="sample" runat="server" ClientIDMode="Static"  Content="Learn the fundamentals of Delphi to build a variety of solutions for many devices and platforms."></ej:Tooltip>
Apply the following style sheet
<style>
        div.img {
            border: 1px solid #ccc;
            width: 159px;
            height: 213px;
            left: 35%;
            position: relative;
            top: 20%;
        }
        div.img img {
            width: 159px;
            height: 179px;
        }
        div.desc {
            padding: 8px;
            text-align: center;
        }
    </style>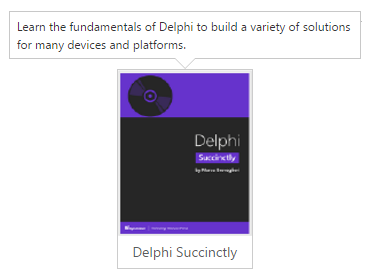
Setting Dimensions
Tooltip dimensions can be set using width and height API.
<div class="control">
        TypeScript lets you write <a id="testSample"><u> JavaScript</u> </a>the way you really want to.
    </div>

    <ej:Tooltip For="testSample" runat="server" ClientIDMode="Static"  Content="JavaScript is the programming language of HTML and the Web." Width="100px" Height="100px"></ej:Tooltip>
Tooltip Appearance
You can configure the appearance of the Tooltip with the title, close button and call out as your application requires.
<div class="img" id="sample2">
        <a target="_blank" href="image/taj.png">
        <img src="http://asp.syncfusion.com/demos/web/content/images/tooltip/template-05.png" alt="Delphi">
        </a>
        <div class="desc">Delphi Succinctly</div>
    </div>

    <ej:Tooltip For="sample2" runat="server" ClientIDMode="Static"  Content="Learn the fundamentals of Delphi to build a variety of solutions for many devices and platforms." Width="180px" Title="Delphi Succinctly" CloseMode="Sticky" IsBalloon="false"></ej:Tooltip>
Apply the following styles to show the Tooltip.
<style>
        div.img {
            border: 1px solid #ccc;
            float: left;
            box-sizing: border-box;
            height: 200px;
            width: 146px;
        }
        div.img img{
            width: 100%;
            height: 166px;
        }
        div.desc {
            padding: 6px;
            text-align: center;
        }
    </style>