How can I help you?
Getting Started with ASP.NET Core Application
Starting with v16.2.0.x, if you reference Syncfusion assemblies from trial setup or from the NuGet feed, you also have to include a license key in your projects. Please refer to this link to know about registering Syncfusion license key in your ASP.NET Core application to use our components.
ASP.NET Core 1.1.0 Application Using Visual Studio 2015
System Requirements:
To work with ASP.NET Core 1.1.0, you need to make sure is whether you have installed the following software on your machine
-
Visual Studio 2015 Update 3.
-
DotNetCore 1.1.0 (Preview 2).
Configure Syncfusion UI Components in ASP.NET Core Application:
The following steps helps to create a ASP.NET Core web application to configure our components.
-
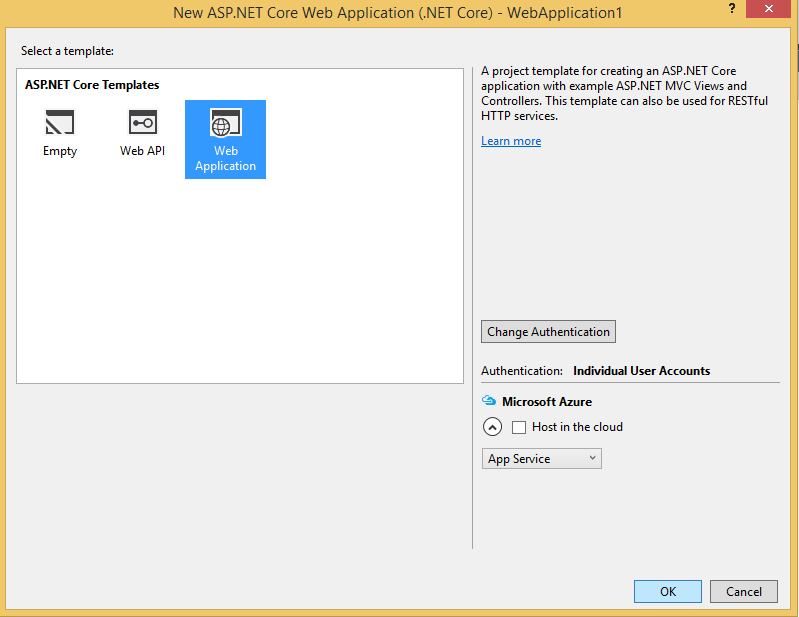
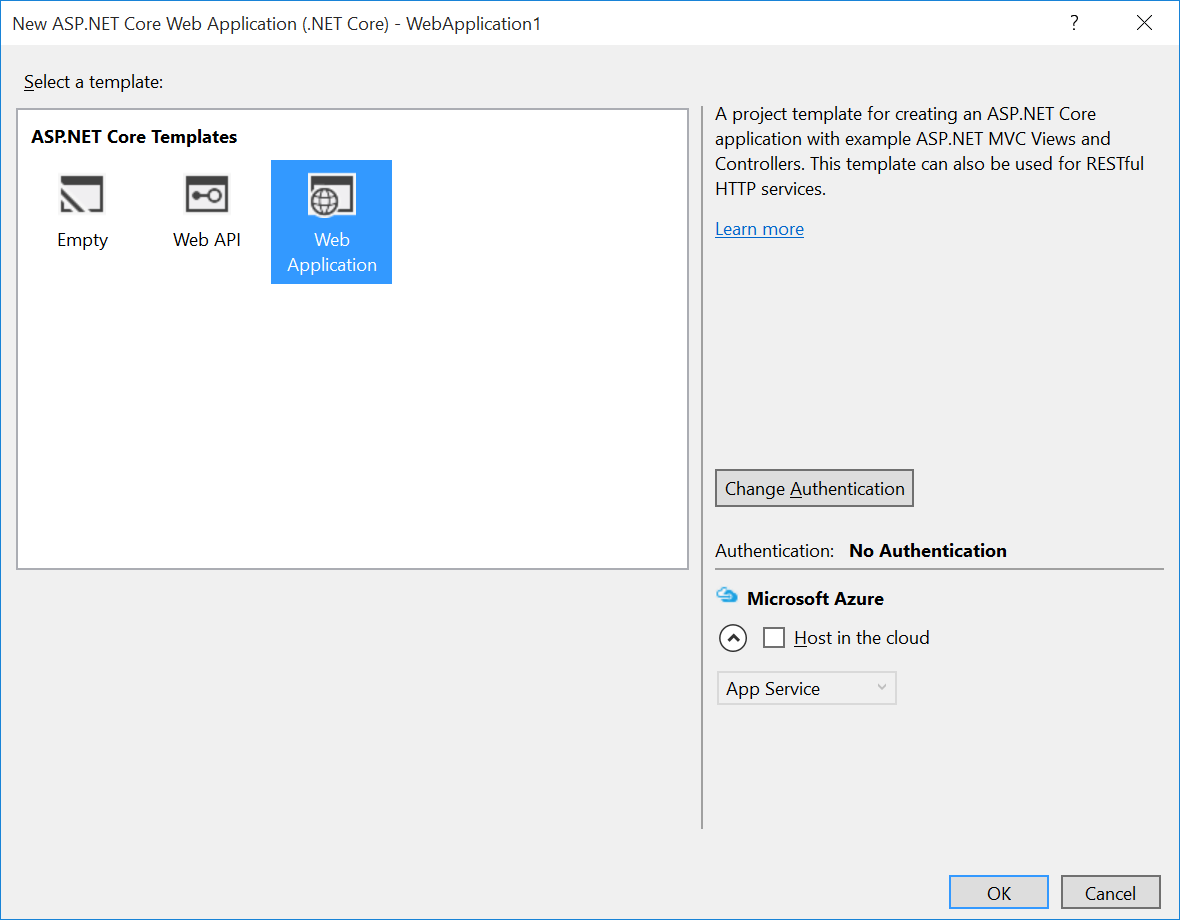
Open Visual Studio 2015 to create ASP.NET Core web application.
-
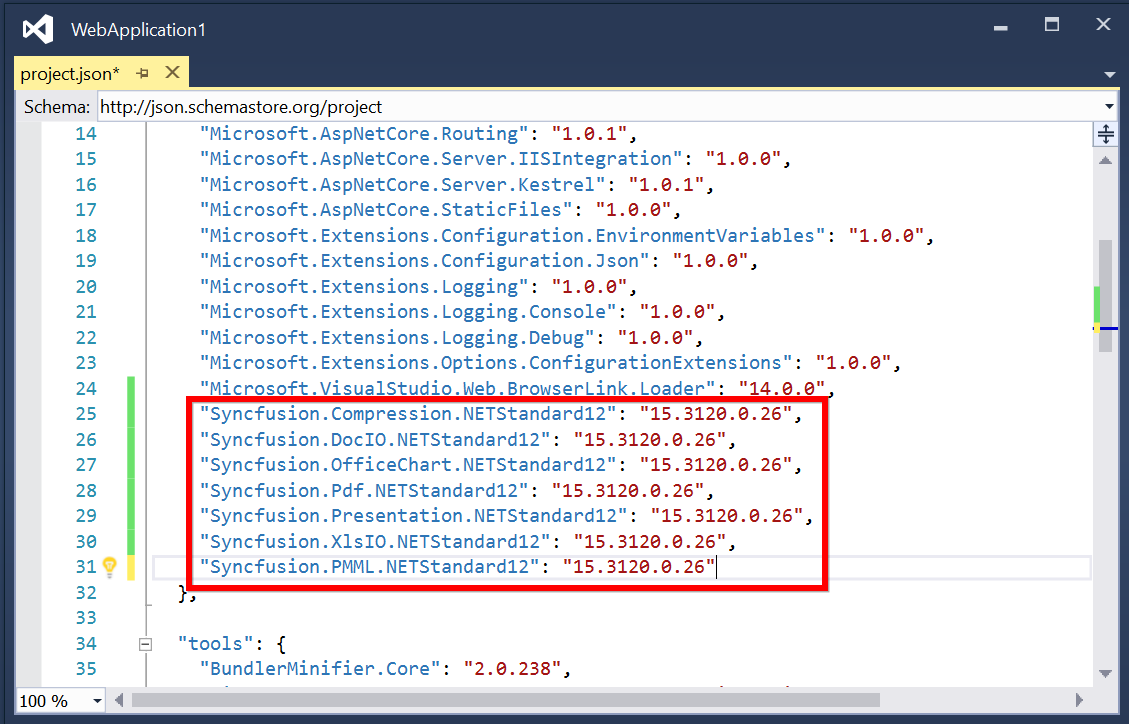
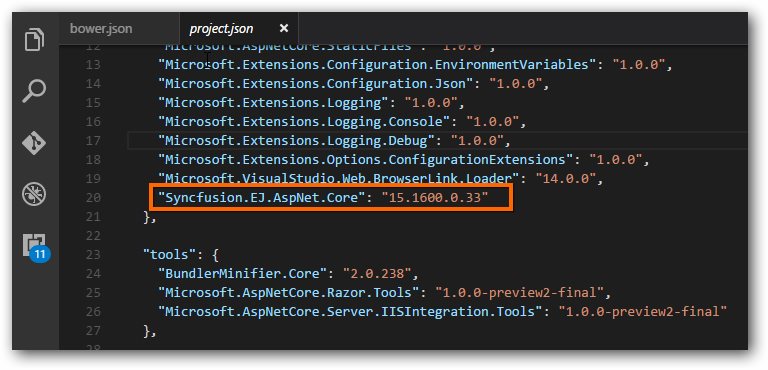
After project creation, open your project.json file to add our Syncfusion assembly packages.
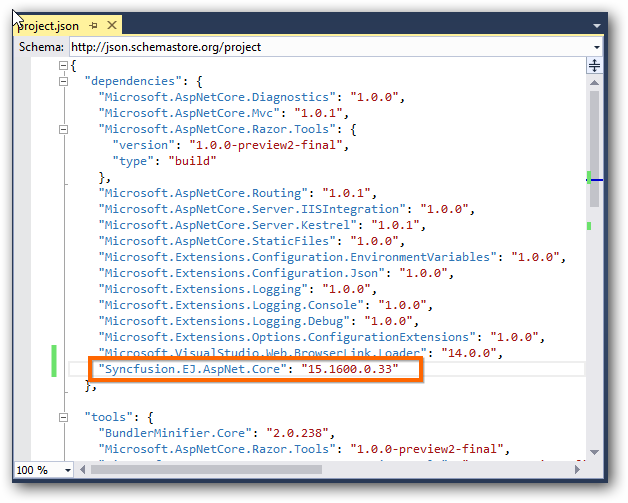
The ASP.NET Core NuGet packages versioning has been streamlined as 16.1.0.32 in shorter than older versioning (16.1600.0.32) from Volume 1, 2018 service pack 1 release (16.1.0.32). Since all the framework version wise assemblies are grouped into a single package.
The package “Syncfusion.EJ.MVC” renamed into “Syncfusion.EJ.AspNet.Core” from Volume 3, 2016 (14.3.0.49) release. The “preview2-final” keyword removed our Syncfusion packages naming from Volume 1, 2017 (15.1.0.33) release.
-
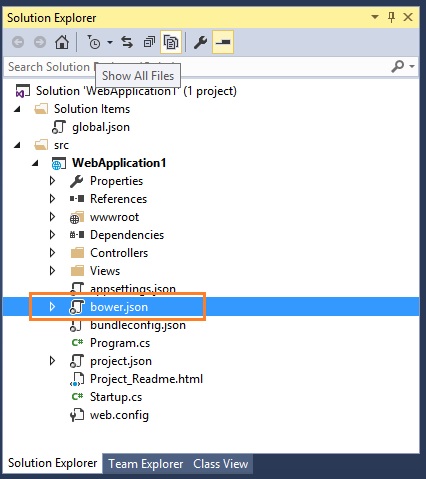
In the Solution Explorer window, click the “Show All Files” button.
-
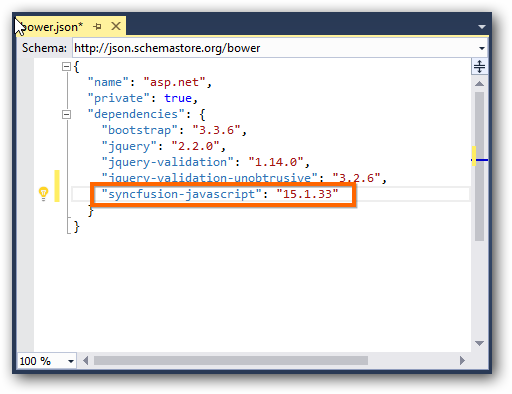
Open bower.json file to include the following necessary packages.
-
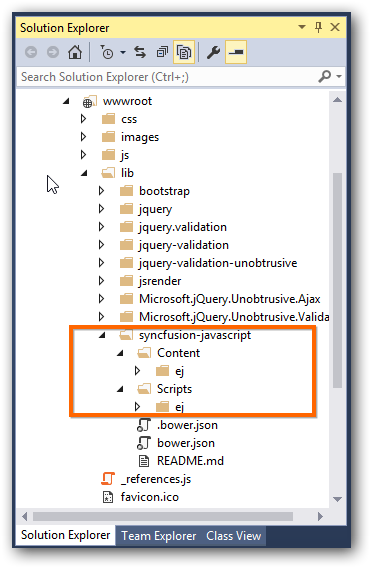
After Bower packages installation the scripts and CSS files are loaded into the wwwroot -> lib folder as shown below
-
Now open _viewImports.cshtml file from the views folder and add the following namespace for components references and Tag Helper support.
@using Syncfusion.JavaScript

@addTagHelper "*, Syncfusion.EJ"- Refer the necessary scripts and CSS files in your layout.cshtml page from lib -> syncfusion-javascript folder.
NOTE
Include the below mentioned scripts and CSS references under the appropriate environment. (For eg: If your environment is “Development”, then refer the scripts and CSS files under the tag environment names=”Development”). Refer all the required external and internal scripts only once in the page with proper order. Refer this link to know about order of script reference.
<html>

<head>

<link rel="stylesheet" href="~/lib/bootstrap/dist/css/bootstrap.css" />

<link href="~/lib/syncfusion-javascript/Content/ej/web/bootstrap-theme/ej.web.all.min.css" rel="stylesheet" />

<link href="~/lib/syncfusion-javascript/Content/ej/web/responsive-css/ej.responsive.css" rel="stylesheet" />

<script src="~/lib/jquery/dist/jquery.js"></script>

<script src="~/lib/jsrender/jsrender.min.js"></script>

<script src="~/lib/syncfusion-javascript/Scripts/ej/web/ej.web.all.min.js"></script>

</head>

<body>


</body>

</html>
NOTE
jQuery.easing external dependency has been removed from version 14.3.0.49 onwards. Kindly include this jQuery.easing dependency for versions lesser than 14.3.0.49 in order to support animation effects.
- Add ScriptManager to the bottom of the layout.cshtml page. The ScriptManager used to place our control initialization script in the page.
<ej-script-manager></ej-script-manager>- Now open your view page to render our Syncfusion components in Tag Helper syntax.
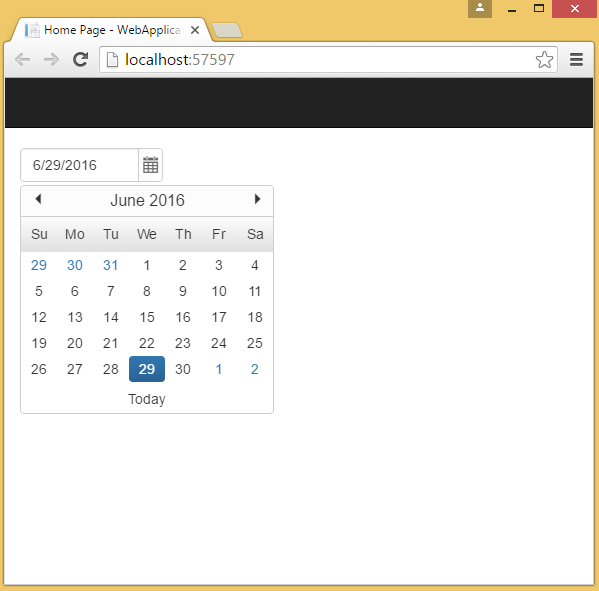
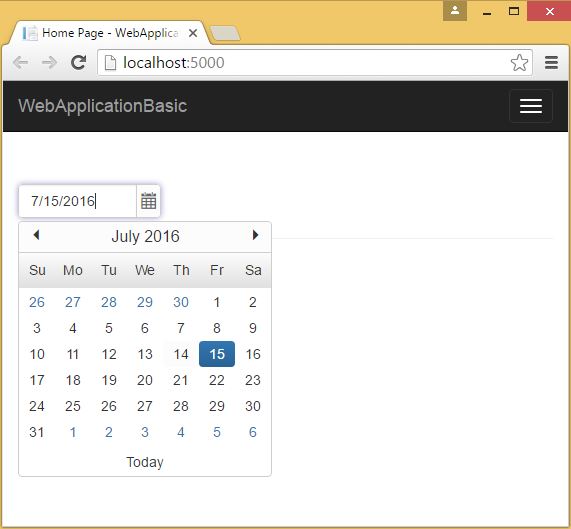
<ej-date-picker id="datepicker" value="@DateTime.Now"></ej-date-picker>-
Finally compile your project, after successful compilation then press F5 key to deploy your project.
Configure Syncfusion File Format Components in ASP.NET Core Application:
The following steps helps to create a ASP.NET Core web application to configure our File Format components.
-
Open Visual Studio 2015 to create ASP.NET Core web application.
-
After project creation, open your project.json file to add our Syncfusion assembly packages.
NOTE
- You can refer Installation procedure to configure Syncfusion NuGet packages.
- The File format component packages has been modified from Volume 3, 2017 (15.3.0.26) release. You can refer migration document for more details.
ASP.NET Core 1.1.0 Application Using Command Prompt with Visual Studio Code
System Requirements:
- Visual Studio Code
- DotNetCore 1.1.0 (Preview 2).
The following steps helps to create a ASP.NET Core web application to configure our components.
- In the command prompt we have an options to develop a below listed types of projects. The default type as console application. If you want to create any other specific type project, need to specify the -t (template) key in command before the project type name. To know more about the project options and its syntax declarations refer the .NET link.
*   console

*   web

*   lib

* xunittest- Then run the below mentioned command to create a new web application. After command execution the project will be created within your folder.
dotnet new -t web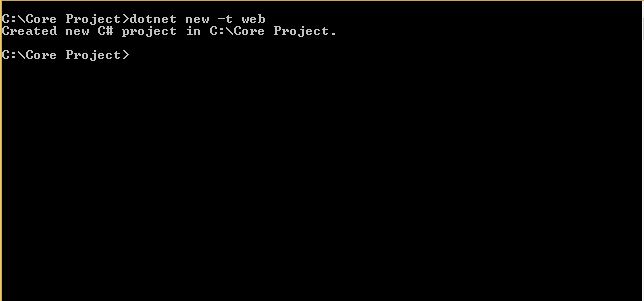
Configure Syncfusion Components in ASP.NET Core Application
-
Open Visual Studio Code and open your ASP.NET folder using Open -> Folder menu. Now your project folder is loaded in Visual Studio Code application.

-
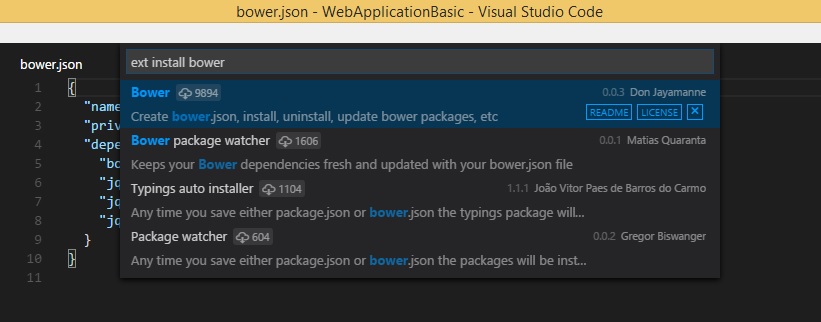
Open your bower.json json file and specify our Syncfusion package will loads our scripts and CSS. Refer this link to configure the bower execution environment in your local machine. Then install a bower extension in your Visual Studio code to complete a configuration.
-
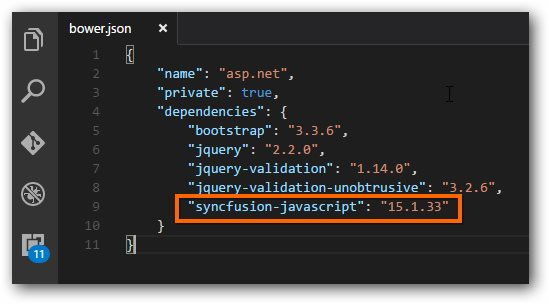
In bower.json file specify our Syncfusion packages with our latest version.
-
Open quick window (Ctrl + p) to run the
bower installcommand to install our scripts and CSS to your application wwwroot -> lib folder.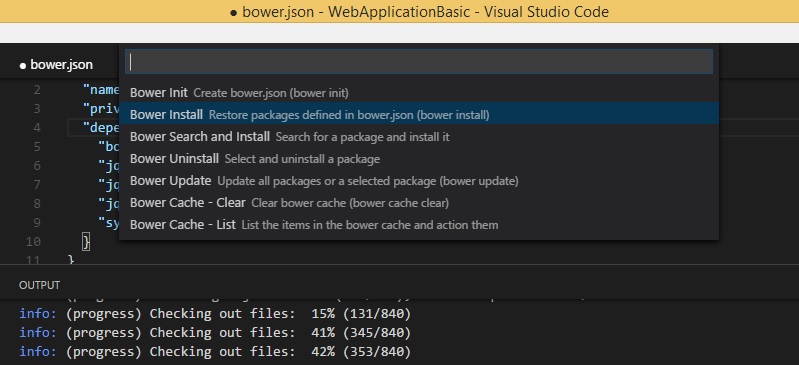
Recommended to install the “Bower package watcher” extension will helps to load the packages whenever save the bower.json file.
-
Now open your project.json file to specify our assembly packages.
The ASP.NET Core NuGet packages versioning has been streamlined as 16.1.0.32 in shorter than older versioning (16.1600.0.32) from Volume 1, 2018 service pack 1 release (16.1.0.32). Since all the framework version wise assemblies are grouped into a single package.
The package “Syncfusion.EJ.MVC” renamed into “Syncfusion.EJ.AspNet.Core” from Volume 3, 2016 (14.3.0.49) release. The “preview2-final” keyword removed our Syncfusion packages naming from Volume 1, 2017 (15.1.0.33) release.
- Open _viewimports.cshtml file from the views folder and add the following namespace for components references and Tag Helper support.
@using Syncfusion.JavaScript

@addTagHelper "*, Syncfusion.EJ"- open command prompt window with administrator rights and navigate to your project folder then execute the following command to restore the packages specified in your project.json file.
dotnet restore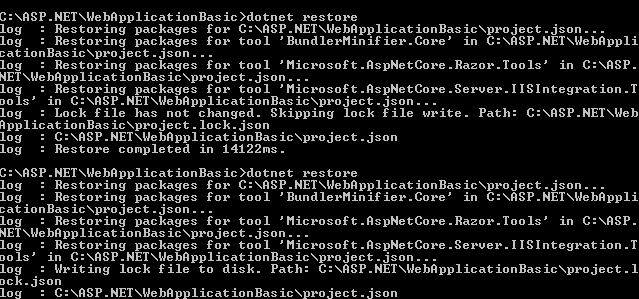
- Now refer the necessary scripts and CSS files in your _layout.cshtml page.
NOTE
Kindly include the below mentioned scripts and CSS references under the appropriate environment. (For eg: If your environment is “Development”, then refer the scripts and CSS files under the tag environment names=”Development”)
[Layout.cshtml]

<html>

<head>

<link rel="stylesheet" href="~/lib/bootstrap/dist/css/bootstrap.css" />

<link href="~/lib/syncfusion-javascript/Content/ej/web/bootstrap-theme/ej.web.all.min.css" rel="stylesheet" />

<link href="~/lib/syncfusion-javascript/Content/ej/web/responsive-css/ej.responsive.css" rel="stylesheet" />

<script src="~/lib/jquery/dist/jquery.js"></script>

<script src="~/lib/jsrender/jsrender.min.js"></script>

<script src="~/lib/syncfusion-javascript/Scripts/ej/web/ej.web.all.min.js"></script>

</head>

<body>


</body>

</html>
NOTE
jQuery.easing external dependency has been removed from version 14.3.0.49 onwards. Kindly include this jQuery.easing dependency for versions lesser than 14.3.0.49 in order to support animation effects.
- Add ScriptManager to the bottom of the layout.cshtml page. The ScriptManager used to place our control initialization script in the page.
<ej-script-manager></ej-script-manager>- Now open your view page to render our Syncfusion components in Tag Helper syntax.
<ej-date-picker id="datepicker" value="@DateTime.Now"></ej-date-picker>-
Finally press F5 key to deploy your project.
ASP.NET Core 1.1.0 Application Using Yeoman with Visual Studio Code:
System Requirements:
- Visual Studio Code
- DotNetCore 1.1.0 (Preview 2).
To create an ASP.NET Core 1.1.0 application, we will use the yeoman tool. This is a scaffolding tool for Modern web apps and helps us to quick start a new web project.
Since Visual Studio Code uses folder structure for storing files of application, we will create a folder of the name ASP.NET
- Install Node from https://nodejs.org/
- Open the Command prompt window in Administrator mode and execute the below mentioned command to install the Yeoman tool in your local machine by using npm.
npm install -g yo- After installing Yo you need to install the ASP.NET generator, gulp and Bower.
`npm install -g yo generator-aspnet gulp bower`- Once Yeoman generator installed successfully, run the below command to invoke a ASP.NET Core project creation wizard.
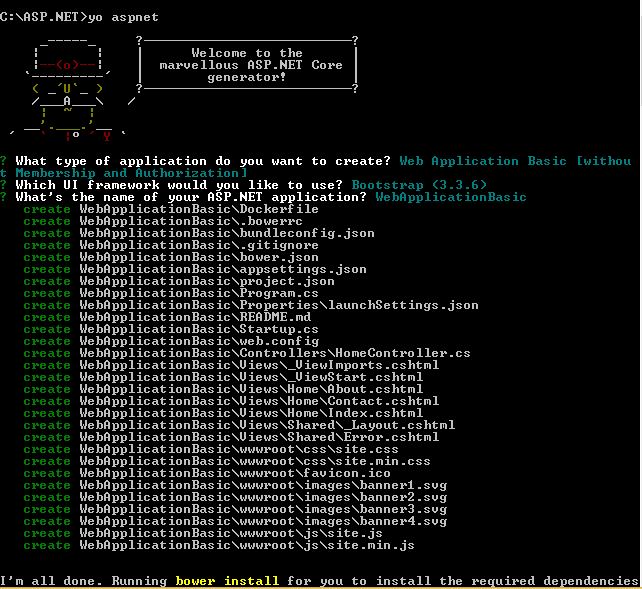
`yo aspnet`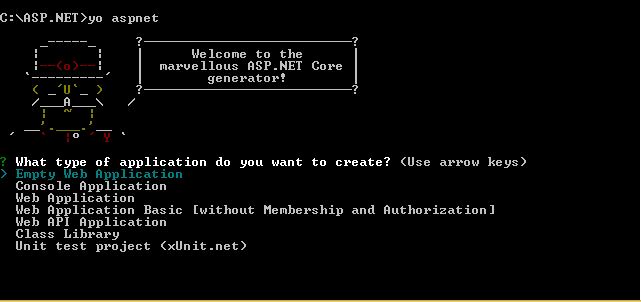
-
From the list of available projects, select the Web Application Basic [ without Membership and Authorization ] by using arrow keys.
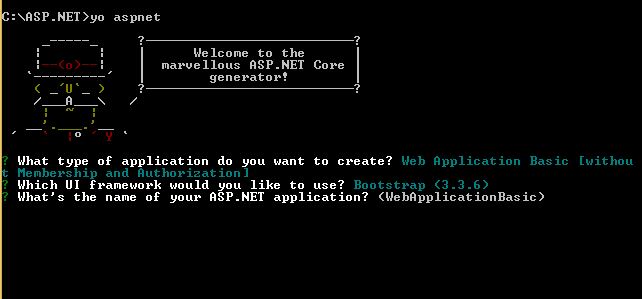
-
And then provide the project name or simply press the enter key to create the project with default name.
Configure Syncfusion Components in ASP.NET Core Application
-
Open Visual Studio Code and open your ASP.NET folder using Open -> Folder menu. Now your project folder is loaded in Visual Studio Code application.
-
Now configure a Bower execution environment in your local machine based on this link. Then install a Bower extension in your Visual Studio code to complete a configuration.
-
In bower.json file specify our Syncfusion packages with our latest version will loads our scripts and CSS.
-
Open quick window (Ctrl + p) to run the
bower installcommand to install our scripts and CSS to your application wwwroot -> lib folder.
Recommended to install the “Bower package watcher” extension will helps to load the packages whenever save the bower.json file.
-
Now open your project.json file to specify our assembly packages.
The ASP.NET Core NuGet packages versioning has been streamlined as 16.1.0.32 in shorter than older versioning (16.1600.0.32) from Volume 1, 2018 service pack 1 release (16.1.0.32). Since all the framework version wise assemblies are grouped into a single package.
The package “Syncfusion.EJ.MVC” renamed into “Syncfusion.EJ.AspNet.Core” from Volume 3, 2016 (14.3.0.49) release. The “preview2-final” keyword removed our Syncfusion packages naming from Volume 1, 2017 (15.1.0.33) release.
- Open “_viewimports.cshtml” file from the views folder and add the following namespace for components references and Tag Helper support.
@using Syncfusion.JavaScript

@addTagHelper "*, Syncfusion.EJ"- open command prompt window with administrator rights and navigate to your project folder then execute the following command to restore the packages specified in your project.json file.
dotnet restore
- Now refer the necessary scripts and CSS files in your _layout.cshtml page.
NOTE
Kindly include the below mentioned scripts and CSS references under the appropriate environment. (For eg: If your environment is “Development”, then refer the scripts and CSS files under the tag environment names=”Development”)
[Layout.cshtml]

<html>

<head>

<link rel="stylesheet" href="~/lib/bootstrap/dist/css/bootstrap.css" />

<link href="~/lib/syncfusion-javascript/Content/ej/web/bootstrap-theme/ej.web.all.min.css" rel="stylesheet" />

<link href="~/lib/syncfusion-javascript/Content/ej/web/responsive-css/ej.responsive.css" rel="stylesheet" />

<script src="~/lib/jquery/dist/jquery.js"></script>

<script src="~/lib/jsrender/jsrender.min.js"></script>

<script src="~/lib/syncfusion-javascript/Scripts/ej/web/ej.web.all.min.js"></script>

</head>

<body>


</body>

</html>
NOTE
jQuery.easing external dependency has been removed from version 14.3.0.49 onwards. Kindly include this jQuery.easing dependency for versions lesser than 14.3.0.49 in order to support animation effects.
- Add ScriptManager to the bottom of the layout.cshtml page. The ScriptManager used to place our control initialization script in the page.
<ej-script-manager></ej-script-manager>- Now open your view page to render our Syncfusion components in Tag Helper syntax.
<ej-date-picker id="datepicker" value="@DateTime.Now"></ej-date-picker>-
Finally press F5 key to deploy your project.