How can I help you?
ASP.NET Core in Bash On Windows
To work with ASP.NET Core samples in Ubuntu based Bash shell on Windows 10 (Bash on Windows), you need to make sure is whether you have following software on your machine.
-
Windows 10 anniversary update (OS Build - 14398 or above 64 bit only)
-
Visual Studio Code
Install Bash on Windows
To getting started with Bash on Windows, once you are sure with having correct version of Windows10. The below guidelines will demonstrate the installation and configuration.
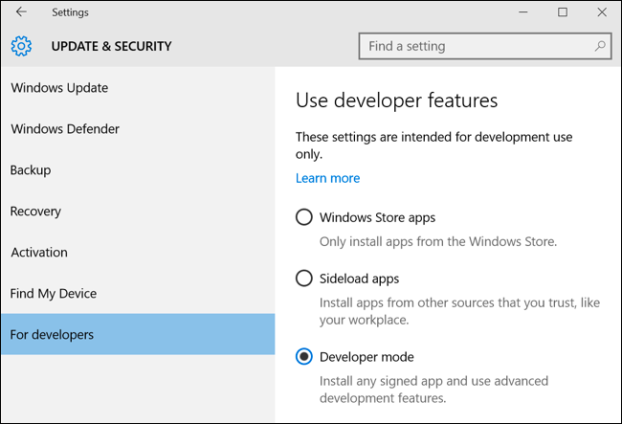
- Open Settings -> Update & Security -> For Developers. In this developer features select the Developer Mode.
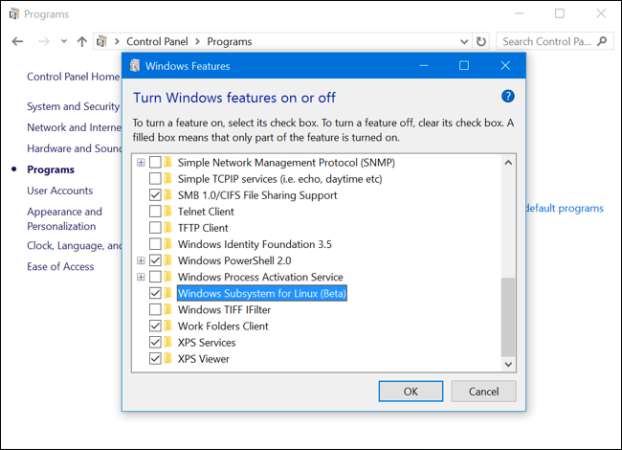
- Next, open Control Panel click Programs in left side pane and click Turn Windows Features On or Off under the programs and features.
-
In this window, enable the Windows Subsystem for Linux (Beta) from list. Then click OK button will automatically install the Windows Subsystem for Linux feature.
-
Once the installation will be completed, you will be prompted to reboot your computer option. Click Restart Now button to reboot your system and Windows10 will install the new feature.
-
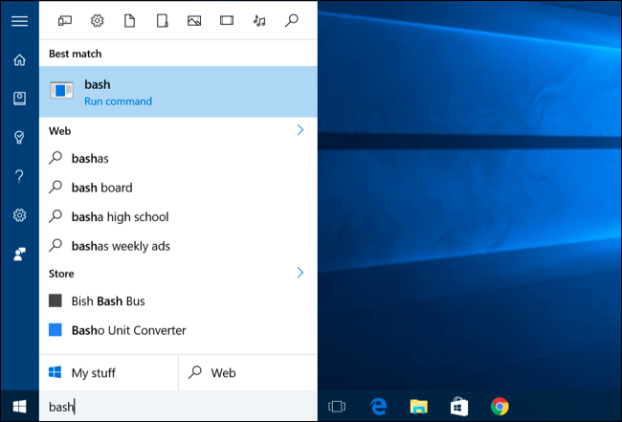
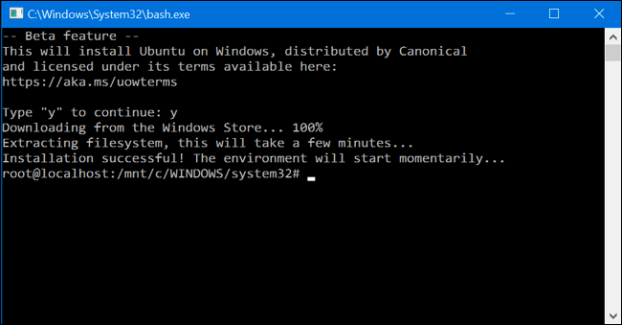
Click Start button and type bash. Form the search result select the Bash run command option.
- When open, the bash run command window in first time, you will be prompted to accept the terms and services. Once you will accept the terms and services, the Bash on Windows will automatically install from Windows store. This installation takes one or two minutes. During installation time, you will be prompted to create a UNIX username and password.
ASP.NET Core with Bash on Windows
The following guidelines will assist how to configure dotnet in Bash on Windows.
-
Click Windows button and type Bash on Ubuntu. From the list of search options select the Bash on Ubuntu on Windows. This option will open the Ubuntu Terminal window.
-
Then execute the following commands in terminal window. It installs and upgrade the necessary softwares in Bash on Windows.
$ sudo apt-get update

$ sudo apt-get upgrade- Now, need to ensure the using Ubuntu version. Based on version the configuration will be varied. Here, we have listed some common version configuration steps.
Ubuntu 14.04
**$ sudo sh -c 'echo "deb [arch=amd64] https://apt-mo.trafficmanager.net/repos/dotnet-release/ trusty main" > /etc/apt/sources.list.d/dotnetdev.list'**

**$ sudo apt-key adv --keyserver hkp://keyserver.ubuntu.com:80 --recv-keys 417A0893**

**$ sudo apt-get update**
Ubuntu 16.04
**$ sudo sh -c 'echo "deb [arch=amd64] https://apt-mo.trafficmanager.net/repos/dotnet-release/ xenial main" > /etc/apt/sources.list.d/dotnetdev.list'**

**$ sudo apt-key adv --keyserver hkp://keyserver.ubuntu.com:80 --recv-keys 417A0893**

**$ sudo apt-get update**
Ubuntu 16.10
**$ sudo sh -c 'echo "deb [arch=amd64] https://apt-mo.trafficmanager.net/repos/dotnet-release/ yakkety main" > /etc/apt/sources.list.d/dotnetdev.list'**

**$ sudo apt-key adv --keyserver hkp://keyserver.ubuntu.com:80 --recv-keys 417A0893**

**$ sudo apt-get update**- Now, install the .NET Core SDK in Ubuntu machine by using apt-get. Once this installation has completed, execute the dotnet command. This command will show the installed dotnet setup details.
**$ sudo apt-get install dotnet-dev-1.0.0-preview2.1-003177**

**$ dotnet**- Create one new folder mkdir sample in terminal window and navigate to the created folder cd sample. Then create a website by executing the following command.
**$ dotnet new -t web**Configuring Syncfusion Components
-
Once the project creation is successful, you need to have one common text editor for configuration. Here we have mentioned Visual Studio code editor throughout the documentation.
-
Now configure a Bower execution environment in your local machine based on this link
-
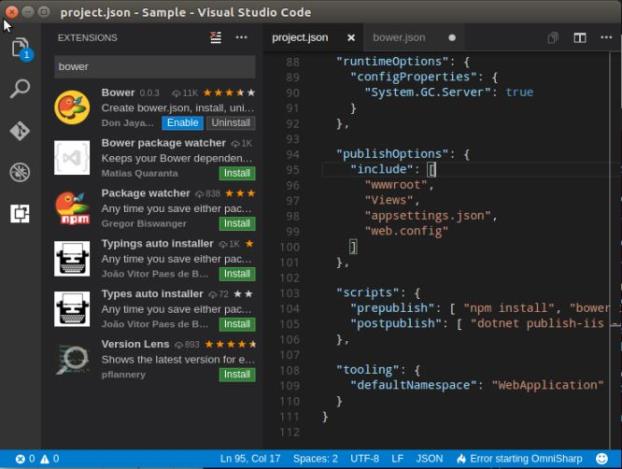
Click the Extension icon in the Visual Studio Code left side pane, in the search window type the command bower. The Bower related extensions are listed out. Now select the Bower extension and click the install button.
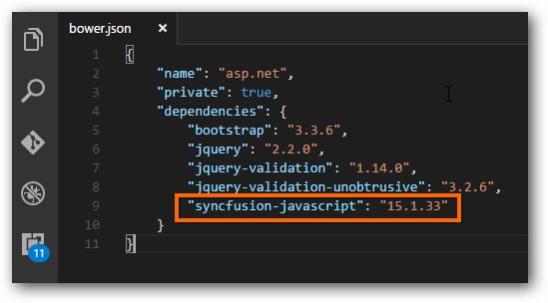
- In bower.json file specify our Syncfusion packages with our latest version, or else specify the * symbol will automatically loads our latest version scripts and CSS files.
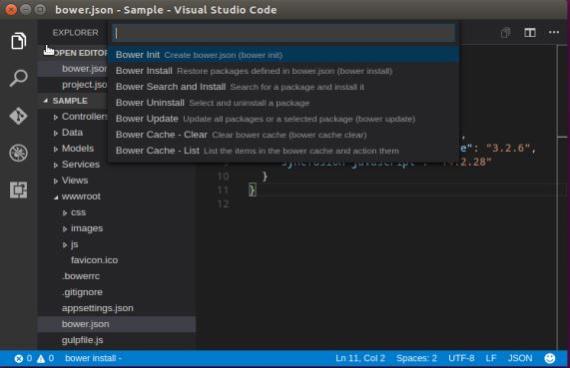
- Then open quick window to enter the >bower command and press Enter key, from the below list of suggestions select the bower install option to restored our scripts and CSS into your application wwwroot -> lib folder.
-
Open a project.json file and refer our Syncfusion assembly Syncfusion.EJ.AspNet.Core into your application for our components deployment. To know more about packages configuration and installation refer this link.
-
Once the NuGet packages installation gets completed, in project.json file to include our Syncfusion.EJ.AspNet.Core package reference.
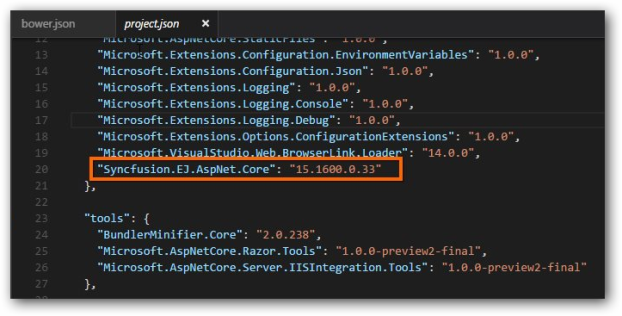
The ASP.NET Core NuGet packages versioning has been streamlined as 16.1.0.32 in shorter than older versioning (16.1600.0.32) from Volume 1, 2018 service pack 1 release (16.1.0.32). Since all the framework version wise assemblies are grouped into a single package.
The package Syncfusion.EJ.MVC renamed into Syncfusion.EJ.AspNet.Core from Volume 3, 2016 (14.3.0.49) release. The preview2-final keyword removed our Syncfusion packages naming from Volume 1, 2017 (15.1.0.33) release.
- Open _viewimports.cshtml file from the views folder and add the following namespace for components references and Tag Helper support.
@using Syncfusion.JavaScript

@addTagHelper *, Syncfusion.EJ- Open Terminal window and navigate to your project folder then execute the following command to restore the packages which are all specified in your project.json file.
dotnet restore- Now refer the necessary scripts and CSS files in your _layout.cshtml page.
NOTE
Include the below mentioned scripts and CSS references under the appropriate environment. (For eg: If your environment is “Development”, then refer the scripts and CSS files under the tag environment names=”Development”). Refer all the required external and internal scripts only once in the page with proper order. Refer this link to know about order of script reference.
<html>

<head>

<link rel="stylesheet" href="~/lib/bootstrap/dist/css/bootstrap.css" />

<link href="~/lib/syncfusion-javascript/Content/ej/web/bootstrap-theme/ej.web.all.min.css" rel="stylesheet" />

<link href="~/lib/syncfusion-javascript/Content/ej/web/responsive-css/ej.responsive.css" rel="stylesheet" />

<script src="~/lib/jquery/dist/jquery.js"></script>

<script src="~/lib/jsrender/jsrender.min.js"></script>

<script src="~/lib/syncfusion-javascript/Scripts/ej/web/ej.web.all.min.js"></script>

</head>

<body>


</body>

</html>
NOTE
jQuery.easing external dependency has been removed from version 14.3.0.49 onwards. Kindly include this jQuery.easing dependency for versions lesser than 14.3.0.49 in order to support animation effects.
- Add ScriptManager to the bottom of the layout.cshtml page. The ScriptManager used to place our control initialization script in the page.
**<ej-script-manager></ej-script-manager>**- Now open your view page to render our Syncfusion components in Tag Helper syntax.
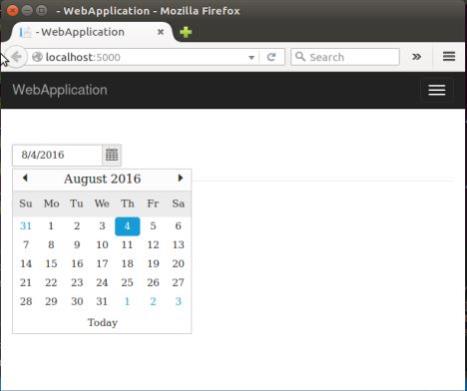
**<ej-date-picker id="datepicker" value="@DateTime.Now"></ej-date-picker>**-
Finally execute the dotnet run command to run your sample browser.
-
Then open your browser and paste the listening port localhost:5000 to view your sample in browser.