Getting Started with Syncfusion® TabView control for Xamarin.Android
17 Jan 202511 minutes to read
This section provides a quick overview for working with the tab view control for Xamarin.Android. Walk through the entire process of creating a real-world application with tab view.
Assembly deployment
After installing Essential Studio® for Xamarin, find all the required assemblies in the installation folders,
{Syncfusion Essential Studio Installed location}\Essential Studio\16.1.0.24\Xamarin\lib
Eg: C:\Program Files (x86)\Syncfusion\Essential Studio\16.1.0.24\Xamarin\lib
NOTE
Assemblies can be found in unzipped package location in Mac.
Tab View for Xamarin.Android
The following list of assemblies should be added as reference from the lib folder to use the tab view.
| Project | Required assemblies |
|---|---|
| Xamarin.Android | pcl\Syncfusion.SfTabView.Android.dll |
Create a simple tab view
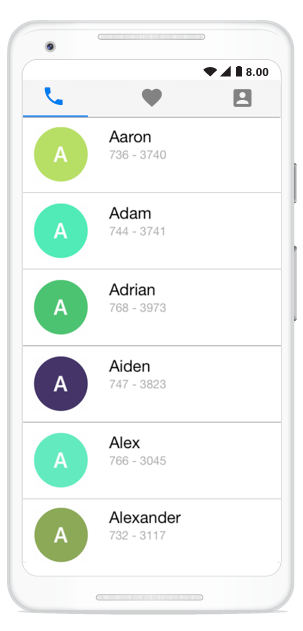
This section explains how to create a tab view and configure it. This is how the final output will look like in Android devices.
Creating the project
Create a new BlankApp (Android) application in Xamarin Studio or Visual Studio.
Adding SfTabView in Xamarin.Android
Add the required assembly reference to the project as discussed in the Assembly deployment section.
Import the control namespace as
using Syncfusion.Android.TabView;Set the tab view control as content view in the OnCreate method.
private SfTabView tabView;
    protected override void OnCreate(Bundle savedInstanceState)
    {
        base.OnCreate(savedInstanceState);
        tabView = new SfTabView(this.ApplicationContext);
        SetContentView(tabView);
    }
Adding Tab items
Tab items can be configured in tab view through the Items property of SfTabView, where it holds collection of SfTabItem through TabItemsCollection
var allContactsGrid = new FrameLayout(ApplicationContext);
var favoritesGrid = new FrameLayout(ApplicationContext);
var contactsGrid = new FrameLayout(ApplicationContext);
allContactsGrid.SetBackgroundColor(Color.Red);
favoritesGrid.SetBackgroundColor(Color.Green);
contactsGrid.SetBackgroundColor(Color.Blue);
var tabItems = new TabItemCollection
{
new SfTabItem()
{
Title = "Calls",
Content = allContactsGrid
},
new SfTabItem()
{
Title = "Favorites",
Content = favoritesGrid
},
new SfTabItem()
{
Title = "Contacts",
Content = contactsGrid
}
};

tabView.Items = tabItems;
SetContentView(tabView);
Share the header space equally
In order to share the header space equally for the , we can set the number of tabs which can be distributed in the available space though VisibleHeaderCount of SfTabView.
tabView.VisibleHeaderCount = 3;That’s it, tab view control is ready. Now we can add the required controls for our application. Here we are adding a ListView in the content region.
Adding List view in the tab view
Preparing data
Create a view model class with ContactsInfo collection property, initialized with required number of data objects.
public class ContactInfo
    {
        public string Name { get; set; }
        public long Number { get; set; }
    }

    public class ContactsViewModel
    {
        private ObservableCollection<ContactInfo> contactList;

        public ObservableCollection<ContactInfo> ContactList
        {
            get { return contactList; }
            set { contactList = value; }
        }

        public ContactsViewModel()
        {
            ContactList = new ObservableCollection<ContactInfo>();
            ContactList.Add(new ContactInfo { Name = "Aaron", Number = 7363750 });
            ContactList.Add(new ContactInfo { Name = "Adam", Number = 7323250 });
            ContactList.Add(new ContactInfo { Name = "Adrian", Number = 7239121 });
            ContactList.Add(new ContactInfo { Name = "Alwin", Number = 2329823 });
            ContactList.Add(new ContactInfo { Name = "Alex", Number = 8013481 });
            ContactList.Add(new ContactInfo { Name = "Alexander", Number = 7872329 });
            ContactList.Add(new ContactInfo { Name = "Barry", Number = 7317750 });
        }
    }
Binding data to list view
Create a custom adapter for ListView and customize the appearance of each item by overriding GetView method in the inherited class of BaseAdapter
var listView = new ListView(Context);
TabContentListAdapter tabContentListAdapter = new TabContentListAdapter(data);
listView.SetAdapter(tabContentListAdapter);
TabContentListAdapter contains GetView method for customize the appearance of each item in the listview.
public class TabContentListAdapter : BaseAdapter
     {
        Context temp;
        private ObservableCollection<ContactInfo> contactList;
        ObservableCollection<ContactInfo> ContactList = new ObservableCollection<ContactInfo>();

        public override int Count
        {
            get { return 7; }
        }

        public TabContentListAdapter(Context context)
        {
            temp = context;
            ContactList.Add(new ContactInfo { Name = "Aaron", Number = 7363750 });
            ContactList.Add(new ContactInfo { Name = "Adam", Number = 7323250 });
            ContactList.Add(new ContactInfo { Name = "Adrian", Number = 7239121 });
            ContactList.Add(new ContactInfo { Name = "Alwin", Number = 2329823 });
            ContactList.Add(new ContactInfo { Name = "Alex", Number = 8013481 });
            ContactList.Add(new ContactInfo { Name = "Alexander", Number = 7872329 });
            ContactList.Add(new ContactInfo { Name = "Barry", Number = 7317750 });
        }


        public override View GetView(int position, View convertView, ViewGroup parent)
        {
            var mainlayout = new LinearLayout(temp);
            mainlayout.Orientation = Orientation.Vertical;
            TextView text = new TextView(temp);
            text.SetBackgroundColor(Color.Transparent);
            text.Text = ContactList[position].Name;
            text.LayoutParameters = new ViewGroup.LayoutParams(ViewGroup.LayoutParams.MatchParent, ViewGroup.LayoutParams.MatchParent);
            TextView text1 = new TextView(temp);
            text1.Text = ContactList[position].Number.ToString();
            text1.LayoutParameters = new ViewGroup.LayoutParams(ViewGroup.LayoutParams.MatchParent, ViewGroup.LayoutParams.MatchParent);
            text1.SetBackgroundColor(Color.Transparent);
            mainlayout.AddView(text);
            mainlayout.AddView(text1);
            mainlayout.SetMinimumHeight(200);
            return mainlayout;
        }

        public override Object GetItem(int position)
        {
            return null;
        }

        public override long GetItemId(int position)
        {
            return -1;
        }
    }
Similarly, content region for other tabs can be configured in the same way.
ContentTransitionDuration
You can set the duration for the TabView content transition by setting ContentTransitionDuration property.
tabview.ContentTransitionDuration = 200;Swiping
Both vertical swiping for the list view and horizontal swiping for the tab view will works by default. If it is not required it can be customized by EnableSwiping property of SfTabView.