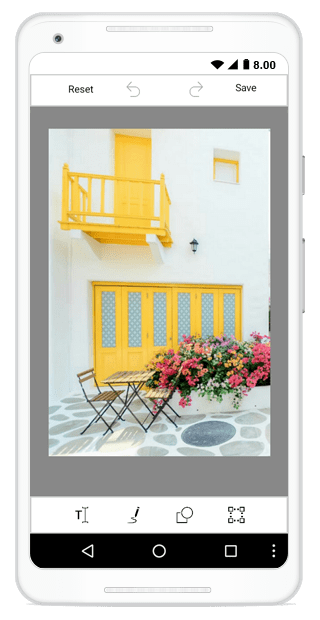
Getting Started of ImageEditor (SfImageEditor)
8 Jan 20251 minute to read
This section explains you the steps required to load an image to the image editor. Image editor has a built in toolbar which has options to edit the image with shapes, path, text, crop and flip.
Reference Essential Studio® components in your solution
After installing Essential Studio® for Xamarin, you can find all the required assemblies in the installation folders,
{Syncfusion Installed location}\Essential Studio\15.2.0.40\lib
NOTE
Assemblies are available in unzipped package location in Mac.
Add the following assembly references to the Android project,
android\Syncfusion.SfImageEditor.Android.dll
IMPORTANT
Starting with v16.2.0.x, if you reference Syncfusion assemblies from trial setup or from the NuGet feed, you also have to include a license key in your projects. Please refer to this link to know about registering Syncfusion license key in your Xamarin application to use our components.
Initialize the image editor
The following steps explain on how to create a image editor and configure its elements,
-
Create an instance of SfImageEditor.
- C#
-
Load an image to the image editor as bitmap object.Since SfImageEditor supports bitmap images you can load the image to the control as a bitmap object only.
- C#
-
Loading the image to the SfImageEditor, you can start to edit the image by using the built-in Toolbars.
SfImageEditor editor  = new SfImageEditor(this);
SetContentView(editor);SfImageEditor editor = new SfImageEditor();
editor.Bitmap = BitmapFactory.DecodeResource(Resources, Resource.Drawable.screenshot);
You can find the complete getting started sample from this link.
See also
How to load an image from the gallery to image editor in Xamarin.Android
How to load an image from the camera to image editor in Xamarin.Android