Data Binding in WPF Tile View
18 Feb 202517 minutes to read
You can add a TileViewItem using data binding in the WPF TileViewControl.
Data binding to Objects
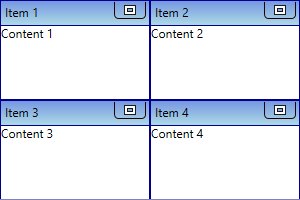
The TileViewControl can bound to an external source to auto create TileViewItem and display the data using ItemsSource property. When you are auto generating TileViewItem using ItemsSource, you need to set Header property or HeaderTemplate in ItemContainerStyle to define header and use Content property or ContentTemplate in ItemContainerStyle to display the content of the TileViewItem item.
NOTE
To bind
ItemsSourcetoTileViewControl, you need to have collection with data object which holds header and content details.
Here, TileItem class defined with Header and Content properties and ViewModel class has ItemsSource property of type ObservableCollection<TileItem>.
// Model.cs
public class TileItem {
    public string Header { get; set; }
    public string Content { get; set; }
    public TileItem() {
    }
}

//ViewModel.cs
public class ViewModel : NotificationObject {
    private ObservableCollection<TileItem> tileViewItems;
    public ObservableCollection<TileItem> TileViewItems {
        get { return tileViewItems; }
        set {
            tileViewItems = value;
            this.RaisePropertyChanged(nameof(TileViewItems));
        }
    }

    public ViewModel() {
        tileViewItems = new ObservableCollection<TileItem>();
        PopulateCollection();
    }

    public void PopulateCollection() {
        //Adding the tileview items into the collection
        TileViewItems.Add(new TileItem() { Header = "Item 1", Content = "Content 1" });
        TileViewItems.Add(new TileItem() { Header = "Item 2", Content = "Content 2" });
        TileViewItems.Add(new TileItem() { Header = "Item 3", Content = "Content 3" });
        TileViewItems.Add(new TileItem() { Header = "Item 4", Content = "Content 4" });
    }
}<syncfusion:TileViewControl ItemsSource="{Binding TileViewItems}"
Name="tileViewControl">
<syncfusion:TileViewControl.ItemContainerStyle>
<Style TargetType="{x:Type syncfusion:TileViewItem}">
<Setter Property="Header" Value="{Binding Header}" />
<Setter Property="Content" Value="{Binding Content}"/>
</Style>
</syncfusion:TileViewControl.ItemContainerStyle>
<syncfusion:TileViewControl.DataContext>
<local:ViewModel/>
</syncfusion:TileViewControl.DataContext>
</syncfusion:TileViewControl>
NOTE
Data binding with XML
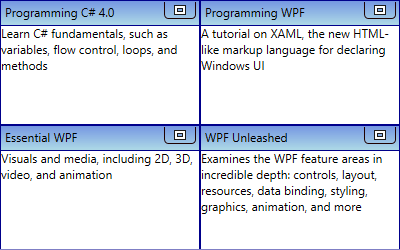
You can bind the XML file as ItemsSource for creating the TileViewItem in the TileViewControl. You can easily populates the items from the XML files using the ItemTemplate and ContentTemplate or ItemContainerStyle properties.
-
Create an
XMLfile with the required details and name it asData.xml.<?xml version="1.0" encoding="utf-8" ?> <Books> <Book Name="Programming C# 4.0" Description="Learn C# fundamentals, such as variables, flow control, loops, and methods"/> <Book Name="Programming WPF" Description="A tutorial on XAML, the new HTML-like markup language for declaring Windows UI"/> <Book Name="Essential WPF" Description="Visuals and media, including 2D, 3D, video, and animation"/> <Book Name="WPF Unleashed" Description="Examines the WPF feature areas in incredible depth: controls, layout, resources, data binding, styling, graphics, animation, and more"/> </Books> -
Add
XmlDataProviderfor the aboveData.xmldocument and bind the data toItemsSourceproperty for theTileViewControl.<Window.Resources> <XmlDataProvider Source="Data.xml" x:Key="xmlSource" XPath="Books"/> </Window.Resources> <Grid> <syncfusion:TileViewControl Name="tileViewControl" ItemsSource="{Binding Source={StaticResource xmlSource}, XPath=Book}"> <syncfusion:TileViewControl.ItemContainerStyle> <Style TargetType="{x:Type syncfusion:TileViewItem}"> <Setter Property="Header" Value="{Binding XPath=@Name}" /> <Setter Property="ContentTemplate"> <Setter.Value> <DataTemplate> <TextBlock Text="{Binding XPath=@Description}"/> </DataTemplate> </Setter.Value> </Setter> </Style> </syncfusion:TileViewControl.ItemContainerStyle> </syncfusion:TileViewControl> </Grid>

NOTE
Virtualization support
You can enable the UI virtualization support in TileViewControl, which allows the users to load large sets of data without affecting loading or scrolling performance by setting the IsVirtualizing property value as true. This feature allows users to reduce the loading time of TileView items regardless of items count. The default value of IsVirtualizing property is false. When using virtualization, it is recommended to use RowCount and ColumnCount instead of RowHeight and ColumnWidth. The RowHeight and ColumnWidth properties are not compatible with virtualization, and the layout will be updated based on the values of RowCount and ColumnCount.
<syncfusion:TileViewControl IsVirtualizing="True"
                            Name="tileViewControl"/>
TileViewControl tileViewControl = new TileViewControl();
tileViewControl.IsVirtualizing = true;TileViewItem header
You can define the TileViewItem header using HeaderTemplate or TileViewItem.ItemContainerStyle property. Otherwise, TileViewItem header will display the data object class name which is associated with TileViewItem. The DataContext of the HeaderTemplate property is TileViewItem.Header.
// Model.cs
public class TileItem {
    public string Header { get; set; }
    public string Content { get; set; }
    public TileItem() {
    }
}

//ViewModel.cs
public class ViewModel : NotificationObject {
    private ObservableCollection<TileItem> tileViewItems;
    public ObservableCollection<TileItem> TileViewItems {
        get { return tileViewItems; }
        set {
            tileViewItems = value;
            this.RaisePropertyChanged(nameof(TileViewItems));
        }
    }

    public ViewModel() {
        tileViewItems = new ObservableCollection<TileItem>();
        PopulateCollection();
    }

    public void PopulateCollection() {
        //Adding the tileview items into the collection
        TileViewItems.Add(new TileItem() { Header = "Item 1", Content = "Content 1" });
        TileViewItems.Add(new TileItem() { Header = "Item 2", Content = "Content 2" });
        TileViewItems.Add(new TileItem() { Header = "Item 3", Content = "Content 3" });
        TileViewItems.Add(new TileItem() { Header = "Item 4", Content = "Content 4" });
    }
}<syncfusion:TileViewControl Name="tileViewControl"
ItemsSource="{Binding TileViewItems}">
<syncfusion:TileViewControl.HeaderTemplate>
<DataTemplate>
<TextBlock Text="{Binding Header}"
HorizontalAlignment="Center"
VerticalAlignment="Center" />
</DataTemplate>
</syncfusion:TileViewControl.HeaderTemplate>
<syncfusion:TileViewControl.ItemContainerStyle>
<Style TargetType="syncfusion:TileViewItem">
<Setter Property="Content" Value="{Binding Content}"/>
</Style>
</syncfusion:TileViewControl.ItemContainerStyle>
<syncfusion:TileViewControl.DataContext>
<viewmodel:ViewModel/>
</syncfusion:TileViewControl.DataContext>
</syncfusion:TileViewControl>
NOTE
TileViewItem content
You can define the TileViewItem content using ItemTemplate or TileViewItem.ItemContainerStyle property. Otherwise, TileViewItem content will display the data object class name which is associated with TileViewItem. The DataContext of the ItemTemplate property is TileViewItem.Content.
<syncfusion:TileViewControl Name="tileViewControl"
                            ItemsSource="{Binding TileViewItems}">
    <syncfusion:TileViewControl.ItemTemplate>
        <DataTemplate>
            <TextBlock Text="{Binding Content}"
                       HorizontalAlignment="Center"
                       VerticalAlignment="Center" />
        </DataTemplate>
    </syncfusion:TileViewControl.ItemTemplate>

    <syncfusion:TileViewControl.ItemContainerStyle>
        <Style TargetType="syncfusion:TileViewItem">
            <Setter Property="Header" Value="{Binding Header}"/>
        </Style>
    </syncfusion:TileViewControl.ItemContainerStyle>

    <syncfusion:TileViewControl.DataContext>
        <viewmodel:ViewModel/>
    </syncfusion:TileViewControl.DataContext>
</syncfusion:TileViewControl>
NOTE
Different UI for TileViewItem content
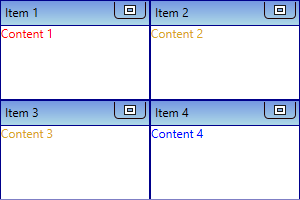
You can change the various UI for the content of TileViewItem based on the provided logic by using the ItemTemplateSelector. You can also use the ItemContainerStyleSelector property to apply the different UI for the TileViewItem content. The DataContext of the ItemTemplate property is TileViewItem.Content.
//ItemTemplateSelector class for select a DataTemplate
public class MyTemplateSelector : DataTemplateSelector {
    public DataTemplate Template1 { get; set; }
    public DataTemplate Template2 { get; set; }
    public DataTemplate Template3 { get; set; }

    public override DataTemplate SelectTemplate(object item, DependencyObject container) {
        if (item is TileItem && (item as TileItem).Header == "Item 1")
            return Template1;
        else if (item is TileItem && (item as TileItem).Header == "Item 4")
            return Template2;
        else
            return Template3;
    }
}<Window.Resources>
<local:MyTemplateSelector x:Key="Mytemplate">
<local:MyTemplateSelector.Template1>
<DataTemplate>
<TextBlock Text="{Binding Content}" Foreground="Red"/>
</DataTemplate>
</local:MyTemplateSelector.Template1>
<local:MyTemplateSelector.Template2>
<DataTemplate>
<TextBlock Text="{Binding Content}" Foreground="Blue"/>
</DataTemplate>
</local:MyTemplateSelector.Template2>
<local:MyTemplateSelector.Template3>
<DataTemplate>
<TextBlock Text="{Binding Content}" Foreground="Goldenrod"/>
</DataTemplate>
</local:MyTemplateSelector.Template3>
</local:MyTemplateSelector>
</Window.Resources>
<Grid>
<syncfusion:TileViewControl ItemTemplateSelector="{StaticResource Mytemplate}"
ItemsSource="{Binding TileViewItems}"
Name="tileViewControl">
<syncfusion:TileViewControl.ItemContainerStyle>
<Style TargetType="syncfusion:TileViewItem">
<Setter Property="Header" Value="{Binding Header}"/>
</Style>
</syncfusion:TileViewControl.ItemContainerStyle>
<syncfusion:TileViewControl.DataContext>
<viewmodel:ViewModel/>
</syncfusion:TileViewControl.DataContext>
</syncfusion:TileViewControl>
</Grid>
NOTE