How can I help you?
Documents Settings in WPF SpreadsheetControl (Classic)
4 May 20218 minutes to read
Protect and unprotect workbook
Spreadsheet control provides support to protect and unprotect the workbook with a password. When you protect the workbook the following option will be disabled:
- Insert Worksheet
- Delete Worksheet
- Hide Worksheet
- Unhide Worksheet
Protect workbook
You can protect the workbook using the Protect Structure and Windows dialog box. You can open the Protect Structure and Windows dialog using the ProtectWorkbookCommand.
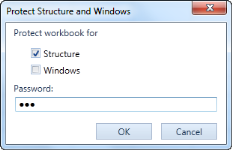
The following code illustrates how to bind the ProtectWorkbookCommand__to a button:
<Button Command="{Binding Path= ProtectWorkbookCommand}">

</Button>
NOTE
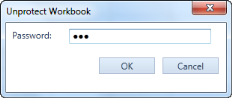
The ProtectWorkbookCommand will open the Unprotect Workbook dialog box if the workbook is already protected.
Unprotect workbook
You can unprotect the workbook using the Unprotect Workbook dialog box. You can open the Unprotect Workbook dialog using the ProtectWorkbookCommand.
Protect and unprotect worksheet
Spreadsheet control supports to protect and unprotect a worksheet. You can set the worksheet as read only. There are two methods to protect and unprotect the worksheet. They are:
- Using method
- Using command
Protect/Unprotect worksheet using method
Protect
To set a worksheet as password protected, pass the sheet name and the password as String to ProtectSheet method. This prevents unwanted changes to the worksheet.
Following code illustrates this:
spreadControl.ProtectSheet("Sheet1", "asd123");spreadControl.ProtectSheet("Sheet1", "asd123")UnProtect
To unprotect a worksheet, pass the sheet name and the password as String to the UnProtectSheet method.
spreadControl.UnProtectSheet("Sheet1", "asd123");spreadControl.UnProtectSheet("Sheet1", "asd123")Protect/Unprotect worksheet using Command
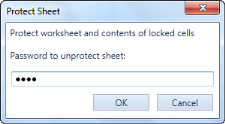
You can protect/unprotect the current worksheet using the Protect Sheet dialog box. You can open the Protect Sheet dialog using the ProtectCurrentSheetCommand_. If the current worksheet is already protected_ Protect Sheet dialog box will unprotect the worksheet after confirming the password.
The following code illustrates how to bind the ProtectCurrentSheetCommand__to a button:
<Button Command="{Binding Path= ProtectCurrentSheetCommand}">

</Button>
Encrypt workbook
Encryption
Encryption is used to protect the workbook data with password. It converts the data into an encrypted format (unreadable). This restricts anonymous users to access the data. You can achieve this by two methods. They are:
- Using method
- Using command
Method
To encrypt a workbook, pass the password in the EncryptWorkBook method. The following code illustrates this:
spreadControl.EncryptWorkBook("asd123");spreadControl.EncryptWorkBook("asd123")Encrypt workbook using the Commands
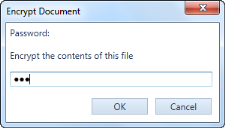
You can also encrypt the workbook using the Encrypt Document dialog box. You can open the Encrypt Document dialog using the EncryptCommand.
The following code illustrates how to bind the EncryptCommand__to a button:
<Button Command="{Binding Path= EncryptCommand}">
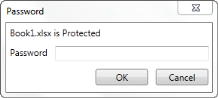
</Button>Open Encrypted Document
When you open encrypted document Password dialog box will open. Enter password to decrypt the data.
Hide and Unhide Worksheet
This feature enables you to hide/unhide a worksheet. You can achieve this in two methods:
- Using method
- Using command
Hide worksheet using method
To hide a worksheet, pass the sheet name to the HideSheet method:
spreadControl.HideSheet("Sheet1");spreadControl.HideSheet("Sheet1")Unhide worksheet using method
To unhide a worksheet, pass the sheet name to the UnHideSheet method:
spreadControl.UnHideSheet("Sheet1");spreadControl.UnHideSheet("Sheet1")###Hide worksheet using comment
You can hide the current worksheet by using the HideCurrentSheetCommand. When you execute this command based on the command parameter it will hide or unhide the worksheet.
The following code illustrates how to bind the HideCurrentSheetCommand__to a button for hide current worksheet:
<Button Command="{Binding Path= HideCurrentSheetCommand}">
<System:bool>true</System:bool>
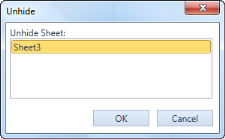
</Button>Unhide worksheet using command
You can unhide the worksheet by using the Unhide dialog box. To open the Unhide dialog box, pass the command parameter as false in the HideCurrentSheetCommand.
The following code illustrates how to bind the HideCurrentSheetCommand__to a button for unhide worksheet:
<Button Command="{Binding Path= HideCurrentSheetCommand}">

<System:bool>false</System:bool>

</Button>
Add or Remove Worksheet
This feature enables you to add or remove a worksheet from a workbook.
Add a worksheet using method
To add a worksheet, pass the sheet name to the AddSheet method.
spreadControl.AddSheet("Sheet4");spreadControl.AddSheet("Sheet4")You can also specify the position of the added worksheet by passing the sheet name and position to the AddSheet method.
spreadControl.AddSheet("Sheet4", 3);spreadControl.AddSheet("Sheet4", 3)</td></tr>Remove a worksheet using method
To remove a worksheet, pass the sheet name to the RemoveSheet method.
spreadControl.RemoveSheet("Sheet4");spreadControl.RemoveSheet("Sheet4")Add a worksheet using command
You can add a worksheet by using the InsertSheetCommand. When you execute this command, it will add a new worksheet at the end of the workbook.
The following code illustrates how to bind the InsertSheetCommand to a button:
<Button Command="{Binding Path= InsertSheetCommand}">

</Button>
Remove a worksheet using Command
You can delete current worksheet using the DeleteCurrentSheetCommand. When you execute this command, it will delete the current worksheet.
The following code illustrates how to bind the DeleteCurrentSheetCommand button:
<Button Command="{Binding Path= DeleteCurrentSheetCommand}">
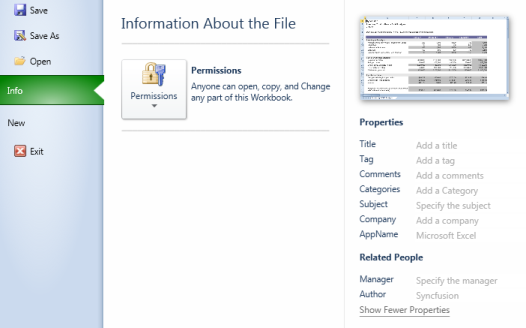
</Button>Document Settings Options
Document properties are named values that provide information about the document namely author, manager, title, tags, commands, subject, company and AppName. Values for these properties can be changed.
Use Case Scenario
When importing and exporting and the Excel sheet, users can get and set the values of the Excel properties.
Properties
| Property | Description | Type | Data Type |
|---|---|---|---|
| Author | Used to get or set the author of the Excel | Dependency | String |
| ApplicationName | Used to get or set the application name of the Excel | Dependency | String |
| Category | Used to get or set the CategoryName of the Excel | Dependency | String |
| Comments | Used to get or set the comments of an Excel | Dependency | String |
| Company | Used to get or set the company name of the Excel | ||
| Subject | Used to get or set the subject of the Excel | Dependency | String |
| Keywords | Used to get or set the keywords of the Excel | Dependency | String |
| Manager | Used to get or set the Manager’s name | Dependency | String |
| Title | Used to get or set the Title | Dependency | String |
Setting Values in Document Properties
The following code snippets are used to set values in Document properties:
this.spreadSheetControl.ExcelProperties.Author = "Syncfusion";
this.spreadSheetControl.ExcelProperties.Manager = "Syncfusion Manager";
this.spreadSheetControl.ExcelProperties.Category = "Spreadsheet control";
this.spreadSheetControl.ExcelProperties.Comments = "This document  genera ted by spreadsheet control";
this.spreadSheetControl.ExcelProperties.Company = "Syncfusion";
this.spreadSheetControl.ExcelProperties.Title = "Spreadsheet control";
this.spreadSheetControl.ExcelProperties.Keywords = "Sync";
this.spreadSheetControl.ExcelProperties.Subject = "Native Excel generator";
this.spreadSheetControl.ExcelProperties.ApplicationName = " Spreadsheet ";Me.spreadSheetControl.ExcelProperties.Author = "Syncfusion"
Me.spreadSheetControl.ExcelProperties.Manager = "Syncfusion Manager"
Me.spreadSheetControl.ExcelProperties.Category = "Spreadsheet control"
Me.spreadSheetControl.ExcelProperties.Comments = "This document genera ted by spreadsheet control"
Me.spreadSheetControl.ExcelProperties.Company = "Syncfusion"
Me.spreadSheetControl.ExcelProperties.Title = "Spreadsheet control"
Me.spreadSheetControl.ExcelProperties.Keywords = "Sync"Me.spreadSheetControl.ExcelProperties.Subject = "Native Excel generator"
Me.spreadSheetControl.ExcelProperties.ApplicationName = "Spreadsheet "