How can I help you?
Switch between Skins at Run time in WPF SkinStorage (Classic)
4 May 20212 minutes to read
Themes can be dynamically switched.
Example 1:
You can use the Syncfusion Skin Picker Control to switch between the skins. Just add the Skin Picker Control to your application as shown below.
<syncfusion:SkinPicker Height="60"/>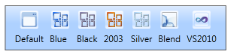
Example 2:
You can switch between the skins at run-time by using the ComboBox Selection Changed event.
Below is the code snippet to explain how to switch between the skins at run-time by using the ComboBox SelectionChanged event.
<Grid Name="grid">
<Grid.ColumnDefinitions>
<ColumnDefinition Width="*"/>
<ColumnDefinition Width="*"/>
</Grid.ColumnDefinitions>
<ComboBox Name="themecombobox" Grid.Column="0" SelectionChanged="ComboBox_SelectionChanged" Width="150" Height="30">
<ComboBoxItem> Blend </ComboBoxItem>
<ComboBoxItem> ShinyBlue </ComboBoxItem>
</ComboBox>
<syncfusion:CalendarEdit Name="calendar" Grid.Column="1"></syncfusion:CalendarEdit>
</Grid>
On ComboBox SelectionChanged event, particular VisualStyle should be set to the control.
The following code snippet explains how to set the switch between the skins.
Private void ComboBox_SelectionChanged(object sender, SelectionChangedEventArgs e)
{
    if (themecombobox.SelectedIndex == 0)
    {
        SkinStorage.SetVisualStyle(calendar, "ShinyBlue");
    }
    Else if (themecombobox.SelectedIndex == 1)
    {
        SkinStorage.SetVisualStyle(calendar, "Blend");
    }
}
The output is displayed as shown below.
