How can I help you?
Common in WPF Diagram (classic)
5 May 202124 minutes to read
This section comprises an assembled list of questions and answers to provide expert solutions on product and its usage. It contains the following:
Common—Answers common questions that arises in minds of fresh users of Essential Diagram WPF.
Advanced—Answers questions that are in an advanced level, meant for experts.
Common in WPF Diagram (classic)
This section answers the following common question that arises in the minds of fresh users of Essential Diagram WPF.
Refresh the Tree Layout while Binding Dynamic Data to the Diagram
Essential Diagram for WPF provides support to bind dynamic data to the diagram.. But once the new data is assigned, the tree needs to be refreshed. This can be done using the RefreshLayout method.
The following code can be used to refresh the layout:
diagramModel.ItemsSource = dataobj;

DirectedTreeLayout tree = new DirectedTreeLayout(diagramModel, diagramView);

tree.RefreshLayout();diagramModel.ItemsSource = dataobj
Dim tree As New DirectedTreeLayout(DiagramModel, DiagramView)
tree.RefreshLayout()In case the hierarchical layout is being used, then the following code can be used:
diagramModel.ItemsSource = dataobj;

HierarchicalTreeLayout tree = new HierarchicalTreeLayout(diagramModel, diagramView);

tree.RefreshLayout();diagramModel.ItemsSource = dataobj
Dim tree As New HierarchicalTreeLayout(DiagramModel, DiagramView)
tree.RefreshLayout()So once data has been assigned, call the RefreshLayout() method of the corresponding tree-layout.
Host an UIElement as Node’s Content
You can host any content inside the node using the Content property.
Node n = new Node();

n.Shape = Shapes.FlowChart_Card;

Button b = new Button();

b.Content = "Click ME!";

n.Content = b;

(n.Content as Button).IsHitTestVisible = true;Dim n As New Node()
n.Shape = Shapes.FlowChart_Card
Dim b As New Button()
b.Content = "Click ME!"
n.Content = b
TryCast(n.Content, Button).IsHitTestVisible = True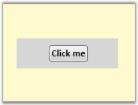
NodeContent
Here, Button is a UIElement. Similarly any UIElement can be hosted as Node’s Content.
Customize Node’s Shape
Users can specify their own custom shapes to be used for the node as follows. First create a style resource that contains your custom shape.
<Style TargetType="{x:Type Path}" x:Key="myNode">

    <Setter Property="Data" Value="M200,239L200,200 240,239 280,202 320,238 281,279 240,244 198,279z"></Setter>

    <Setter Property="Fill" Value="MidnightBlue" />

</Style>
Now use it for the node; the following code can be used as an example.
Style s = (Style)this.Resources["myNode"];

Node n = new Node();

n.Shape = Shapes.CustomPath;

n.CustomPathStyle = s;

diagramModel.Nodes.Add(n);Dim s As Style = CType(Me.Resources("myNode"), Style)
Dim n As New Node()
n.Shape = Shapes.CustomPath
n.CustomPathStyle = s
diagramModel.Nodes.Add(n)
CustomNode
Apply Style with Triggers for all the Nodes
You can specify style with triggers which is applied to all the Nodes as shown in the following code snippet.
<Style TargetType="{x:Type syncfusion:Node}" x:Key="{x:Type syncfusion:Node}">

                <Setter Property="LabelHorizontalAlignment" Value="Center"/>

                <Setter Property="LabelVerticalAlignment" Value="Center"/>

                <Setter Property="Foreground" Value="Black"/>

                <Setter Property="FontWeight" Value="Bold"/>

                <Style.Triggers>

                    <Trigger Property="Level"  Value="0">

                        <Setter Property="CustomPathStyle">

                            <Setter.Value>

                                <Style TargetType="{x:Type Path}">

                                    <Setter Property="Fill" Value="LightGray" />

                                </Style>

                            </Setter.Value>

                        </Setter>

                    </Trigger>

                    <Trigger Property="Level"  Value="2">

                        <Setter Property="CustomPathStyle">

                            <Setter.Value>

                                <Style TargetType="{x:Type Path}">

                                    <Setter Property="Fill" Value="LightBlue" />

                                </Style>

                            </Setter.Value>

                        </Setter>

                    </Trigger>

                </Style.Triggers>

            </Style>
Restrict Port Connections
Using the events provided for LineConnectors we can restrict making connections to ports by checking the desired condition in the event handler.
Let us consider a case where we want to restrict making connections to the port based on the color of the ports, say connections should only happen when the ports are of same color.
There are two scenarios that we need to take care of:
Scenario 1
In case a new connection is being created by dragging from one port to another, The
AfterConnectionCreate event can be used. This event fires soon after a new connection is created.
The following is the code example for restricting connections between ports and allowing connecting ports of the same color:
// Declare the event.

diagramView.AfterConnectionCreate += new ConnDragEndChangedEventHandler(diagramView_AfterConnectionCreate);


// Handle the event.

void diagramView_AfterConnectionCreate(object sender, ConnDragEndRoutedEventArgs evtArgs)

{

LineConnector line = evtArgs.Connector;

if (line.ConnectionTailPort != null && line.ConnectionHeadPort != null && line.ConnectionTailPort.PortStyle.Fill == line.ConnectionHeadPort.PortStyle.Fill)

{

// Do nothing.

}

else

{

// Remove the connection.

diagramModel.Connections.Remove(evtArgs.Connector);

}

}'Declare the event.
Private diagramView.AfterConnectionCreate += New ConnDragEndChangedEventHandler(AddressOf diagramView_AfterConnectionCreate)
'Handle the event.
Private Sub diagramView_AfterConnectionCreate(ByVal sender As Object, ByVal evtArgs As ConnDragEndRoutedEventArgs)
Dim line As LineConnector = evtArgs.Connector
If line.ConnectionTailPort IsNot Nothing AndAlso line.ConnectionHeadPort IsNot Nothing AndAlso line.ConnectionTailPort.PortStyle.Fill = line.ConnectionHeadPort.PortStyle.Fill Then
'Do nothing.
Else
'Remove the connection.
diagramModel.Connections.Remove(evtArgs.Connector)
End If
End SubScenario 2
In case an already existing connection is been dragged to connect to other ports, then the
ConnectorDragStart and ConnectorDragEnd events can be used to restrict connections.
As the name implies, the ConnectorDragStart event fires when either ends of the connector is dragged.
The ConnectorDragEnd fires soon after the drag operation is complete.
The following is the code example for restricting connections between ports and allow only red ports to connect.
// Declare the event.

diagramView.ConnectorDragStart += new ConnDragChangedEventHandler(diagramView_ConnectorDragStart);


// To store the previous port to which the line was connected to.

ConnectionPort oldport;


// Handle the event.

void diagramView_ConnectorDragStart(object sender, ConnDragRoutedEventArgs evtArgs)

{

LineConnector line = evtArgs.Connector;

if (evtArgs.FixedNodeEnd == line.TailNode)

oldport = line.ConnectionHeadPort;

else

oldport = line.ConnectionTailPort;

}'Declare the event.
Private diagramView.ConnectorDragStart += New ConnDragChangedEventHandler(AddressOf diagramView_ConnectorDragStart)
'To store the previous port to which the line was connected to.
Private oldport As ConnectionPort
'Handle the event.
Private Sub diagramView_ConnectorDragStart(ByVal sender As Object, ByVal evtArgs As ConnDragRoutedEventArgs)
Dim line As LineConnector = evtArgs.Connector
If evtArgs.FixedNodeEnd = line.TailNode Then
oldport = line.ConnectionHeadPort
Else
oldport = line.ConnectionTailPort
End If
End SubNow once you have stored the old port, you can check for the condition in ConnectorDragEnd event as follows.
// Declare the event.

diagramView.ConnectorDragEnd += new ConnDragEndChangedEventHandler(diagramView_ConnectorDragEnd);


// Handle the event.

void diagramView_ConnectorDragEnd(object sender, ConnDragEndRoutedEventArgs evtArgs)

{

LineConnector line = evtArgs.Connector;

if (line.ConnectionTailPort != null && line.ConnectionHeadPort != null &&     line.ConnectionTailPort.PortStyle.Fill ==  line.ConnectionHeadPort.PortStyle.Fill)

{

// Do nothing.

}

else

{

// Check to which end the old port has to be restored.

if (evtArgs.HitNodeEnd == line.HeadNode && oldport != null)

{

evtArgs.Connector.ConnectionHeadPort = oldport;

evtArgs.Connector.HeadNode = oldport.Node;

}

else

{

evtArgs.Connector.ConnectionTailPort = oldport;

evtArgs.Connector.TailNode = oldport.Node;

}

}

}'Declare the event.
Private diagramView.ConnectorDragEnd += New ConnDragEndChangedEventHandler(AddressOf diagramView_ConnectorDragEnd)
'Handle the event.
Private Sub diagramView_ConnectorDragEnd(ByVal sender As Object, ByVal evtArgs As ConnDragEndRoutedEventArgs)
Dim line As LineConnector = evtArgs.Connector
If line.ConnectionTailPort IsNot Nothing AndAlso line.ConnectionHeadPort IsNot Nothing AndAlso line.ConnectionTailPort.PortStyle.Fill = line.ConnectionHeadPort.PortStyle.Fill Then
'Do nothing.
Else
'Check to which end the old port has to be restored.
If evtArgs.HitNodeEnd = line.HeadNode AndAlso oldport IsNot Nothing Then
evtArgs.Connector.ConnectionHeadPort = oldport
evtArgs.Connector.HeadNode = oldport.Node
Else
evtArgs.Connector.ConnectionTailPort = oldport
evtArgs.Connector.TailNode = oldport.Node
End If
End If
End SubHide Resizer or Rotator’s Visibility of a Node
Gripper or Rotator Visibility can be hidden using the following code example.
node.Loaded += new RoutedEventHandler(node_Loaded);

//Hide the Node's Resizer and Rotator in the Node's loaded event.

        void node_Loaded(object sender, RoutedEventArgs e)

        {

            Node node = sender as Node;

            //node.Template will be null if it's template is not applied.

            if (node != null && node.Template != null)

            {

                //To hide the Resizer.

                (node.Template.FindName("PART_Resizer", node) as Control).Template = null;

                //To hide the Rotator.

                (node.Template.FindName("PART_Rotator", node) as Control).Template = null;

            }

}Private node.Loaded += New RoutedEventHandler(AddressOf node_Loaded)
'Hide the Node's Resizer and Rotator in the Node's loaded event.
Private Sub node_Loaded(ByVal sender As Object, ByVal e As RoutedEventArgs)
Dim node As Node = TryCast(sender, Node)
'node.Template will be null if it's template is not applied.
If node IsNot Nothing AndAlso node.Template IsNot Nothing Then
'To hide the Resizer.
TryCast(node.Template.FindName("PART_Resizer", node), Control).Template = Nothing
'To hide the Rotator.
TryCast(node.Template.FindName("PART_Rotator", node), Control).Template = Nothing
End If
End SubNOTE
Node’s Template will be available only after its template is applied, so if you try to do these operations before it will not give an expected result.
Hide the Default Center Port of a Node
Each node will have a default center port visibility of this port can be hidden using the following statement.
node.Loaded += new RoutedEventHandler(node_Loaded);

        //Hide the Node's center port in the Node's loaded event.

        void node_Loaded(object sender, RoutedEventArgs e)

        {

            Node node = sender as Node;

            if (node.Ports.Count > 0)

            {

                node.Ports[0].Visibility = Visibility.Hidden;

            }

}Private node.Loaded += New RoutedEventHandler(AddressOf node_Loaded)
'Hide the Node's center port in the Node's loaded event.
Private Sub node_Loaded(ByVal sender As Object, ByVal e As RoutedEventArgs)
Dim node As Node = TryCast(sender, Node)
If node.Ports.Count > 0 Then
node.Ports(0).Visibility = Visibility.Hidden
End If
End SubNOTE
node.Ports[0] refers to the center port. This default center port will be available only after the Node’s Template is applied. So you have to change the Visibility accordingly.
Programmatically Rotate a Node and Keep the Label Horizontal after Rotating
Node can be programmatically rotated and the Label can be kept horizontal after rotation using the following code example.
Node NewClient = new Node();

NewClient.Shape = Shapes.FlowChart_Card;

diagramModel.Nodes.Add(NewClient);


double angle = 90;

NewClient.RenderTransform = new RotateTransform(angle);

NewClient.Label = "90 deg rotation";

NewClient.RenderTransformOrigin = new System.Windows.Point(0.5, 0.5);

NewClient.LabelAngle = 360 - angle;Dim NewClient As New Node()
NewClient.Shape = Shapes.FlowChart_Card
diagramModel.Nodes.Add(NewClient)
Dim angle As Double = 90
NewClient.RenderTransform = New RotateTransform(angle)
NewClient.Label = "90 deg rotation"
NewClient.RenderTransformOrigin = New System.Windows.Point(0.5, 0.5)
NewClient.LabelAngle = 360 - angleHere diagramModel is an instance of DiagramModel.
Identify the Shapes Dropped on the Page from the Palette
The SymbolPaletteItemName property can be used to identify the item dropped on the page in the NodeDrop event. This is particularly useful when you have to identify the item which is dropped and performs an operation on the node before it is added to the View. The Name property of the SymbolPaletteItem can be set while adding the item to the palette and then by using SymbolPaletteItemName property in the event args of NodeDrop.A reference to the corresponding SymbolPaletteItem can be obtained.
SymbolPaletteItem ss = new SymbolPaletteItem();

Label l = new Label();

l.Content = "Label";

ss.Content = l;

ss.Name = "MyItem";Dim ss As New SymbolPaletteItem()
Dim l As New Label()
l.Content = "Label"
ss.Content = l
ss.Name = "MyItem"The NodeDrop event can be declared:
// Declare the event.

diagramView.NodeDrop += new NodeDroppedEventHandler(diagramView_NodeDrop);

// Handle the event.

void diagramView_NodeDrop(object sender, NodeDroppedRoutedEventArgs evtArgs)

{

if(evtArgs.SymbolPaletteItemName=="MyItem")

{

// User-specified code.

}}'Declare the event.
Private diagramView.NodeDrop += New NodeDroppedEventHandler(AddressOf diagramView_NodeDrop)
'Handle the event.
Private Sub diagramView_NodeDrop(ByVal sender As Object, ByVal evtArgs As NodeDroppedRoutedEventArgs)
If evtArgs.SymbolPaletteItemName = "MyItem" Then
'User-specified code.
End If
End SubHide ContextMenu for all Nodes and Connections
ContextMenu for all Nodes and LineConnectors can be hidden using the following code snippet.
diagramView.NodeContextMenu = new ContextMenu { Visibility = Visibility.Collapsed };

diagramView.LineConnectorContextMenu = new ContextMenu { Visibility = Visibility.Collapsed };diagramView.NodeContextMenu = New ContextMenu With {.Visibility = Visibility.Collapsed}
diagramView.LineConnectorContextMenu = New ContextMenu With {.Visibility = Visibility.Collapsed}Where, diagramView is an instance of DiagramView
How can the nudge operation be stopped?
The nudge operation can be stopped by handling the DiagramControl’s PreviewKeyDown event, as shown in the code example displayed below.
//Register the PreviewKeyDown event.

        diagramControl.PreviewKeyDown += new KeyEventHandler(MainWindow_PreviewKeyDown);

        //Handle the PreviewKeyDown event for the arrow keys.

        void MainWindow_PreviewKeyDown(object sender, KeyEventArgs e)

        {

            if (e.Key == Key.Up || e.Key == Key.Down || e.Key == Key.Right || e.Key == Key.Left)

            {

                e.Handled = true;

            }

}'Register the PreviewKeyDown event.
Private diagramControl.PreviewKeyDown += New KeyEventHandler(AddressOf MainWindow_PreviewKeyDown)
'Handle the PreviewKeyDown event for the arrow keys.
Private Sub MainWindow_PreviewKeyDown(ByVal sender As Object, ByVal e As KeyEventArgs)
If e.Key = Key.Up OrElse e.Key = Key.Down OrElse e.Key = Key.Right OrElse e.Key = Key.Left Then
e.Handled = True
End If
End SubHow can MultipleTrigger be applied for a Node?
MultiTrigger enables you to set the property values or start actions based on a collection of conditions. A condition is met when the element’s property value matches the specified value. This comparison is performed by a reference equality check. The following example shows how to use MultipleTrigger.
<Style.Triggers>

        <MultiTrigger>

            <MultiTrigger.Conditions>

                <Condition Property="IsSelected" Value="True"/>

                <Condition Property="Tag" Value="True"/>

            </MultiTrigger.Conditions>

            <Setter Property="Effect">

                <Setter.Value>

                    <DropShadowEffect Color="Gray" BlurRadius="5" Direction="325" ShadowDepth="5"/>

                </Setter.Value>

            </Setter>

        </MultiTrigger>

    </Style.Triggers>
If a Node has the above Trigger set in its Style, then the Node will have a DropShadowEffect when both the IsSelected property and the Tag property are set to True.