Day View in WinUI Scheduler (SfSchedule)
30 Mar 2021 / 17 minutes to read
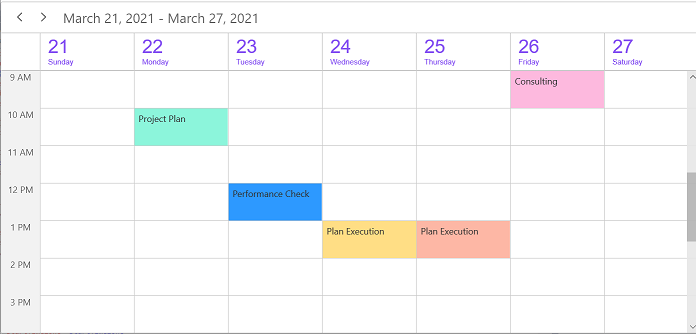
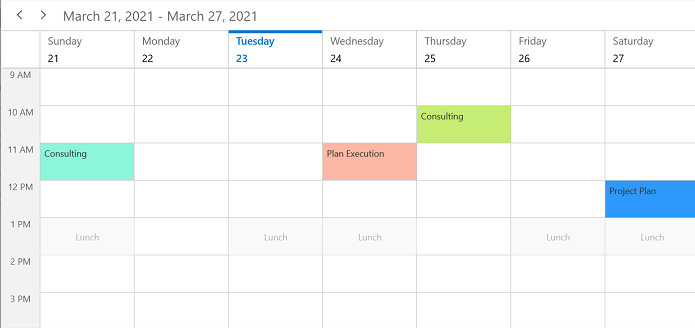
The Scheduler supports to display the day, week, workweek views, and the current day will be visible by default. The appointments on a specific day will be arranged in the respective timeslots based on their duration.
Change time interval
You can customize the interval of timeslots in all the day, week, workweek views by using the TimeInterval property of DaysViewSettings.
this.Schedule.ViewType = SchedulerViewType.Week;
this.Schedule.DaysViewSettings.TimeInterval = new System.TimeSpan(0, 120, 0);
NOTE
If you modify the timeInterval value (in minutes), you need to change the time labels format by setting the timeFormat value to hh:mm.
Change time interval size
You can customize the interval size of timeslots in a day, week, and workweek views by setting TimeIntervalSize property of `DaysViewSettings’.
<scheduler:SfScheduler x:Name="Schedule" ViewType="Week">
    <scheduler:SfScheduler.DaysViewSettings>
        <scheduler:DaysViewSettings
            TimeIntervalSize="120"/>
        </scheduler:SfScheduler.DaysViewSettings>
</scheduler:SfScheduler>this.Schedule.ViewType = SchedulerViewType.Week;
this.Schedule.DaysViewSettings.TimeIntervalSize = 120;
Flexible working days and working hours
The default values for StartHour and EndHour are 0 and 24 to show all the timeslots in a day, week, workweek views. You can set the StartHour and EndHour properties of DaysViewSettings to show only the required time duration for users. You can set the StartHour and EndHour in time duration to show the required time duration in minutes.
<scheduler:SfScheduler x:Name="Schedule" ViewType="Week">
    <scheduler:SfScheduler.DaysViewSettings>
        <scheduler:DaysViewSettings
            StartHour="8"
            EndHour="13"/>
        </scheduler:SfScheduler.DaysViewSettings>
</scheduler:SfScheduler>this.Schedule.ViewType = SchedulerViewType.Week;
this.Schedule.DaysViewSettings.StartHour = 8;
this.Schedule.DaysViewSettings.EndHour = 13;
NOTE
- The
NonWorkingDaysproperty will applicable only forworkWeekandTimelineWorkWeekviews only, and not applicable for the remaining views.- Scheduler Appointments UI, which does not fall within the
StartHourandEndHourwill not be visible and if it falls partially, it will be clipped.- No need to specify the decimal point values for
StartHourandEndHour, if you do not want to set the minutes.- The number of time slots will be calculated based on total minutes of a day and time interval (total minutes of a day ((start hour - end hour) * 60) / time interval).
- If a custom timeInterval is given, then the number of time slots calculated based on the given
TimeIntervalshould result in an integer value (total minutes % timeInterval = 0), otherwise the next immediate time interval that results in integer value when dividing total minutes of a day will be considered. For example, if TimeInterval=2 Hours 15 minutes and total minutes = 1440 (24 Hours per day), then theTimeIntervalwill be changed to ‘144’ (1440%144=0) by considering (total minutes % TimeInterval = 0), it will return integer value for time slots rendering.- If the custom
StartHourandEndHourare given, then the number of time slots calculated based on givenStartHourandEndHourshould result in integer value, otherwise the next immediateTimeIntervalwill be considered until the result is integer value. For example, if theStartHouris 9 (09:00AM),EndHouris 18.25 (06:15 PM),TimeIntervalis 30 minutes, and total minutes = 555 ((18.25-9)*60), then theTimeIntervalwill be changed to ’37 minutes’ (555%37=0) by considering (total minutes % timeInterval = 0). it will return the integer value for time slots rendering.
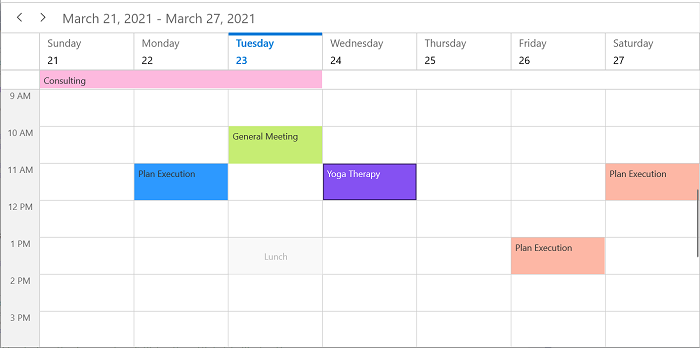
Special time regions
You can restrict the user interaction such as selection and highlight specific regions of time in a day, week, and workweek views by adding the SpecialTimeRegions property of SfScheduler. You need to set the StartTime and EndTime properties of SpecialTimeRegion to create a SpecialTimeRegion, you can use the timeZone property to set the specific timezone for Start and end time of SpecialTimeRegion. The SpecialTimeRegion will display the text or image on it, which is set to the text or icon property of SpecialTimeRegion.
You can merge the adjacent region of SpecialTimeRegion and show them as a single region instead of showing them separately for each day using the CanMergeAdjacentRegions property of SpecialTimeRegion in the week and workweek views. By default, its value is set to false.
Selection restriction in timeslots
You can enable or disable the touch interaction of SpecialTimeRegion using the CanEdit property of SpecialTimeRegion. By default, its value is set to true.
this.Schedule.ViewType = SchedulerViewType.Week;
this.Schedule.DaysViewSettings.SpecialTimeRegions.Add(new SpecialTimeRegion
{
    StartTime = new System.DateTime(2021, 03, 23, 13, 0, 0),
    EndTime = new System.DateTime(2021, 03, 23, 14, 0, 0),
    Text = "Lunch",
    CanEdit = false,
    Background = new SolidColorBrush(Colors.LightGray),
    Foreground = new SolidColorBrush(Colors.White)
});
NOTE
This property only restricts the interaction on region and it does not restrict the following:
- Programmatic selection (if the user updates the selected date value dynamically).
- Does not clear the selection when the user selects the region and dynamically change the
CanEditproperty to false.- It does not restrict appointment interaction when the appointment placed in the region.
- It does not restrict the appointment rendering on a region, when appointments are loaded from data services or adding programmatically.
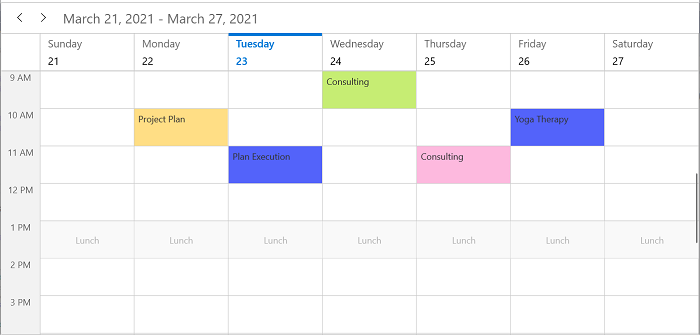
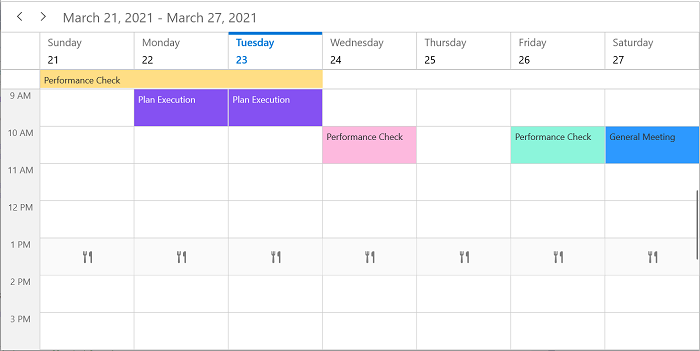
Recurring time region
The recurring time region on a daily, weekly, monthly, or yearly interval. The recurring special time regions can be created by setting the RecurrenceRule property in SpecialTimeRegion.
You can merge the adjacent region of SpecialTimeRegion and show them as a single region instead of showing them separately for each day using the CanMergeAdjacentRegions property of SpecialTimeRegion in the week and workweek views. By default, its value is set to false.
this.Schedule.ViewType = SchedulerViewType.Week;
this.Schedule.DaysViewSettings.SpecialTimeRegions.Add(new SpecialTimeRegion
{
    StartTime = new System.DateTime(2021, 03, 21, 13, 0, 0),
    EndTime = new System.DateTime(2021, 03, 21, 14, 0, 0),
    Text = "Lunch",
    CanEdit = false,
    Background = new SolidColorBrush(Colors.LightGray),
    Foreground = new SolidColorBrush(Colors.White),
    CanMergeAdjacentRegions = true,
    RecurrenceRule = "FREQ=DAILY;INTERVAL=1"
});
If the CanMergeAdjacentRegions of SpecialTimeRegion is set to false. The SpecialTimeRegion will be rendering on date basis.
Recurrence exception dates
You can delete any of the occurrence that are an exception from the recurrence pattern time region by using the RecurrenceExceptionDates property of SpecialTimeRegion. The deleted occurrence date will be considered as a recurrence exception date.
this.Schedule.ViewType = SchedulerViewType.Week;

DateTime recurrenceExceptionDates = DateTime.Now.Date.AddDays(-1);
DateTime recurrenceExceptionDates1 = DateTime.Now.Date.AddDays(2);
this.Schedule.DaysViewSettings.SpecialTimeRegions.Add(new SpecialTimeRegion
{
    StartTime = new System.DateTime(2021, 03, 21, 13, 0, 0),
    EndTime = new System.DateTime(2021, 03, 21, 14, 0, 0),
    Text = "Lunch",
    CanEdit = false,
    RecurrenceRule = "FREQ=DAILY;INTERVAL=1",
    CanMergeAdjacentRegions = true,
    Background = new SolidColorBrush(Colors.LightGray),
    Foreground = new SolidColorBrush(Colors.White),
    RecurrenceExceptionDates = new ObservableCollection<DateTime>()
    {
        recurrenceExceptionDates,
        recurrenceExceptionDates1,
    }
});
The SpecialTimeRegion can be get in date basis by setting the value of CanMergeAdjacentRegions to false.
Special time region customization
The SpecialTimeRegion background color can be customized by using the Background and SpecialTimeRegionTemplate properties of SpecialTimeRegion that is used to customize the text style for the image of the SpecialTimeRegion.
<Page.Resources>
    <DataTemplate x:Key="specialRegionTemplate">
        <Grid Background="{Binding Background}"
            Opacity="0.5"
            HorizontalAlignment="Stretch"
            VerticalAlignment="Stretch">
        <Path x:Name="Fork" Data="M11,0 C11.553001,0 12,0.4469986 12,1 L12,15 C12,15.553001 11.553001,16 11,16 10.446999,16 10,15.553001 10,15 L10,7 9,7 C8.4469986,7 8,6.5530014 8,6 L8,3 C8,1.3429985 9.3429985,0 11,0 z M0,0 L1,0 1.2340002,4 1.7810001,4 2,0 3,0 3.2340002,4 3.7810001,4 4,0 5,0 5,4 C5,4.9660001 4.3140001,5.7727499 3.4029064,5.9593439 L3.4007993,5.9597201 3.9114671,14.517 C3.9594617,15.321 3.3195295,16 2.5136147,16 L2.5076156,16 C1.6937013,16 1.0517693,15.309 1.1107631,14.497 L1.7400641,5.9826035 1.6955509,5.9769421 C0.73587513,5.8301721 0,5.0005002 0,4 z" Fill="Black" HorizontalAlignment="Center" Height="16"  Stretch="Fill" VerticalAlignment="Center" Width="12"/>
        </Grid>
    </DataTemplate>
</Page.Resources><scheduler:SfScheduler x:Name="Schedule" ViewType="Week">
<scheduler:SfScheduler.DaysViewSettings>
<scheduler:DaysViewSettings SpecialTimeRegionTemplate="{StaticResource specialRegionTemplate}">
</scheduler:DaysViewSettings>
</scheduler:SfScheduler.DaysViewSettings>
</scheduler:SfScheduler>this.Schedule.DaysViewSettings.SpecialTimeRegions.Add(new SpecialTimeRegion
{
StartTime = new System.DateTime(2021, 03, 21, 13, 0, 0),
EndTime = new System.DateTime(2021, 03, 21, 14, 0, 0),
Text = "Lunch",
CanEdit = false,
RecurrenceRule = "FREQ=DAILY;INTERVAL=1",
CanMergeAdjacentRegions = true,
Background = new SolidColorBrush(Colors.LightGray),
Foreground = new SolidColorBrush(Colors.White),
});
The SpecialTimeRegion can be customized on a date basis by setting the value of CanMergeAdjacentRegions to false.
Change time ruler size
You can customize the size of the time ruler view where the labels mentioning the time are placed by using the TimeRulerSize property of DayViewSettings.
<scheduler:SfScheduler x:Name="Schedule" ViewType="Week" >
    <scheduler:SfScheduler.DaysViewSettings>
        <scheduler:DaysViewSettings
            TimeRulerSize="100">
        </scheduler:DaysViewSettings>
    </scheduler:SfScheduler.DaysViewSettings>
</scheduler:SfScheduler>this.Schedule.ViewType = SchedulerViewType.Week;
this.Schedule.DaysViewSettings.TimeRulerSize = 100;
Minimum appointment duration
The MinimumAppointmentDuration property in DayViewSettings is to set an arbitrary height to appointments when it has a minimum duration in a day, week, workweek views so that the subject can be readable.
this.Schedule.ViewType = SchedulerViewType.Week;
this.Schedule.DaysViewSettings.MinimumAppointmentDuration = new System.TimeSpan(0, 120, 0);
NOTE
- The
MinimumAppointmentDurationvalue will be set when an appointment duration value is lesser thanMinimumAppointmentDuration.- The appointment duration value will be set when the appointment duration value is greater than the
MinimumAppointmentDuration.- The
TimeIntervalvalue will be set when theMinimumAppointmentDurationis greater than theTimeIntervalwith lesser appointment duration.- All-day Appointment does not support
MinimumAppointmentDuration.
Time text formatting
You can customize the format for the labels mentioning the time by setting the TimeRulerFormat property of DayViewSettings in Scheduler.
this.Schedule.ViewType = SchedulerViewType.Week;
this.Schedule.DaysViewSettings.TimeRulerFormat = "hh mm";
this.Schedule.DaysViewSettings.TimeInterval = new System.TimeSpan(0, 30, 0);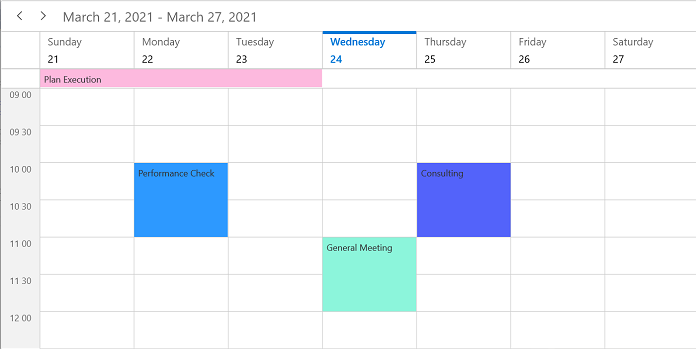
View header
You can customize the default appearance of view header in a day, week, and workweek views by setting the ViewHeaderDateFormat, ViewHeaderHeight, ViewHeaderDayFormat and ViewHeaderTemplate of DaysViewSettings.
View header text formatting
You can customize the date and day format of ViewHeader by using the ViewHeaderDateFormat and ViewHeaderDayFormat properties of DaysViewSettings.
<scheduler:SfScheduler x:Name="Schedule" ViewType="Week">
    <scheduler:SfScheduler.DaysViewSettings>
        <scheduler:DaysViewSettings
            ViewHeaderDayFormat="ddd"
            ViewHeaderDateFormat="dd"/>
    </scheduler:SfScheduler.DaysViewSettings>
</scheduler:SfScheduler>this.Schedule.ViewType = SchedulerViewType.Week;
this.Schedule.DaysViewSettings.ViewHeaderDateFormat = "dd";
this.Schedule.DaysViewSettings.ViewHeaderDayFormat = "ddd";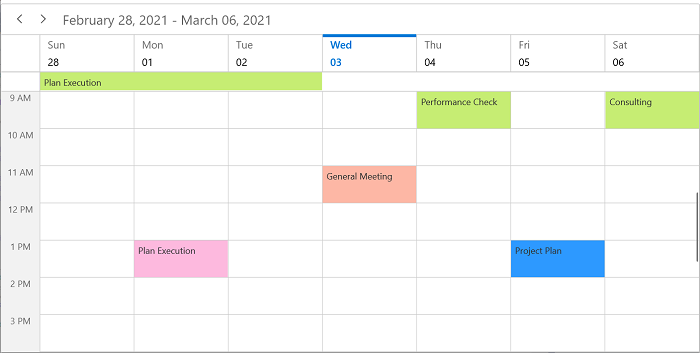
View header height
You can customize the height of the ViewHeader in a day, week, and workweek views by setting the ViewHeaderHeight property of DaysViewSettings in SfScheduler.
<scheduler:SfScheduler x:Name="Schedule" ViewType="Week">
    <scheduler:SfScheduler.DaysViewSettings>
        <scheduler:DaysViewSettings
            ViewHeaderHeight="100"/>
    </scheduler:SfScheduler.DaysViewSettings>
</scheduler:SfScheduler>this.Schedule.ViewType = SchedulerViewType.Week;
this.Schedule.DaysViewSettings.ViewHeaderHeight = 100;
View header appearance customization
You can customize the default appearance of view header by setting the ViewHeaderTemplate property of DaysViewSettings in SfScheduler.
<Page.Resources>
    <DataTemplate x:Key="viewHeaderTemplate">
        <StackPanel Background="Transparent"
            Width="Auto"
            VerticalAlignment="Center"
            HorizontalAlignment="Stretch"
            Orientation="Vertical">
        <TextBlock
            HorizontalAlignment="Left"
            VerticalAlignment="Center"
            Foreground="#8551F2"
            FontFamily="Arial"
            Text="{Binding DateText}"
            FontSize="25"
            TextTrimming="CharacterEllipsis"
            TextWrapping="Wrap" />
        <TextBlock
            HorizontalAlignment="Left"
            VerticalAlignment="Center"
            Foreground="#8551F2"
            FontFamily="Arial"
            Text="{Binding DayText}"
            FontSize="10"
            TextTrimming="CharacterEllipsis"
            TextWrapping="Wrap" />
        </StackPanel>
    </DataTemplate>
</Page.Resources><scheduler:SfScheduler x:Name="Schedule" ViewType="Week">
<scheduler:SfScheduler.DaysViewSettings>
<scheduler:DaysViewSettings
ViewHeaderTemplate="{StaticResource viewHeaderTemplate}" />
</scheduler:SfScheduler.DaysViewSettings>
</scheduler:SfScheduler>