Getting Started with WinForms TreeMap
18 Nov 20187 minutes to read
WinForms TreeMaps are a growing trend in data visualization. They display hierarchical information in a series of clustered rectangles, which together represent a whole. Each box’s size represents a quantity. WinForms TreeMaps can also use color to represent values, and colors are often used to categorize the boxes within the WinForms TreeMap.
Assembly deployment
To use the TreeMap control, add the Syncfusion.TreeMap.Windows assembly as a reference to your application. Refer to the control dependencies section to get the list of assemblies or NuGet packages that need to be referenced.
For more information on installing NuGet packages in a Windows Forms application, see the following link:
Creating tree map for Windows Forms applications
The tree map control is available in the following assembly and namespace:
-
Assembly:
Syncfusion.TreeMap.Windows -
Namespace:
Syncfusion.Windows.Forms.TreeMap
Step 1: Create a Windows Forms application
Create a new Windows Forms Application project in Visual Studio and add the Syncfusion.TreeMap.Windows assembly or NuGet package as a reference. Refer to the control dependencies section for the list of required assemblies and NuGet packages.
Step 2: Define a Data Model
Define a simple data model that represents a data point.
public class PopulationDetail
{
    public string Continent { get; set; } = string.Empty;
    public string Country { get; set; } = string.Empty;
    public double Growth { get; set; }
    public double Population { get; set; }
}
Public Class PopulationDetail
Public Property Continent As String = String.Empty
Public Property Country As String = String.Empty
Public Property Growth As Double
Public Property Population As Double
End ClassStep 3: Create Data Source
Create a view model class with an ObservableCollection and populate it with sample data.
public class PopulationViewModel
{
    public PopulationViewModel()
    {
        this.PopulationDetails = new ObservableCollection<PopulationDetail>();
        PopulationDetails.Add(new PopulationDetail() { Continent = "Asia", Country = "Indonesia", Growth = 3, Population = 237641326 });
        PopulationDetails.Add(new PopulationDetail() { Continent = "Asia", Country = "Russia", Growth = 2, Population = 152518015 });
        PopulationDetails.Add(new PopulationDetail() { Continent = "Asia", Country = "Malaysia", Growth = 1, Population = 29672000 });
        PopulationDetails.Add(new PopulationDetail() { Continent = "North America", Country = "United States", Growth = 4, Population = 315645000 });
        PopulationDetails.Add(new PopulationDetail() { Continent = "North America", Country = "Mexico", Growth = 2, Population = 112336538 });
        PopulationDetails.Add(new PopulationDetail() { Continent = "South America", Country = "Colombia", Growth = 1, Population = 47000000 });
    }

    public ObservableCollection<PopulationDetail> PopulationDetails { get; set; }
}
Public Class PopulationViewModel
Public Sub New()
Me.PopulationDetails = New ObservableCollection(Of PopulationDetail)()
PopulationDetails.Add(New PopulationDetail() With { .Continent = "Asia", .Country = "Indonesia", .Growth = 3, .Population = 237641326 })
PopulationDetails.Add(New PopulationDetail() With { .Continent = "Asia", .Country = "Russia", .Growth = 2, .Population = 152518015 })
PopulationDetails.Add(New PopulationDetail() With { .Continent = "Asia", .Country = "Malaysia", .Growth = 1, .Population = 29672000 })
PopulationDetails.Add(New PopulationDetail() With { .Continent = "North America", .Country = "United States", .Growth = 4, .Population = 315645000 })
PopulationDetails.Add(New PopulationDetail() With { .Continent = "North America", .Country = "Mexico", .Growth = 2, .Population = 112336538 })
PopulationDetails.Add(New PopulationDetail() With { .Continent = "South America", .Country = "Colombia", .Growth = 1, .Population = 47000000 })
End Sub
Public Property PopulationDetails As ObservableCollection(Of PopulationDetail)
End ClassStep 4: Import the TreeMap namespace
Add the following namespace in your C# code file.
using Syncfusion.Windows.Forms.TreeMap;Imports Syncfusion.Windows.Forms.TreeMapStep 5: Configure WinForms TreeMap Properties
Configure the TreeMap control by setting the data source and key properties such as WeightValuePath and ColorValuePath. The levels of the TreeMap control can be categorized into two types: flat and hierarchical, which are used to define the levels of the data collection.
PopulationViewModel data = new PopulationViewModel();

TreeMap treeMap = new TreeMap();
treeMap.ItemsSource = data.PopulationDetails;
treeMap.WeightValuePath = "Population";
treeMap.ColorValuePath = "Growth";
treeMap.Dock = DockStyle.Fill;

TreeMapFlatLevel treeMapFlatLevel1 = new TreeMapFlatLevel();
treeMapFlatLevel1.GroupPath = "Continent";

treeMap.Levels.Add(treeMapFlatLevel1);
this.Controls.Add(treeMap);
Dim data As New PopulationViewModel()
Dim treeMap As New TreeMap()
treeMap.ItemsSource = data.PopulationDetails
treeMap.WeightValuePath = "Population"
treeMap.ColorValuePath = "Growth"
treeMap.Dock = DockStyle.Fill
Dim treeMapFlatLevel1 As New TreeMapFlatLevel()
treeMapFlatLevel1.GroupPath = "Continent"
treeMap.Levels.Add(treeMapFlatLevel1)
Me.Controls.Add(treeMap)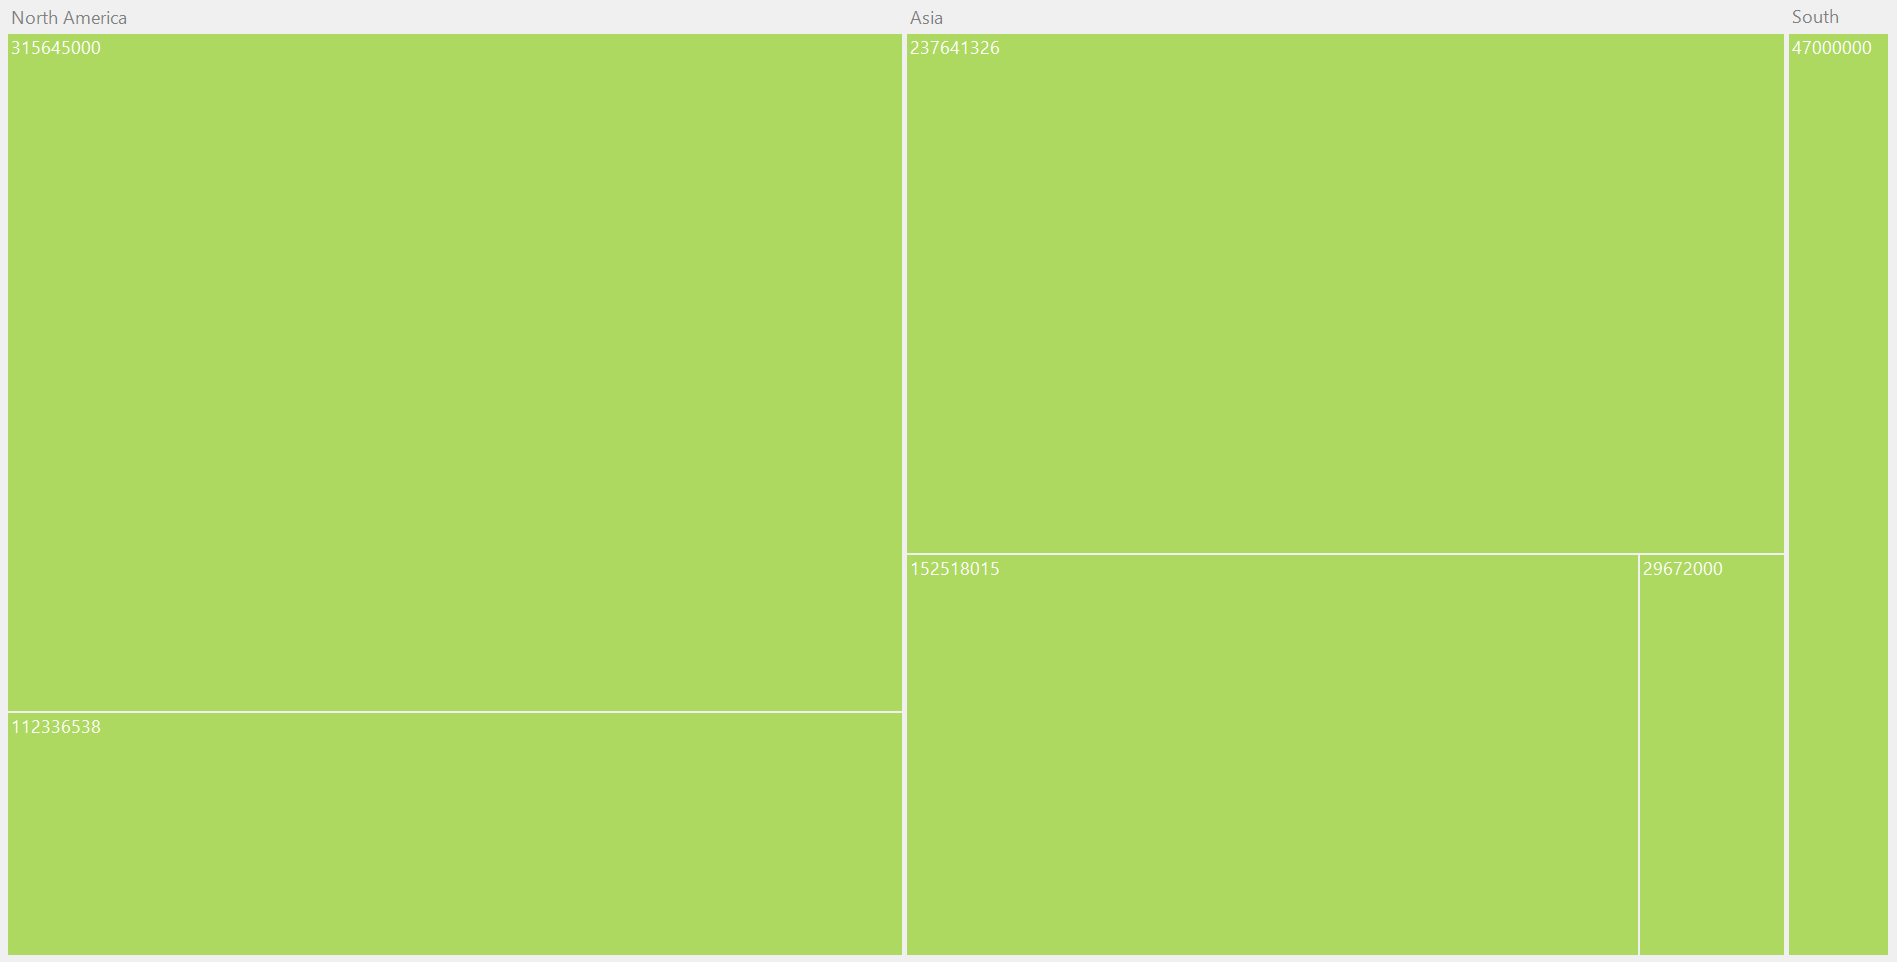
See also
How to populate the WinForms TreeMap data values by using the DataTable?