Appearance in Windows Forms ListView
18 Nov 201810 minutes to read
ListView allows to customize the appearance of selected items through the Style property that contains all the settings for Item and Items Group appearance customizations.
Customizing item appearance
Item appearance can be customized by using the ItemStyle property that contains all the settings for the item appearance customization.
sfListView1.Style.ItemStyle.BackColor = Color.AliceBlue;
sfListView1.Style.ItemStyle.ForeColor = Color.DarkBlue;
sfListView1.Style.ItemStyle.TextAlignment = ContentAlignment.BottomLeft;
sfListView1.Style.ItemStyle.Font = new Font("Segoe UI", 10);sfListView1.Style.ItemStyle.BackColor = Color.AliceBlue
sfListView1.Style.ItemStyle.ForeColor = Color.DarkBlue
sfListView1.Style.ItemStyle.TextAlignment = ContentAlignment.BottomLeft
sfListView1.Style.ItemStyle.Font = New Font("Segoe UI", 10)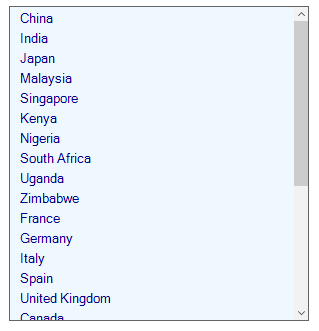
Customizing items group appearance
The items group appearance can be customized by using the GroupItemStyle property that contains all the settings for the items group appearance customization.
sfListView1.Style.GroupItemStyle.BackColor = Color.PaleTurquoise;
sfListView1.Style.GroupItemStyle.ForeColor = Color.DarkRed;
sfListView1.Style.GroupItemStyle.TextAlignment = ContentAlignment.BottomLeft;
sfListView1.Style.GroupItemStyle.Font = new Font("Segoe UI", 12);sfListView1.Style.GroupItemStyle.BackColor = Color.PaleTurquoise
sfListView1.Style.GroupItemStyle.ForeColor = Color.DarkRed
sfListView1.Style.GroupItemStyle.TextAlignment = ContentAlignment.BottomLeft
sfListView1.Style.GroupItemStyle.Font = New Font("Segoe UI", 12)
Conditional styling
The ListView allows the items customization by using DrawItem event.
sfListView1.DrawItem += new EventHandler<Syncfusion.WinForms.ListView.Events.DrawItemEventArgs>(SfListView1_DrawItem);
private void SfListView1_DrawItem(object sender, DrawItemEventArgs e)
{
  if(e.ItemType == ItemType.Record && (e.ItemData as CountryInfo).Continent == "Asia")
  {
      e.Style.BackColor = Color.Coral;
      e.Style.ForeColor = Color.White;
  }
}
AddHandler sfListView1.DrawItem, AddressOf SfListView1_DrawItem
Private Sub SfListView1_DrawItem(ByVal sender As Object, ByVal e As DrawItemEventArgs)
If e.ItemType Is ItemType.Record AndAlso (TryCast(e.ItemData, CountryInfo)).Continent = "Asia" Then
e.Style.BackColor = Color.Coral
e.Style.ForeColor = Color.White
End If
End Sub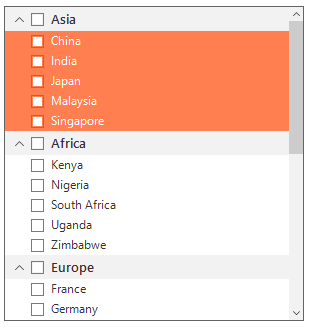
Adding image to an item
The ListView allows adding image to each item by using the DrawItem event. An image can be set to an item by using the Image property.
sfListView1.DrawItem += new EventHandler<Syncfusion.WinForms.ListView.Events.DrawItemEventArgs>(SfListView1_DrawItem);
private void SfListView1_DrawItem(object sender, Syncfusion.WinForms.ListView.Events.DrawItemEventArgs e)
{
    if (e.Text == "Spain" && e.Value.ToString() == "Europe")
   {
       e.Image = Image.FromFile(@"..\..\Flags\Spain.png");
       e.ImageAlignment = ContentAlignment.BottomLeft;
   }
   else if (e.Text == "United States of America" && e.Value.ToString() == "North America")
   {
       e.Image = Image.FromFile(@"..\..\Flags\USA.png");
       e.ImageAlignment = ContentAlignment.BottomLeft;
   }
   else if (e.Text == "Canada" && e.Value.ToString() == "North America")
   {
       e.Image = Image.FromFile(@"..\..\Flags\Canada.png");
       e.ImageAlignment = ContentAlignment.BottomLeft;
   }
   else if (e.Text == "Argentina" && e.Value.ToString() == "South America")
   {
       e.Image = Image.FromFile(@"..\..\Flags\Argentina.png");
       e.ImageAlignment = ContentAlignment.BottomLeft;
   }
   else if (e.Text == "Colombia" && e.Value.ToString() == "South America")
   {
       e.Image = Image.FromFile(@"..\..\Flags\Colombia.png");
       e.ImageAlignment = ContentAlignment.BottomLeft;
   }
}
AddHandler sfListView1.DrawItem, AddressOf SfListView1_DrawItem
Private Sub SfListView1_DrawItem(ByVal sender As Object, ByVal e As Syncfusion.WinForms.ListView.Events.DrawItemEventArgs)
If e.Text = "Spain" AndAlso e.Value.ToString() = "Europe" Then
e.Image = Image.FromFile("..\..\Flags\Spain.png")
e.ImageAlignment = ContentAlignment.BottomLeft
ElseIf e.Text = "United States of America" AndAlso e.Value.ToString() = "North America" Then
e.Image = Image.FromFile("..\..\Flags\USA.png")
e.ImageAlignment = ContentAlignment.BottomLeft
ElseIf e.Text = "Canada" AndAlso e.Value.ToString() = "North America" Then
e.Image = Image.FromFile("..\..\Flags\Canada.png")
e.ImageAlignment = ContentAlignment.BottomLeft
ElseIf e.Text = "Argentina" AndAlso e.Value.ToString() = "South America" Then
e.Image = Image.FromFile("..\..\Flags\Argentina.png")
e.ImageAlignment = ContentAlignment.BottomLeft
ElseIf e.Text = "Colombia" AndAlso e.Value.ToString() = "South America" Then
e.Image = Image.FromFile("..\..\Flags\Colombia.png")
e.ImageAlignment = ContentAlignment.BottomLeft
End If
End Sub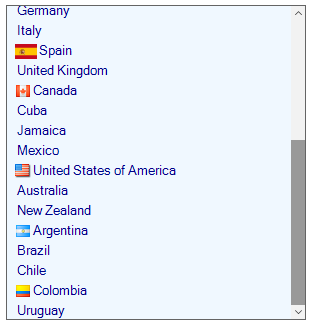
Themes
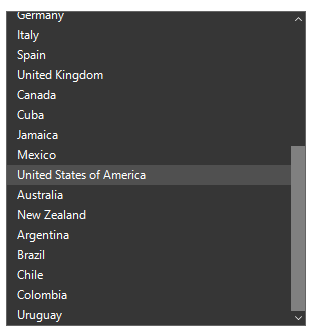
The ListView offers four built-in themes for professional representation as follows:
- Office2016Colorful
- Office2016White
- Office2016DarkGray
- Office2016Black
Themes can be applied to the ListView by using the following steps:
Load theme assemblyApply theme
Load theme assembly
The Syncfusion.Office2016Theme.WinForms assembly should be added as reference to set theme for the ListView in any application.
Before applying theme to the ListView, required theme assembly should be loaded.
using Syncfusion.WinForms.Controls;
{
    static class Program
    {
        static void Main()
        {
            SfSkinManager.LoadAssembly(typeof(Office2016Theme).Assembly);
            Application.EnableVisualStyles();
            Application.SetCompatibleTextRenderingDefault(false);
            Application.Run(new Form1());
        }
    }
}
Private ReadOnly Property Controls() As using Implements Syncfusion.WinForms.Controls
static class Program
static void Main()
SfSkinManager.LoadAssembly(GetType(Office2016Theme).Assembly)
Application.EnableVisualStyles()
Application.SetCompatibleTextRenderingDefault(False)
Application.Run(New Form1())
End PropertyApply theme
Appearance of the ListView can be changed by using the ThemeName.
Office2016Colorful
This option helps to set the Office2016Colorful Theme.
sfListView1.ThemeName = "Office2016Colorful";sfListView1.ThemeName = "Office2016Colorful"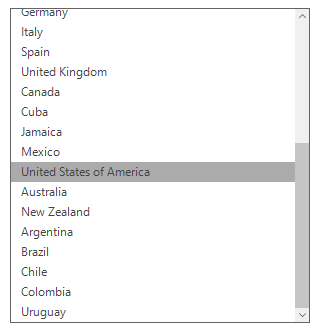
Office2016White
This option helps to set the Office2016White Theme.
sfListView1.ThemeName = "Office2016White";sfListView1.ThemeName = "Office2016White"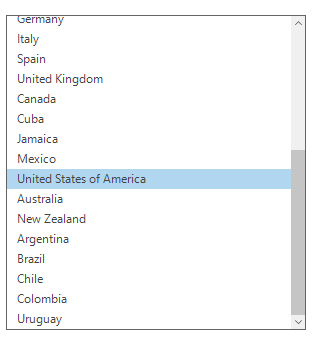
Office2016DarkGray
This option helps to set the Office2016DarkGray Theme.
sfListView1.ThemeName = "Office2016DarkGray";sfListView1.ThemeName = "Office2016DarkGray"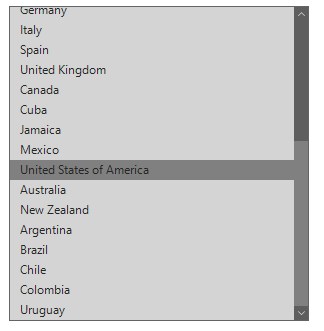
Office2016Black
This option helps to set the Office2016Black Theme.
sfListView1.ThemeName = "Office2016Black";sfListView1.ThemeName = "Office2016Black"