Customization in AIAssistView
15 Jul 202615 minutes to read
This section explains how to customize the BannerView, and how to create a custom BotView and UserView for the Windows Forms SfAIAssistView control.
NOTE
You can also explore our sample on GitHub, which demonstrates complete customization of the BannerView, the creation of a custom BotView, and a custom UserView within an AssistView.
The following using directives are included in your file:
using System;
using System.Collections.Specialized;
using System.ComponentModel;
using System.Drawing;
using System.Windows.Forms;
using Syncfusion.WinForms.AIAssistView;
NOTE
A
ViewModelclass with aChatscollection andCurrentUserproperties exists. Refer to the Getting Started page for setup details.
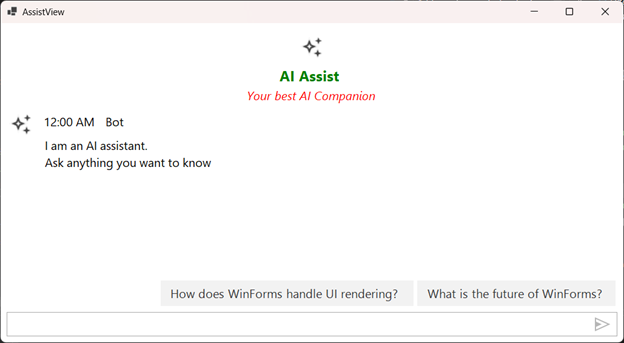
Customizing BannerView
You can customize the BannerView and apply it to the AssistView by using the SetBannerView method.
The following example demonstrates how to customize the Title string, TitleFont, Subtitle string, SubtitleFont, ImageSize, SubtitleColor, and TitleColor of an AssistView banner.
public partial class Form1 : Form
{
    ViewModel viewModel;
    private SfAIAssistView sfAIAssistView1;
    public Form1()
    {
        InitializeComponent();
        viewModel = new ViewModel();

        sfAIAssistView1 = new SfAIAssistView();
        sfAIAssistView1.Location = new System.Drawing.Point(41, 40);
        sfAIAssistView1.Size = new System.Drawing.Size(818, 457);
        sfAIAssistView1.Dock = DockStyle.Fill;
        this.Controls.Add(sfAIAssistView1);

        sfAIAssistView1.DataBindings.Add("Messages", viewModel, "Chats", true, DataSourceUpdateMode.OnPropertyChanged);
        sfAIAssistView1.DataBindings.Add("ShowTypingIndicator", viewModel, "ShowTypingIndicator", true, DataSourceUpdateMode.OnPropertyChanged);
        sfAIAssistView1.DataBindings.Add("Suggestions", viewModel, "Suggestion", true, DataSourceUpdateMode.OnPropertyChanged);
        viewModel.CurrentUser = sfAIAssistView1.User;

        BannerTemplate();

        sfAIAssistView1.TypingIndicator.Author = new Author() { Name = "Bot", AvatarImage = Image.FromFile(@"Asset\AI_Assist.png") };
        sfAIAssistView1.TypingIndicator.DisplayText = "Typing";
    }

    private void BannerTemplate()
    {

        BannerStyle customStyle = new BannerStyle
        {
            TitleFont = new Font("Segoe UI", 14F, System.Drawing.FontStyle.Bold),
            SubTitleFont = new Font("Segoe UI", 12F, System.Drawing.FontStyle.Italic),
            ImageSize = AvatarSize.Medium,
            SubTitleColor = Color.Red,
            TitleColor = Color.Green,
        };

        string title = "AI Assist ";
        string subTitle = "Your best AI Companion";
        sfAIAssistView1.SetBannerView(title, subTitle, Image.FromFile(@"Asset\AI_Assist.png"), customStyle);
    }
}
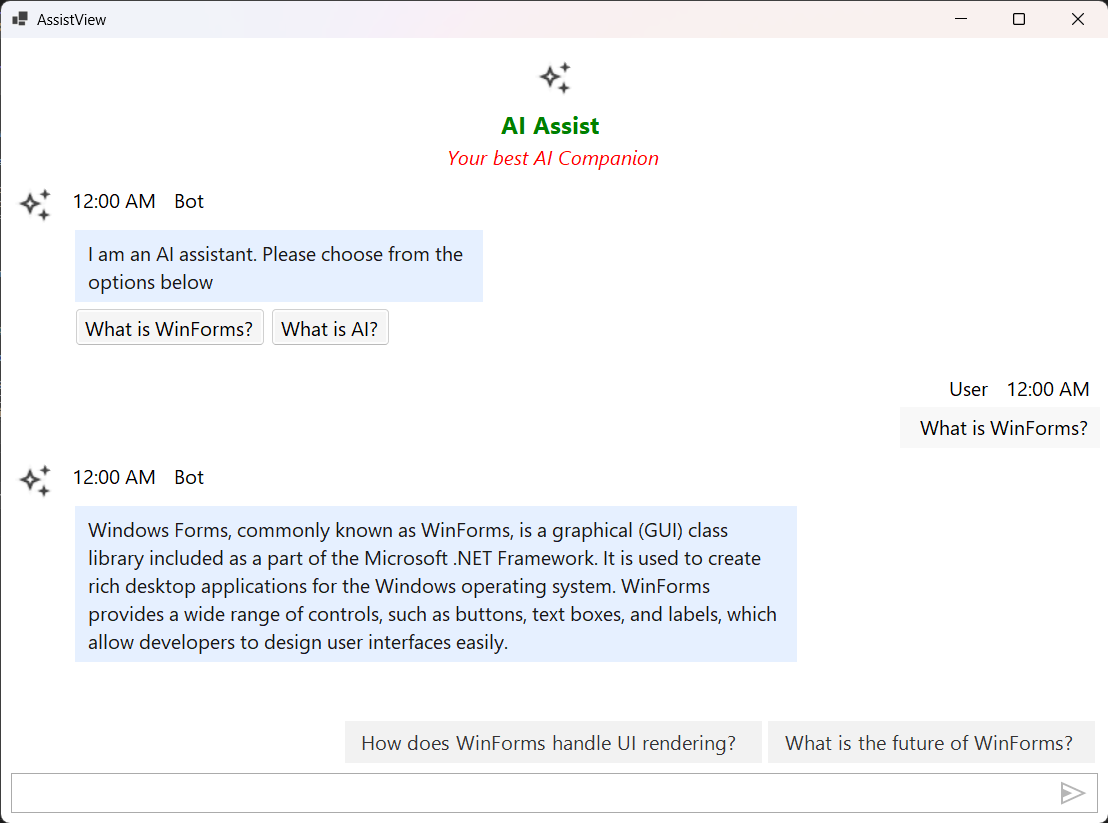
Creating a Custom BotView
You can create and set a custom BotView and apply it to the AssistView by using the SetBotView method.
The following example demonstrates how to create and set a custom BotView in the AssistView.
public partial class Form1 : Form
{
    public Form1()
    {
        viewModel.Chats.CollectionChanged += Chats_CollectionChanged;

        // To Apply custom views to any existing default messages
        foreach (var item in viewModel.Chats)
        {
            if (item is TextMessage tm)
            {
                sfAIAssistView1.SetBotView(tm, CreateBotView(tm));
            }
        }
    }


    private void Chats_CollectionChanged(object sender, NotifyCollectionChangedEventArgs e)
    {
        if (e.Action != NotifyCollectionChangedAction.Add) return;

        foreach (var newItem in e.NewItems ?? new object[0])
        {
            if (newItem is TextMessage message)
            {
                    sfAIAssistView1.SetBotView(message, CreateBotView(message));
            }
        }
    }

    private Control CreateBotView(TextMessage message)
    {
        string text = string.IsNullOrEmpty(message?.Text) ? "Hello from the bot." : message.Text;

        var container = new FlowLayoutPanel
        {
            AutoSize = true,

            WrapContents = true,
            Padding = new Padding(6),
            BackColor = Color.Transparent
        };

        var lbl = new Label
        {
            Text = text,
            AutoSize = true,
            BackColor = Color.FromArgb(230, 240, 255),
            ForeColor = Color.FromArgb(24, 24, 24),
            Padding = new Padding(8),
            Margin = new Padding(0, 0, 0, 6)
        };

        container.Controls.Add(lbl);

        // Only show buttons for the initial prompt message
        const string prompt = "I am an AI assistant. Please choose from the options below";
        if (string.Equals(text?.Trim(), prompt, StringComparison.OrdinalIgnoreCase))
        {
            var btnRow = new FlowLayoutPanel
            {
                AutoSize = true,
                WrapContents = true,
                Margin = new Padding(0)
            };

            string[] choices = new[] { "What is WinForms?", "What is AI?" };
            foreach (var c in choices)
            {
                var btn = new Button
                {
                    Text = c,
                    AutoSize = true,
                    Tag = c,
                    BackColor = Color.WhiteSmoke,
                    Margin = new Padding(0, 0, 6, 0)
                };

                btn.Click += (s, e) =>
                {
                    try
                    {
                        var choice = (string)((Button)s).Tag;
                        viewModel?.Chats.Add(new TextMessage
                        {
                            Author = viewModel.CurrentUser,
                            Text = choice
                        });
                    }
                    catch { }
                };

                btnRow.Controls.Add(btn);
            }

            container.Controls.Add(btnRow);
        }

        return container;
    }
}
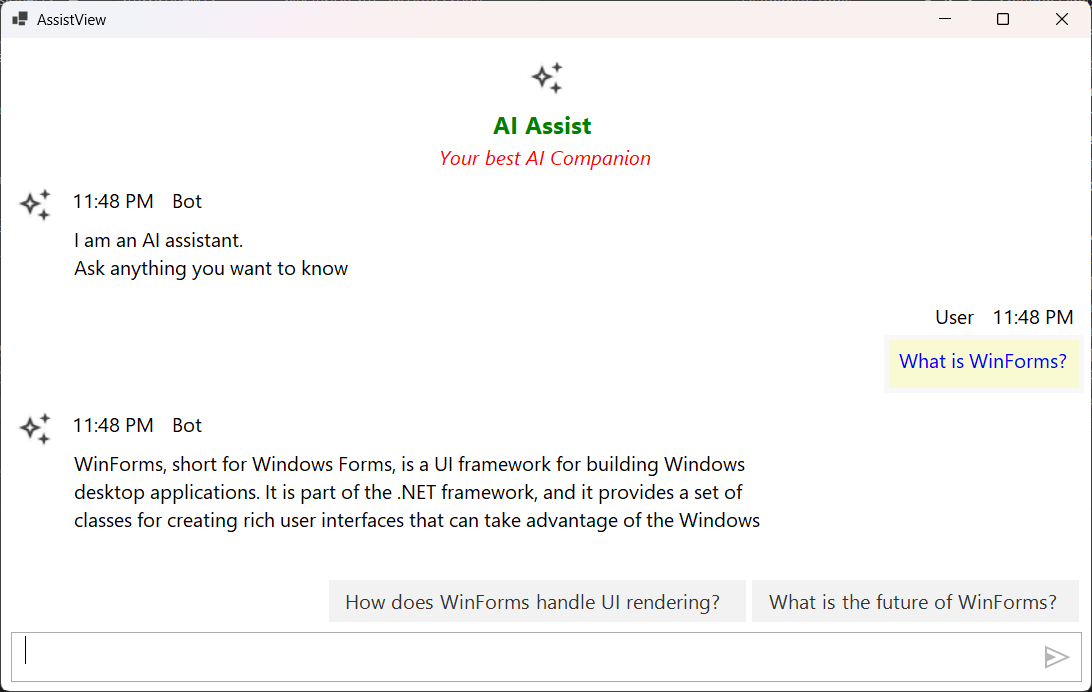
Creating a Custom UserView
You can create and set a custom UserView and apply it to the AssistView by calling the SetUserView method.
The following example demonstrates how to create and set a custom UserView in the AssistView.
public partial class Form1 : Form
{
    public Form1()
    {
        InitializeComponent();

        viewModel.Chats.CollectionChanged += Chats_CollectionChanged;

    }

    private void Chats_CollectionChanged(object sender, NotifyCollectionChangedEventArgs e)
    {
        if (e.Action != NotifyCollectionChangedAction.Add) return;

        foreach (var newItem in e.NewItems ?? new object[0])
        {
            if (newItem is TextMessage message)
            {
                sfAIAssistView1.SetUserView(message, CreateUserView(message));
            }
        }
    }
    private Control CreateUserView(TextMessage message)
    {
        string content = message?.Text ?? string.Empty;

        var lbl = new Label
        {
            Text = content,
            AutoSize = true,
            MaximumSize = new System.Drawing.Size(520, 0),
            BackColor = Color.LightGoldenrodYellow,
            ForeColor = Color.Blue,
            Padding = new Padding(5),
            Margin = new Padding(0, 0, 0, 6)
        };

        return lbl;
    }
}