Existing Database Settings
This section explains how to configure Database Settings with the Syncfusion User Management Server.
Get Database Connection Details
To import users into Syncfusion User Management Server from existing database, configure the existing database details in database settings page in the administration page of Syncfusion User Management Server.
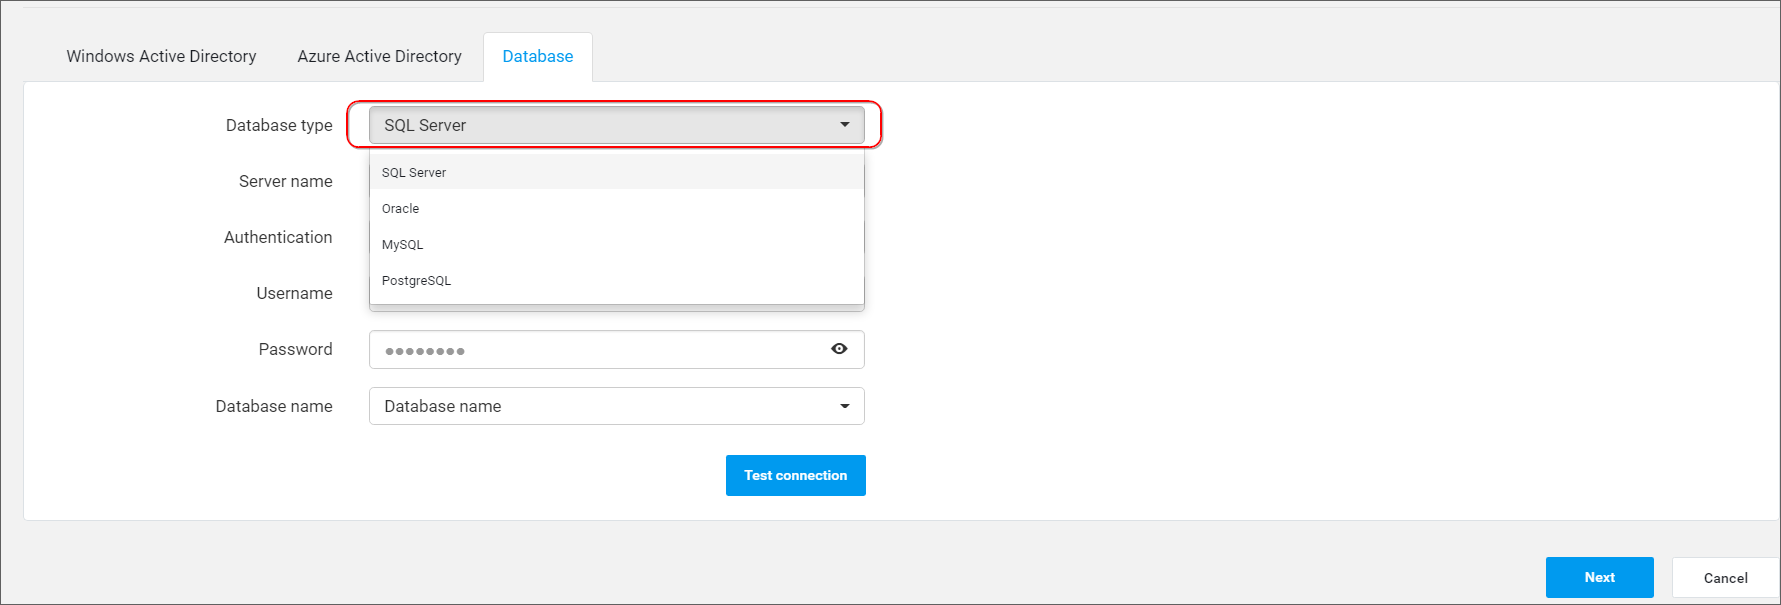
Users can be imported from below types of Databases.
- SQL Server
- MySQL
- Oracle
- PostgreSQL
To select the database type from which the users to be imported, click on Database type dropdown.
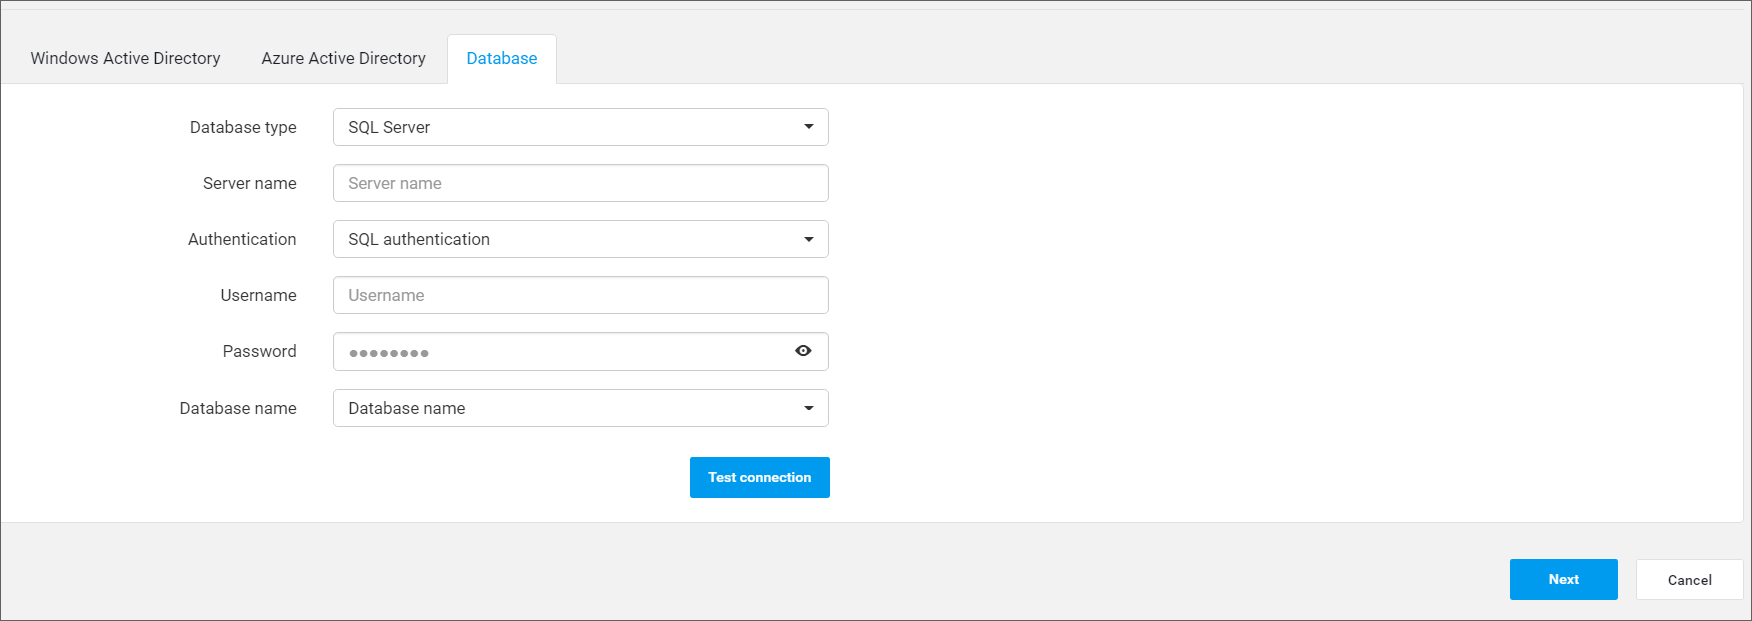
SQL Server Database
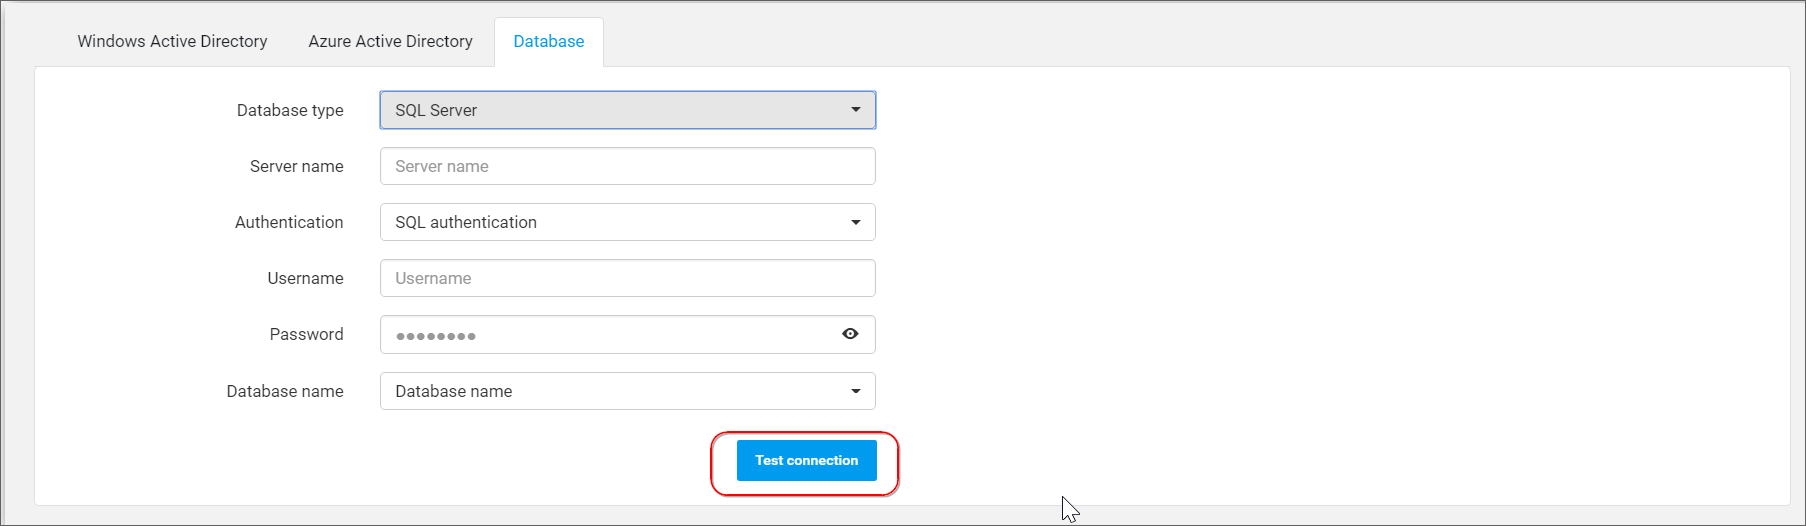
For SQL Server Database, fill the form with Server name, Authentication type, Username, Password and Database name.
The connection details can be tested by clicking the Test Connection button.
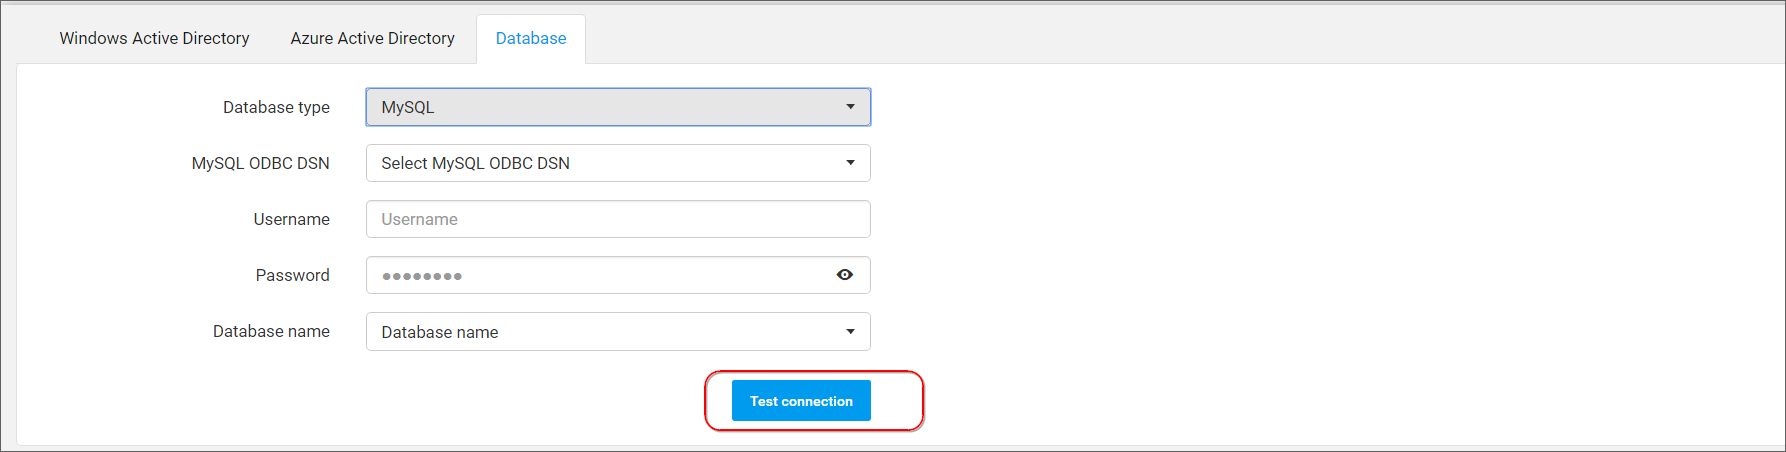
MySQL Database
For MySQL Database, fill the form with DSN, Username, Password and Database name.
The connection details can be tested by clicking the Test Connection button.
Oracle Database
For Oracle Database, fill the form with DSN, Admin username, Admin password, Database name and Database password.
The connection details can be tested by clicking the Test Connection button.

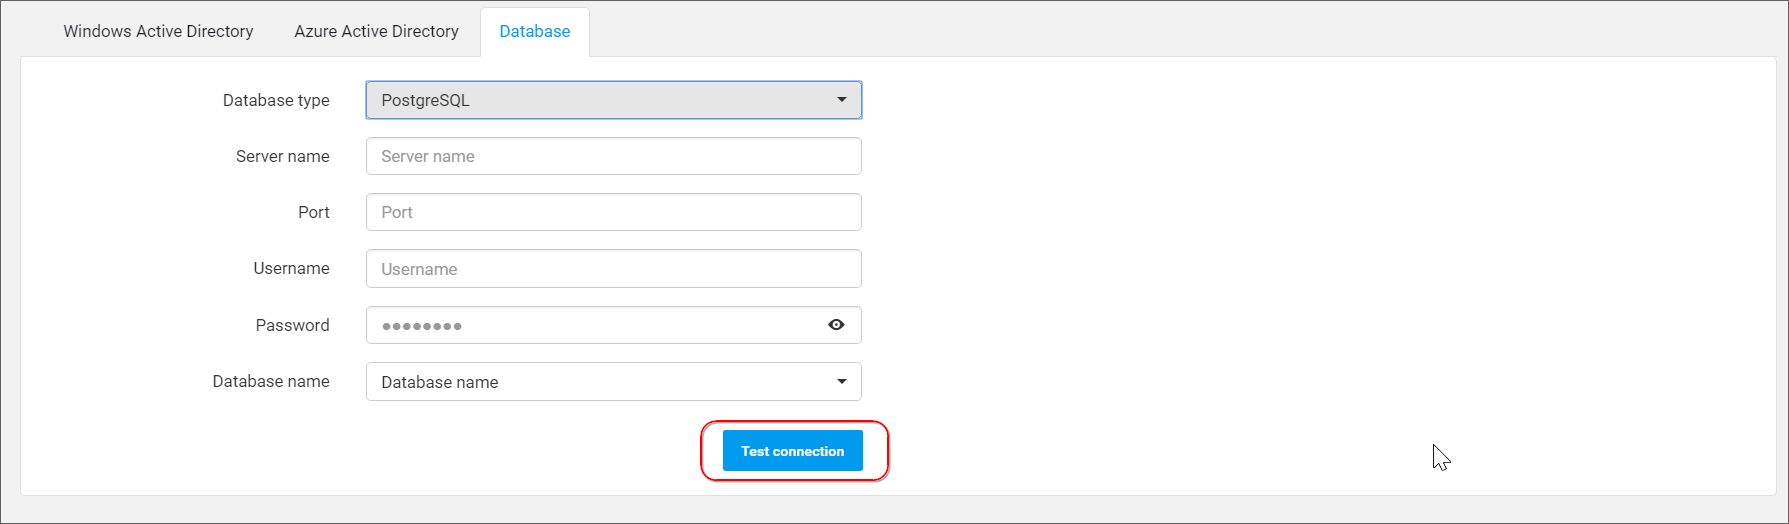
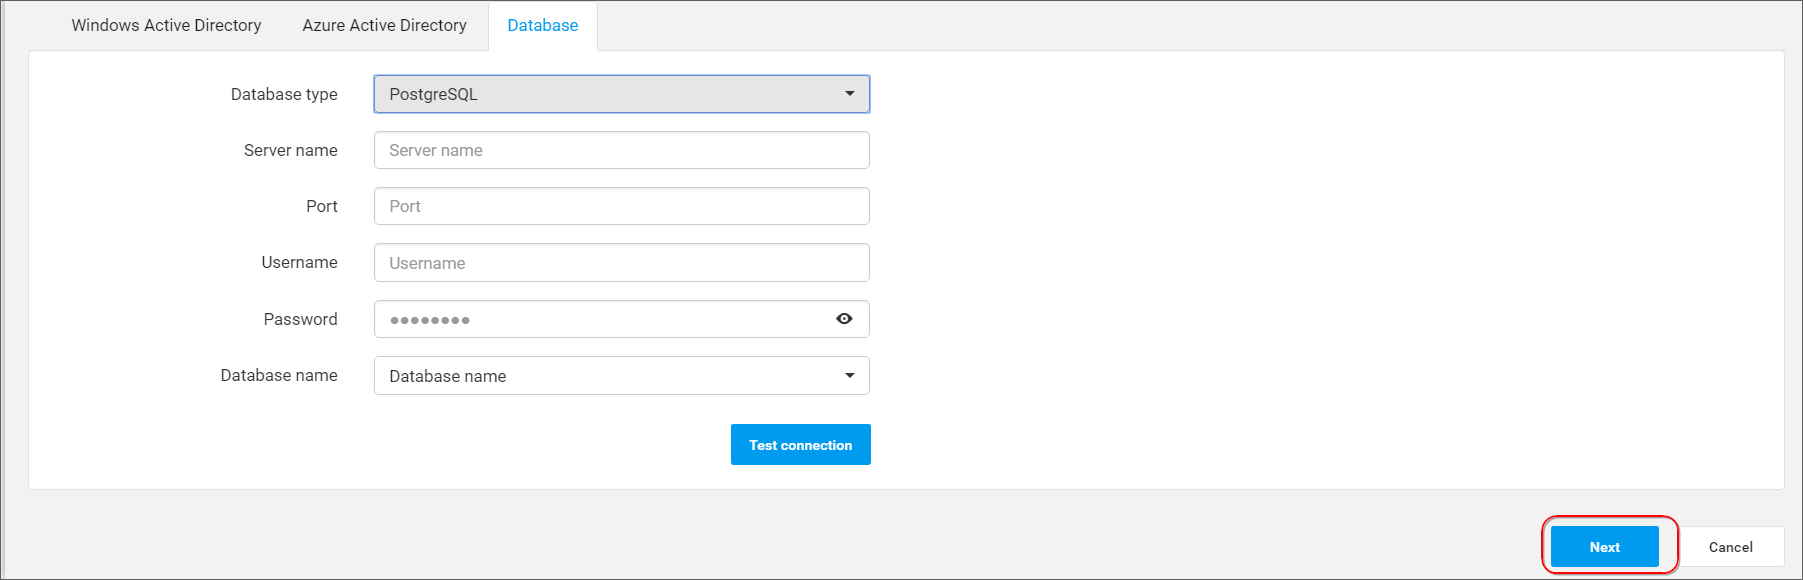
PostgreSQL Database
For PostgreSQL Database, fill the form with Server name, Port, Username, Password and Database name.
The connection details can be tested by clicking the Test Connection button.
Once the connection details are filled, click on Next for getting schema of the provided database connection.
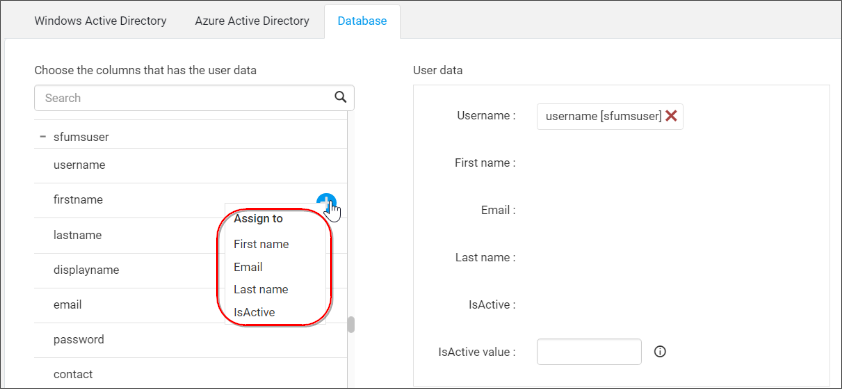
Map Database Columns
The page will look like below once the database has been connected.
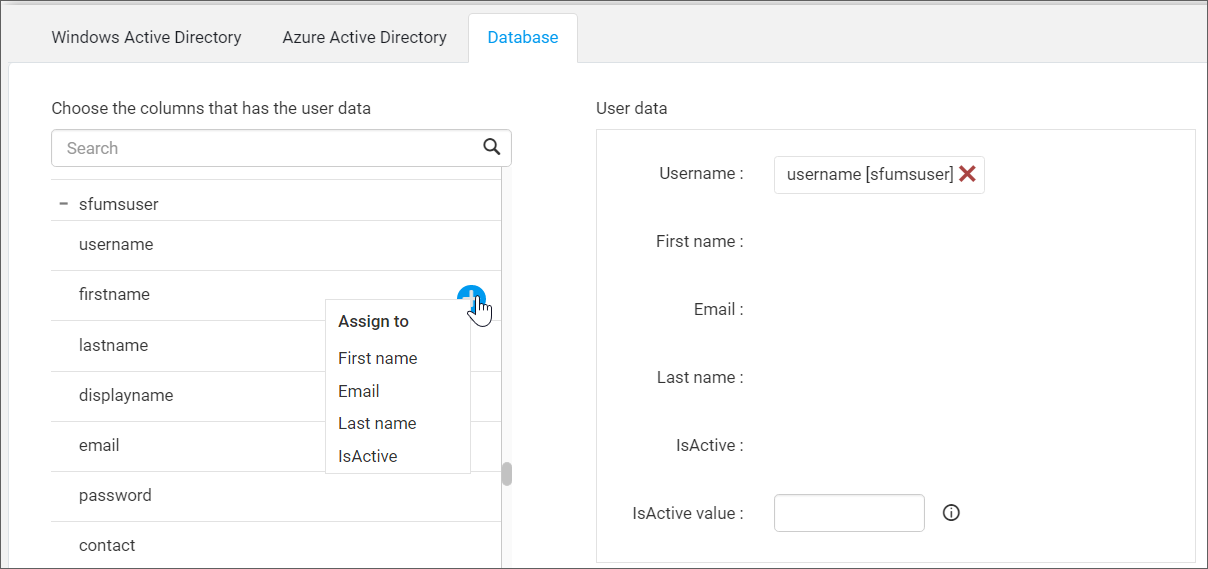
Select the matched columns from the database schema for Username, First name, Email address, Last name(Optional) and IsActive (Optional) fields.
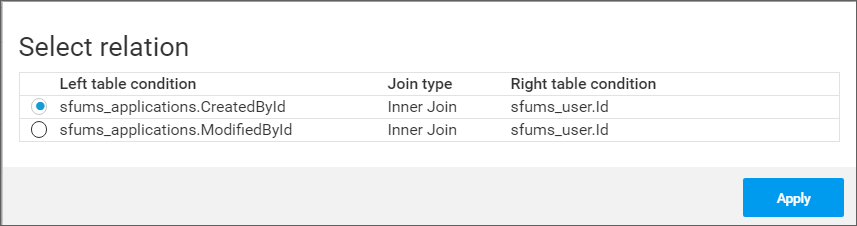
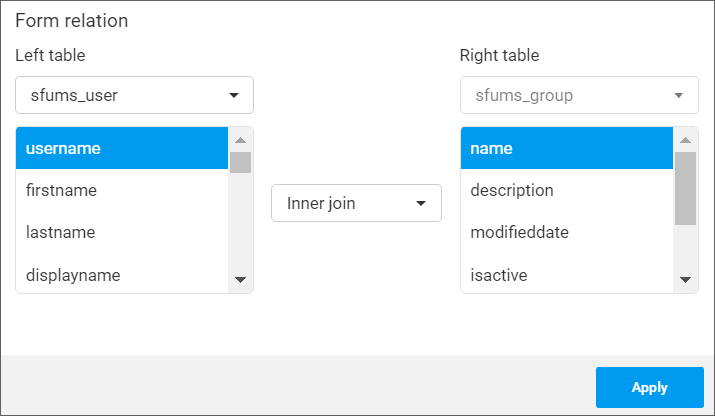
If the columns are selected from different tables, below scenarios will happen.
-
If the tables have single relationship - The join will be made with the particular relationship.
-
If the tables have multiple relationships - The relationship can be selected from the list of relationships and then click on
Apply
- If there is no relationship between tables - Form Join with the selected tables and then click on
Apply
After selection of all columns, click on Save to save the database details. Based on this saved details it will pull the users from the configured Database.
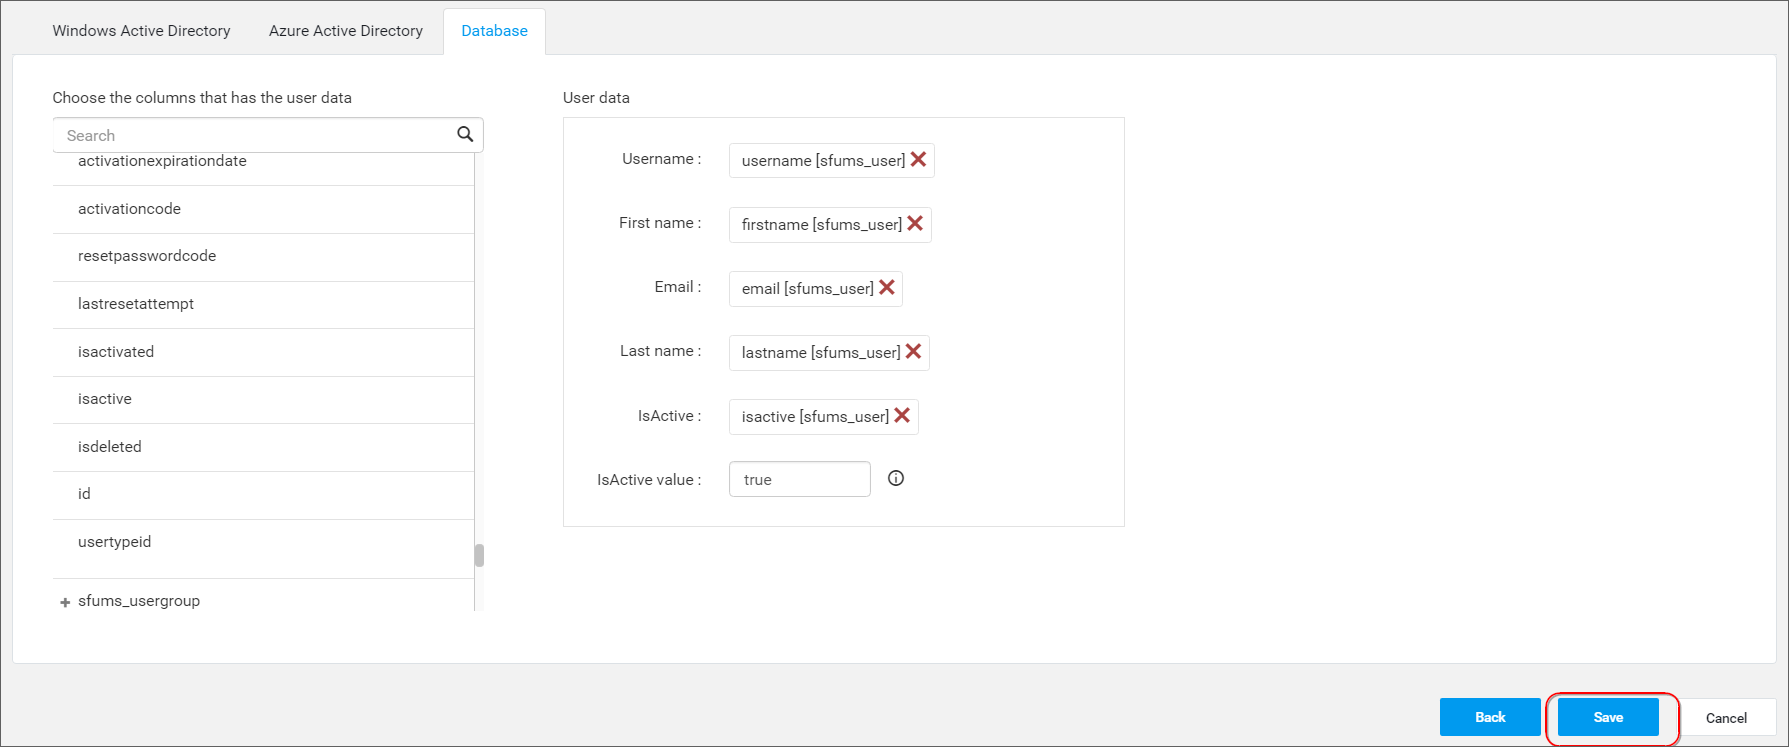
Also included the Back button in the settings page to edit the database details before complete mapping and saving the database configuration.