How to set up Azure Active Directory to Perform Authentication using Single Sign-On
This section explains how to perform Single Sign-On for users in Azure Active Directory with Syncfusion User Management Server.
NOTE
This configuration has been done using the Azure Portal
Steps to Set Up Azure Active Directory
Prerequisites
- An Azure account with Active Directory support
- Install Syncfusion User Management Server and Login with Administrator account
Setup Azure Active Directory Application
Login to the Azure portal. Create Azure Active Directory.
-
Click
Create a resourceand searchAzure Active Directoryas follows.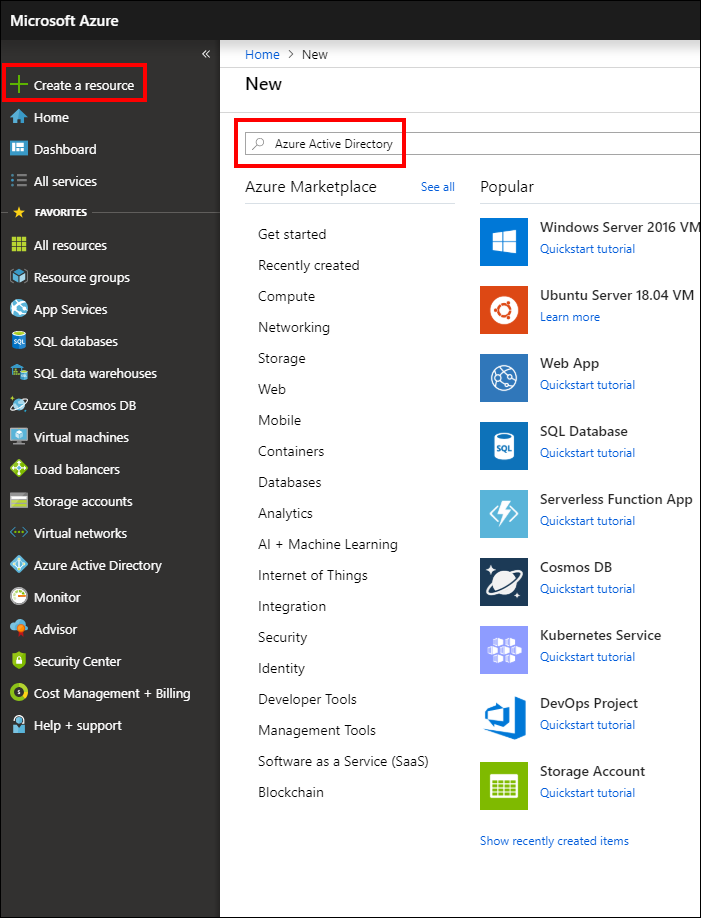
-
Click
Createin the following screenshot.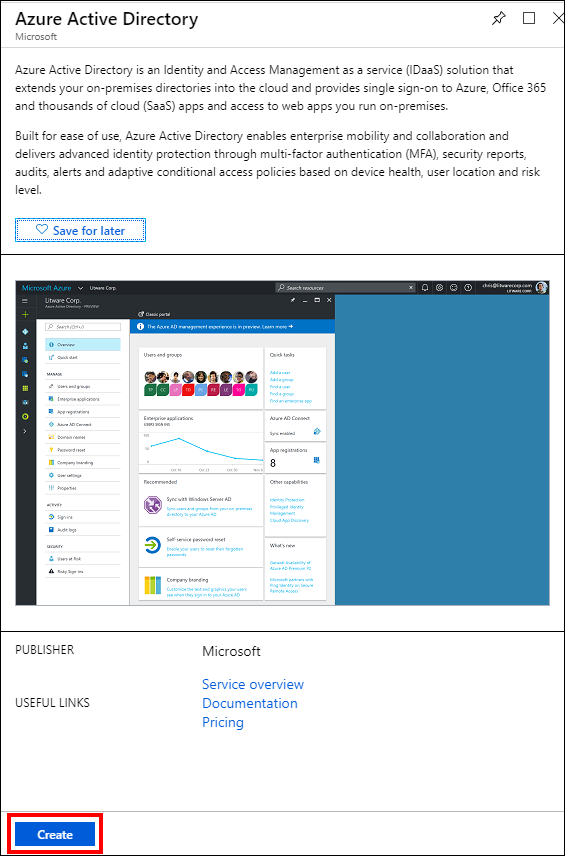
-
In the dialog box, enter the
Name,Domain Nameand choose theCountry or Region, and then clickCreate.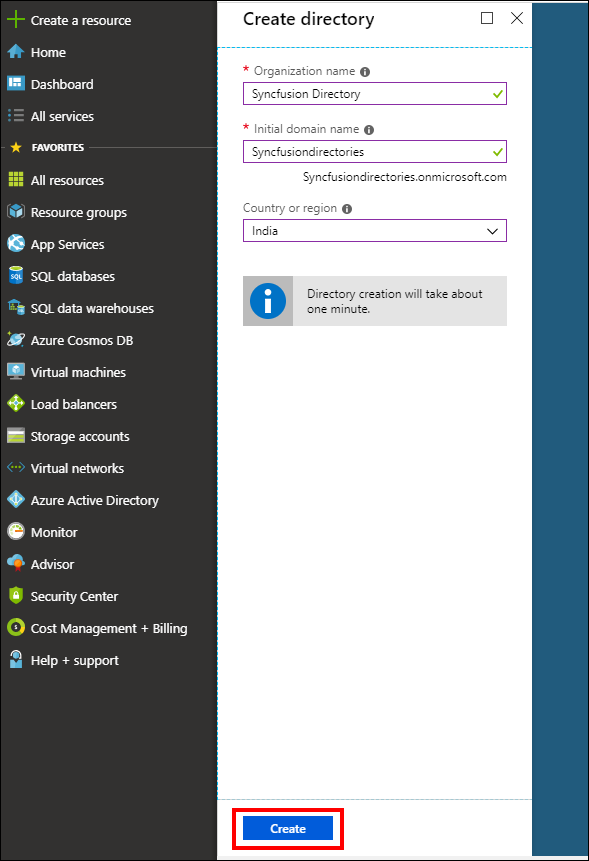
The application will be added to the directory and you can view the details of the application in the App registrations.
In this directory, you should add three applications. An application acts as a Web API Server (User Management Server), and the other two applications act as native client applications (Dashboard Designer and Syncfusion Dashboards mobile app).
-
Enter into the created directory and click
Azure Active Directory, and then selectApp Registrations. -
Now, click
New application registrationto add a new application.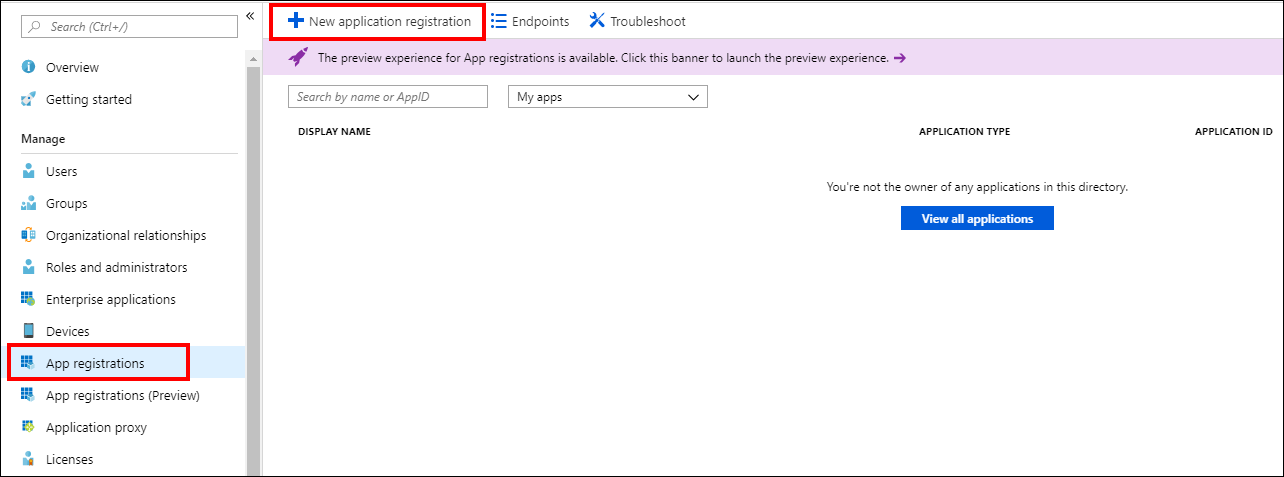
-
Enter the name of the application and choose Web app/API as Application type and enter the sign-on URL.

-
To view all registered applications, click
Azure Active Directoryand selectApp registrations, and then chooseAll apps.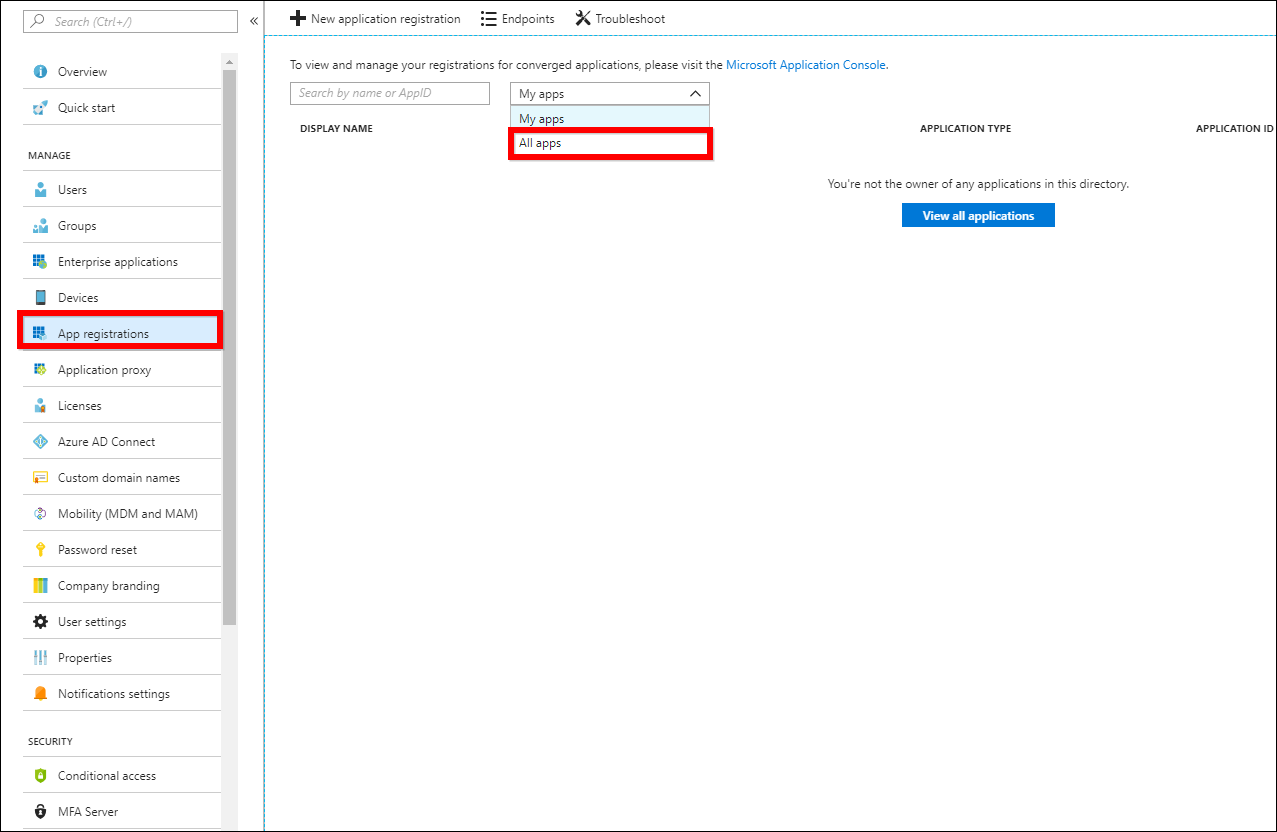
-
Choose the registered application and click
Settings.
-
Select
Propertiesand enter theApp Id URIandHome page URL.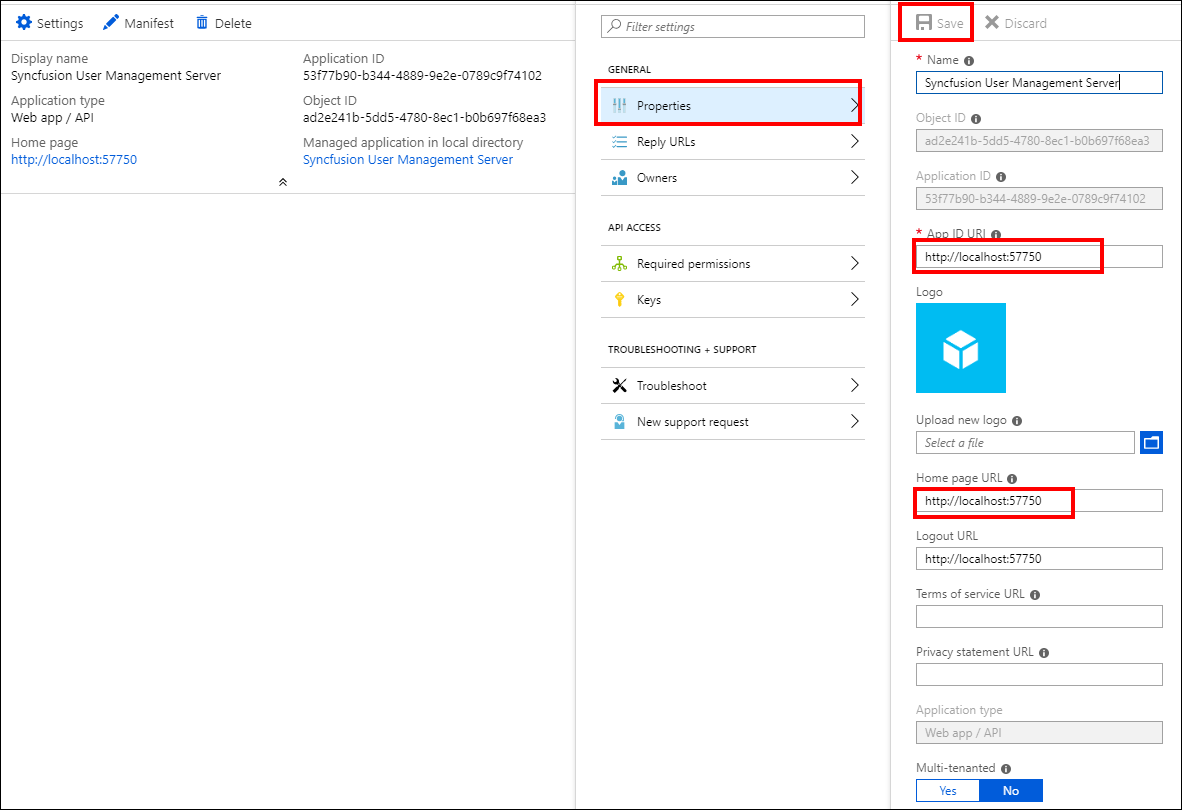
-
Click
Saveas highlighted in the above screenshot.
NOTE
The Sign-on URL and the App ID URI should be the URL of the Syncfusion User Management Server application.
Now, you can add Microsoft Graph application to your application to import the users and groups into the Syncfusion Dashboard Server.
-
Go to application, click
Settings, and select theRequired permissions. Then clickAddand clickSelect an API.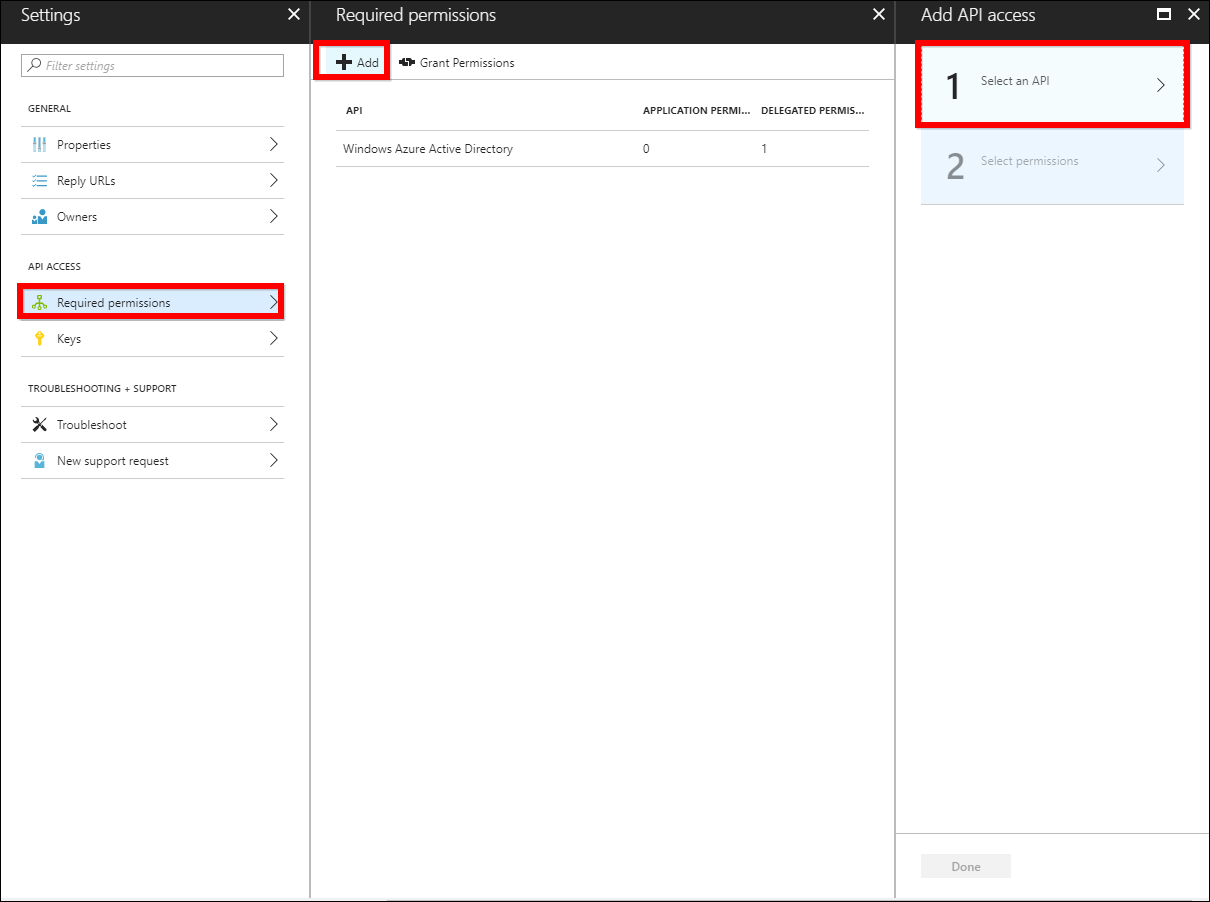
-
Select
Microsoft Graphfrom the list and clickSelect.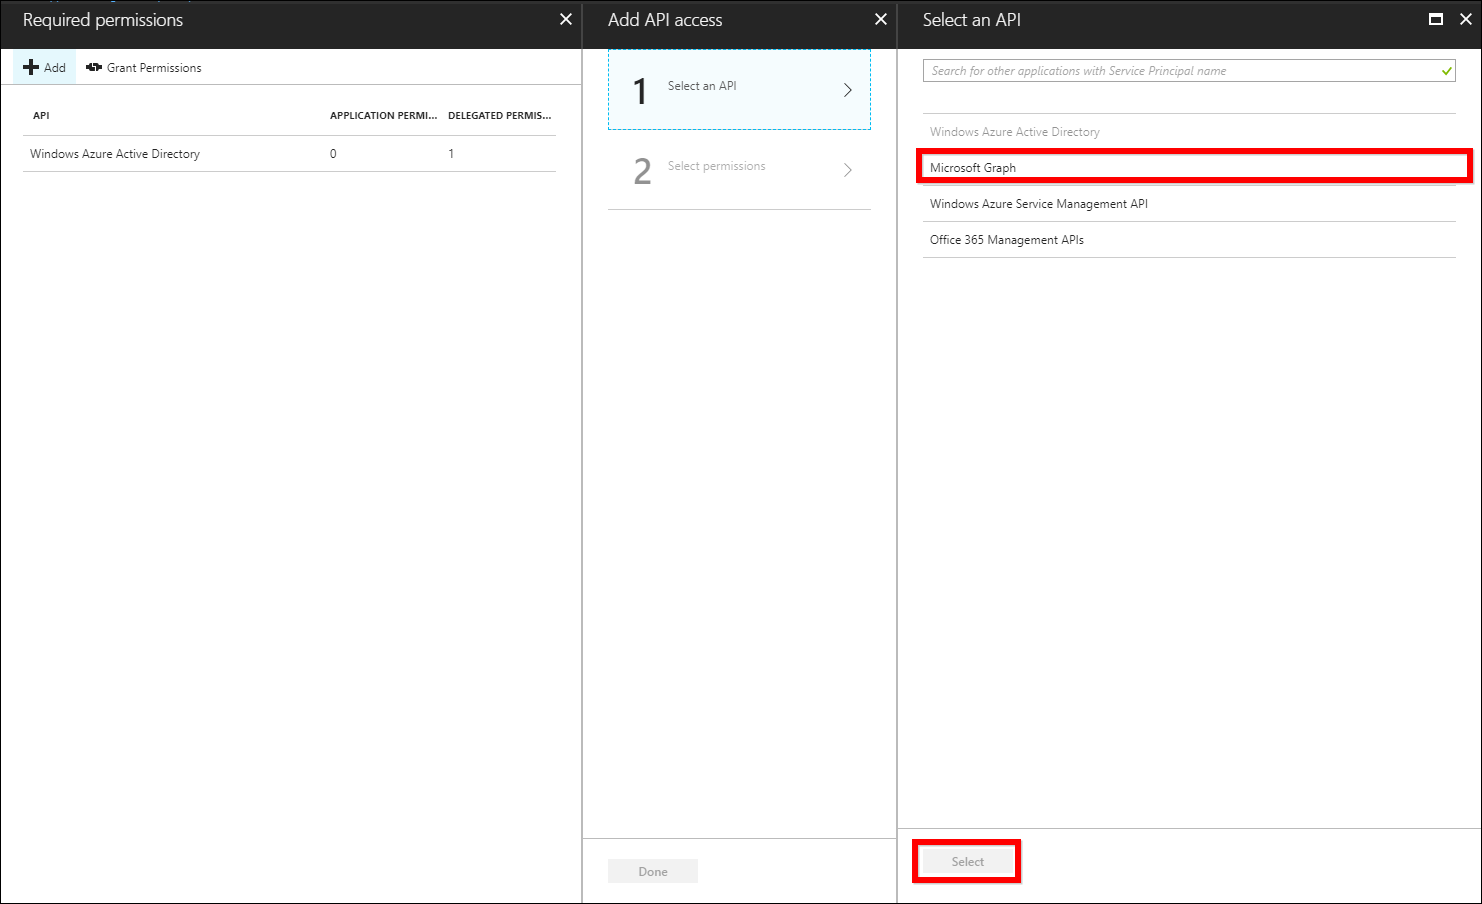

-
Enable following permissions for dashboard server application
- Microsoft Graph Application and Delegated Permissions
Application Permissions Read directory data Delegated Permissions 1. Read directory data 2. Read all groups 3. Sign in and read user profile 4. Access directory as the signed in user - Windows Azure Active Directory Application and Delegated Permission
Application Permissions Read directory data Delegated Permissions 1. Read directory data 2. Sign in and read user profile -
After adding the permission, click the
Grant Permissionfrom theRequired permissionssection of the application page and selectyesas below.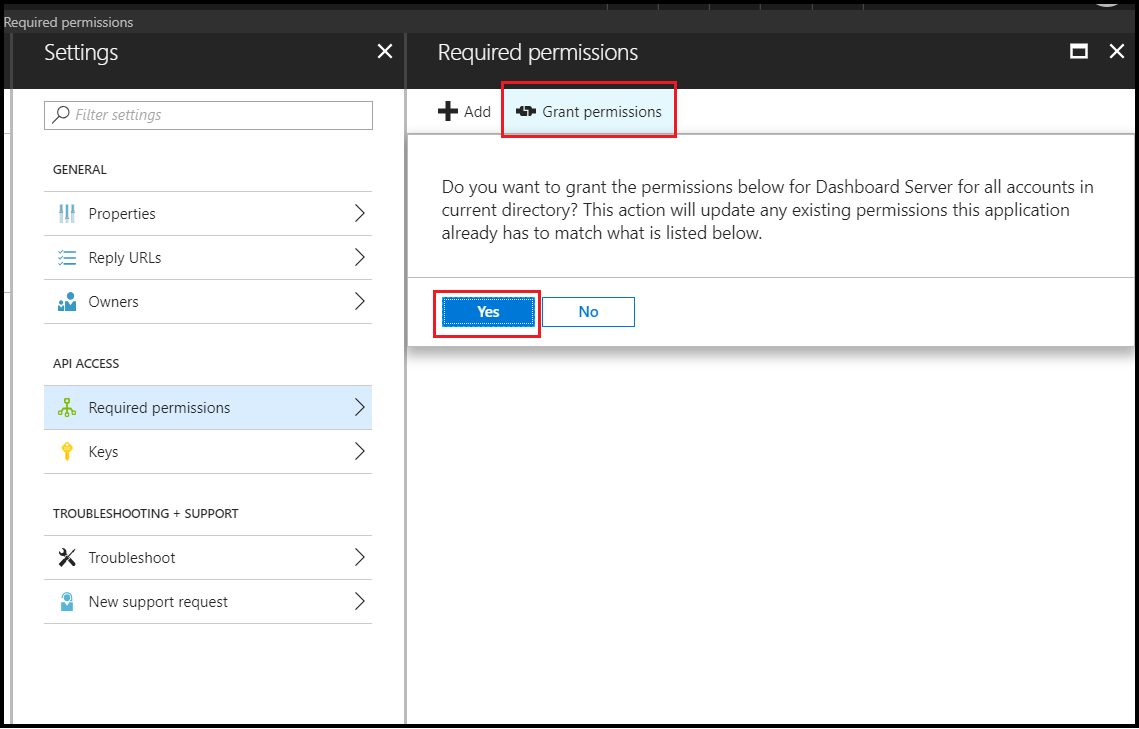
Configure Azure Active Directory to perform Single Sign-On in Dashboard Designer application
-
Enter into the created directory and click the
Azure Active Directory. Then, selectApp registrationsand click theNew application registrationto add a new application. -
Enter the name of the client application and choose the Application type as
Nativeand enter theRedirect URI.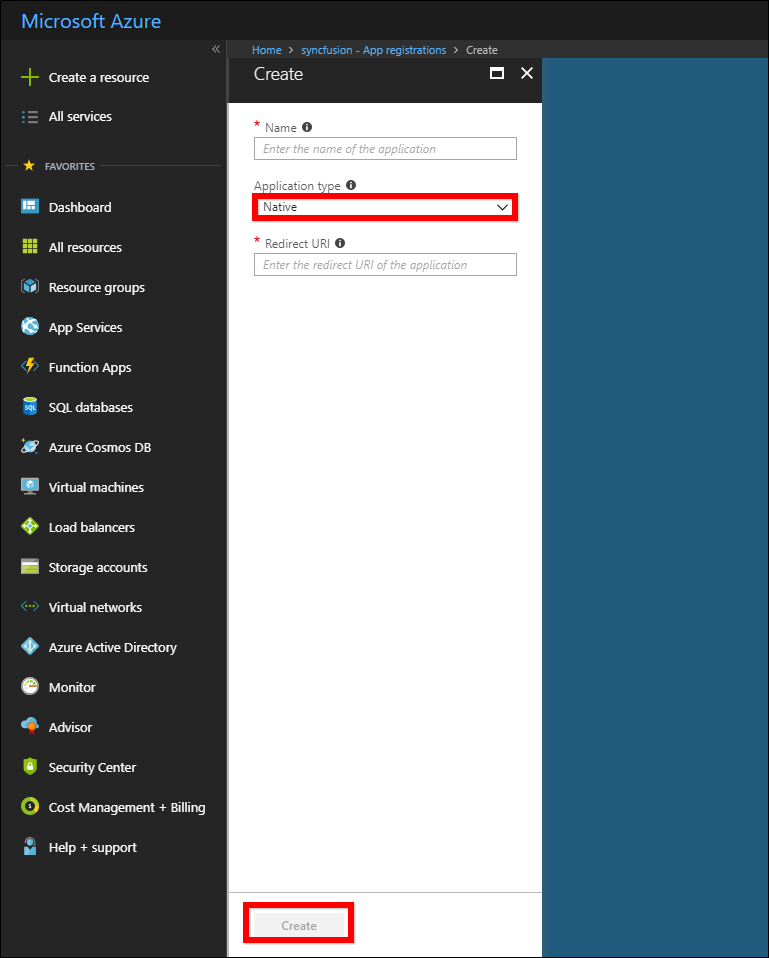
-
Click
Create. The client application will be added to the directory and you can view the details of the application in theApp registrations.
NOTE
Redirect URI should be the URL of the Syncfusion User Management Server application.
-
To view all registered applications, click the
Azure Active Directoryand selectApp registrations, and then chooseAll apps.Now, you can add
User Management Serverapplication to the client application to enable Single Sign-On in native client application. -
Choose the registered application and click the
Settings.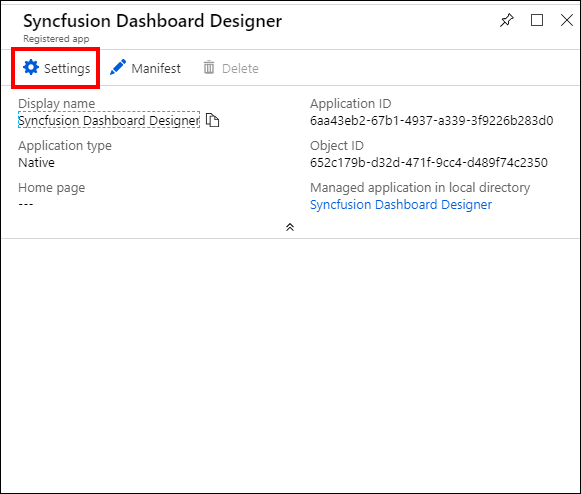
-
Go to application, click
Settings, and selectRequired permissions. Then clickAdd, and then chooseSelect an API.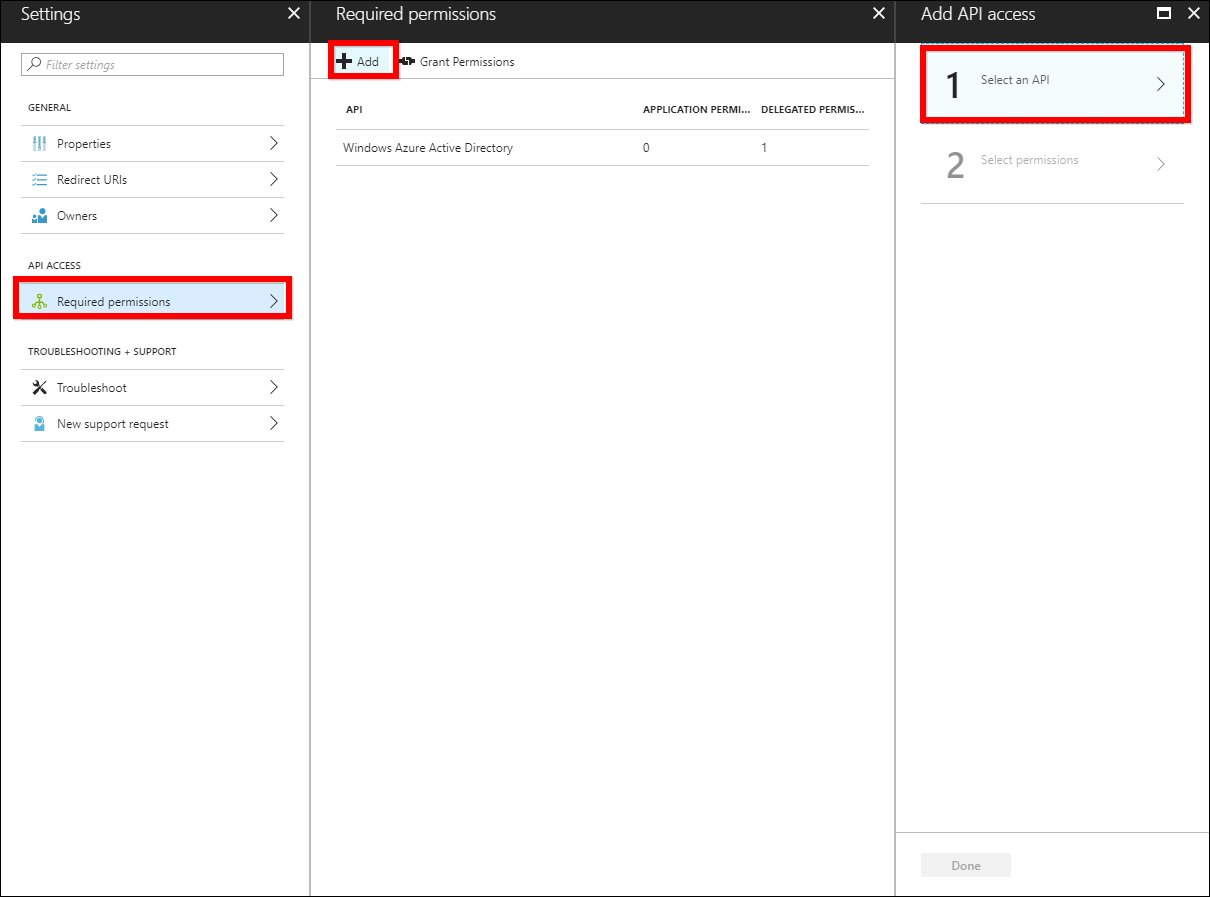
-
Select the
Syncfusion User Management Serverfrom the list and clickSelect.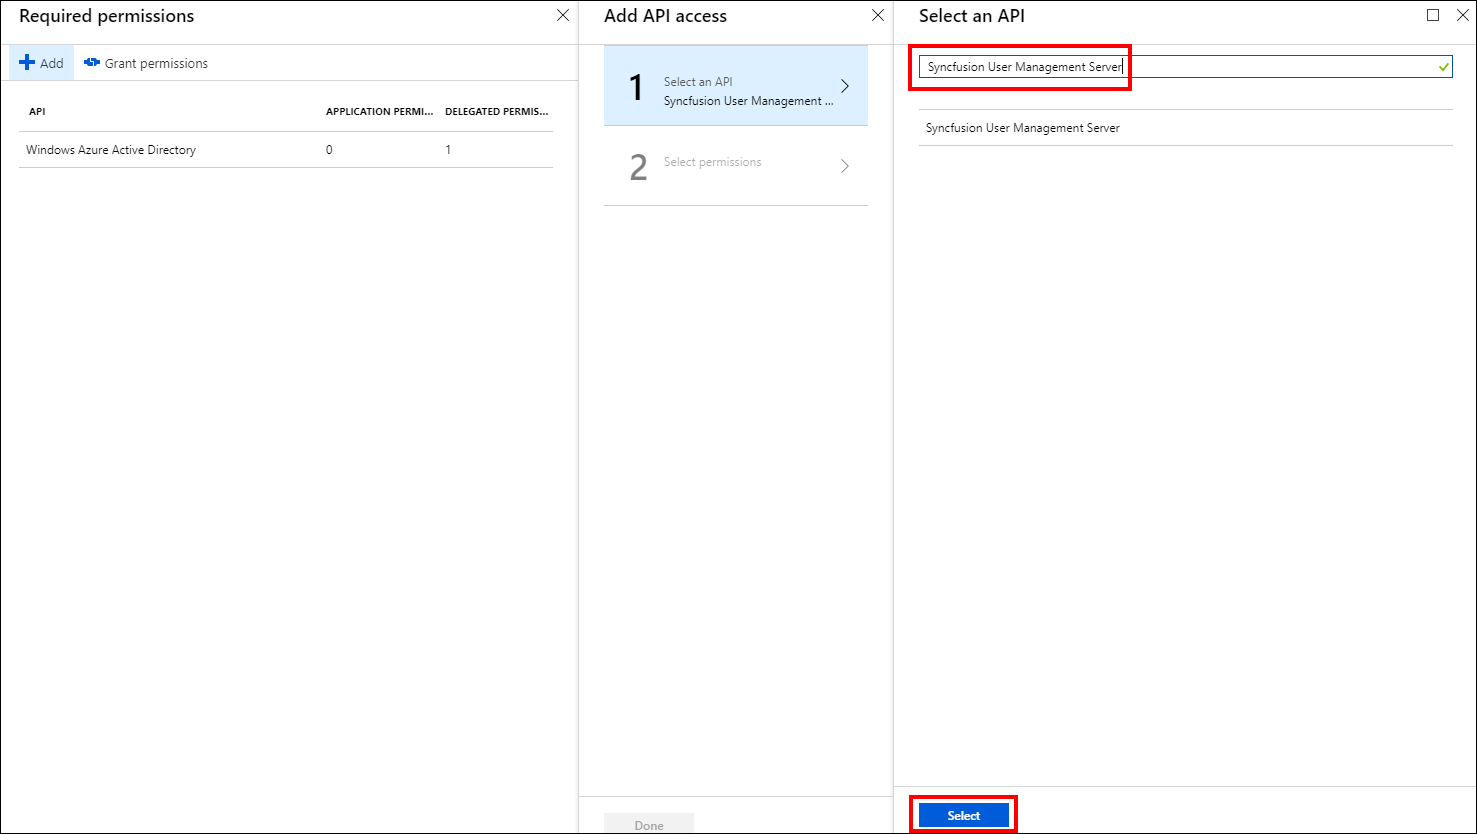
-
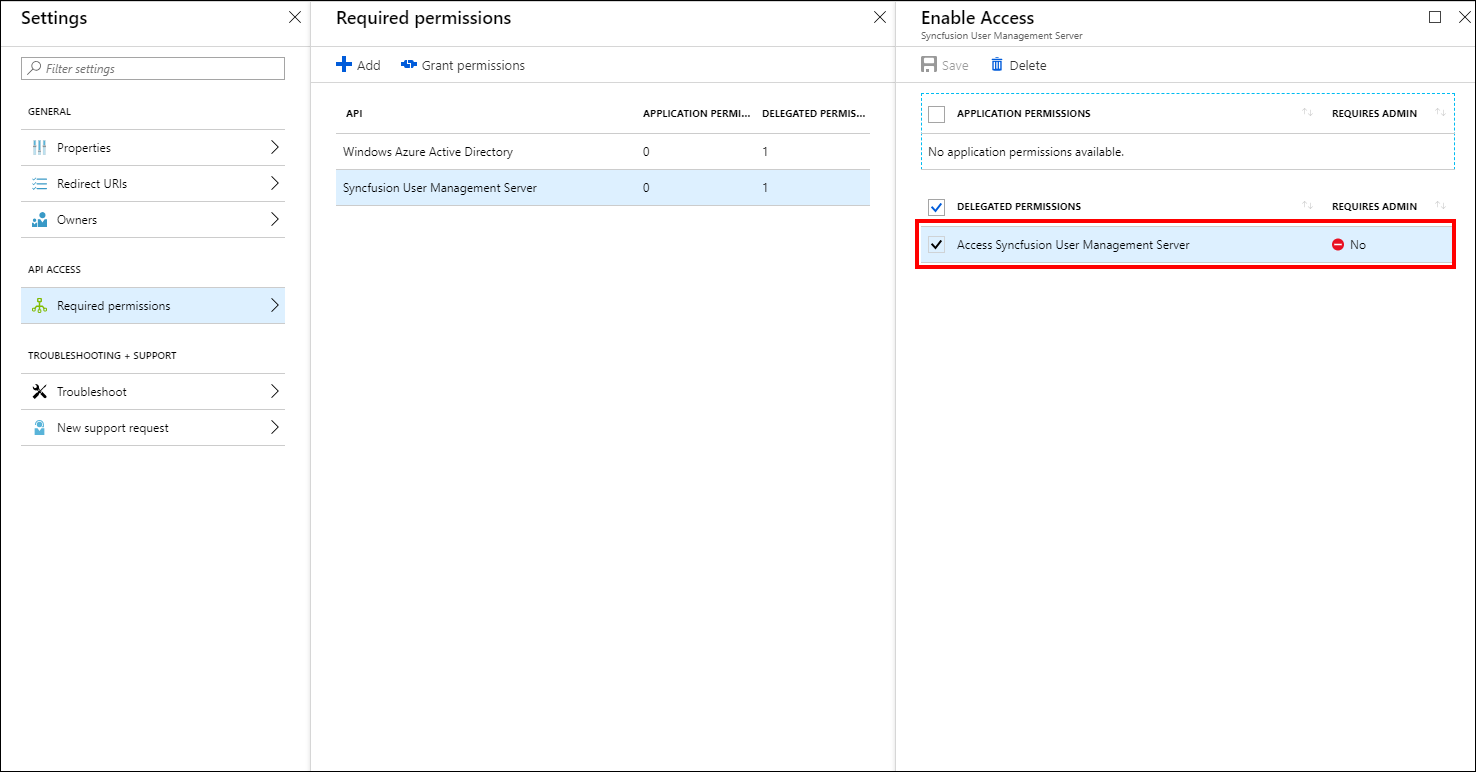
Select the delegated permission for accessing User Management Server and save it.
Configure Azure Active Directory to perform Single Sign-On in Syncfusion Dashboard Mobile application
-
Enter into the created directory and click
Azure Active Directory. Select theApp registrationsand clickNew application registrationto add a new application. -
Enter the name of the client application and choose the Application type as
Native, and then enter theRedirect URI. -
Click
Create, the client application will be added to the directory and you can view the details of the application in theApp registrations.NOTE
Redirect URI should be the URL of the Syncfusion User Management Server application.
-
To view all registered applications, click the
Azure Active Directoryand selectApp registrations, and then chooseAll apps.Now, you can add
User Management Serverapplication to the client application to enable Single Sign-On in native client application. -
Choose the registered application and click the
Settings.
-
Go to application, click the
Settings, and selectRequired permissions. Then clickAdd, and then chooseSelect an API. -
Select the
User Management Serverfrom the list and clickSelect. -
Select the delegated permission for accessing the User Management Server and saving it.
Setup Azure Active Directory Users and Groups
By default, a root user sourced from the Microsoft account is added in the directory. You can add users to this directory and later it should be imported to the Syncfusion User Management Server to perform the Single Sign-On.
Setup Syncfusion User Management Server to Perform Single Sign-On
We need to configure the settings in Syncfusion User Management Server to perform Single Sign-On.
-
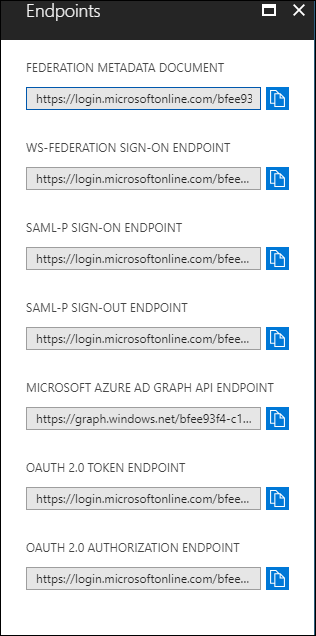
When you are in the same Azure Active Directory application (User Management Server) page, go to
App registrations, and clickEndpointsat the top, and a pop-up will be appeared as follows.
-
Start Syncfusion User Management Server and Log in with administrator account. Click on the
Settingsicon in the bottom left corner and click theSSO Settings.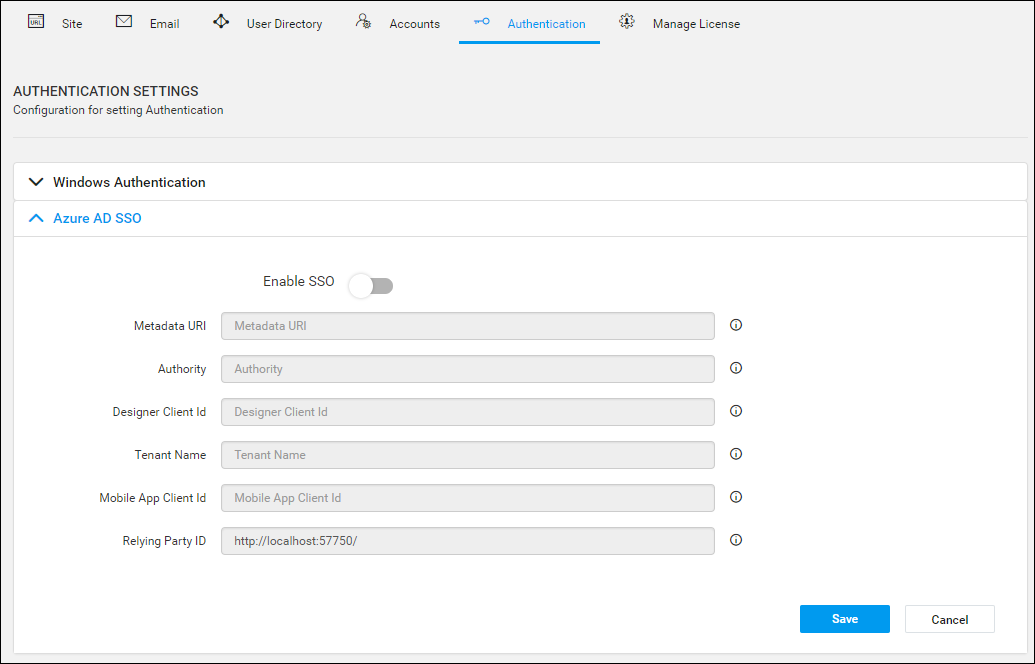
-
To perform Single Sign-On with User Management Server, we need to configure the following fields in the Syncfusion User Management Server.
-
Metadata URI - Copy the text in the first text box named
FEDERATION METADATA DOCUMENTand paste it. -
Relying Party ID - The Default Site URL is already defined in this field. Copy this URL. Go to CONFIGURE menu of the Server application you created in the Azure. Paste the URL in
Sign-on URL,App ID URI,Reply URLand save the application.
-
-
Configure the following fields in the Syncfusion User Management Server to perform Single Sign-On with Dashboard Designer.
-
Authority - From the Azure application, click on the
VIEW ENDPOINTSand the pop up will appear. Copy the text in the second text box namedWS-Federation Sign-On Endpointand paste it. -
Tenant Name - Go to the created
Azure Active Directoryand copy the domain name by clicking it as shown in the following image.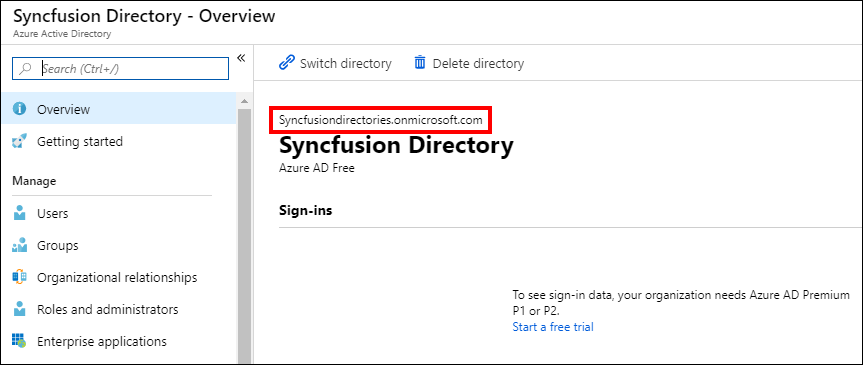
-
Designer Client Id - Go to the registered application and click the
Settings. Then, copy theApplication Idand paste it.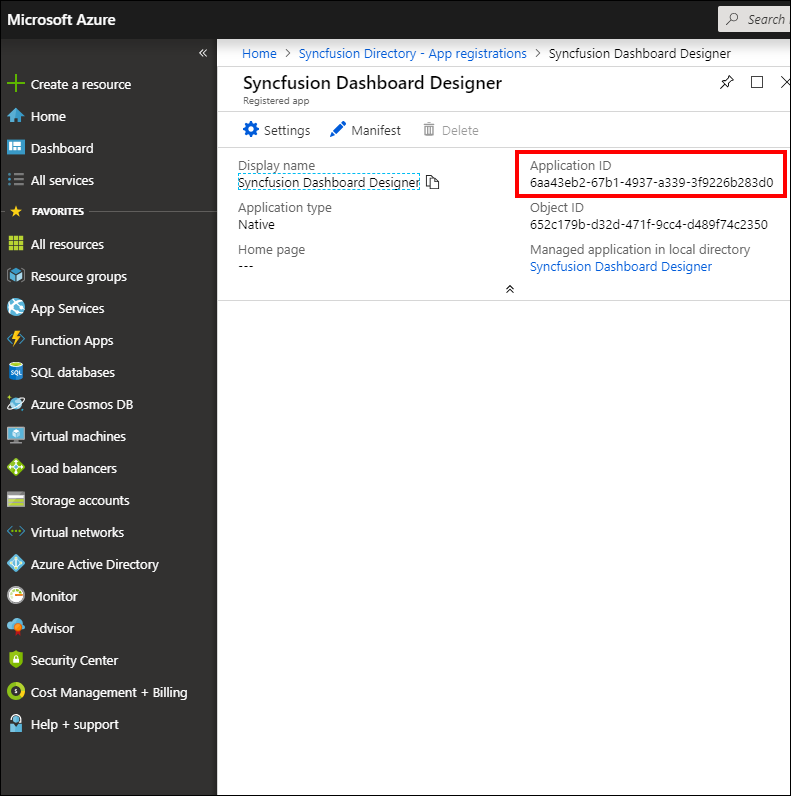
-
Mobile App Client Id - The Client Id of the Syncfusion User Management client application is created in the Azure Active Directory.
-
-
Now click on
Savebutton. Once the values are saved, the application isRestartedin order to apply the settings.
Setup Syncfusion User Management Server to Import Azure Active Directory Users and Groups
- Go to the
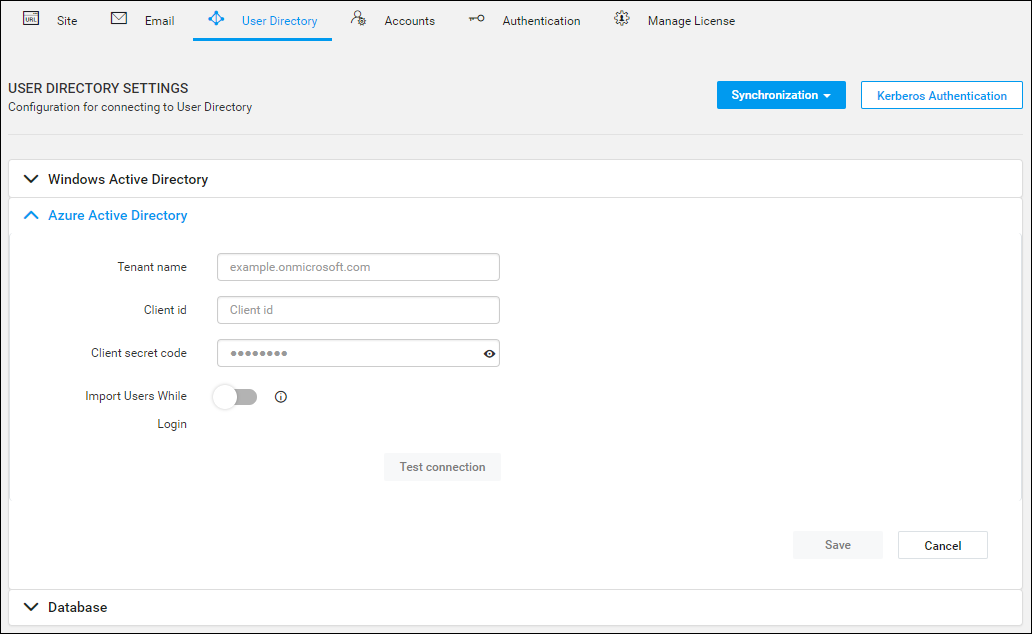
Active Directory Settingspage in Syncfusion User Management Server and click on theAzure Active Directorytab.
-
To import Azure users and groups, we need to configure the following fields in the Syncfusion User Management Server.
-
Tenant Name - Go to the created Azure Active Directory and copy the domain name by clicking it as follows.
-
Client Id - Go to the registered application and click the
Settings, and then copy theApplication Idand paste it.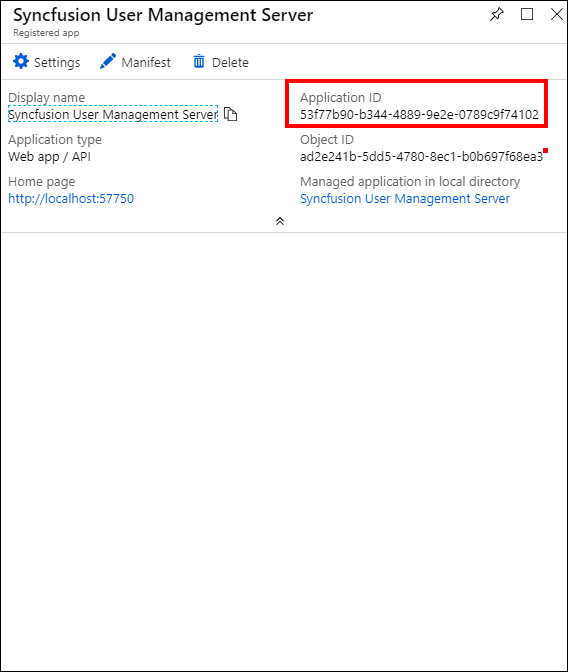
-
Client Secret Code - Go to the
Settingsand clickKeys, and then enter theDescriptionand choose theDurationunderPasswords.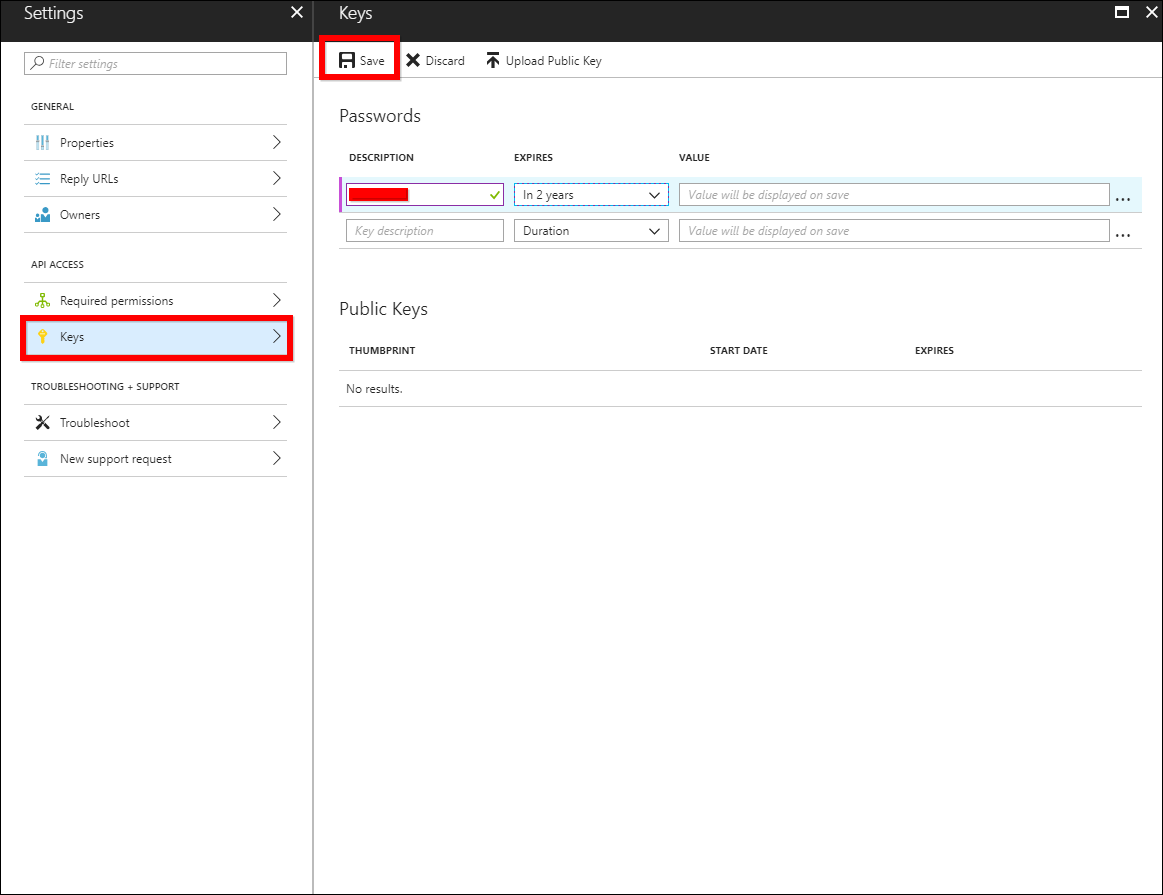
-
-
Click
Save. Theclient secretwill be generated, and then copy and paste it into the text box.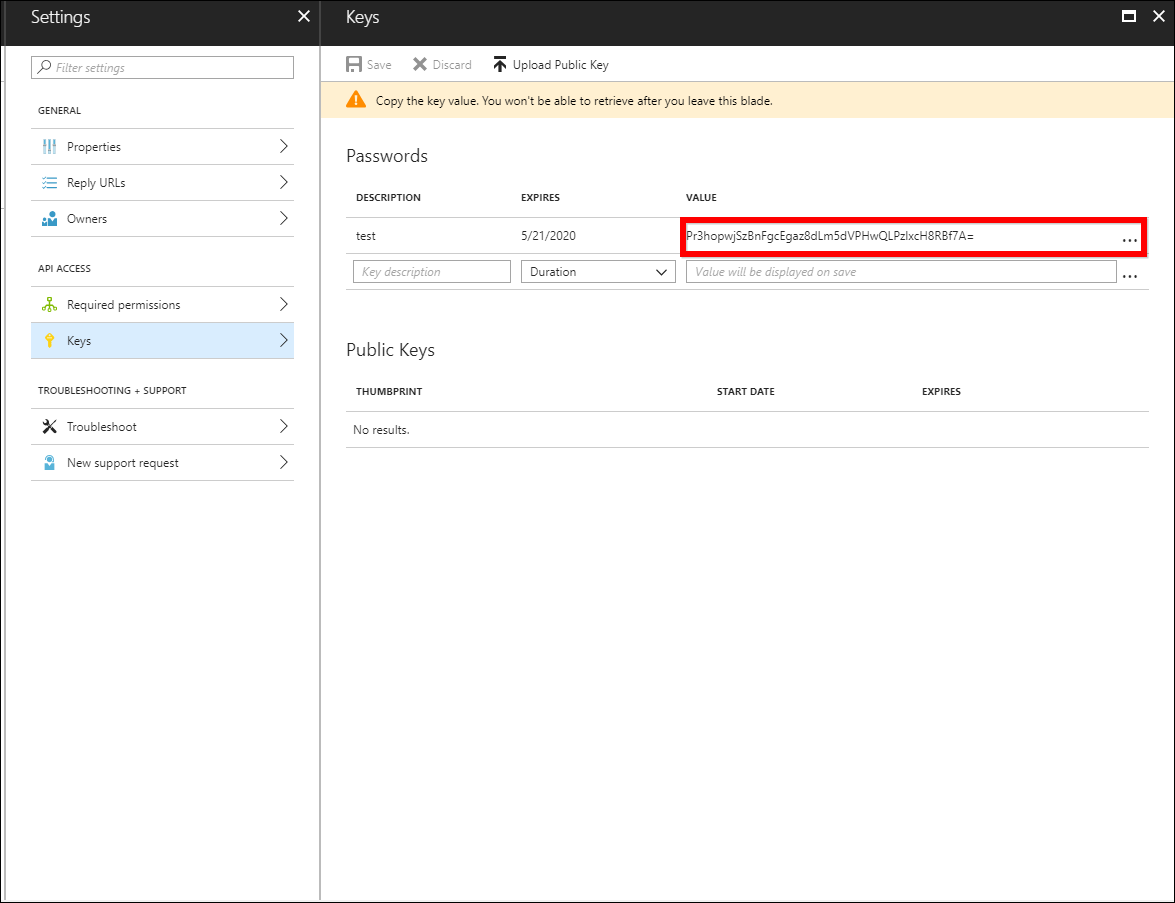
-
Now Test the connection. If the connection is valid, the success message is displayed.
Savethe settings.
The Azure user can now be imported into the Syncfusion User Management Server. Refer the following link to Import Azure Active Directory Users and Import Azure Active Directory Groups
Login with Azure ADFS
Once the SSO settings are saved and the Azure users are imported to the Syncfusion User Management Server, logout from the application. The Login page now will have an additional button named Microsoft ADFS, which opens the external authentication provider login window.
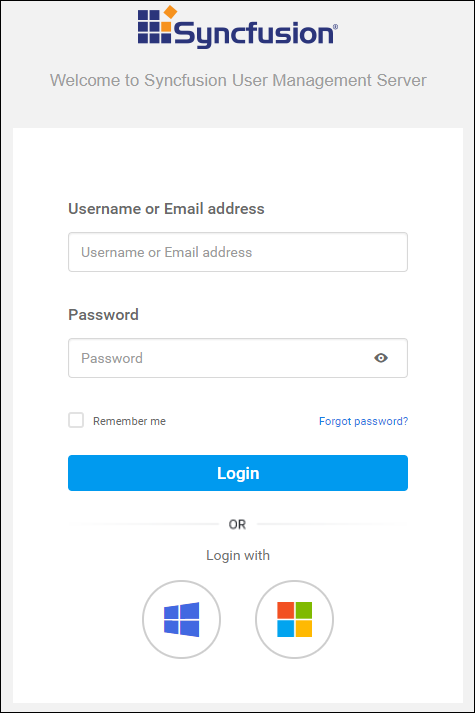
Once you Sign In with the Azure username and password, you have logged in to the Syncfusion User Management Server.
NOTE
To login to the Syncfusion User Management Server with Azure ADFS, the particular user should be imported to the application. If the user is not imported, it redirects to the Login page.