Installation and Deployment
This section explains on how to deploy the user management Server application into Azure cloud.
Download Setup
- Download the user management Server Azure setup from here
- Licensed customers can download the install from the downloads section
How to deploy
Create New Web App
After logged into your Azure management portal, click the New link in the left panel of the Azure portal. And follow the breadcrumb in the below screenshot.
At the end, it will be landed in the Create Web App form as below,
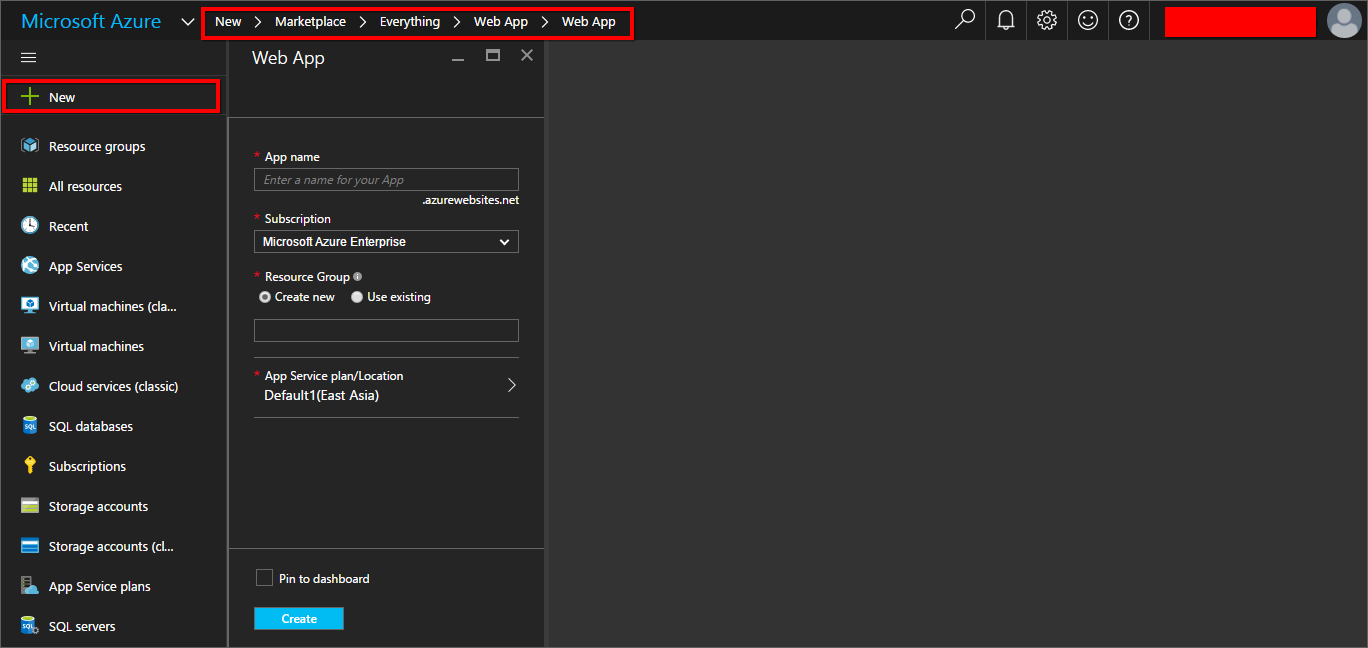
In order to create the new Azure cloud web Application, click on Create button at the bottom of the form.
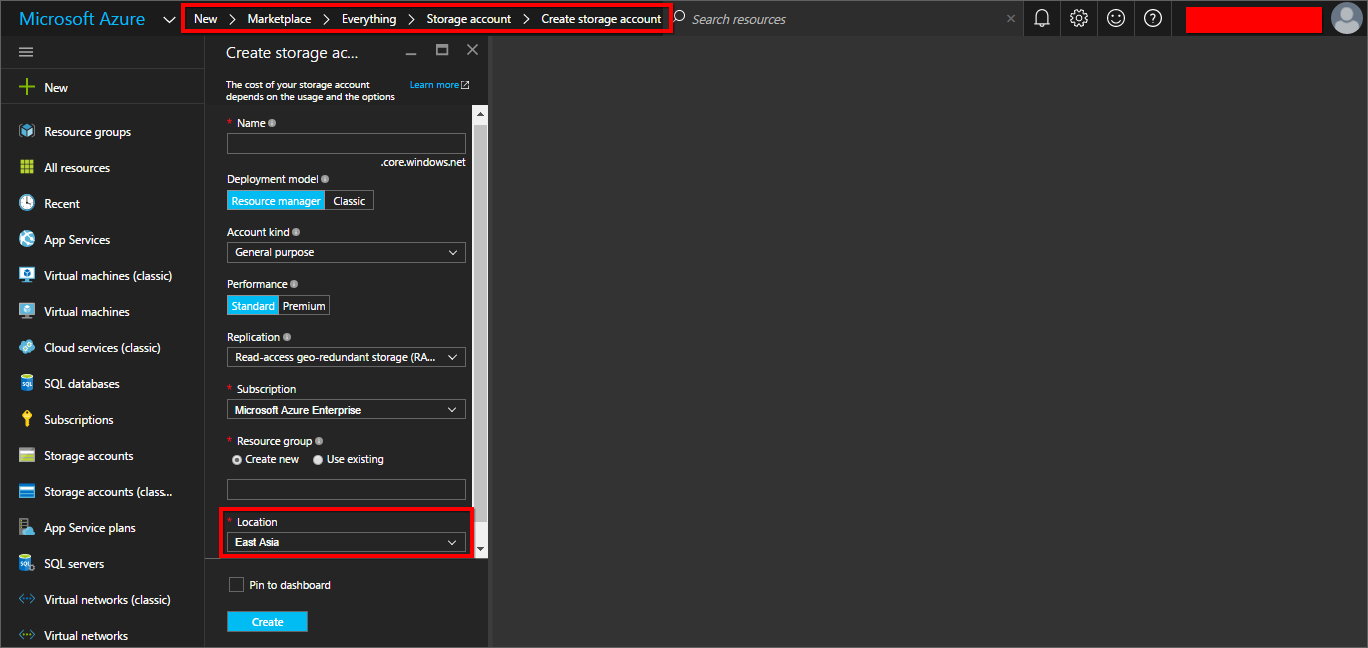
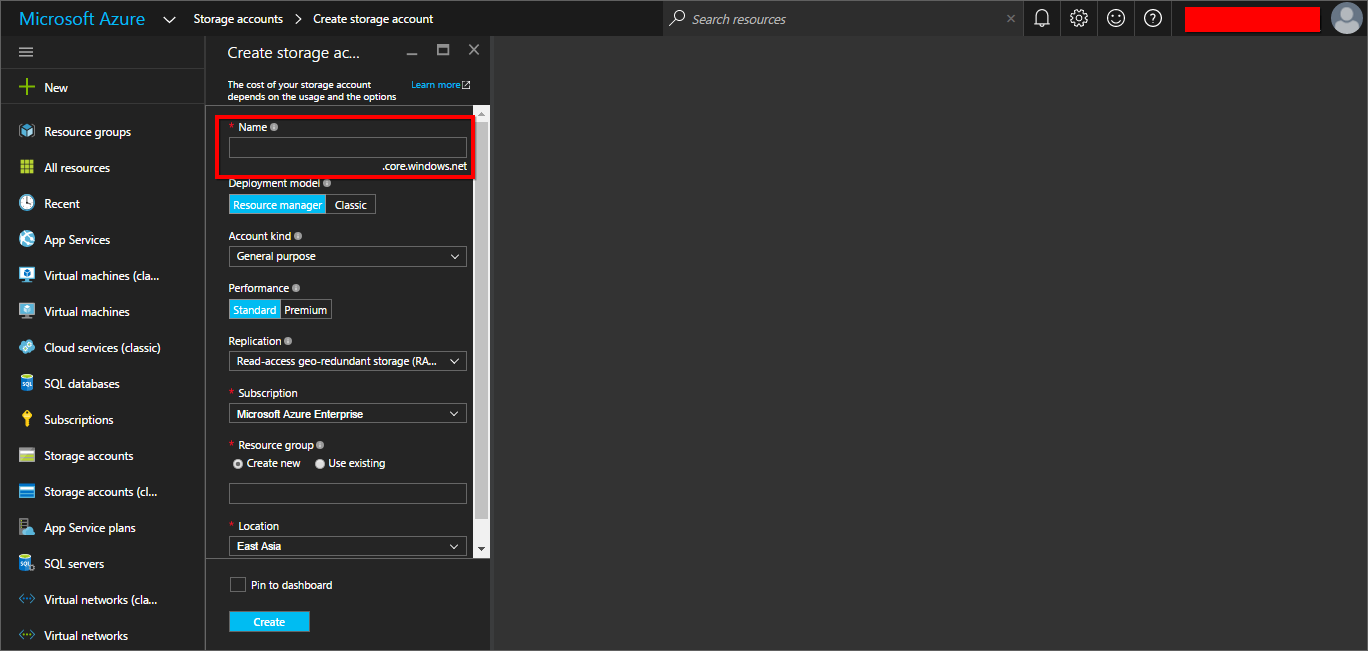
Create New Storage Account
Create the Azure storage account with the same location of Azure web application.
Click New button in the left panel of the Azure portal. And follow the breadcrumb in the below screen shot
NOTE
If you want to choose the above Storage Account for Diagnostics Logs, the location of the Storage Account must be same as Azure Web App service.
And click on Create button to create the new Azure storage account to hold the containers, files, tables, blobs, queues inside it.
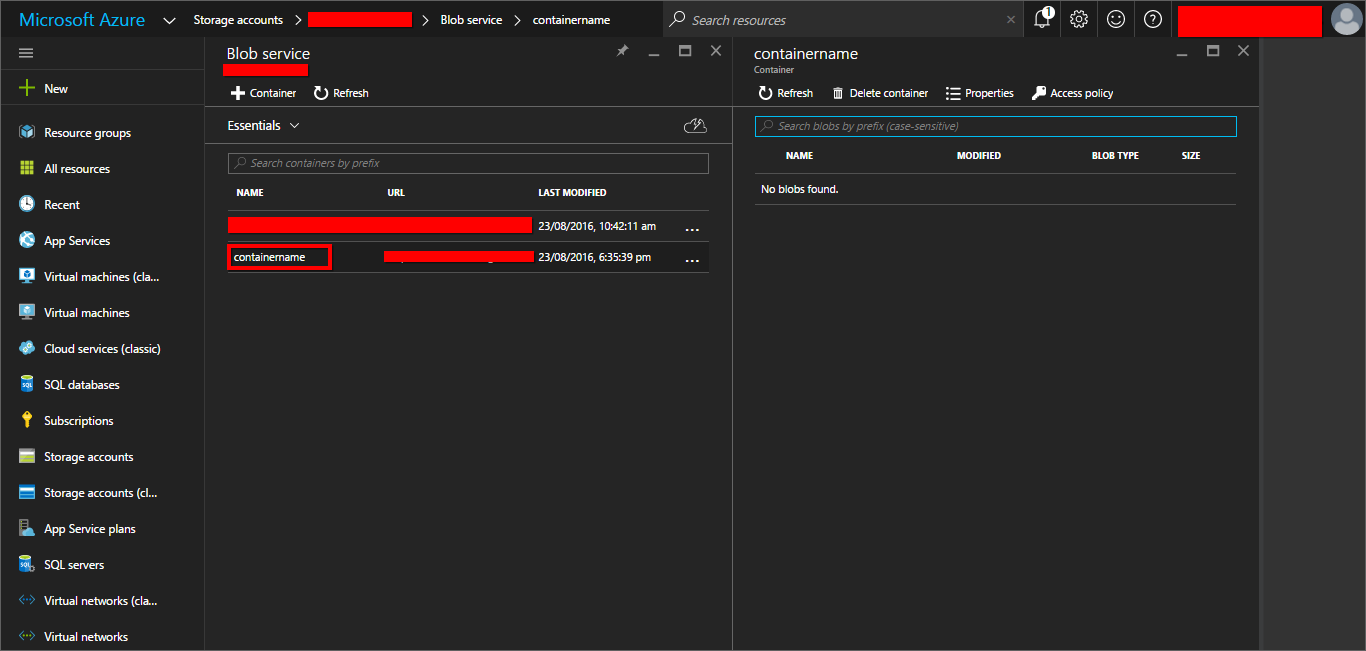
Create Container
In order to create the container under Blob service, browse for storage account and choose the corresponding account from the list of accounts and choose the blob service from service list, then the list of containers and the Add container button is at the top of the panel.
While click on Add Container button, the form will be appeared next to the list of containers.
Please refer the below figure,
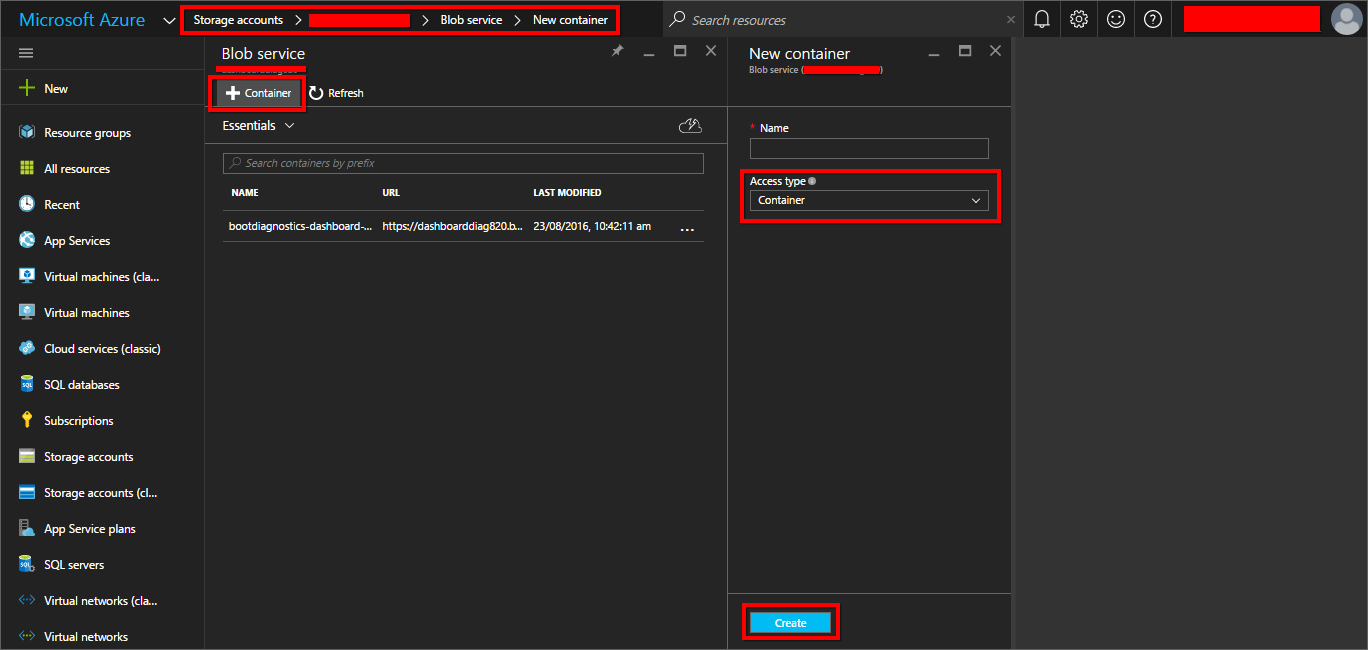
You have to choose the Access Type as Container.
And click on Create button to create the new Azure storage account container to store the blobs inside it.
Web Configuration file edits
You will need the following storage settings to store the files into the Azure Blob container.
- Azure Blob storage Account name
- Azure Blob storage Container name
- Azure Blob storage Access key
- Azure Blob storage Endpoint
- Blob Endpoint (If it has the custom endpoint).
Find the Account name and Access key from the below figure

Find the Azure Blob storage Endpoint from the below figure
Azure Blob storage Endpoint will be https://example.core.windows.net, if the Account name is example.
Find the container name from the below figure
Extract the zip file which was downloaded earlier and edit the files in the below location and replace the settings as below.
- \Web.Config
- \App_Data\jobs\continuous\UserManagementServerScheduler\Syncfusion.Server.Base.Scheduler.AzureWebJob.exe.config
- API\Web.Config

Azure connection type should be one of the following values customendpoint | HTTPS | HTTP.
If the connection type is custom end point, the sub domain of the AzureStorageBlobURL must be equal to the storage account name. Otherwise leave the AzureStorageBlobURL as empty.
NOTE
We recommend to set custom end point as the connection type to avoid the below exception from Azure Blob storage.
“No valid combination of account information found.”
Azure Web App Deployment
Deploy the Azure User Management Server files into Azure Web app as below,
- To deploy User Management Server using FTP click here
- To deploy User Management Server using Visual Studio click here
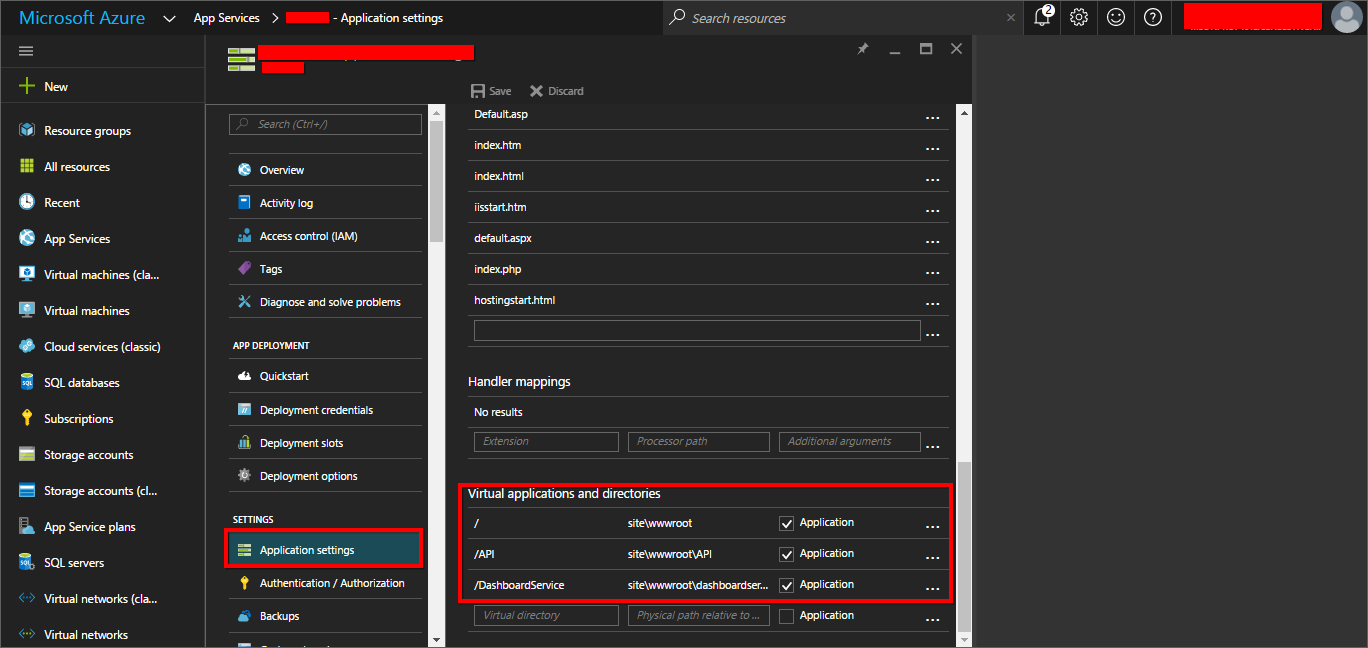
After deployed the files into the Azure web app, Configure the virtual path for below applications
- Root User Management server project
- API project
- User Management Service project
To navigate to the below screen, click settings and click on the Application settings link in the settings panel.
Enabling Log
This section explains how to configure Logging for User Management Server to diagnose the application.
To enable logging in the User Management Server web application, go to the User Management Server web app in Azure portal and click Settings > Diagnostics logs.

Enable Application Logging (Blob) then set the level as Information and click on Storage Settings then it will be asked to select the storage account.

And click on the storage account which is used in the web application then it will display all the containers inside the storage account.
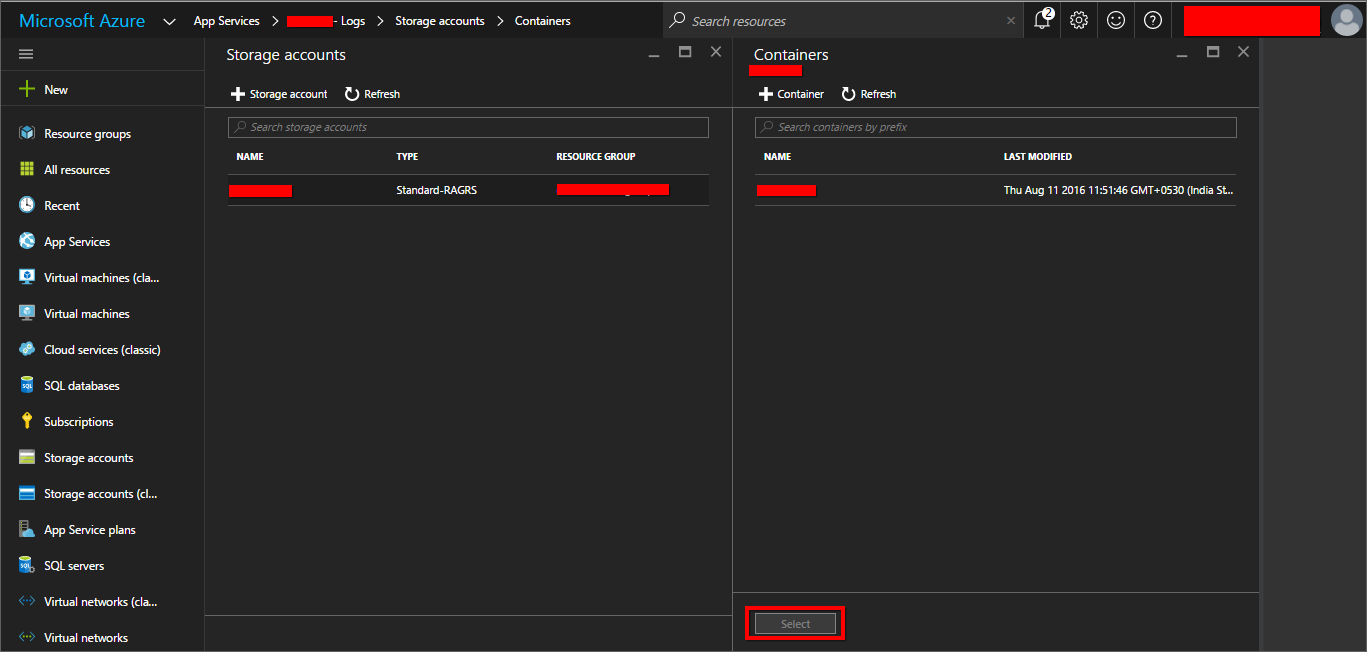
Choose the container which is used in the web application to store the logs and click on the Select button. Now the selected Storage Account will be displayed in the logs menu.
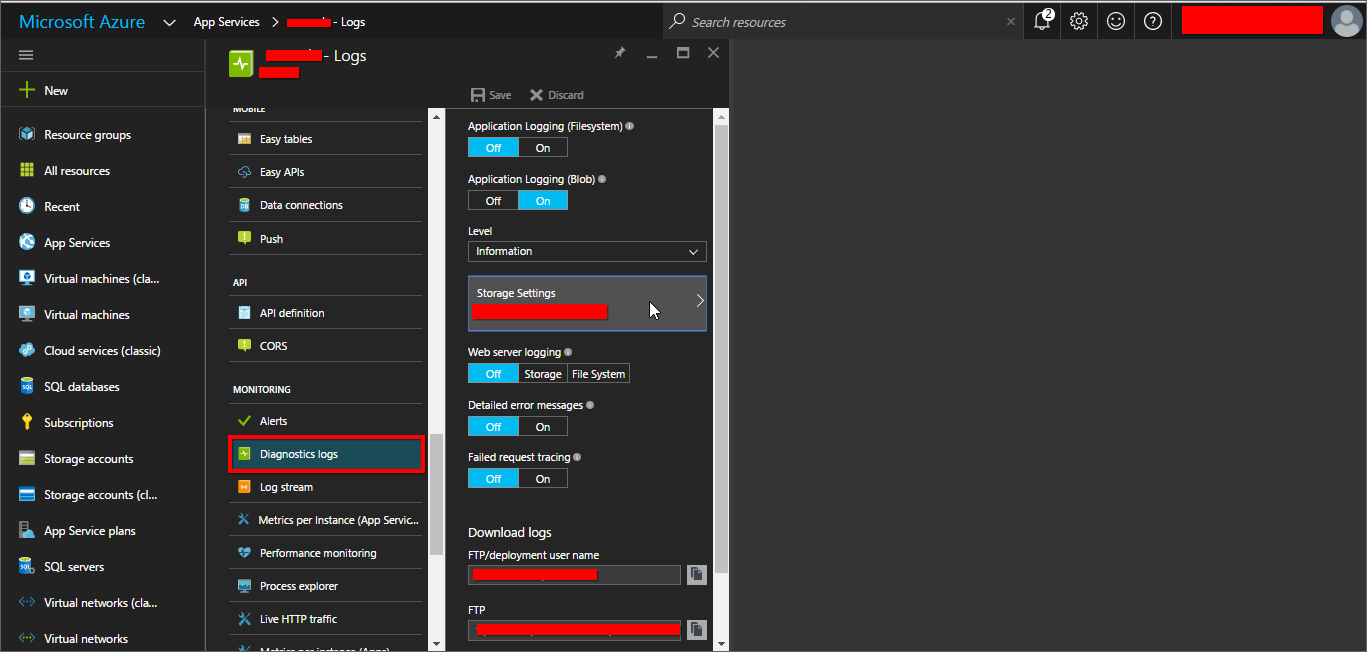
Then click on the Save button in the Logs menu. It will log all information produced by the application and the log files will be stored in blob storage container.
Now browse your site and configure the startup screens.
Azure Blob Storage settings
This section explain how to set up the Azure blob settings to store the static files into the Azure blob.
If the application will be hosted as Azure cloud Application, you cannot be create the SQL CE database, so the database SQL CE will not be listed.
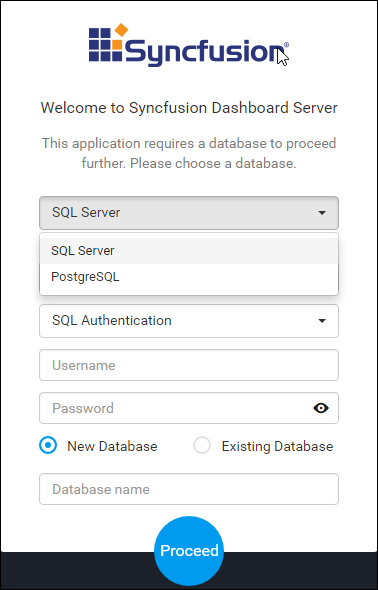
After creating the database, it will be redirected to the Azure Blob storage settings form.
If the application will be hosted as Azure cloud application, the form filled with the Azure blob settings which will be available in the Web.Config and the form will be disabled by default, you cannot be edit the values here. Please refer the below screenshot.

If the provided Azure Blob storage settings are invalid, the error message will be displayed under the form as shown in the below
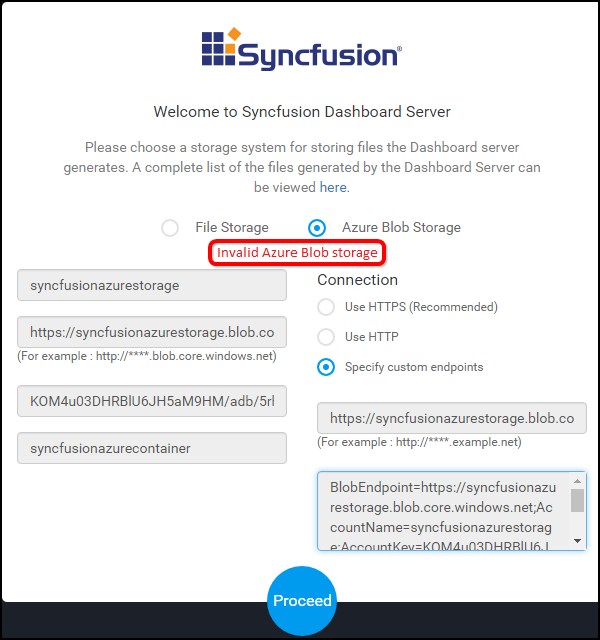
If the settings are configured without any error, it will be redirected to the admin user creation form.
View/Download logs
To view the resources and logs stored in the blob storage, install the Microsoft Azure Storage Explorer.
Download and install Microsoft Azure Storage Explorer from here.
Add your Azure account in the Microsoft Azure Storage Explorer.
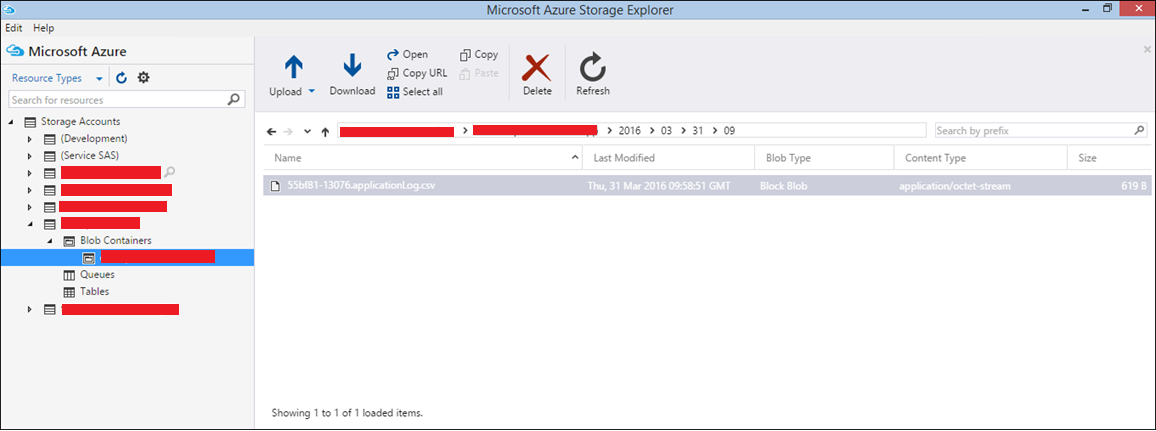
Then the storage accounts will be listed in the Microsoft Azure Storage Explorer, expand the storage account which is used in the web application. Select the container inside the Blob containers.
The log files generated by the User Management Server web application will be listed under the Year/Month/Date/Time folder structure and download log files from here.
Upgrade to new Version
This Section explains on how to upgrade the Syncfusion User Management Server Azure App Service to the next version.
Download the latest build
-
Download the User Management Server Azure package from here.
-
Licensed customers can download the User Management Server Azure package from here.
Steps to upgrade the User Management Server Azure Web App
- Extract the downloaded User Management Server Azure web App package.
- Edit the Azure Storage properties in the below project config files with your existing property values.
- \Web.Config
- \App_Data\jobs\continuous\UserManagementServerScheduler\Syncfusion.Server.Base.Scheduler.AzureWebJob.exe.config
- API\Web.Config
- Upload the files into the Azure App Service using FileZilla in the below folder
- /site/wwwroot
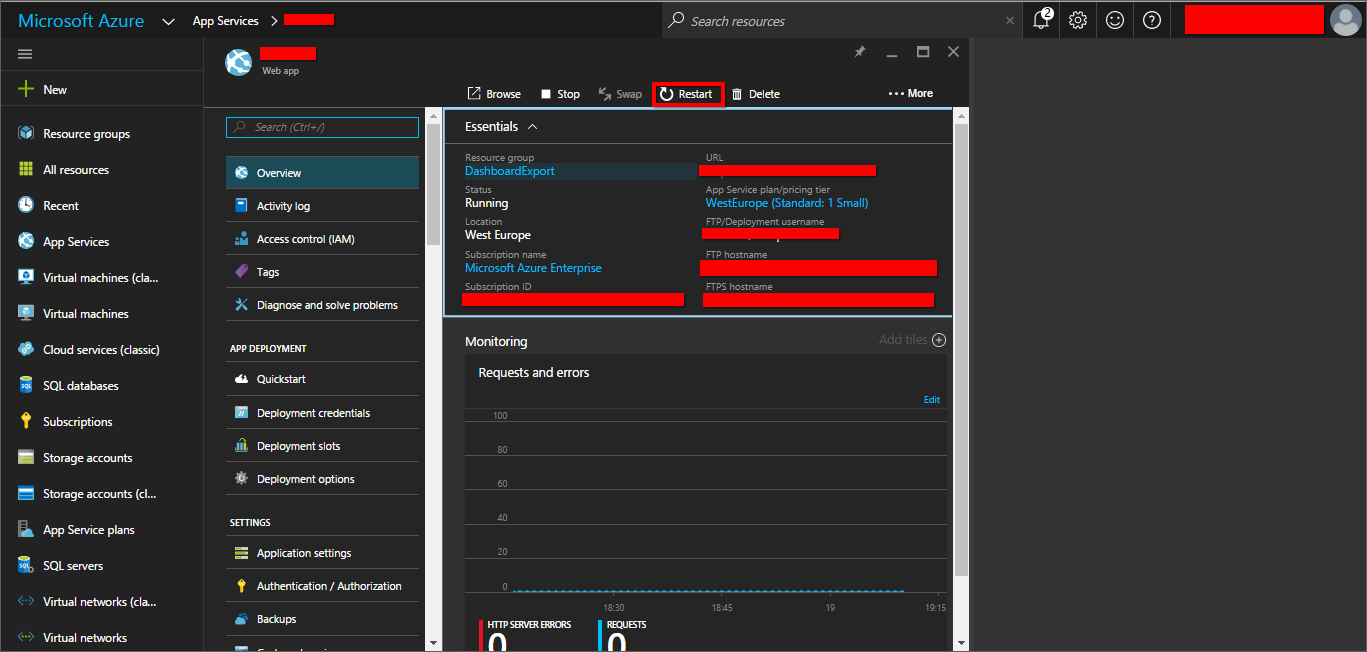
- Restart the Azure App Service as below,