Getting Started with Vue Block Editor
This section explains how to create a simple Block Editor and configure its available functionalities in a Vue 2 environment. It requires the @syncfusion/ej2-vue-blockeditor package and Vue 2.6 or higher. For Vue 3, see the Getting Started with Vue 3 page.
Prerequisites
- System requirements for Syncfusion® Vue UI components
- Node.js and npm (or Yarn) installed on your machine.
Create a Vue Application
To generate a Vue 2 project using Vue-CLI, use the vue create command. If Vue CLI is not installed yet, run the first command below.
npm install -g @vue/cli
vue create quickstart
or
yarn global add @vue/cli
vue create quickstart
When creating a new project, choose the option Default ([Vue 2] babel, eslint) from the menu.
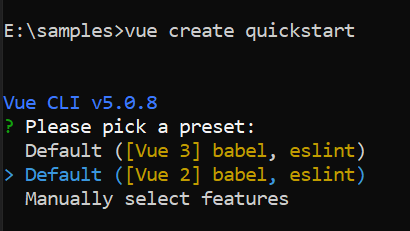
Navigate to the project directory:
cd quickstartAdding Syncfusion® Vue Block Editor packages
All Syncfusion® Vue packages are published on npmjs.com. Install the Vue Block Editor package by running the following command:
npm install @syncfusion/ej2-vue-blockeditor --saveor
yarn add @syncfusion/ej2-vue-blockeditorAdding CSS reference
Syncfusion provides multiple themes for the Block Editor component. For a complete list of available themes, refer to the themes topic.
To apply the Tailwind 3 theme, install the corresponding theme package by using the following command:
npm install @syncfusion/ej2-tailwind3-theme --saveThen add the following CSS reference to the src/App.vue file:
<style>
@import "../node_modules/@syncfusion/ej2-tailwind3-theme/styles/blockeditor/index.css";
</style>
Adding Block Editor component
The Block Editor code should be added in the src/App.vue file, using either the Composition API or the Options API.
<template>
  <ejs-blockeditor></ejs-blockeditor>
</template>

<script setup>
import { BlockEditorComponent as EjsBlockeditor } from '@syncfusion/ej2-vue-blockeditor';
</script>

<style>
  @import "../node_modules/@syncfusion/ej2-tailwind3-theme/styles/blockeditor/index.css";
</style><template>
<ejs-blockeditor></ejs-blockeditor>
</template>
<script>
import { BlockEditorComponent } from '@syncfusion/ej2-vue-blockeditor';
import { enableRipple } from '@syncfusion/ej2-base';
enableRipple(true);
export default {
components: {
"ejs-blockeditor": BlockEditorComponent
}
}
</script>
<style>
@import "../node_modules/@syncfusion/ej2-tailwind3-theme/styles/blockeditor/index.css";
</style>Run the application
Use the following command to run the application in the browser.
npm run serveor
yarn run serveFor migrating from Vue 2 to Vue 3, refer to the migration documentation. Vue CLI has been deprecated; existing Vue 2 projects can continue to use @vue/cli, but new projects should use Vite as described in the Vue 3 getting started guide.