Getting Started with Blazor Block Editor in Blazor WASM App
The Blazor Block Editor is a modular, block-based content editor component that enables rich, structured content creation. It provides an intuitive interface for building documents and articles content using customizable blocks such as headings, paragraphs, lists, and more. The WebAssembly deployment model allows the editor to run entirely in the browser, providing a responsive client-side experience.
This section explains briefly how to include the Blazor Block Editor component in a Blazor WebAssembly App using Visual Studio, Visual Studio Code, and the .NET CLI.
Using .NET CLI Templates
Quickly set up a Blazor application using the preconfigured Syncfusion WebAssembly App Template.
First, install the template using the .NET CLI.
dotnet new install Syncfusion.Blazor.WebAssemblyApp.TemplatesNext, create a new project with following command.
dotnet new syncfusionblazorwasmapp --name MyApp --pwa trueAfter creating the project, navigate to the main project folder (for example, MyApp) and run the following command.
cd MyApp
dotnet run
Manually creating a new Blazor WebAssembly (Standalone) App
Create a Blazor WebAssembly App using Visual Studio via Microsoft Templates or the Syncfusion® Blazor Extension.
Run the following command to create a new Blazor WebAssembly App.
dotnet new blazorwasm -o BlazorApp
cd BlazorApp
Alternatively, create a Blazor WebAssembly App using Visual Studio Code via Microsoft Templates or the Syncfusion® Blazor Extension, or the C# Dev Kit extension.
Install the required Blazor packages
Install the Syncfusion.Blazor.BlockEditor and Syncfusion.Blazor.Themes NuGet packages. All Syncfusion Blazor packages are available on nuget.org. See the NuGet packages topic for details.
- Go to Tools → NuGet Package Manager → Manage NuGet Packages for Solution.
- Search the required NuGet packages (
Syncfusion.Blazor.BlockEditorandSyncfusion.Blazor.Themes) and install them.
Alternatively, you can install the same packages using the Package Manager Console with the following commands.
Install-Package Syncfusion.Blazor.BlockEditor -Version 35.1.37
Install-Package Syncfusion.Blazor.Themes -Version 35.1.37
Open the terminal and run the following commands.
dotnet add package Syncfusion.Blazor.BlockEditor -v 35.1.37
dotnet add package Syncfusion.Blazor.Themes -v 35.1.37
Add import namespaces
After the packages are installed, open the ~/_Imports.razor file and import the Syncfusion.Blazor and Syncfusion.Blazor.BlockEditor namespaces.
@using Syncfusion.Blazor
@using Syncfusion.Blazor.BlockEditor
This adds the necessary namespaces to all Razor pages in your application, so you don’t need to add @using directives individually in each page.
Register the Blazor service
Open the Program.cs file in Blazor WebAssembly App and register the Blazor service and include the required namespace reference using Syncfusion.Blazor; at the top.
builder.Services.AddSyncfusionBlazor();Add stylesheet and script resources
The theme stylesheet and script can be accessed from NuGet through Static Web Assets. Include the stylesheet at the end of the <head> section in the ~wwwroot/index.html file.
<link href="_content/Syncfusion.Blazor.Themes/fluent2.css" rel="stylesheet" />Include the required script references at the end of the <body> section in the ~wwwroot/index.html file to enable Block Editor functionality.
<script src="_content/Syncfusion.Blazor.Core/scripts/syncfusion-blazor.min.js" type="text/javascript"></script>Add Blazor Block Editor component
Open a Razor file located in the ~/Pages/*.razor (for example, Home.razor) and add the Blazor Block Editor component inside the razor file.
@using Syncfusion.Blazor.BlockEditor

<SfBlockEditor @bind-Blocks="blockDataOverview"></SfBlockEditor>

@code
{
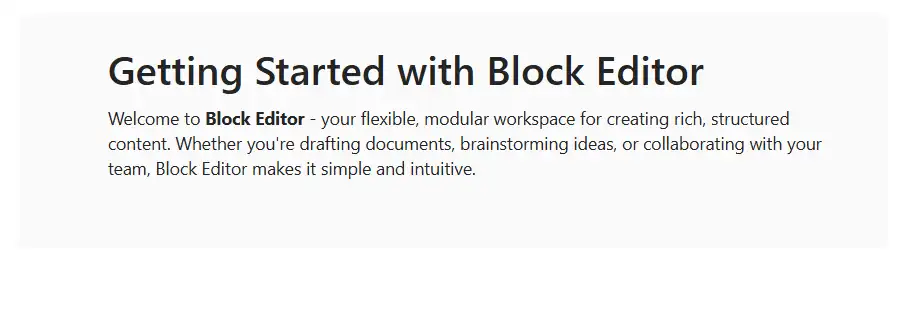
    private List<BlockModel> blockDataOverview = new EditorBlockData().GetBlockDataOverview();

    public class EditorBlockData
    {
        public List<BlockModel> GetBlockDataOverview()
        {
            List<BlockModel> blockDataOverview = new()
            {
                new BlockModel
                {
                    BlockType = BlockType.Heading,
                    Properties = new HeadingBlockSettings { Level = 2 },
                    Content = new()
                    {
                        new ContentModel
                        {
                            ContentType = ContentType.Text,
                            Content = "Getting Started with Block Editor"
                        }
                    }
                },
                new BlockModel
                {
                    BlockType = BlockType.Paragraph,
                    Content = new()
                    {
                        new ContentModel { ContentType = ContentType.Text, Content = "Welcome to" },
                        new ContentModel
                        {
                            ContentType = ContentType.Text,
                            Content = " Block Editor",
                            Properties = new TextContentSettings
                            {
                                Styles = new StyleModel { Bold = true }
                            }
                        },
                        new ContentModel
                        {
                            ContentType = ContentType.Text,
                            Content = " - your flexible, modular workspace for creating rich, structured content. Whether you're drafting documents, brainstorming ideas, or collaborating with your team, Block Editor makes it simple and intuitive."
                        }
                    }
                },
                new BlockModel
                {
                    BlockType = BlockType.Paragraph,
                    Content = new()
                }
            };

            return blockDataOverview;
        }
    }
}
Run the application
Press Ctrl+F5 (Windows) or ⌘+F5 (macOS) to launch the application. The Blazor Block Editor component will render in your default web browser.
Open the terminal and run the following command.
dotnet run