How can I help you?
Manage Schedules
This section explains on how to add, edit, delete schedules and also on how to run the schedules on demand and enable or disable schedules in the Syncfusion Report Server.
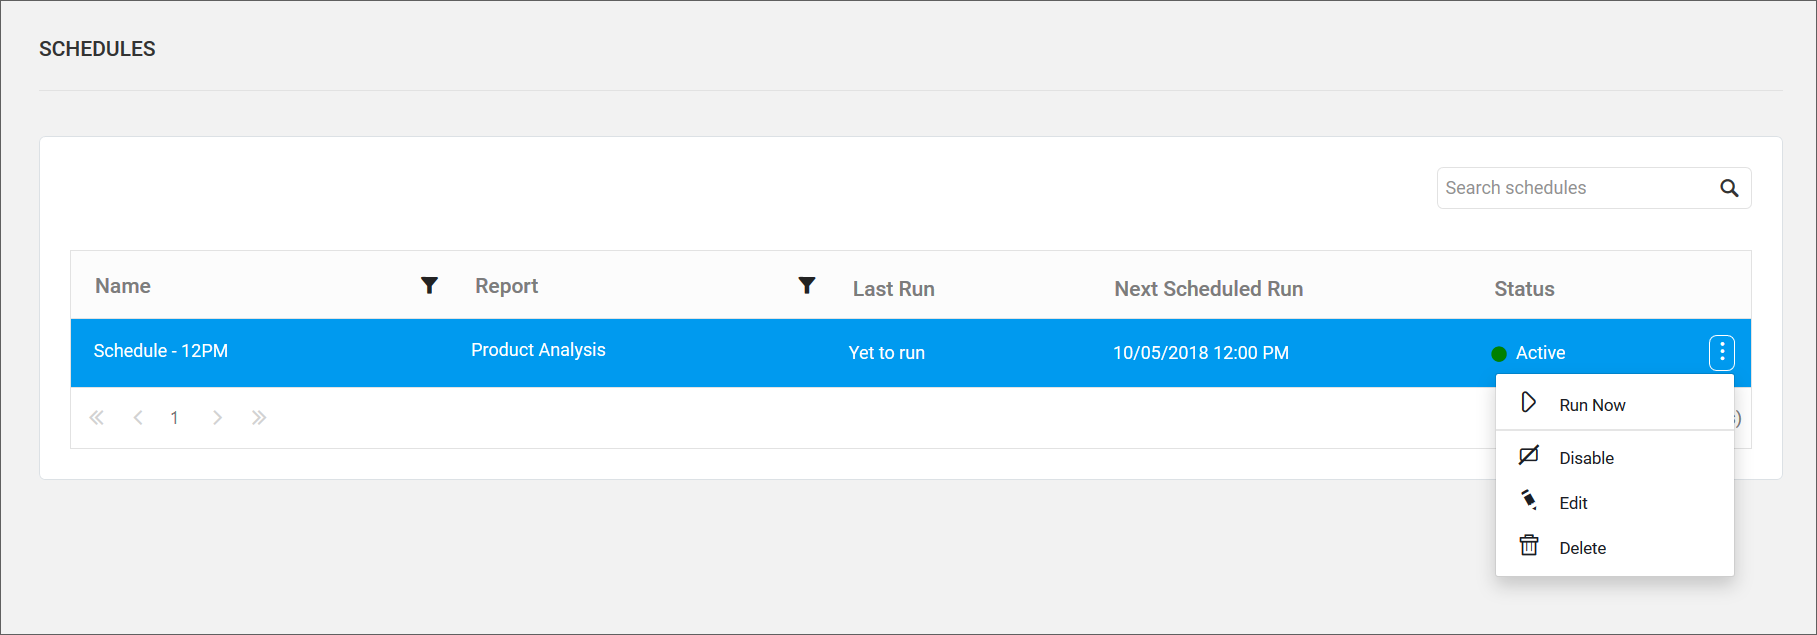
Schedules’ page displays the schedules that are accessible by the user depending on the user’s permission will be shown in the schedules’ page.
Add Schedules
Schedules can be created only if the user has Create All Schedules permission. Schedules can be created in two ways,
-
Add schedule from create menu.
-
Add schedule from context menu of the respective reports.
Add schedule from create menu
-
Click on
Createbutton in the menu and selectScheduleoption to schedule the reports.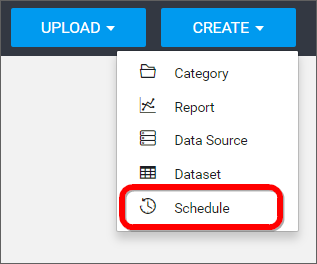
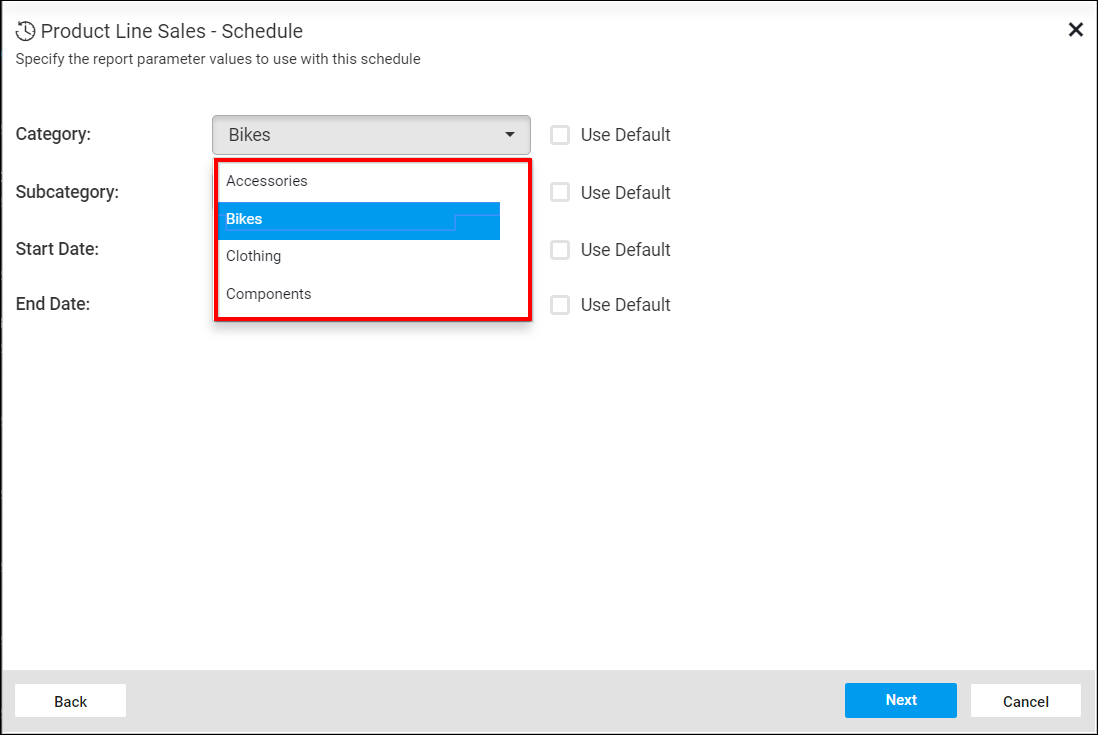
-
Select the required category from
Categorydropdown. After selecting the category, corresponding reports under that selected category will be displayed in thereportdropdown,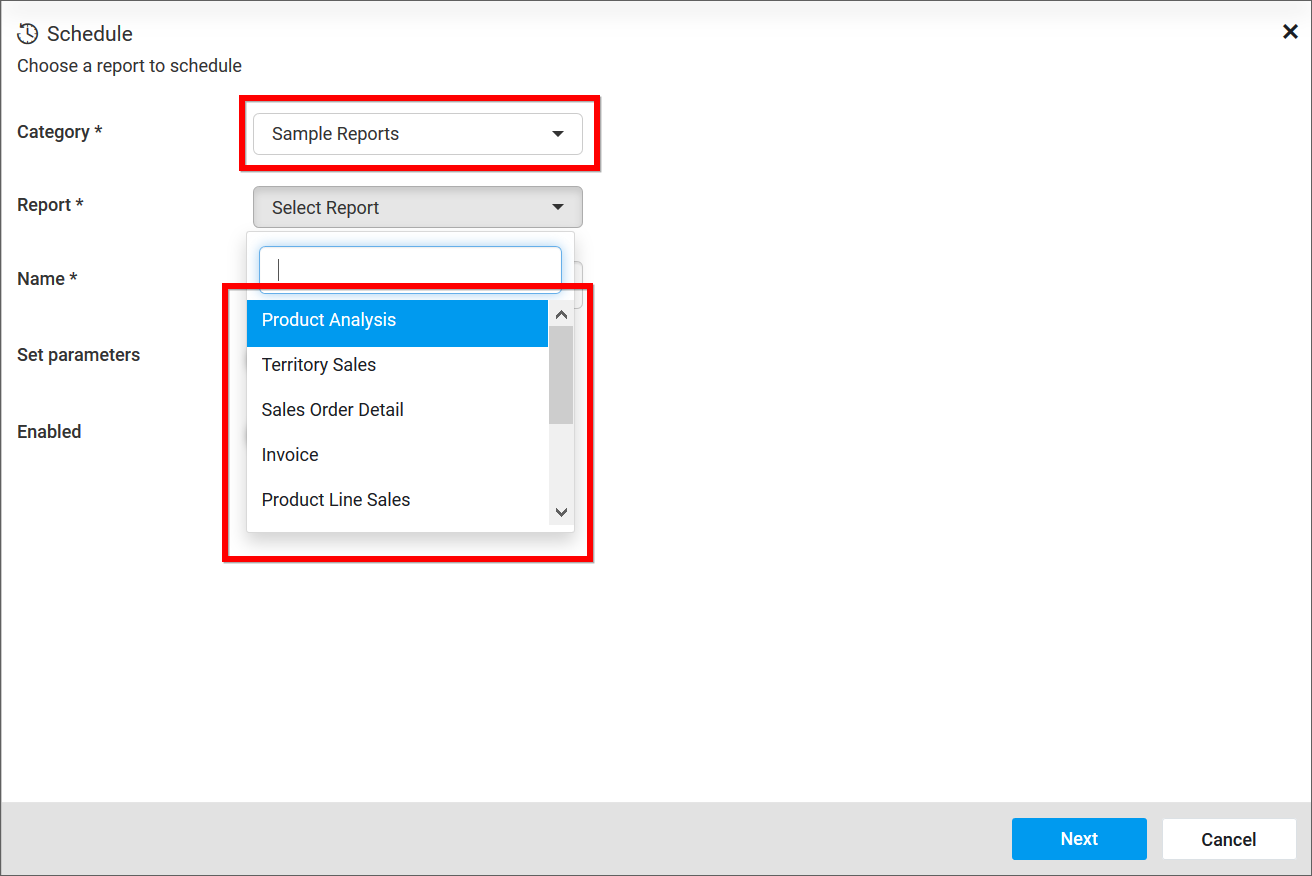
-
Select the required report from the dropdown.
Add schedule from context menu of the respective reports
-
Click the
Actionsbutton in the schedules grid context menu and selectScheduleto schedule the corresponding report.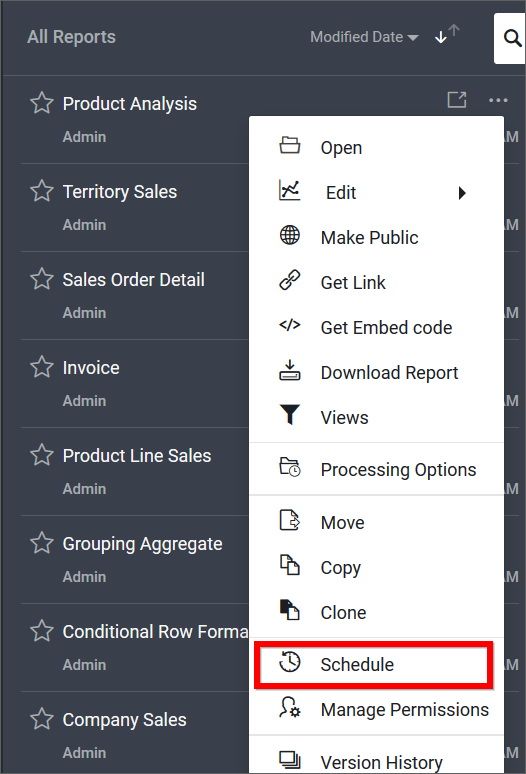
-
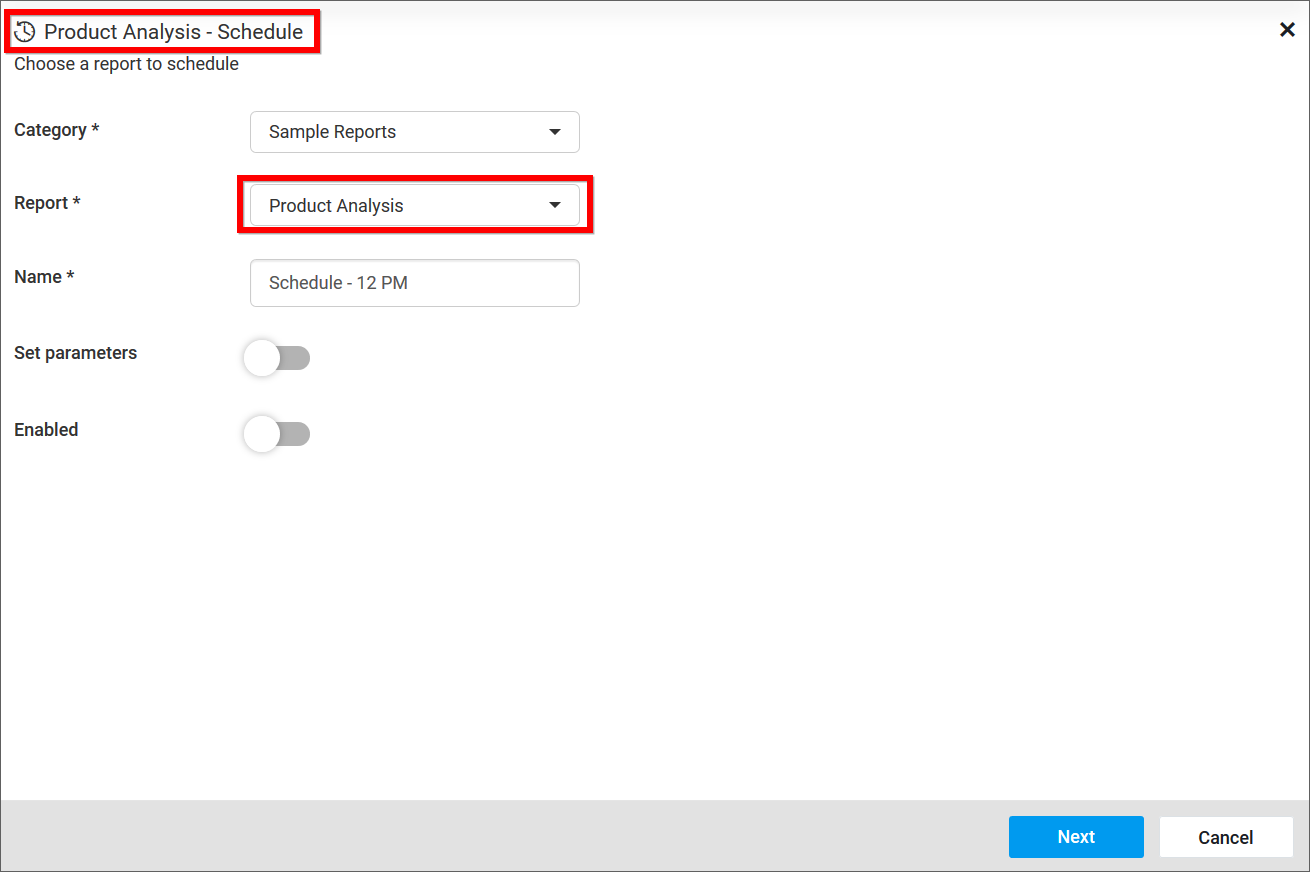
Once dialog was opened, the category and report values are selected by default,

NOTE
Categories or Reports can be changed from schedule dialog box itself.
-
Parameters available for the report will be shown in scheduler dialog.
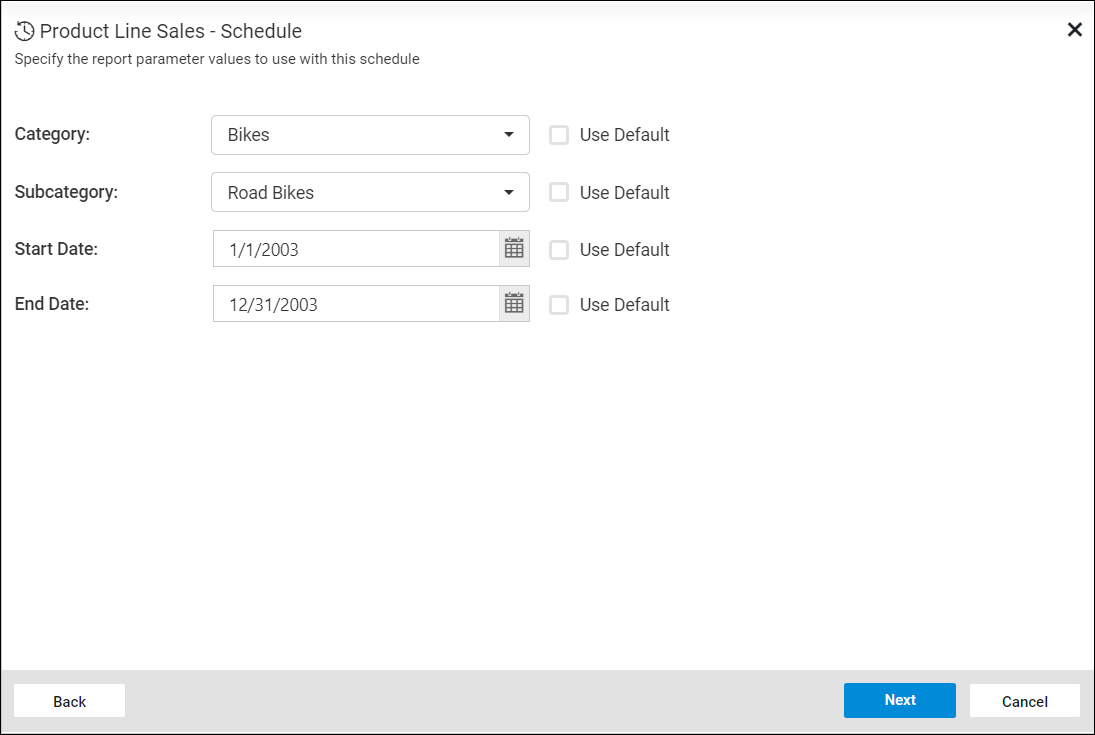
-
Select the parameter values to schedule and export the reports with this filter.
NOTE
To modify the parameter values, you should enable the
Set parametersoption in the schedule dialog box.
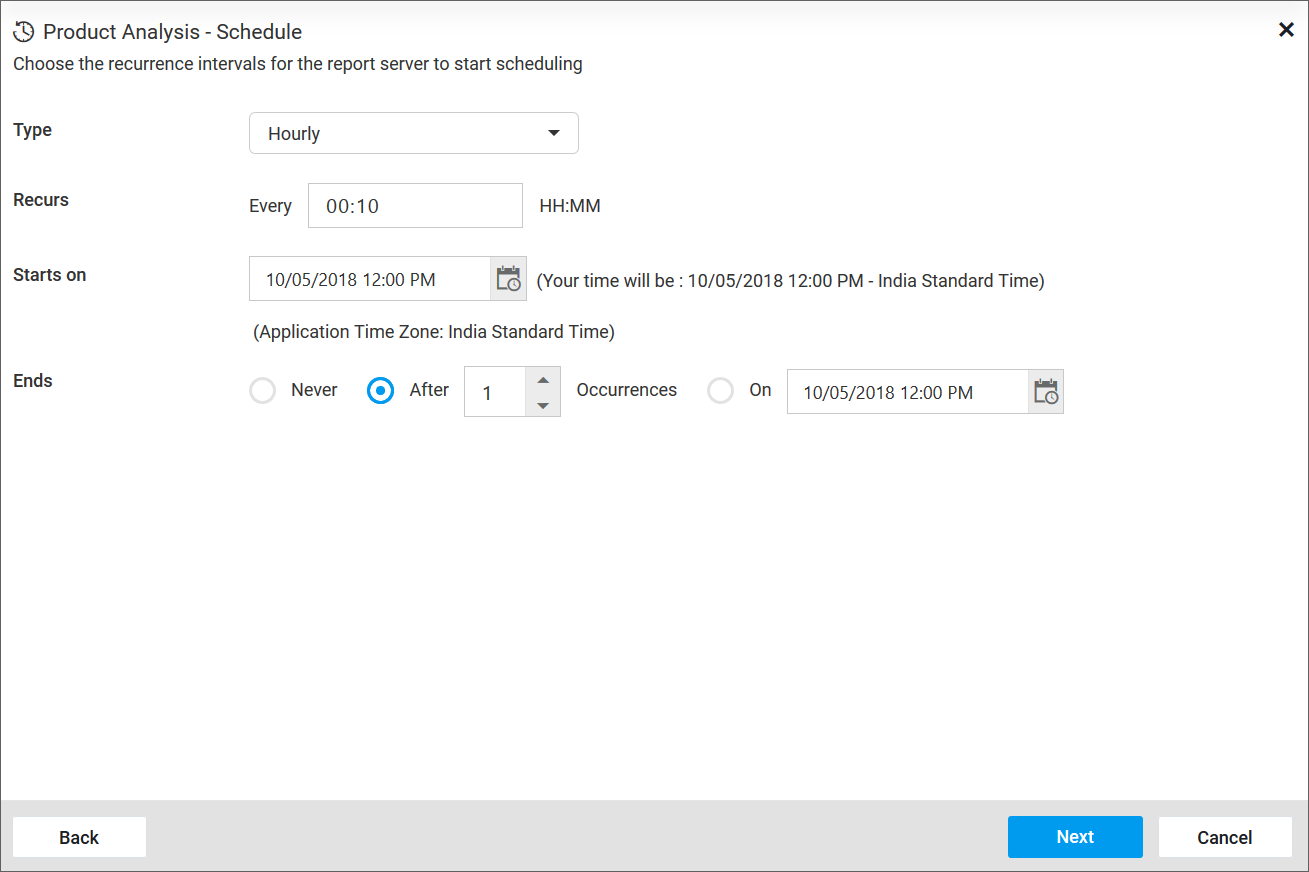
- Select the recurrence type, recurrence, start and end dates, export formats and the users to which the exported reports has to be emailed in the `Add Schedule’ dialog box.
- Reports can be scheduled hourly, daily, weekly, monthly and yearly
- Reports can be exported in PDF, Word, Excel, HTML, PPT and CSV formats
-
Application time zone will be shown below the date picker. Start time of the schedule will be converted to client time zone and shown in the right side for user’s convenience.
-
You can compress the exporting reports as a zip file by selecting the
Enable File Compressionoption in the schedule dialog box. This is not mandatory and you can uncompress it at any time by simply unchecking that option.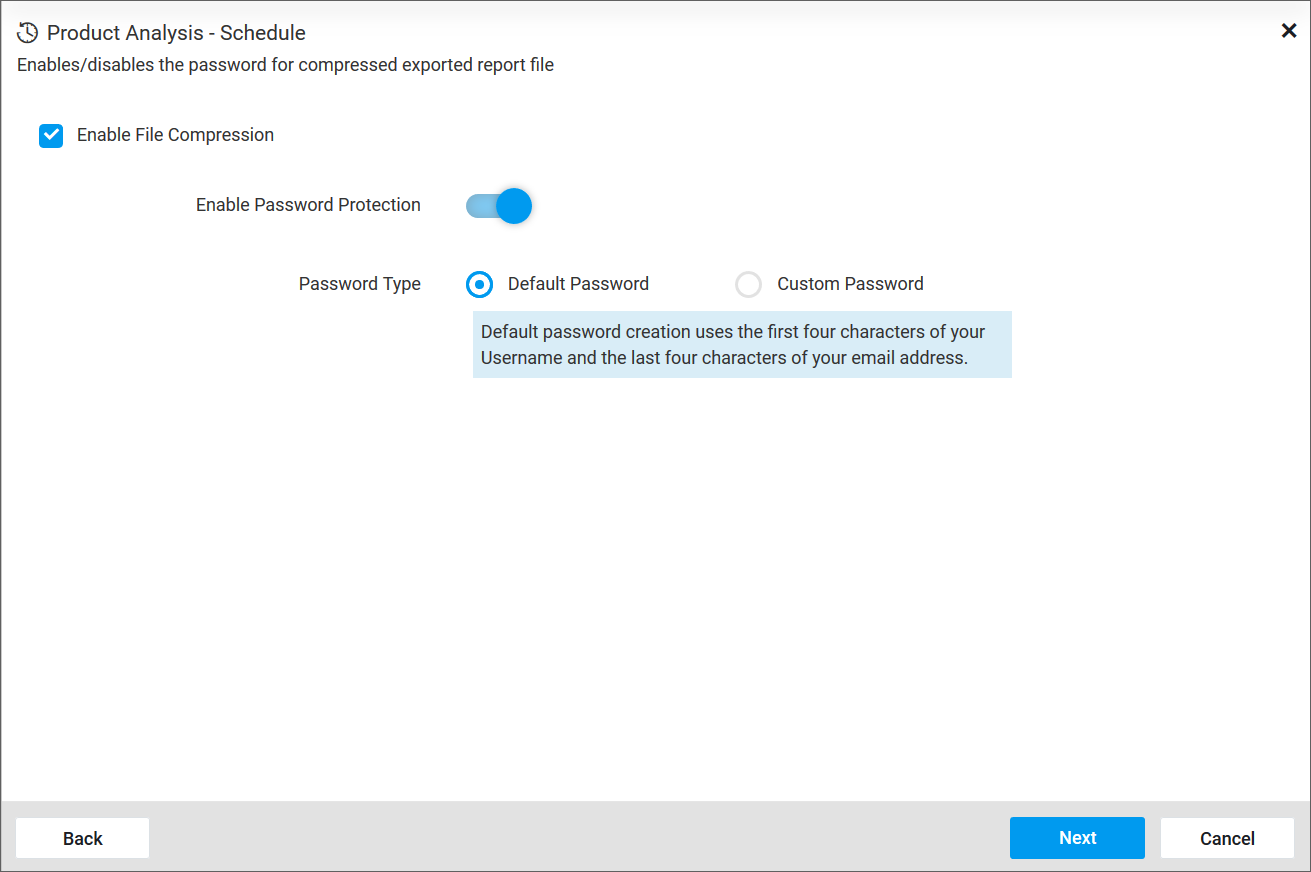
- You can secure the exporting reports with password protection by enabling the
Enable Password Protectionoption in the schedule dialog box. By default, theDefault Passwordoption is selected.
NOTE
For default password, the password will be generated in the combination of first four characters of username and last four characters of email.
-
You can customize the password protection rules for exporting reports by choosing the
Custom Passwordoption.
But, the username or first name is mandatory in the password condition.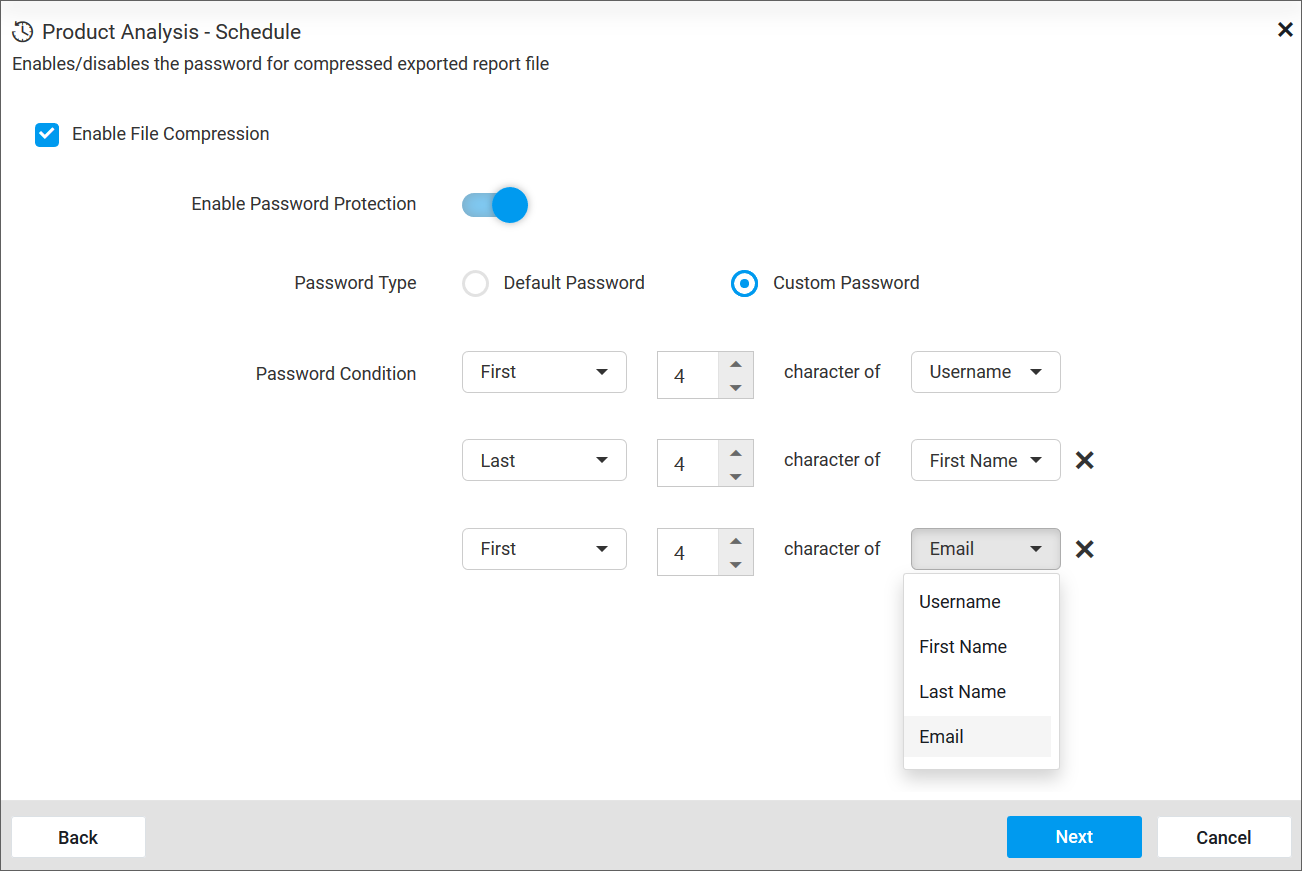
For instance, you have a sample user with details below:
Username : Michael
First Name : John
Last Name :
Email: [email protected]With this sample user, the possible password combination and its unlock password have been explained below.
Password Rule Unlock Password First four characters of Username
+
Last four characters of First NameMichJohn First four characters of First Name
+
First four characters of Last NameJohn First four characters of Email
+
Last four characters of Last Name
+
Last four characters of Usernamejohnhael -
Exported reports can be sent to individual users or groups by checking
Email attachmentoption.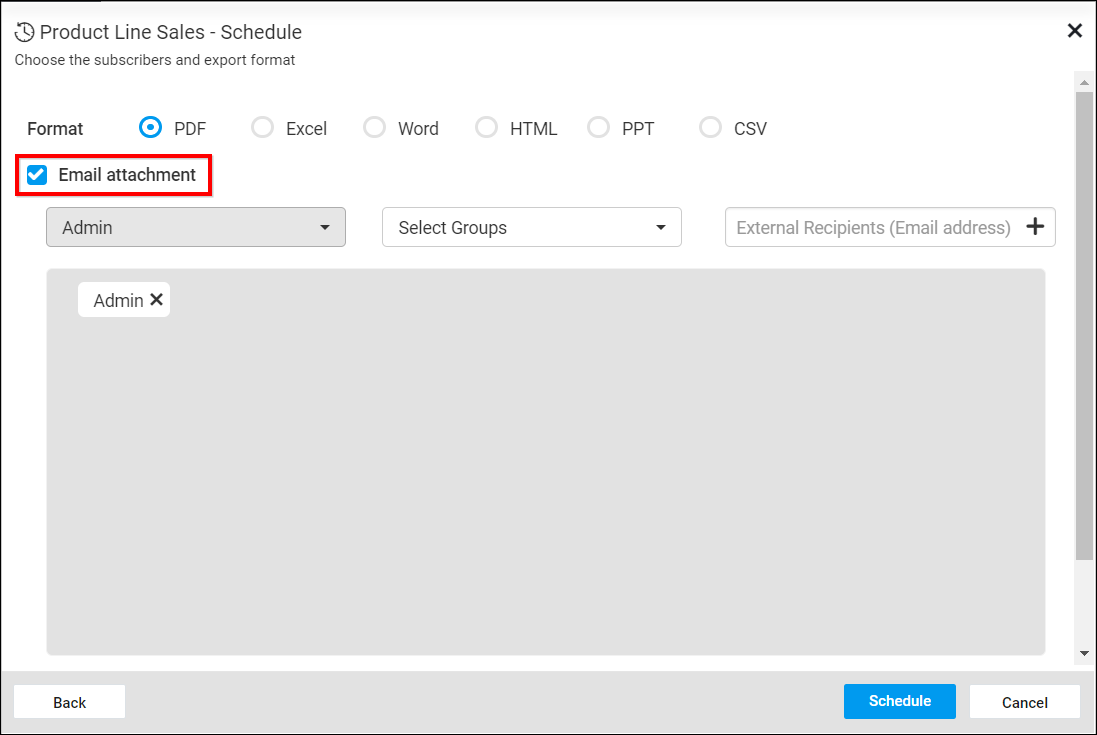
-
We can also save exported reports into any location by checking
Save as fileoption.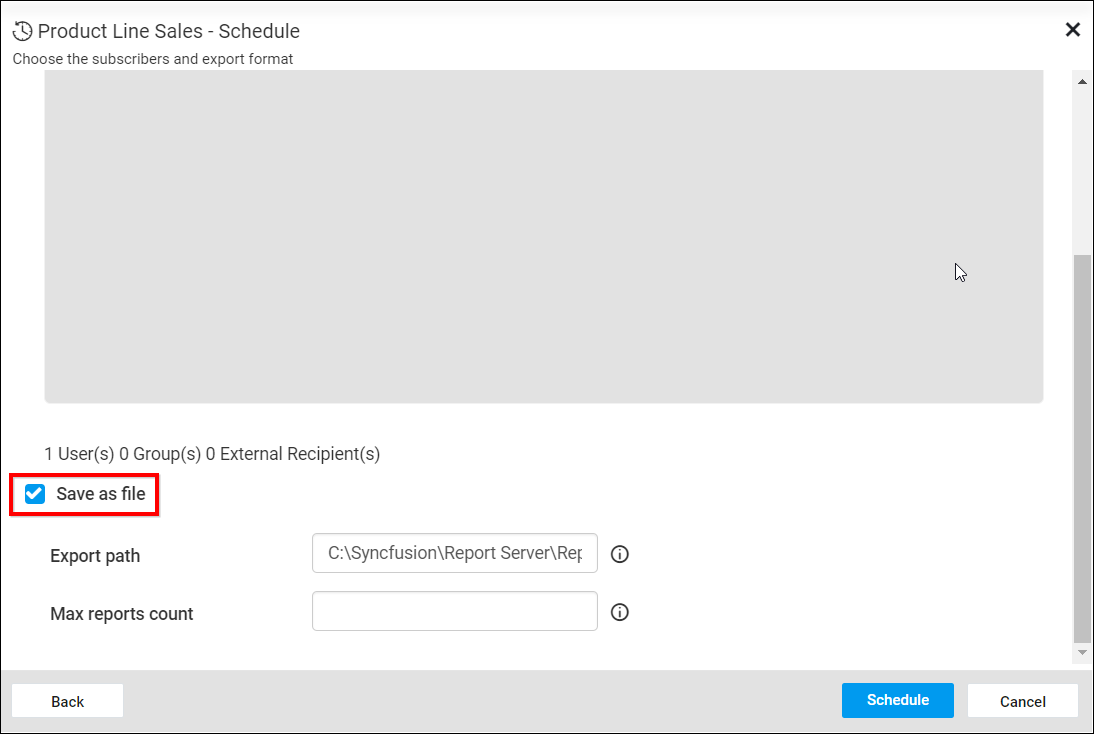
-
To save the exported report,
Export PathandMax reports counthas to be filled.Export Path- Location to save the exported report. By default, the location will beC:\Syncfusion\Report Server\ReportServer.Web\App_Data.Max reports count- Maximum exported reports count to be save in that location. -
When clicking the
Schedule, the report will be scheduled in the selected recurrence.
NOTE
Read Write Deletepermission for thatSpecific Schedulewill be added for the user who created the schedule.
Edit Schedules
Category, report, name, recurrence type, recurrence, start and end dates, export format and the recipients can be changed in the Edit Schedule dialog box.
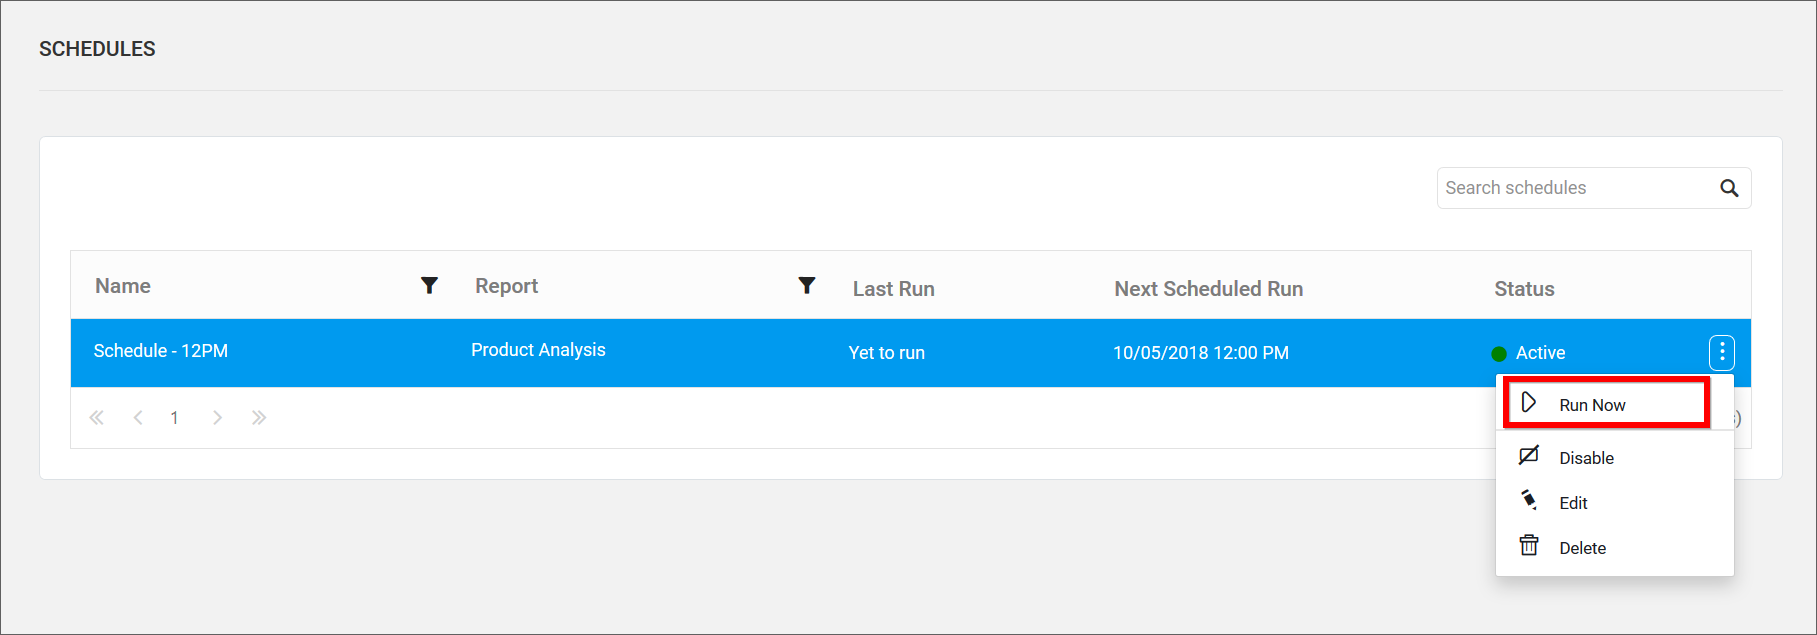
Run Now
Schedules can be made to run on demand by using this Run Now option in the schedule grid context menu. Report will be exported in the format specified and sent to the recipients.
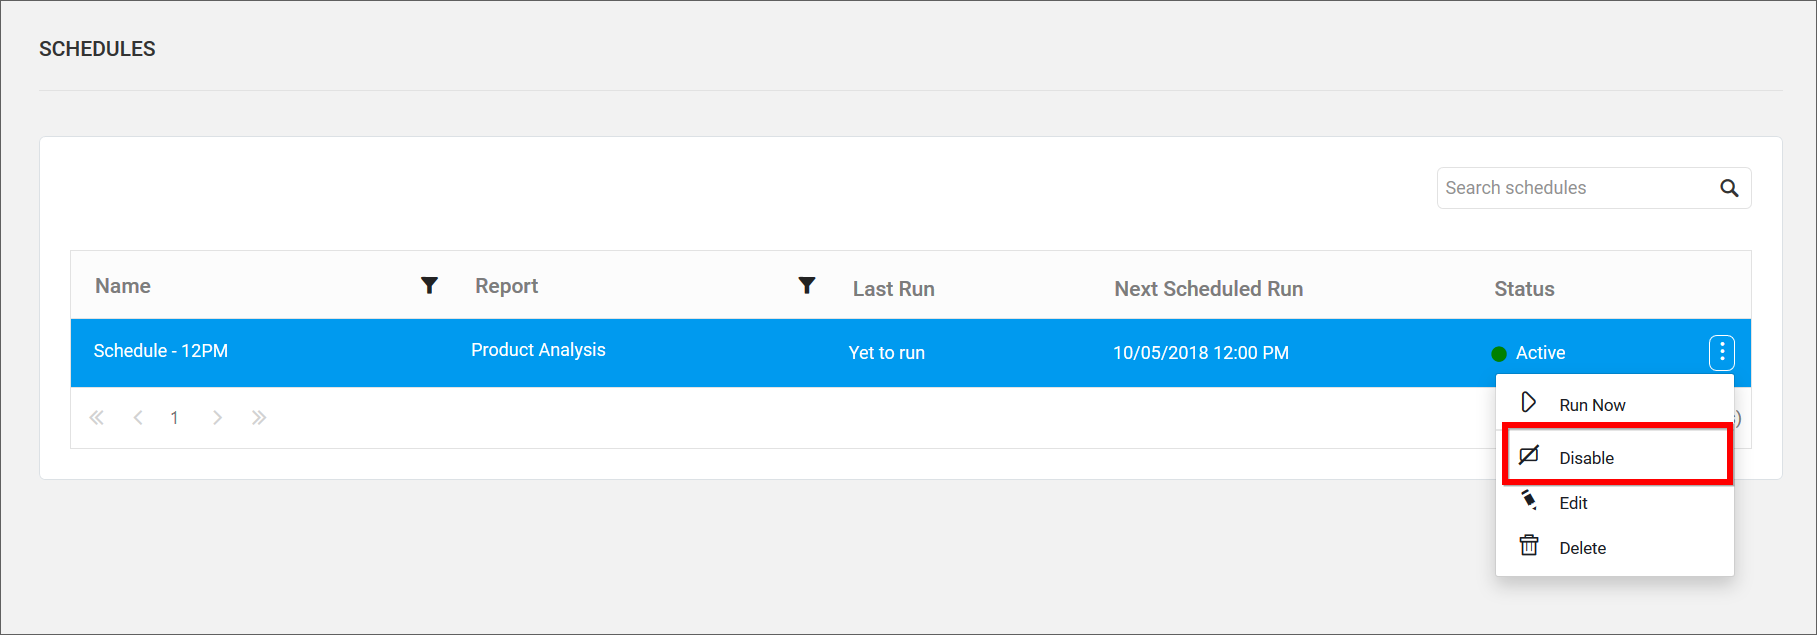
Enable or Disable Schedule
Schedules can be disabled at any time which will ignore any next occurrences. When enabled it will get the next occurrence and run accordingly.
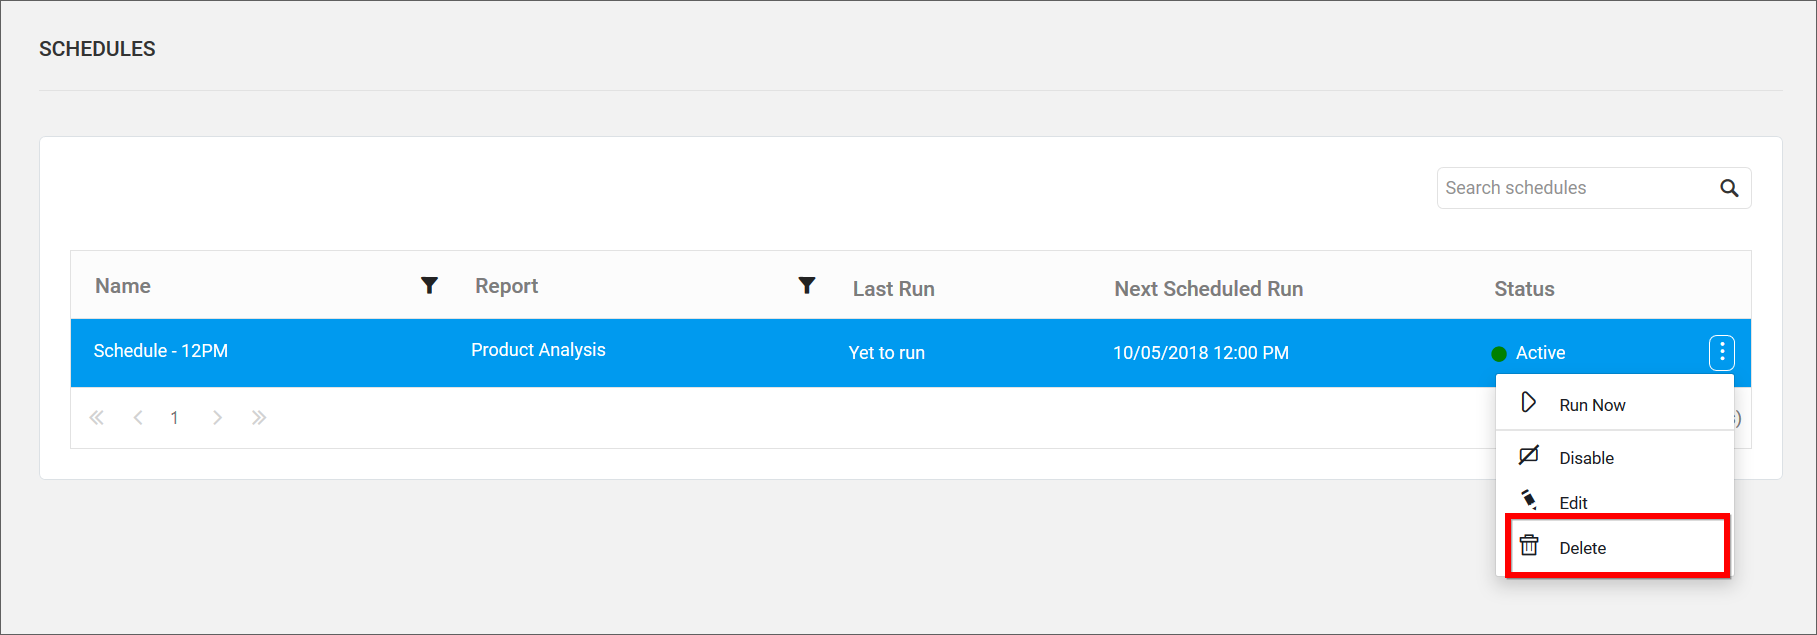
Delete Schedules
Schedules can be deleted from the Report Server when it is no longer required.
Click the Actions button in the schedules grid context menu and select Delete to delete the schedule.
REST API Reference
The following table illustrates the list of available APIs related to schedules in Syncfusion Report Server.
| Action | HTTP Method | Endpoint | Description |
|---|---|---|---|
| AddSchedule | POST | /api/v3.0/reports/schedule | Adds schedule to the server. Schedule details should be passed as input. |
| UpdateSchedule | PUT | /api/v3.0/reports/schedule/{scheduleid} | Updates schedule. Should provide Schedule ID in path parameter and schedule details as input. |
| RunScheduleReport | GET | /api/v3.0/schedules/{scheduleId}/run | Runs scheduled report. Should provide Schedule ID in path parameter. |
| AddScheduleWithFilterParameters | POST | /api/v4.0/reports/schedule | Adds schedule with filter parameters to the server. Should provide schedule details with parameter as input. |
| UpdateScheduleWithFilterParameters | PUT | /api/v4.0/reports/schedule/{scheduleid} | Updates schedule with filter parameters. Should provide Schedule ID in path parameter and schedule details with updated parameter as input. |
| GetScheduleItemDetail | GET | /api/v4.0/reports/schedule/{scheduleId} | Returns the respective schedule details. Should pass Schedule ID in path parameter. |
| GetScheduleItems | GET | /api/v4.0/reports/schedule/items | Returns list of scheduled items. |
| GetSchedules | GET | /api/v5.0/items | Returns the list of schedules for current user. ItemType should be Schedule. |
| IsScheduleNameExists | POST | /api/v2.0/items/is-name-exists | Returns an item existence whether the given schedule name already exists or not in server. Schedule name and ItemType as Schedule should be passed in request body. |
| GetScheduleDetail | GET | /api/v2.0/items/{id} | Returns the specified schedule details from the server. Schedule item ID should be passed in path parameter. |
| DeleteSchedule | DELETE | /api/v2.0/items/{id} | Deletes the specified schedule from the server. Schedule item ID should be passed in path parameter. |