Deploy Using Visual Studio
This section explains on how to deploy the Report Server application into Azure portal through Visual Studio.
- Please follow the below link to configure the prerequisite of Azure deployment in Azure Portal.
https://help.syncfusion.com/report-platform/report-server/prerequisites
How to deploy using Visual Studio
Please follow the below steps to deploy Syncfusion Report Server into Azure portal through Visual Studio.
Step 1
Extract the Azure package of a Syncfusion Report Server which is downloaded from the Syncfusion site.
Step 2
Open extracted Azure package as Web Site from Visual Studio as below in the screenshot.

Step 3
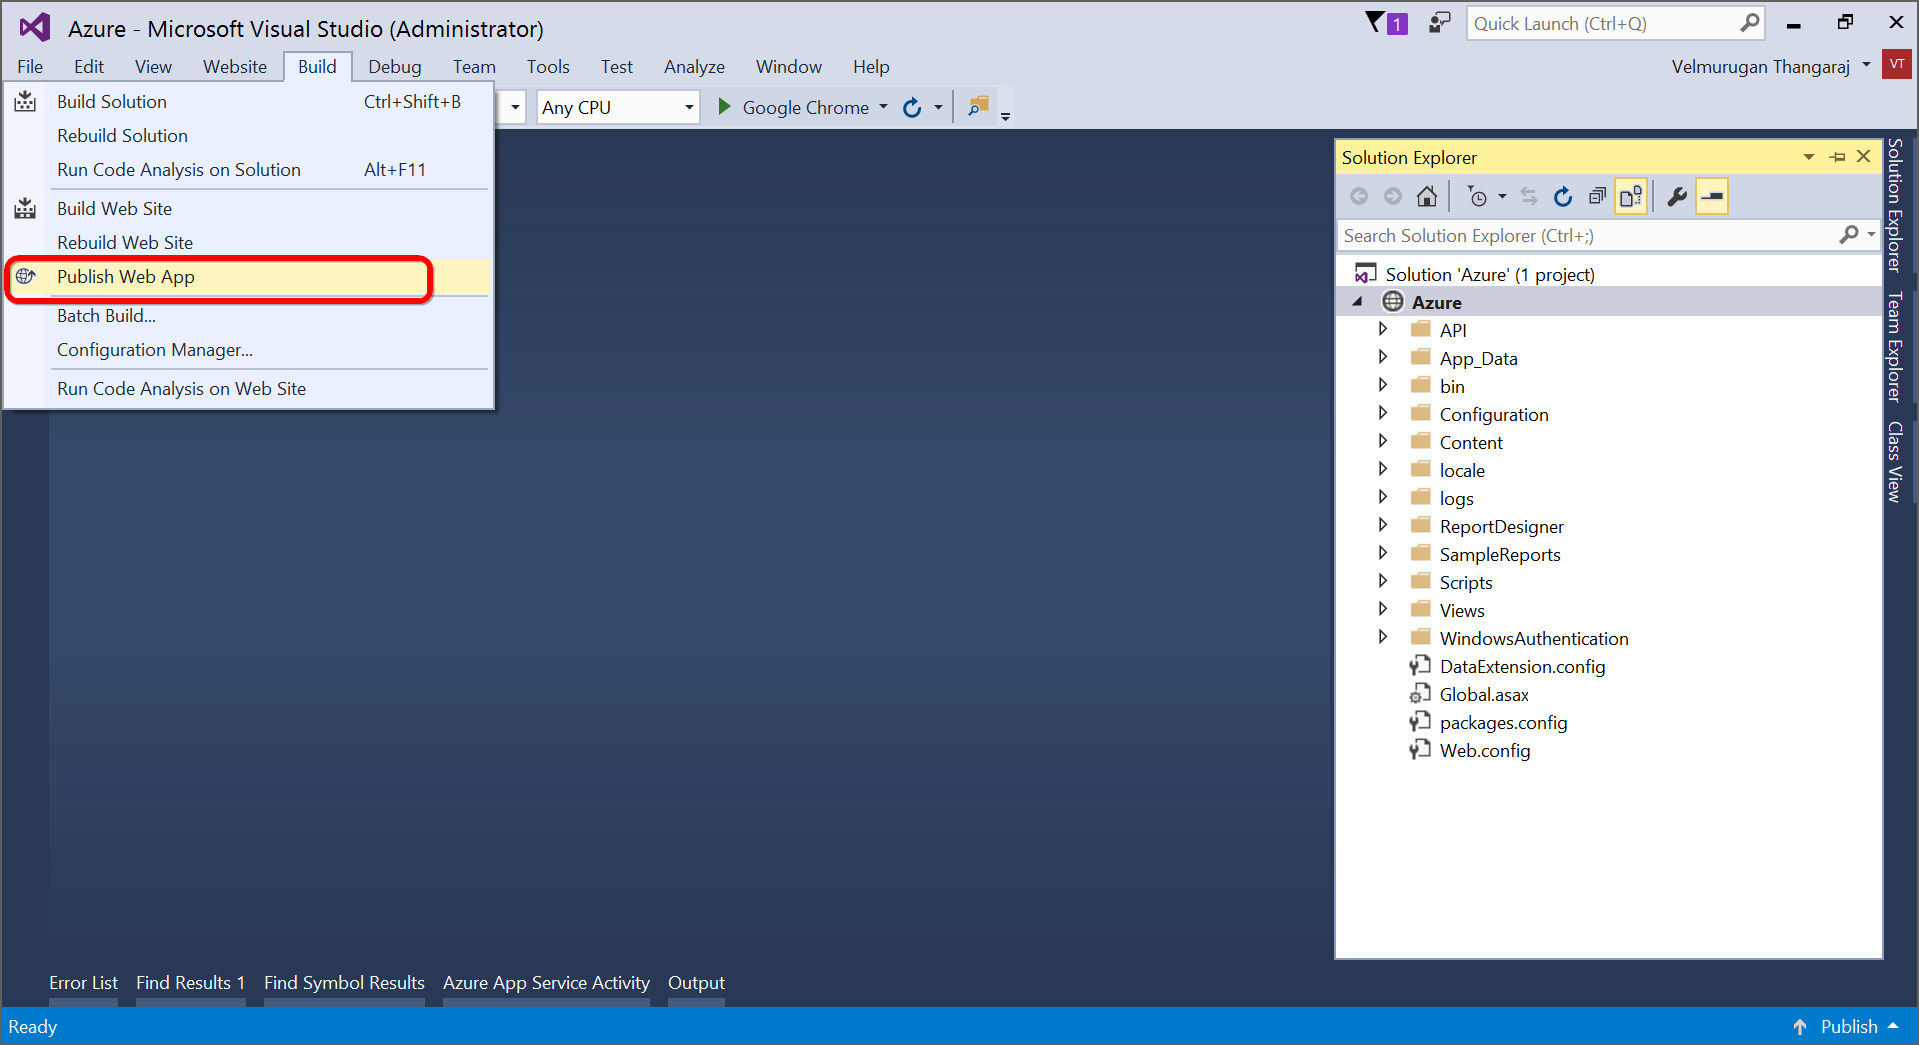
After Open Azure Report Server package as Web Site, Click on Publish Web App under Build main menu, below popup will be appear in Visual Studio.
Step 4
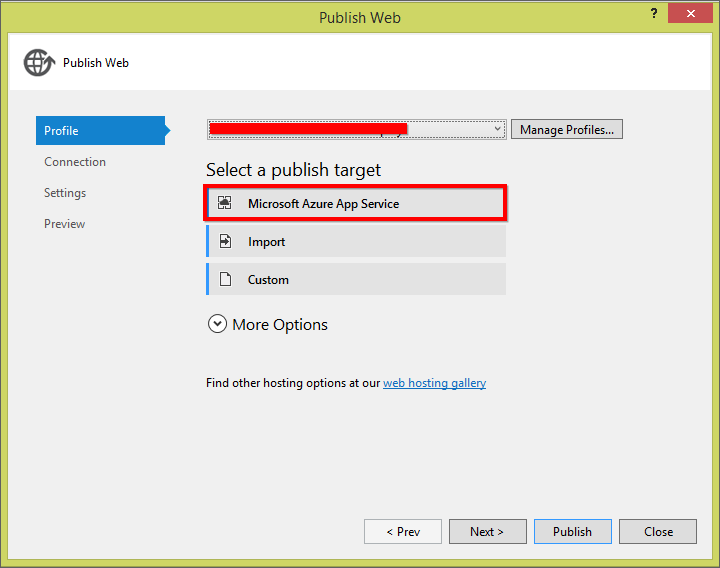
While click on Microsoft Azure App Service the below window will open up,
Step 5
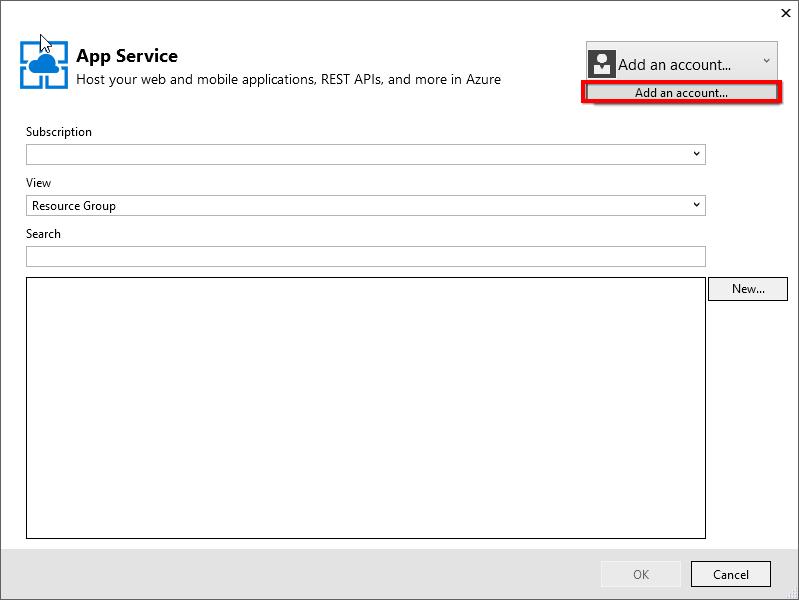
Azure App Service need Microsoft account to publish the web app into Azure portal. Login here by click Add an Account option as above.
Step 6
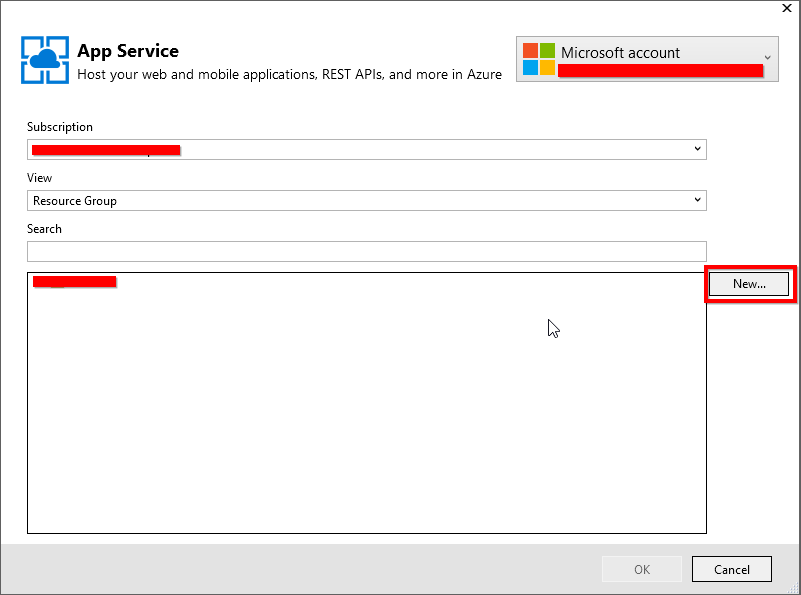
After logged with Microsoft account, create new Azure web app by click on New button as below,
Step 7
After click on New button, the below window will be appeared. After fill the details click on Create button.
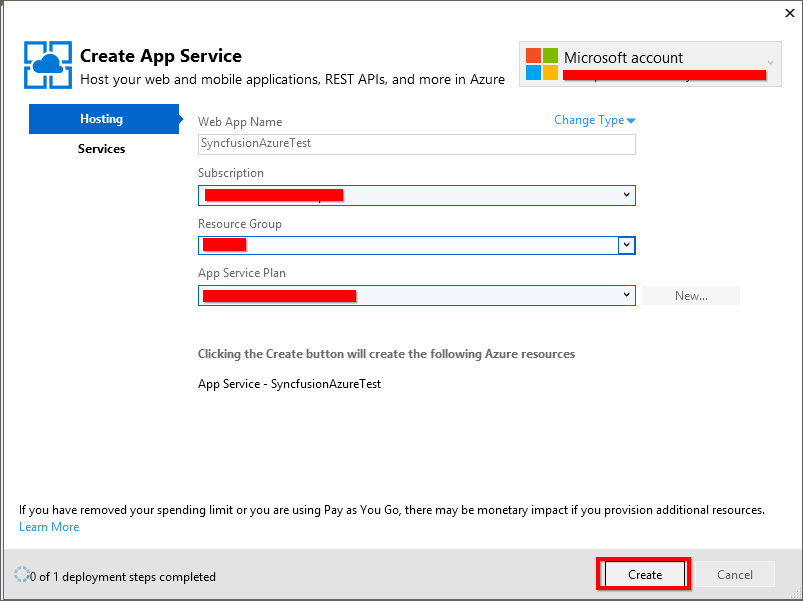
Step 8
After click on Create button, the Web App has been created in Azure portal and now the files are ready to move. Click on Publish button in the next window as below.
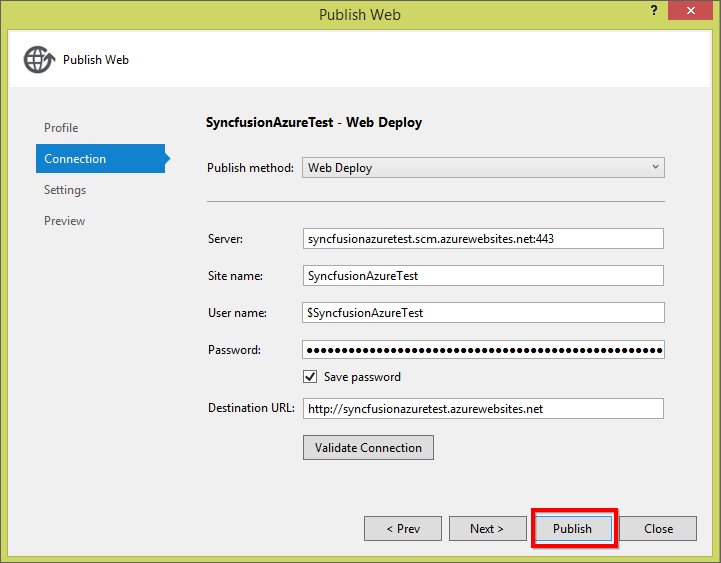
Step 9
However, occasionally, you might get the following in the output window

Step 10
Alternatively open Web Publish Activity window by click on View=> Other Windows => Web Publish Activity menu option as below,
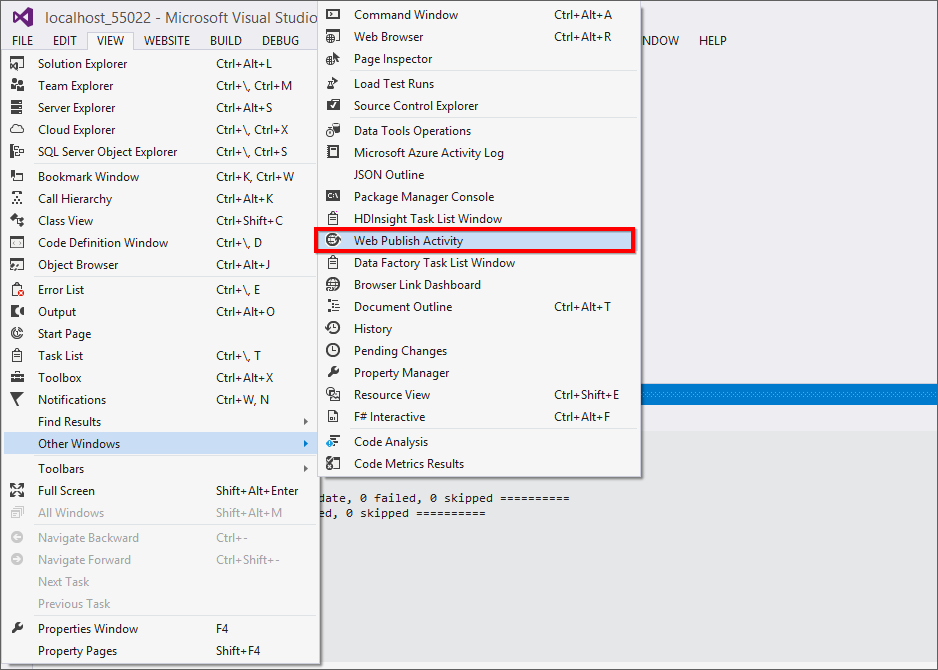
Step 11
Click on Publish icon in Web Publish Activity window as below.

Step 12
Now the publishing will be started and after publishing, the site will be open in default browser and the success message will be shown in output window as below.
